
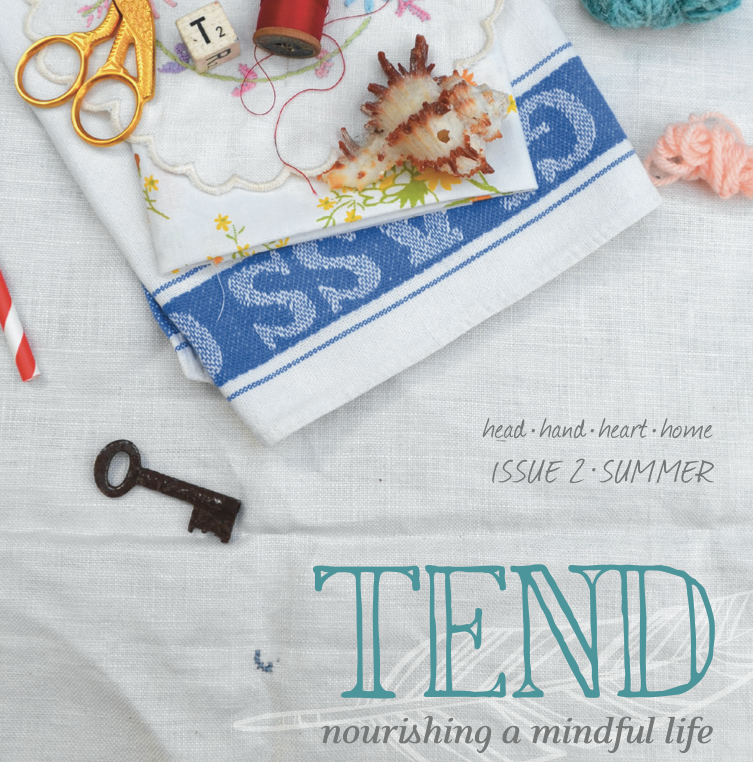
 It is hard to believe that it has been just over a year since I told Debbie that I'd love to be a contributor to her new magazine project. It was perfect timing - I had been writing again, developing recipes, taking photos and scribbling away in my notebooks. I wanted to start publishing again and get to where I was ready to start on the always in the back of my mind book(s). To push myself with deadlines and themes and recipe development. While you have now only seen two issues (Spring 2014 released in March, Summer 2014 just released this week), I just submitted yet another issue of content this week to my chief editor of awesomeness, bringing it up to four for us, and we will be starting on the fifth! I was initially focused mainly on my photography and writing, but I have also found that I enjoy managing a section. I have been working with several great people who are contributing articles to the Whole Foods and Herbal Health category and it has been fun to brainstorm ideas, tie it all together, and see what they come up with! 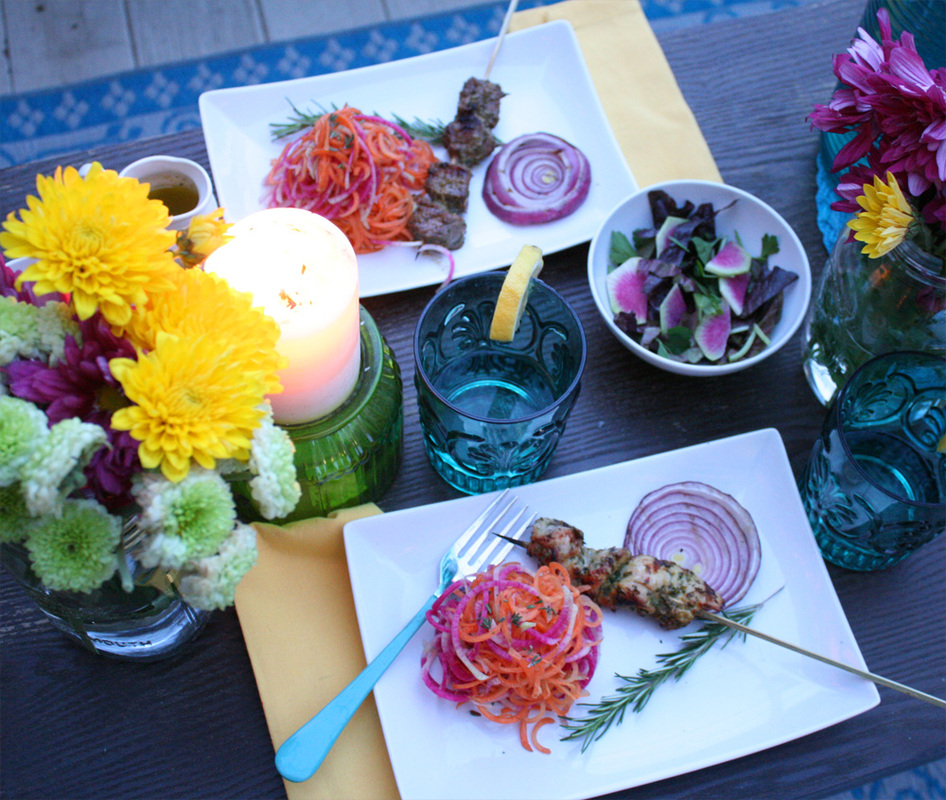 Last weekend the Summer 2014 issue launched. It is lovely. Everything summer should be. Important conversations about ethical business and consumers, sustainability, economy, families, mothering. Gorgeous gorgeous vibrant home shots celebrating outdoor summer living. All kinds of summery recipes ~ grilling, side dishes, drinks, cold treats, using herbs, herbal sun relief and summer vinegar. Peeks into beautiful sustainable living. Really fun projects for kids (it is going to take us all summer to work through them - spy kits, secret messages, ciphers - SO COOL!). Plus several lovely craft projects for wee ones, patterns patterns patterns, DIY projects. Book reviews. I really could go on and on. 166 pages (more of a book than a magazine!) of amazing things to keep you busy, happy, surrounded in beauty, thinking, and satiated all summer long. So many talented people have contributed, and I am like a kid in a candy shop myself seeing all of the lovely projects and articles. 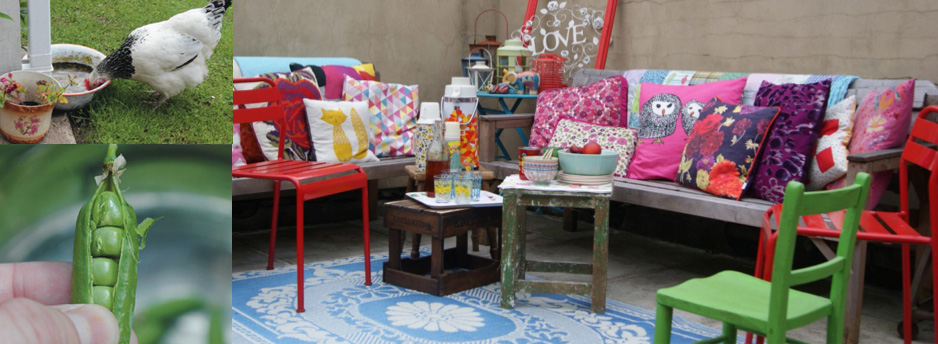 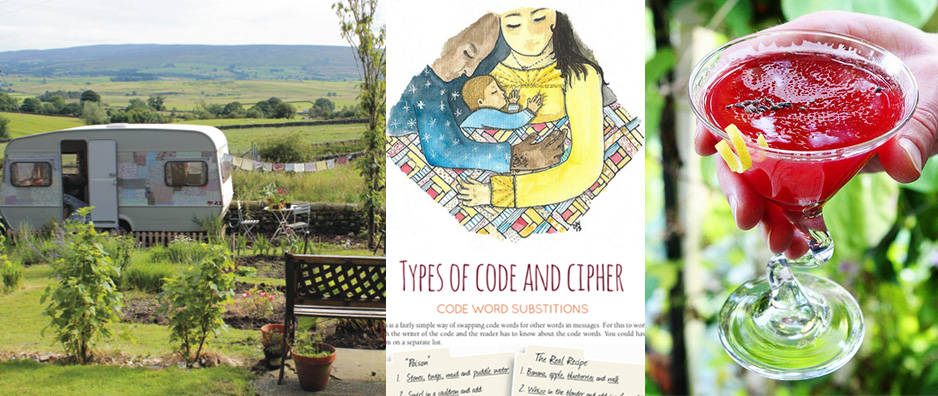 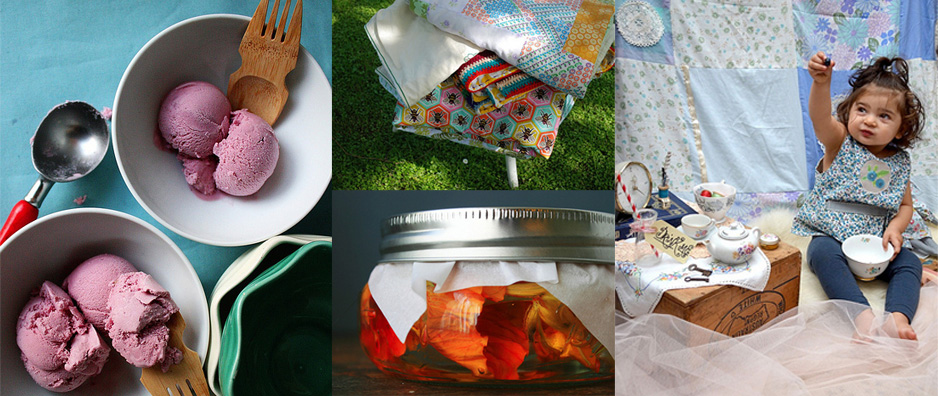 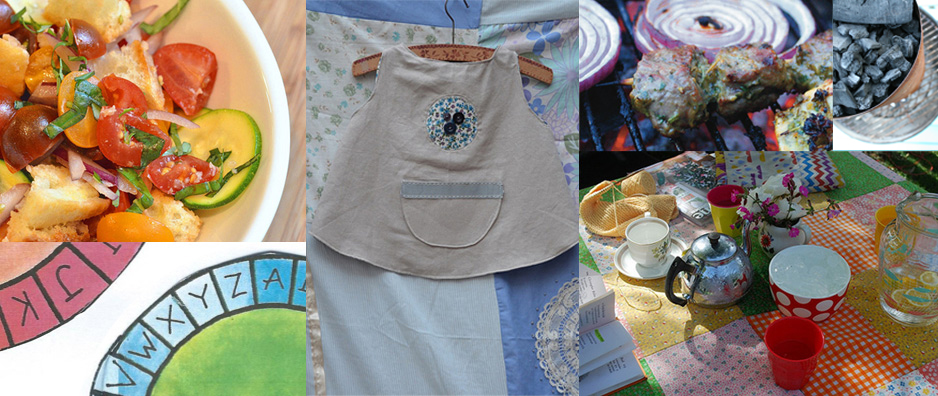 So, to celebrate the launch of the latest issue (did I mention it is 166 pages!?!), I am doing a drawing for one FREE copy of the Summer 2014 Issue of Tend Magazine! Here is how to enter: Leave a comment on this post. You can earn additional comments by liking my Wholly Rooted Facebook page, liking the Tend Magazine Facebook page, sharing this post via Facebook, Twitter, or your blog, or following Tend Magazine on Instagram. So, you can earn up to 7 entries! Be sure to post a separate comment here for each action you take to receive the entry. I will pick one winner from a random number generator draw using the comment numbers. You have until midnight Sunday June 8. I will announce the winner on Monday June 9! And, of course, go check out the preview of the latest issue! Be sure to visit the Free Projects page for a yummy herbal infused water recipe.
So enter your comment, come back to comment if you have done any additional entries, and I will announce the winner on Monday! Here is to a great summer!
18 Comments
Capturing my love of whole foods, combined with the activity of a bustling kitchen. A weekly collection of photos from the center of my home. * * * * * 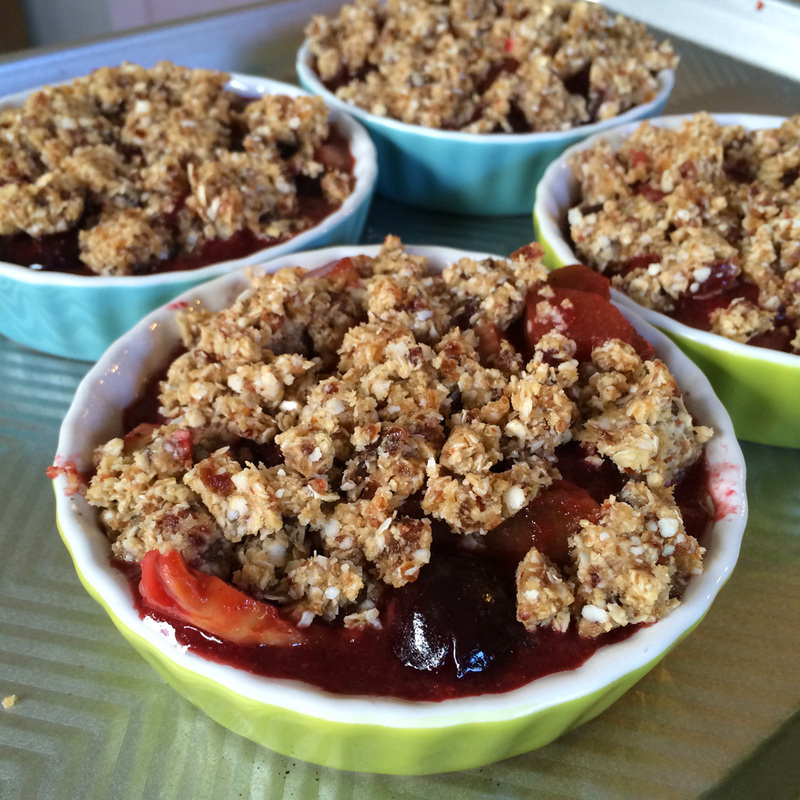   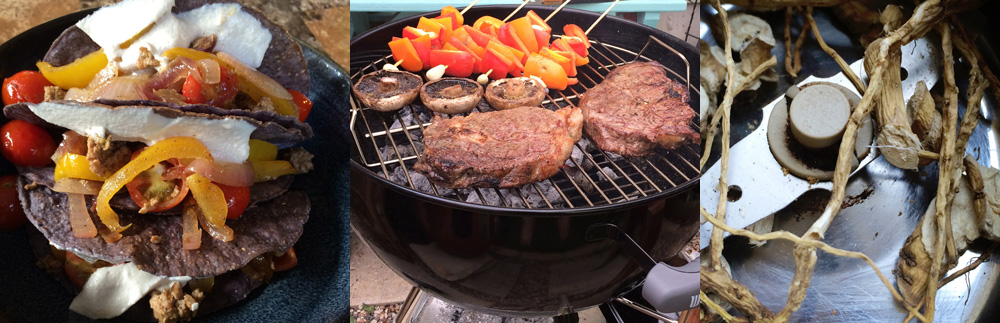 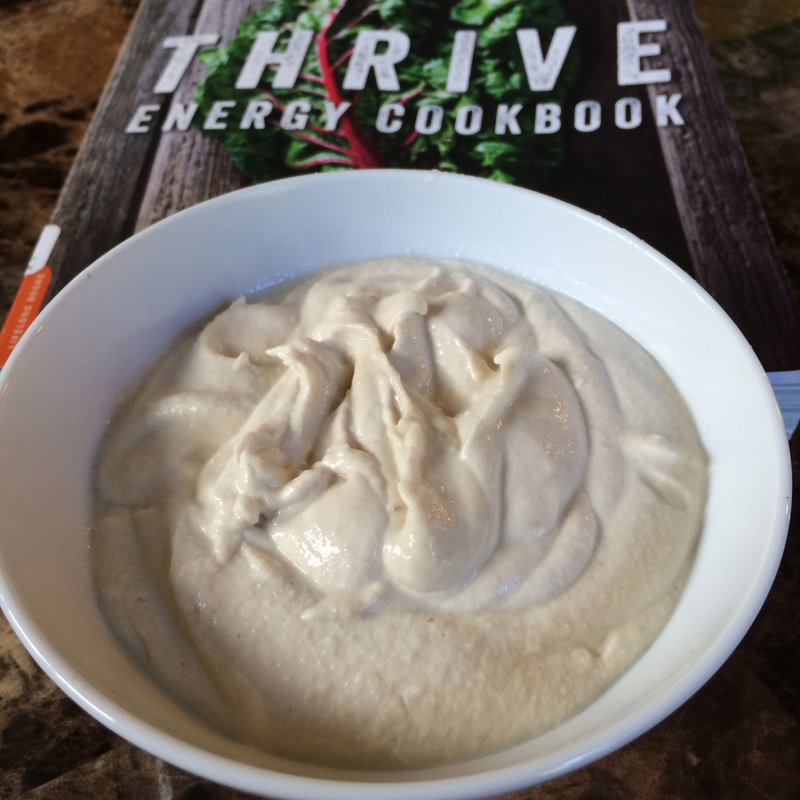  top to bottom: gluten free/dairy free cherry-rhubarb crumble, A modeling a warm winter beverage for me (Tend Magazine, Winter issue), spices in the grinder, vegan marshmallow roasting for my allergy boy (Dandies), dairy free coconut milk lemon-blueberry gelato, tacos, steaks on the grill (a special treat for my husband, as we don't usually have beef in the house with the allergy boy nearby), dry marshmallow root in the grinder for thickening the crumble (cornstarch free that way!), vegan sour cream, rhubarb syrup in the making for "sodas".
This particular vegan sour cream recipe was a new one for me this week. I have made cashew cream and "cheeses" in the past, as I am lactose intolerant myself, but we had removed all peanuts and tree nuts from our home for so long I haven't had anything even remotely like that in ages. While we have not tried bringing any peanut products back in yet (he is scared, I understand, no rush), we have started little bits of almond and cashew. So far so good. The book "Thrive Energy Cookbook" is being pored over this week, and the vegan sour cream is one of many recipes we have tried. The book is written by an athlete who is also head of nutrition for the Garmin-Sharp Pro Cycling Team (we are huge cycling fans in this house, so we know who that is). And he is a vegan. We are not exclusively vegans of course, but having a son with dairy, gelatin, and all red meat allergies (not to mention gluten), means we most often look to vegan and raw recipes for new ideas of tasty things that my son - and the rest of us - can eat which are dense in nutrients but also really tasty and kid friendly and can slot in with the things he knows he likes. The book is oriented towards high performance athletes, and wow, it has a lot of great foods. I can't wait to work through more of the book. The sour cream is made using soaked cashews, and we are on our third batch this week. Yum. I checked the book out from the library, but I'm going to buy a copy. I am enjoying this once a week in my kitchen recap. This time of year is busy busy busy busy. The garden needs planting and tending and weeding, spring veggies are starting to come in and need to be used NOW, there are deadlines to meet, and the kids want to be outside every single second that the weather is cooperative. So while I have a backlog of recipes sitting in my notebook ready to share (once I enter them into my recipe app and edit photos, and, and, and), I still come back to this. What are we doing every day. Here. Now. I can't believe it is almost June!!!! How about you? Be sure to visit Heather at Beauty That Moves to see everyone on the blog hop! Capturing my love of whole foods, combined with the activity of a bustling kitchen. A weekly collection of photos from the center of my home. * * * * *  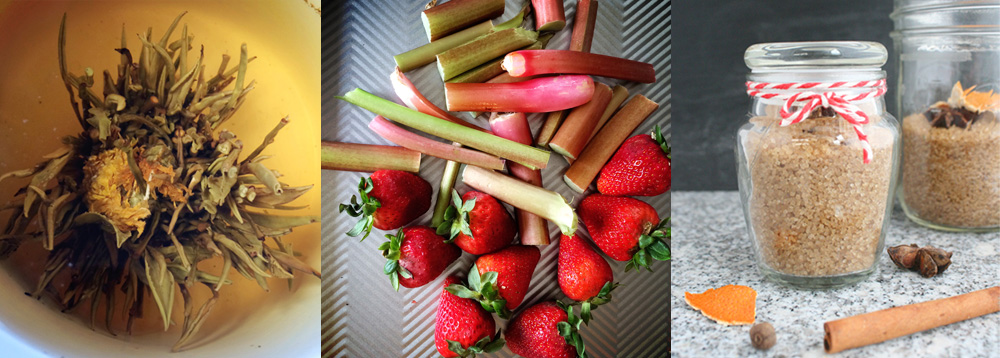 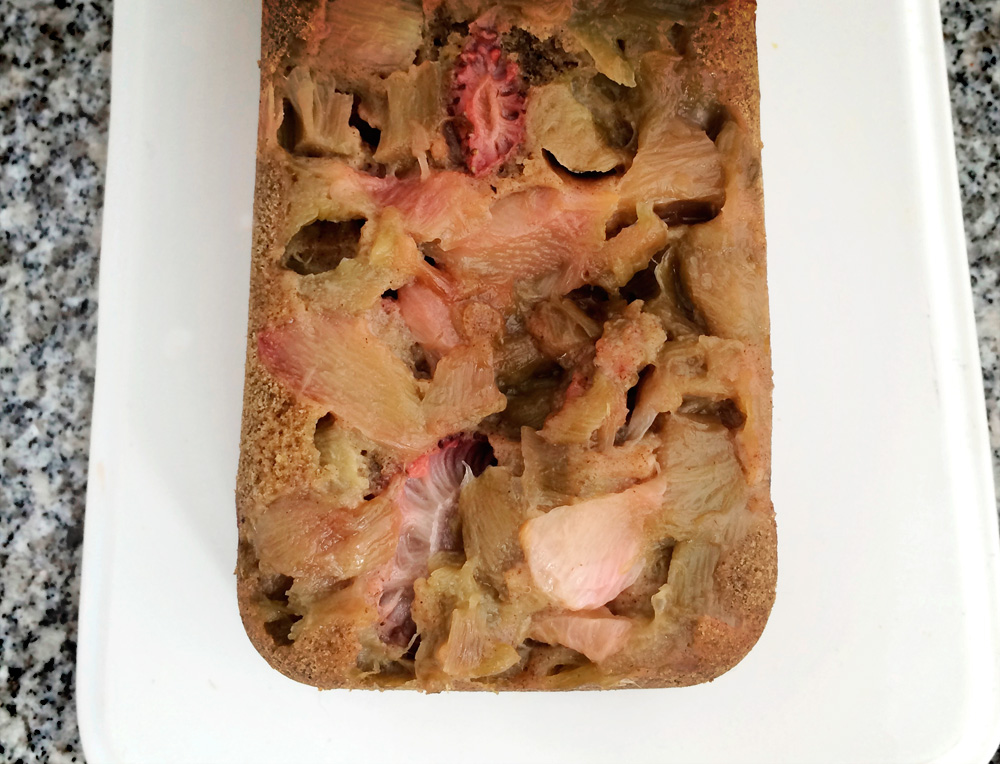 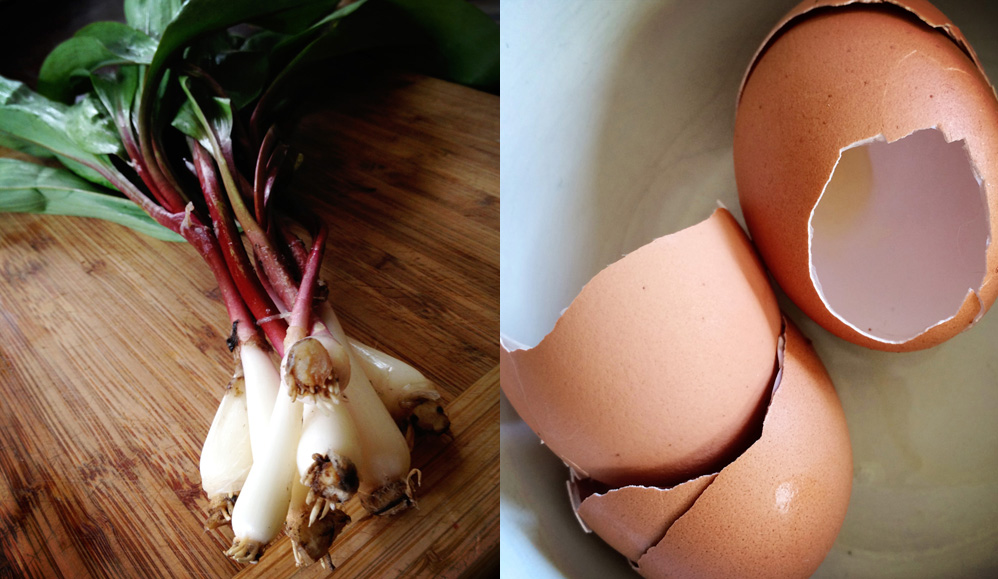 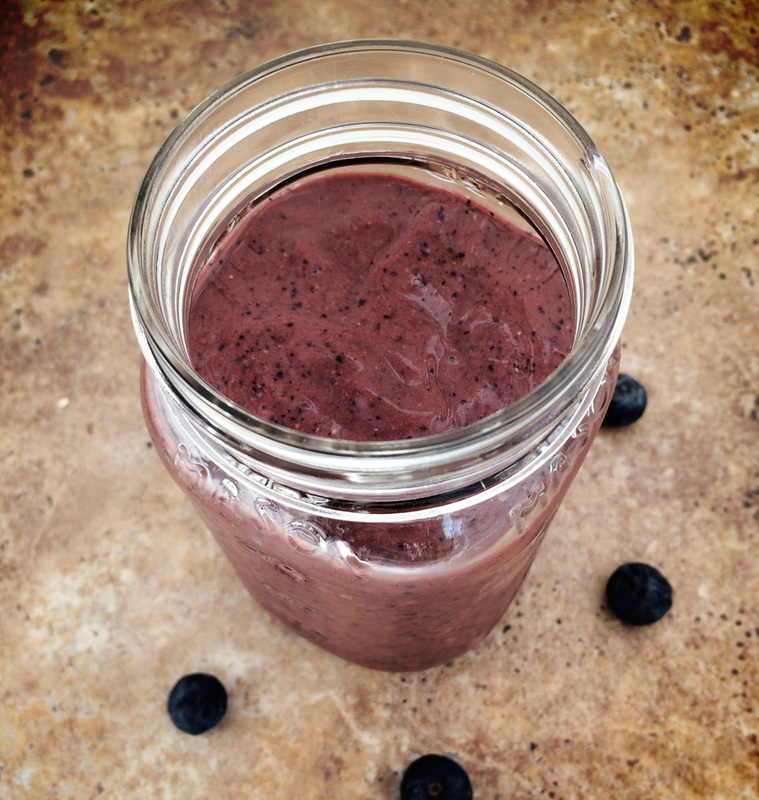 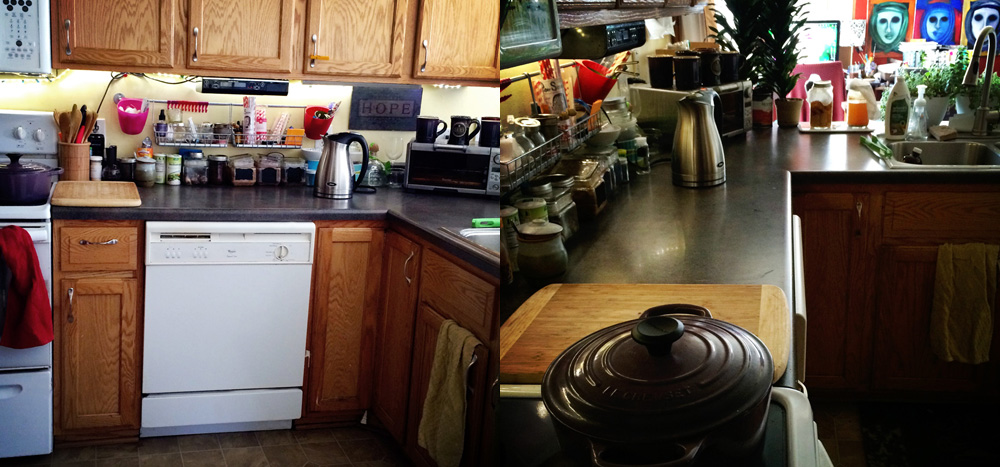 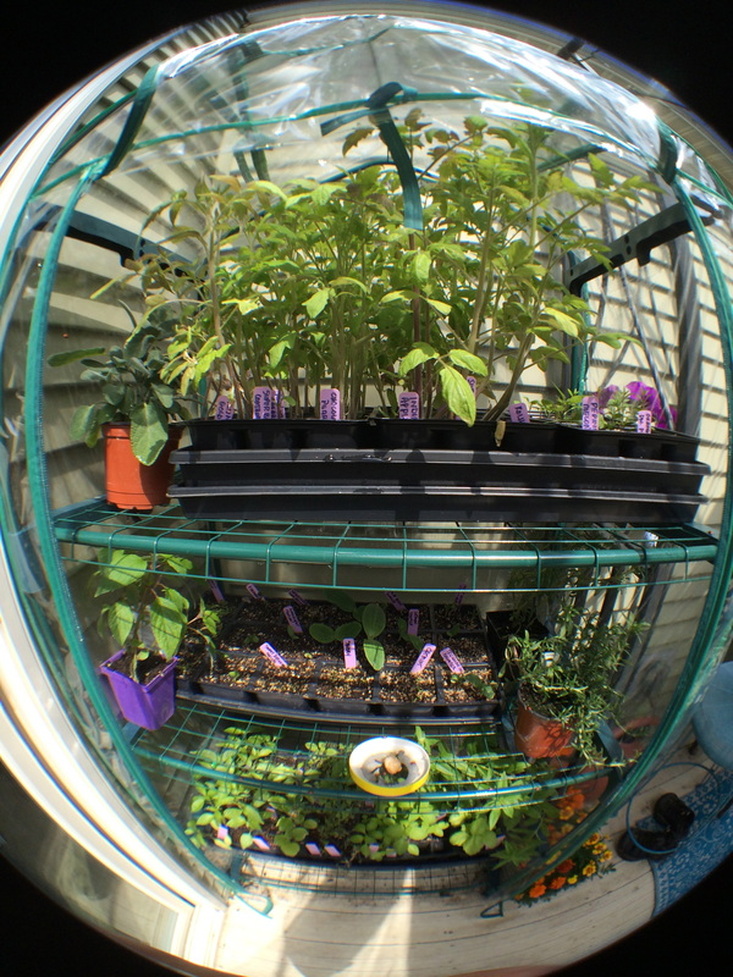 top to bottom:: fresh elderberry lemonade on a hot day (and silly boys drinking it), blooming tea, strawberry rhubarb goodness, gift making for Winter 2014 Tend Magazine, GF/DF Rhubarb Upside Down Cake, fresh ramps, eggshell saving for the garden, Blue-Banana Mocha Maca Smoothie, my kitchen, and what I've been doing most of this week.
This week finally warmed up and we have been outside planting planting planting. My kids love our new hammock and will lay in the shade reading and chatting while I work in the garden. I love chatting with them, hearing their stories, all while I dig. They help out when they are in the mood and they squirt me with the hose in between. Ahem. We have been saving eggshells and coffee grounds from the kitchen all week for the garden, and are using them as we go! I wasn't in the kitchen as much this week. So much planting. And the looming deadline for the Winter Edition of Tend Magazine which means wrapping up all of the loose strings and taking photos of holiday gifts and goodies. It has been hard to think WINTER when it is 86ºF outside. But also, my husband has been on a business trip all week. That means I find myself not really wanting to cook anything for myself and craving mostly salads and fresh peas and then cooking fun crazy foods and snacks for the kids all week. They struggle when he is gone, so we focus on fun. Of course we also had to make fresh lemonade this week in this heat, and put some in the ice cream maker for slushies. Yum. The ramps are in, and have been sitting in my fridge all week. I keep changing my mind about what to do with them. I think I'm going to pickle them. We shall see! And my kitchen. Oh, my tiny, tiny, dark kitchen. Every week people show their lovely bustling busy bright shiny sunny kitchens. Ahhhh. I have not shown my kitchen in what, 8 weeks? I have lived in this house 10 years and the kitchen was obviously not designed to be used. Ha. I think a lot of modern homes are designed for freezer to oven/microwave living. No room for people in the kitchen. No room for prep and cooking. No real pantry. My kitchen doesn't have any windows and can only comfortably fit one person at a time. Since we cook and can and make together a lot, much of that is actually done in the next room - the dining room! Of course I do realize that many in the world have smaller kitchens, and I am very grateful to have even the space we have. I do dream of a big bright family hanging around the island kitchen some day (who doesn't) with chef level appliances. But what is the saying? It's not what you've got, but what you do with it? So I am showing you my kitchen - a lot happens in that tiny space! And we have adapted many things to accomodate our lifestyle (hallway "coat" closet is second pantry space, extra freezer in the garage, dehydrator/herb armoire/culinary herb cabinet/hydroponics in the dining room, etc.). I feel good that our house uses less energy/water than average, and has less empty lawn than average. The trade off for a small kitchen. And a smaller kitchen means less to clean, right? What is your favorite part of your kitchen? ** Be sure to visit Heather at Beauty that Moves to link to everyone on the blog hop this week! 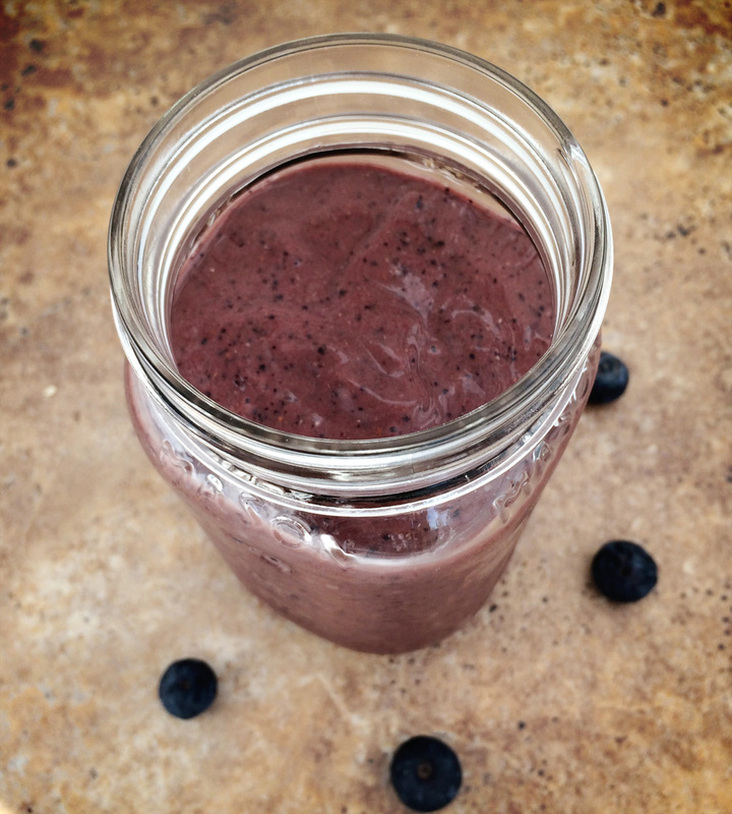
This is the time of year I most often start in the garden early before it heats up. My boys wake up early and so I start them some breakfast, and then head outside. When I come back in I am often craving something cold. This breakfast smoothie is of course yummy for the whole family, but is a nice adult flavor too. It tastes like a rich chocolate banana milkshake - of course without any dairy. Really good. The cacao and maca also give me a bit of an energy boost for the day, without having a coffee and the chia addition not only adds some nutrients and fiber, but make the smoothie feel even more like a meal. My boys love love love smoothies too, but they usually prefer cherries/peaches/greens/juiced things/coconut yogurt types of sweet fruity flavors, and not seeds or cacao. Crazy boys. 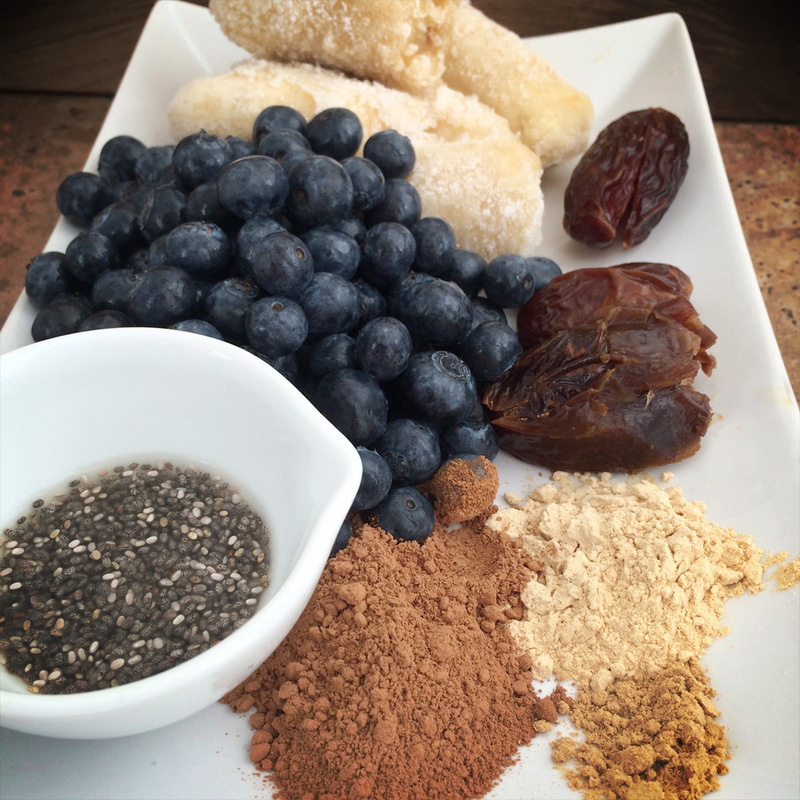
Blue-Banana Mocha Maca SmoothiePrint |
{wholly rooted}An icy morning smoothie packed with nutrients and antioxidants with a rich wonderful flavor. Forget the coffee - start the day with a cool, filling smoothie. {ingredients}
First soak your dates. I will place them in some kettle water first thing when I am making the boys breakfast. Or, soaking overnight even works. 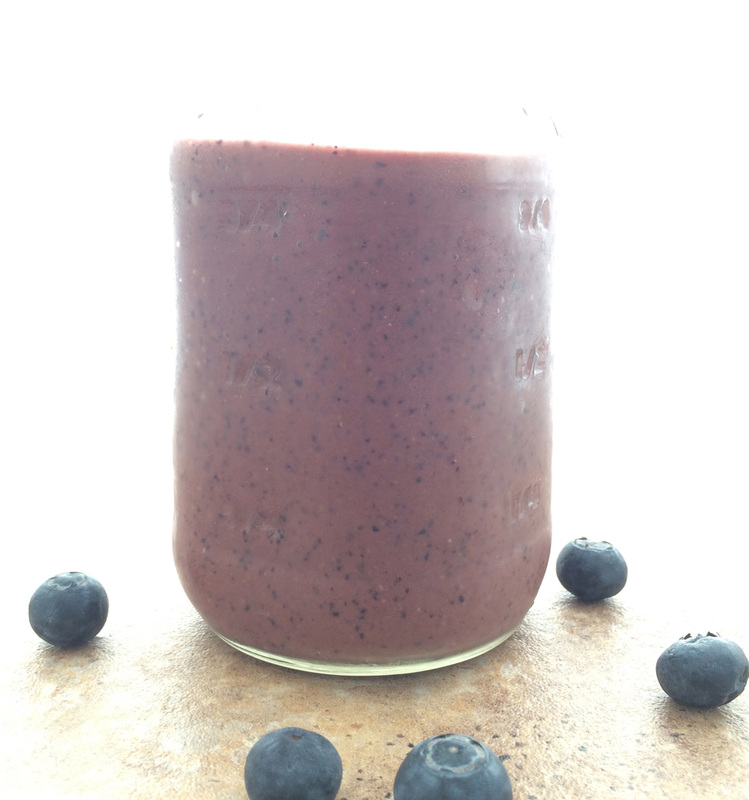
Quite honestly, I rarely if ever eat breakfast. Which is bad for me with how my blood sugar works. I make food for the kids and wander off to work in the garden, clean up, or work on projects for a bit while they eat. Making a smoothie though, is easier for me (for some reason). And after being in the garden something cool encourages me a bit more. As does something that takes just a few minutes to whiz up. This has enough in it that it is a good breakfast, and gets me through to lunch time! Capturing my love of whole foods, combined with the activity of a bustling kitchen. A weekly collection of photos from the center of my home. * * * * * 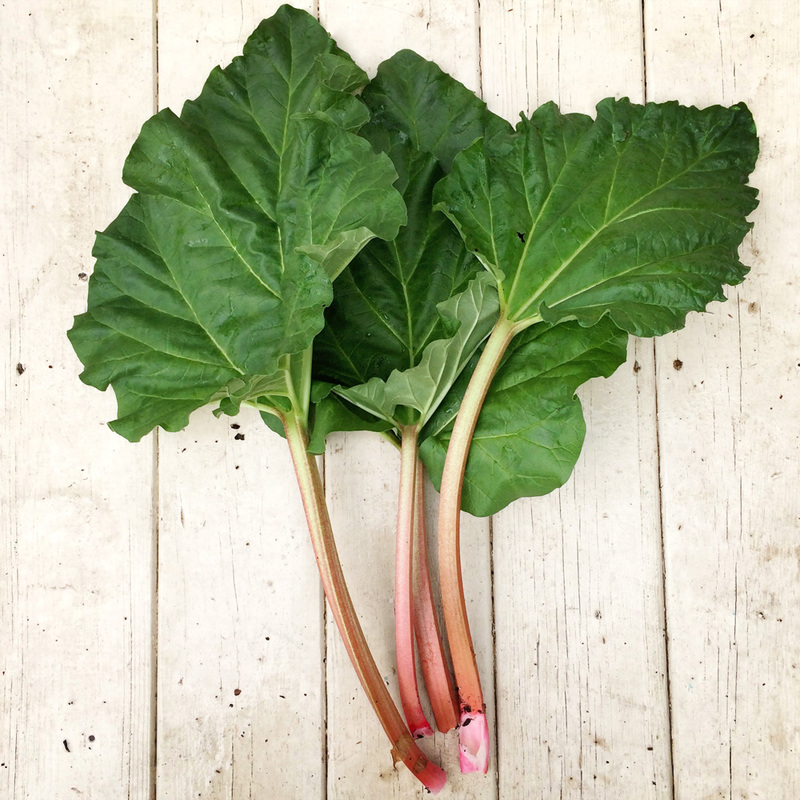 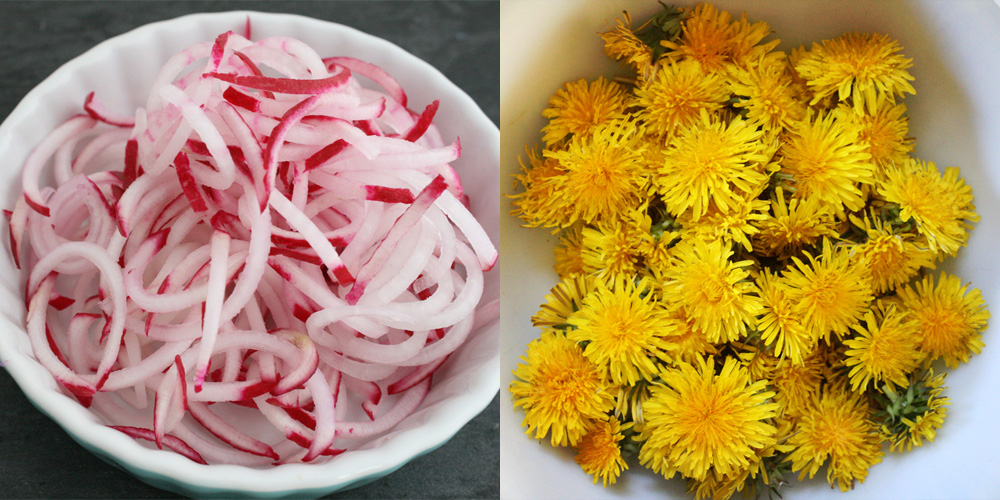 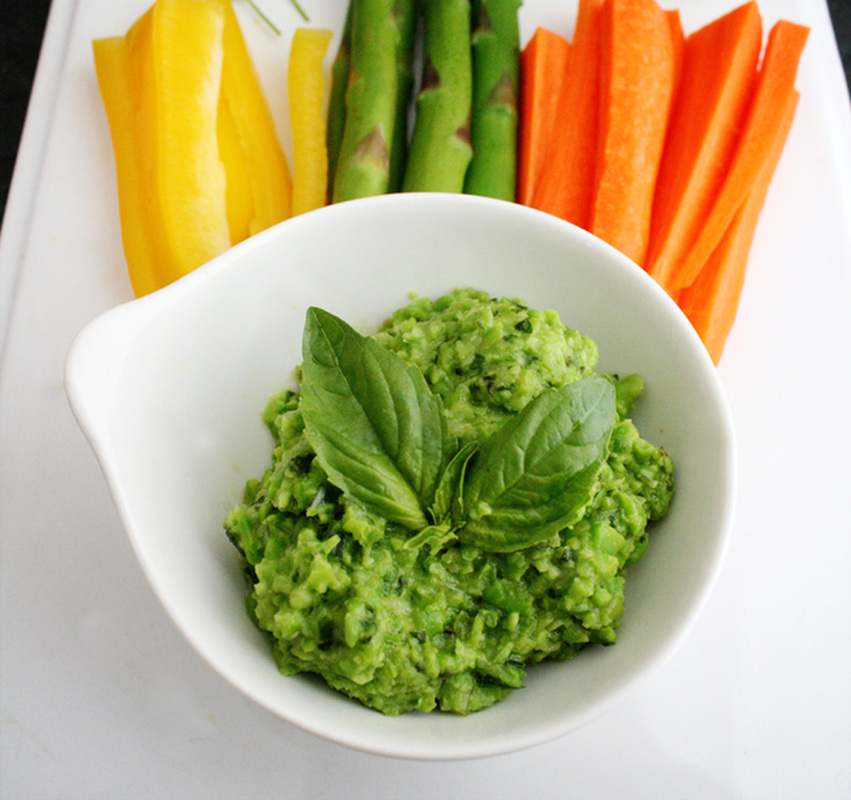 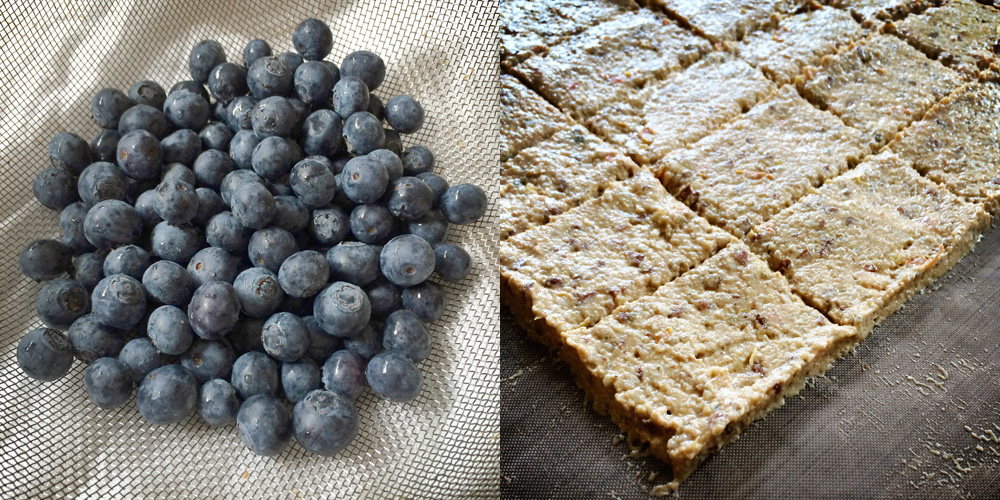 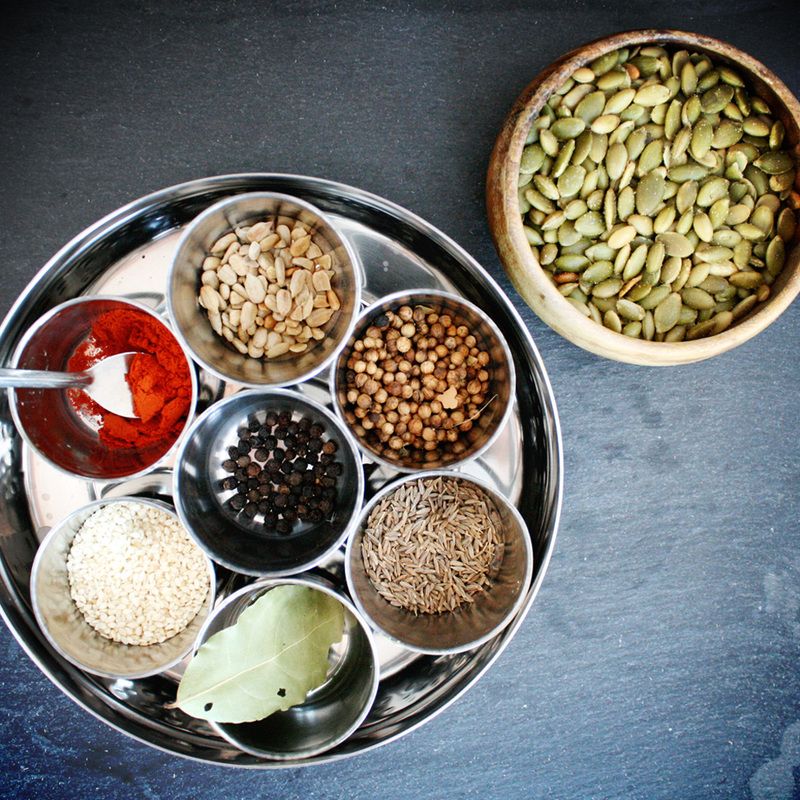 top to bottom: the rhubarb is in (I know what I'm making today), spring radishes, dandelion season (one day of dry to harvest a few before rains set in all week), pea pesto, blueberries and seed crackers going into the dehydrator, spices and seeds for dukka making.
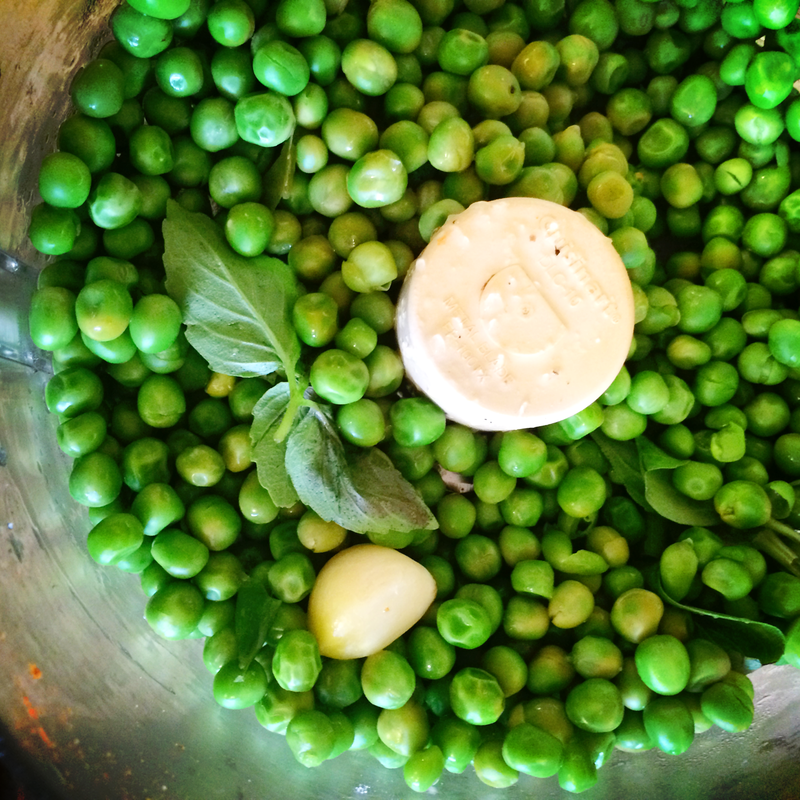
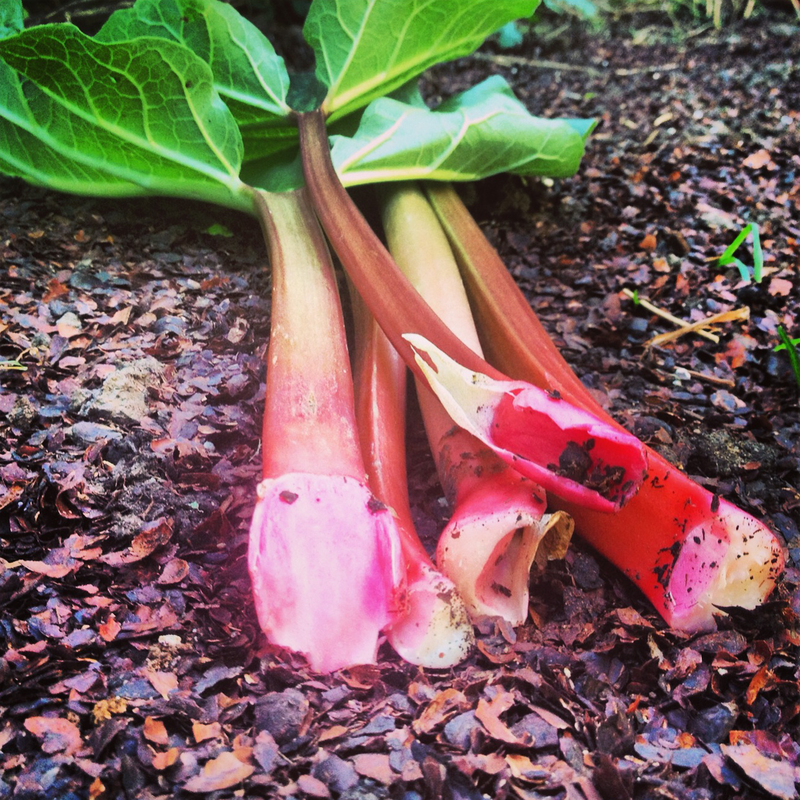
We have had a week of cold, dark, gray, windy, and rainy. We have been inside more than we would usually be for May, but we have been finding plenty to keep us busy, and I am thankful for some days where the boys don't mind being busy inside while I work on some articles that are on deadline! It is easier to have holiday decorations out for props when it is cold and gloomy anyway. It has been c-c-c-old. We might even have some frost coming tonight, so maybe we will leave up these twinkly lights when I'm done for some mood enhancing! The good thing about all of this rain is that my surviving rhubarb (I lost some after that brutal winter) had a massive growth spurt and I was able to pick some this morning. Yay! I have a gluten free rhubarb upside down cake in mind. I get to take pictures of hydroponics systems tonight at the local garden center, so it might be nice to take along some goodies for the guys there who are being wonderful about letting me take photos. Hope you are having a wonderful (warm!?!) week. Be sure to visit Heather at Beauty that Moves to link to everyone on the blog hop this week! 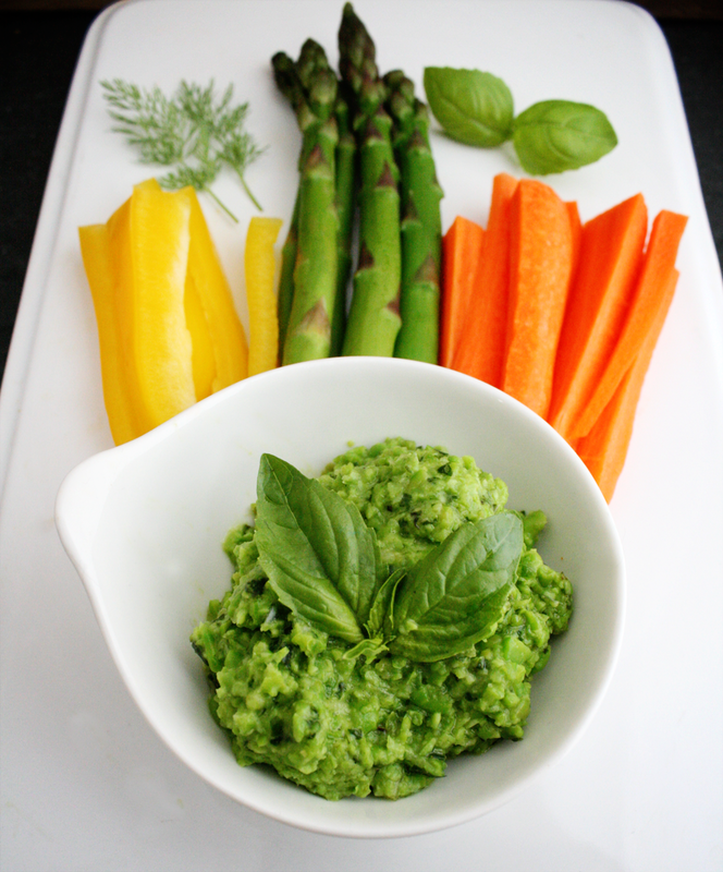 I love when the first crisp green vegetables and herbs come up in spring. I have a good month or more where I cannot get enough of peas. I also love pesto - although in a house of various allergies and intolerances, we cannot do the pine nuts or cheese - and I find myself making vegan pesto variations from May to November. This is my favorite spring pesto, and is fantastic as a spread on a crudités platter, over pasta, or smeared on a piece of freshly toasted bread of choice with a sprig of fresh dill and a drizzle of olive oil. I even love it over steamed veggies or fish. This takes everything that we love about peas - their sweet freshness and tender bite - and ramps it up a few notches to an amazing flavor that tastes purely of spring. 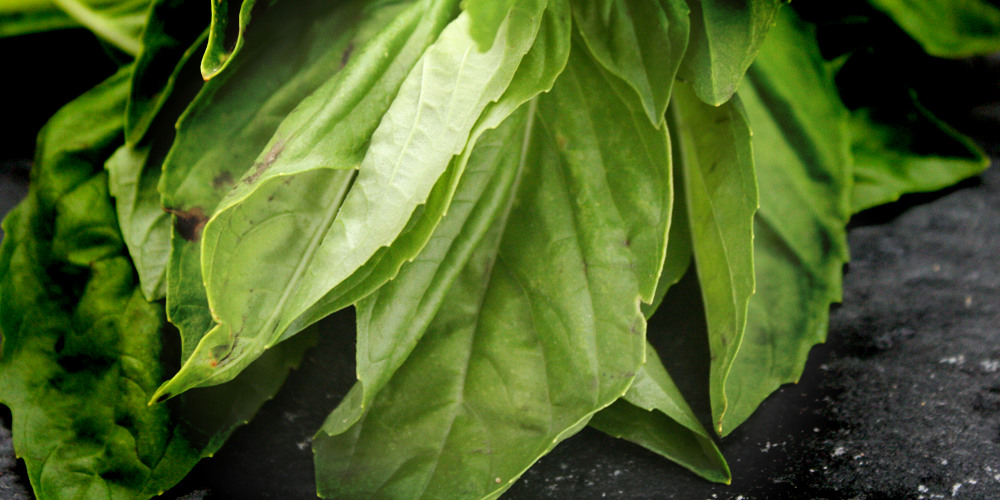 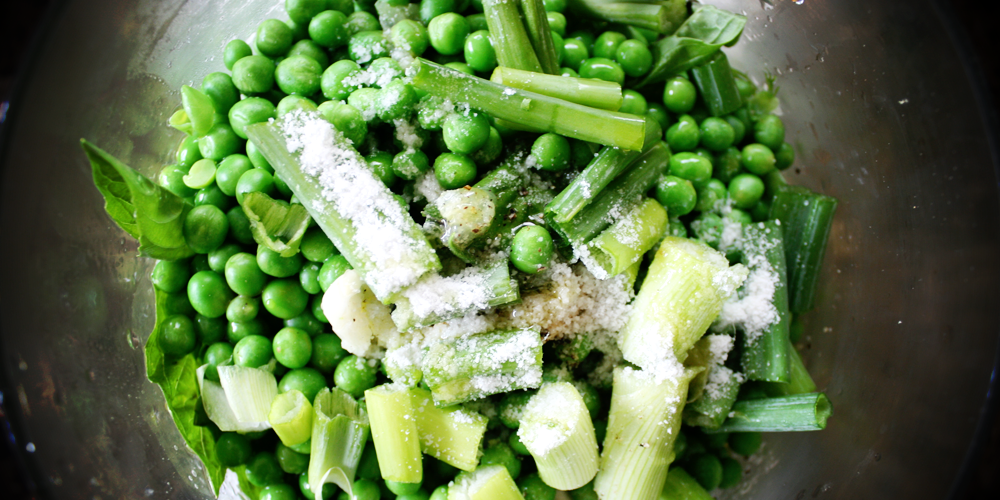 Vegan Pea PestoPrint | {wholly rooted}This vegan pea pesto tastes like spring. Whether on a crudités plate, spread on warm crostini, or served over fish or steamed vegetables, this pesto adds delicious flavor to your dish. GF/DF/NF {ingredients}
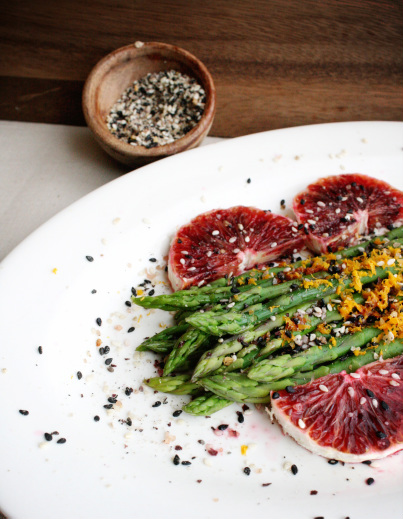
Bring 2 cups of water to a simmer on your stove top. Add your peas to the simmering water, and let cook for only about 2 or so minutes for fresh peas, a short while longer if using frozen. Strain and rinse with cool water. Drain. Pour your peas into a food processor, along with the garlic, olive oil, sea salt, pepper, lemon, spring onion, and fresh herbs. Pulse in your food processor until mostly smooth. Do not over whiz - you want a spreadable pesto with some texture left. Taste, add additional salt and pepper to taste. Serve immediately, or store in an airtight container in your refrigerator and eat within a few days. 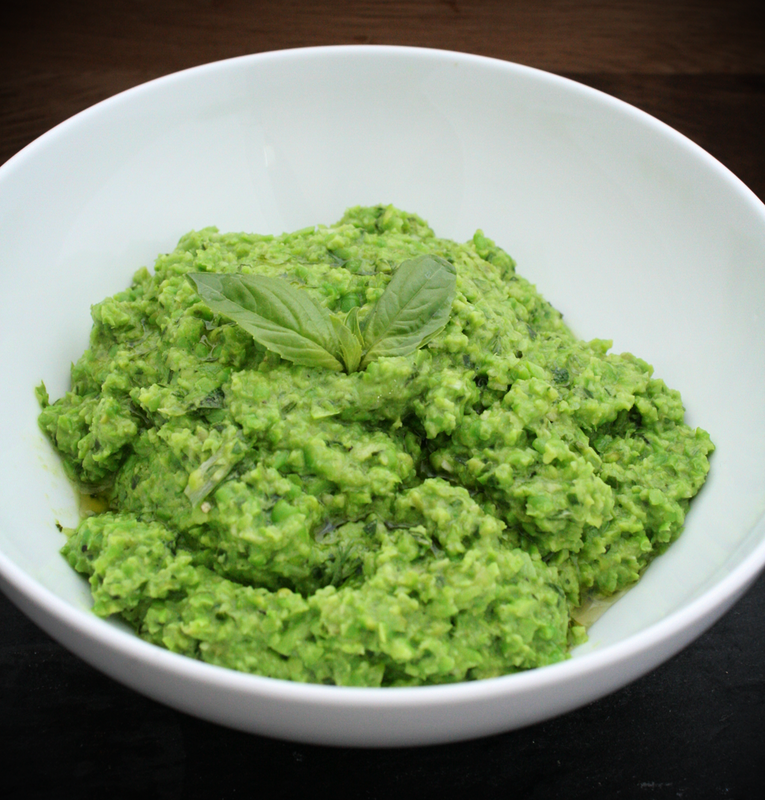 Of course I ate the entire platter of crispy veggies and steamed asparagus with that top shot of pea pesto the moment I was done taking photos. Ahem. Lunch. I made myself put away the rest of the pesto to serve with dinner tonight. Of course since this only takes a few minutes to make, I could just make another batch if this one mysteriously disappears. Capturing my love of whole foods, combined with the activity of a bustling kitchen. A weekly collection of photos from the center of my home. * * * * * 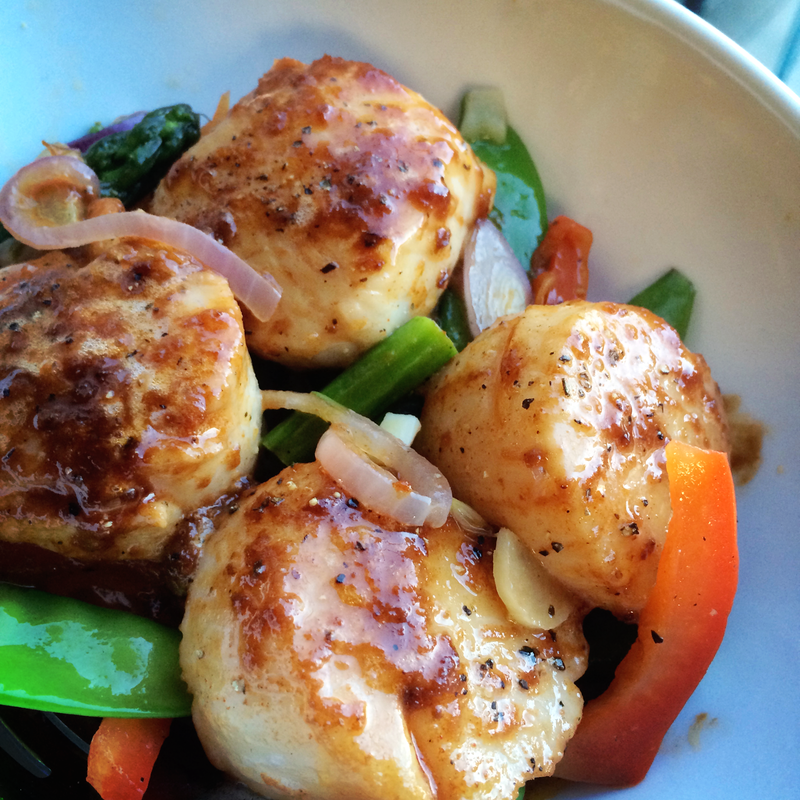 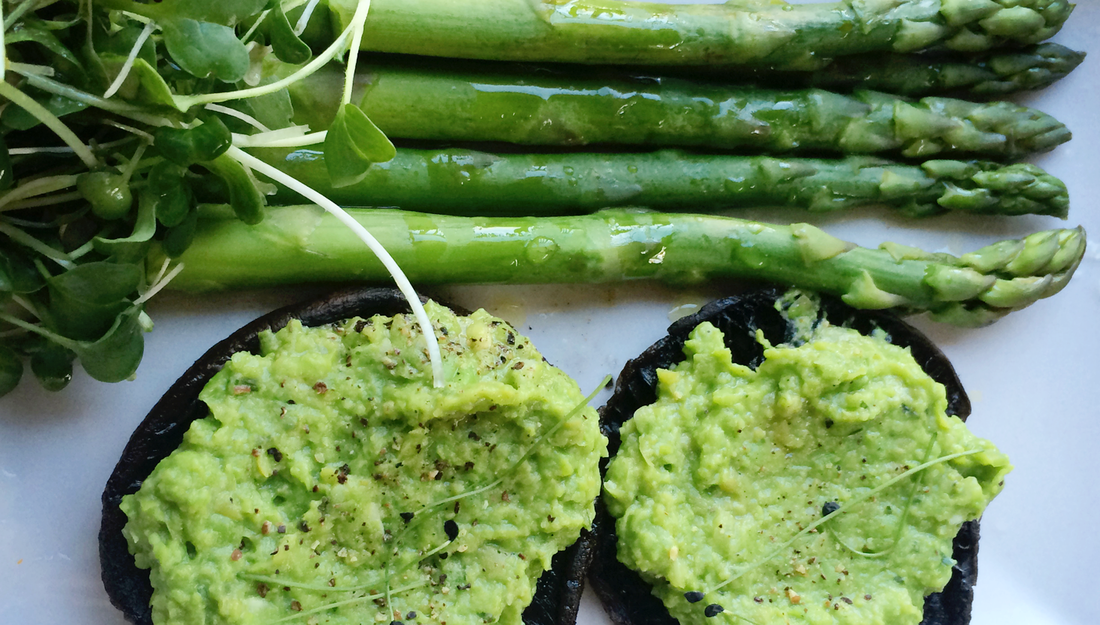
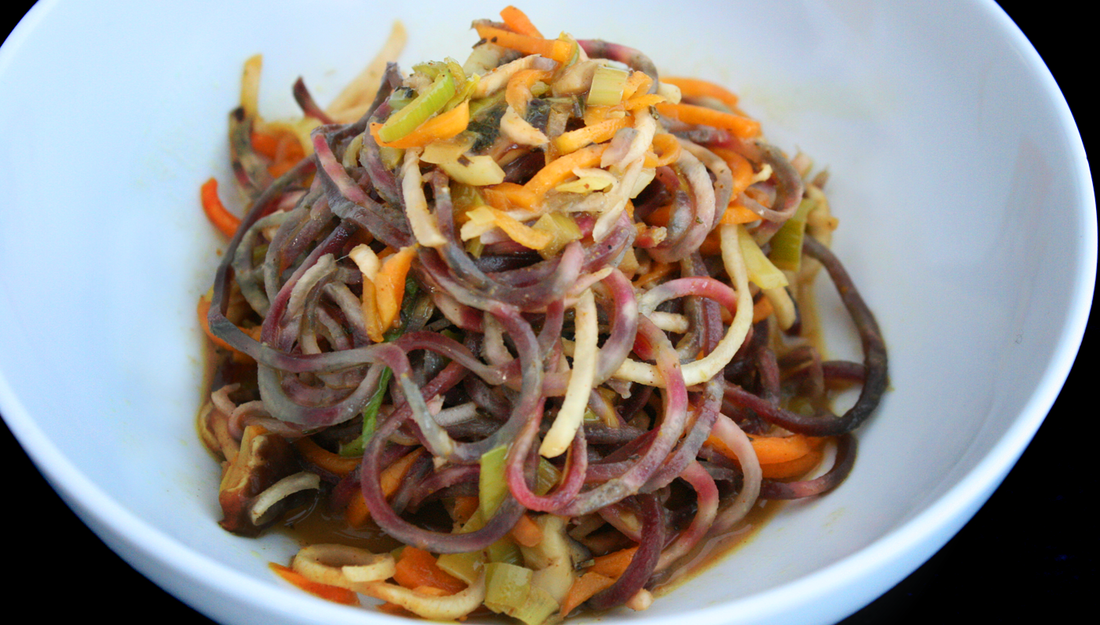
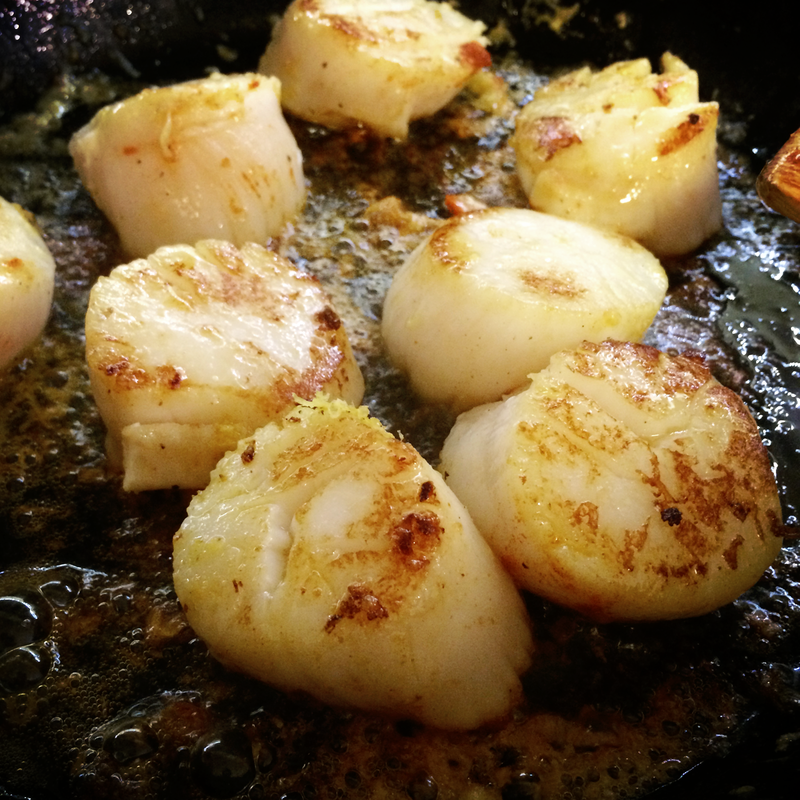
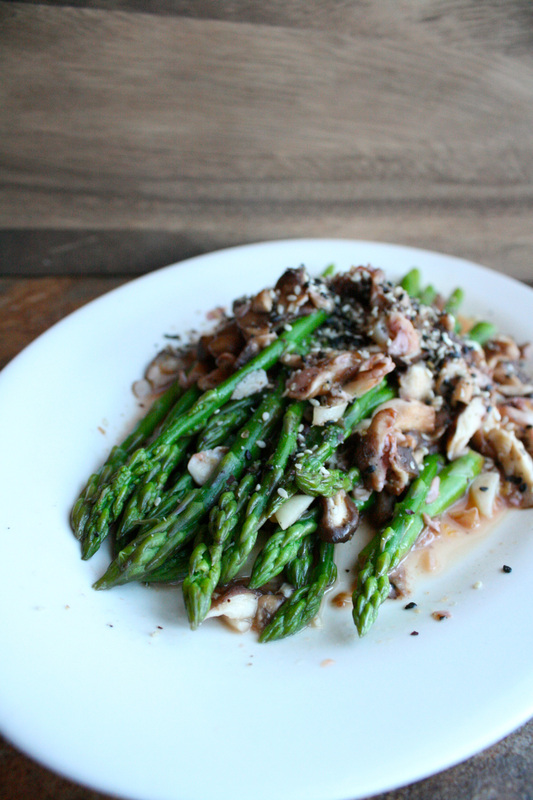
 Top to bottom: grilled lemon miso scallops with spring veggies, vegan pea pesto stuffed portobello mushrooms with asparagus and microgreens, grilling scallops, making pea pesto, dehydrating cocoa coconut balls, steamed spiralized beet/carrot/sweet potato with veggie stock, vanilla glycerite in the making, one of the recipes I developed for the Winter Issue of TEND Magazine (deadline soon! eep! go go go!) , first batch of herbal tulsi hibiscus iced tea of the season.
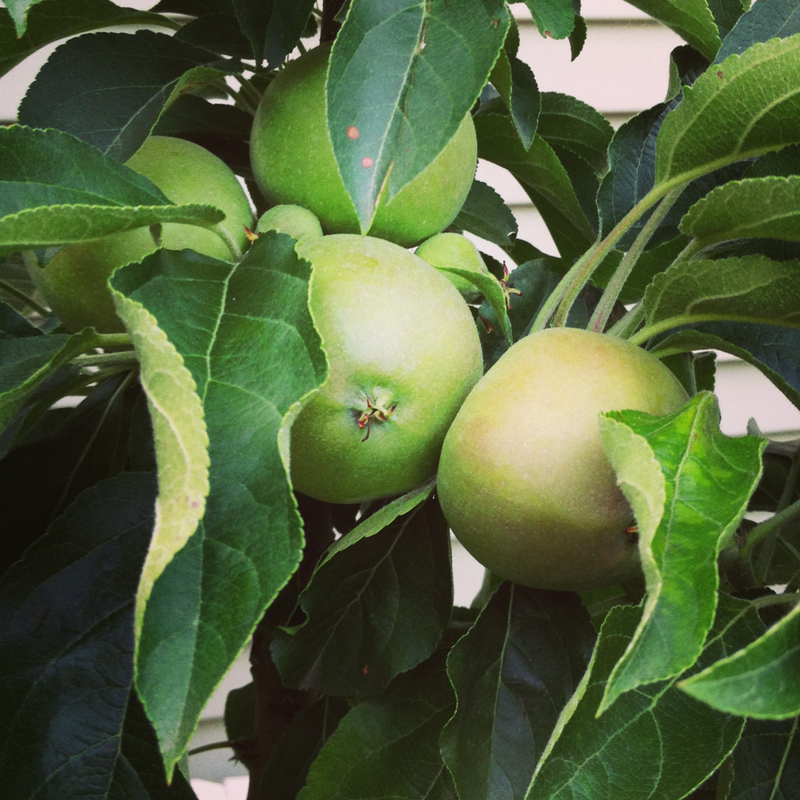
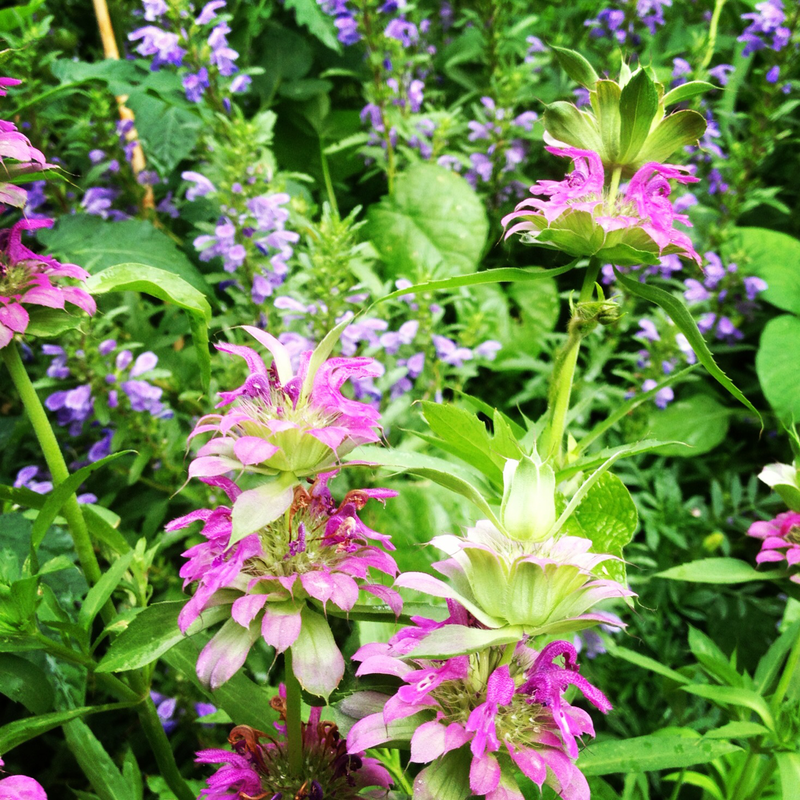
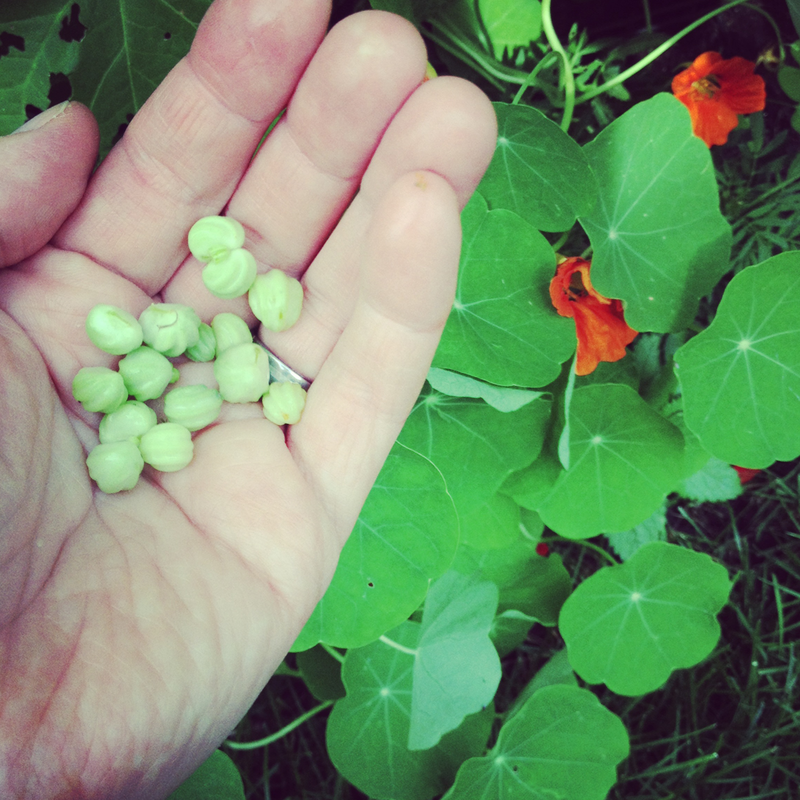
The past week and a half have been a little rough here. My 11 year old has had repeated additional allergy testing (skin prick, oral test, and blood test) at the allergist plus an electrocardiogram on his heart at the children's hospital (it was fine - woot!). He will have additional testing in a few weeks. I know testing and medical stuff is hard for all kids, but particularly so for him. He has extreme sensory issues and really does not like changing our daily routine. At all. It is extra hard when he has not been feeling that great lately. Put that together with changing seasons, a dad with an intense work schedule, guests in town, and getting some work done on the house that was LOUD and had people in our space for a whole day...wow. That would be a lot for extroverted non-sensory types - and we are all pretty much introverted highly sensitive people here. I am always in awe of his humor and good naturedness while in the thick of it, even if the struggles later at home are epic. He is such an amazing kid and I am crazy about him. One good thing from all of this additional testing is that we found out his tree nut allergies are gone. Poof! Zero skin, zero blood, zero on oral food allergy challenge. Almonds, cashews, walnuts, etc. Yep. I'm still terrified, funny enough. It makes me nervous to even type this here and tell you all. Knock on every type of wood imaginable. I observed him again closely at home after he ate some almond crackers. I can't help but think what if they are wrong? What if he has a reaction? I know some people outgrow certain allergies and not others and we don't yet know exactly why. He can't believe it either. For a boy who follows strict rules and guidelines for every single thing (he likes things to be *just so*), to change his eating habits is scary for him. He asks repeatedly are you SURE I can eat that? We feel like we are letting our guard down. I am afraid to even mention his peanut allergy. We think he might have outgrown that too. His tests were negative on blood and skin and the Doc tested and re-tested on his back after the blood tests were negative. Let's try again to be sure. Let's try one more time to be sure. We have to do a supervised oral allergy challenge to verify verify verify before we know 100% for sure, but he is scared, and I'm not in a rush to make him do it until he is comfortable. Of course this doesn't change a whole lot as his other allergies are still here and are still serious - he still cannot eat any gluten, and he is still severely allergic to all dairy and seemingly all red meat furred mammals (their meat, milk, and dander). We tested some additional animals and meats to see if it was ALL, and yes. Rabbits, pigs, cows, bison, rabbits, sheep, goats, horses, cats, dogs, mice. Yes, yes, yes. His levels were even higher for meat and dairy too, so we need to be extra diligent for all of those pesky hidden/undisclosed animal by-product ingredients and will still need our epi-pens and be on the lookout for severe reactions. But almonds, cashews, and pistachios? OH MY! So with all of this our meals for the past 10 days have been green. A lot of peas and asparagus and microgreens and lettuce and eggs. Quick and simple. I have also been warily dusting off my almond and cashew cracker dehydrator recipes. It is a relief as well as stressful. If that makes any sense. I am afraid of making an error with our changes, and I am excited to be able to add another protein source into his diet (not to mention I have not eaten a single nut myself in ages). We have about 4 weeks before his next round of appointments, so he gets a break for a bit. Time to relax, work in the garden, get out of town to enjoy warmer weather, and make some cashew cream and almond crackers. Gulp! Anyone have a child that has outgrown nut allergies? How did you transition a child from STOP, that can kill you to HERE, have another bite? And for those of you who have children with severe peanut and tree nut allergies. Breathe. Breathe again. I know that feeling. Every time I have read someone saying their child just got back from the allergist and outgrew their nut allergies and I thought - can it be? No way. Will that be us? BIG GIANT HUG to you and your wee one. Now that my sub rambling is over. Ahem. Whew!! I can't wait to pour my iced tea and go visit all of the other blogs on this blog hop. Hope you all have a fantastic week! Be sure to visit Heather at Beauty That Moves for a listing of all the links in the blog hop! Spring for me is garden. Where I live we have about 6 months on/6 months off garden-wise. Even with some late bloomers or early risers, it really is too cold to call it gardening until April or May. This year has been even colder than normal, so even my peas are just now starting to finally sprout - in MAY. I don't usually plant out things like tomatoes or heat loving herbs until the first weekend in June each year anyway, so starting seeds indoors helps give a boost to a short growing season. I have a small garden. Now, I know *some* city dwellers may say mine seems big, but really, in the grand scheme of things I have a much smaller than average American yard. I am here to tell those who say they don't have enough room to grow food - yes you can. If you haven't known me for long, you might not know about our garden. When I say small, it is small. We have a side yard stripe in between two houses. It goes from street to alley. Our front yard is only a few feet to sidewalk (so I don't even call it a yard), and there is no back yard, only carriage lane and a short driveway. 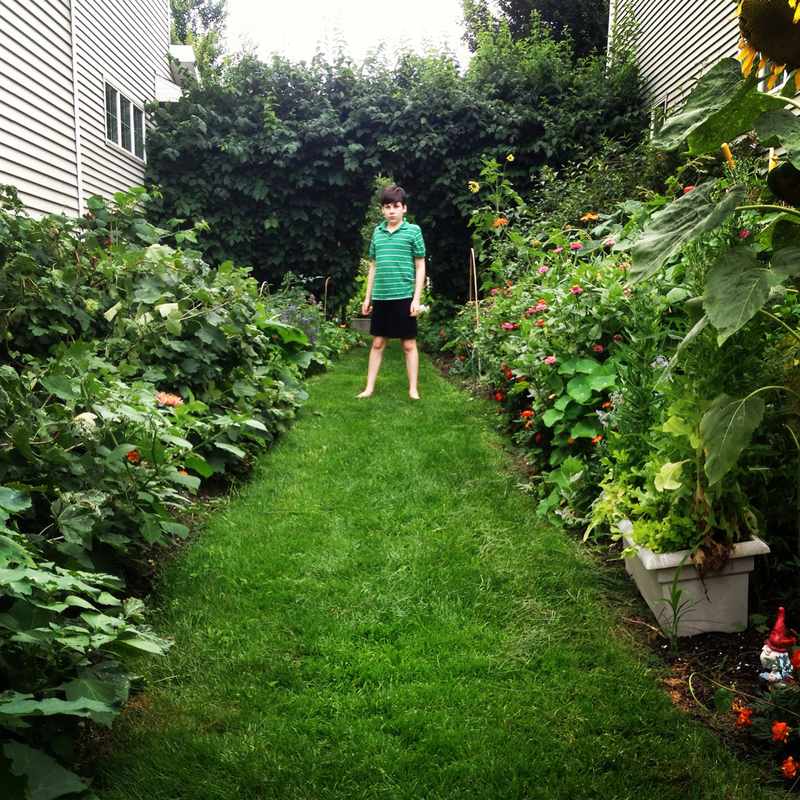 And when I say I grow a lot of fruit, vegetables, herbs, and flowers in a small space, I mean it! And I'm not a big fan of rows. The trick with a small garden is to find plants that tolerate your light, your scale, and your climate, and grow UP if you can. I try to experiment with new varieties every year to tweak our space to get the maximum result from our shady half of the day urban garden. And I know my limits. I plant determinate varieties of tomatoes in pots on my front porch because that is the only place it gets hot and sunny enough. I stick fruit canes and bushes in any extra spots. I grow dwarf or columnar of certain types (I have two dwarf columnar apple trees in pots on my deck). I use every inch I can find. And most importantly, I know that since I have a small space in a neighborhood where my garden is visible to all, that appearance matters. I know I need flowers and color and height and interest and smell and continued blooms - not just square areas with things in a line! Our garden is urban organic permaculture. No chemicals, no pesticides, integrated plantings. My neighborhood is what you would call urban - at the edge of our city. Houses are close together and we have houses and condos and shops and a restaurant and a new grocery store. A city bus passes our house several times a day. But our garden is living. We get frogs, worms, rabbits, dozens of kinds of bees and wasps, ladybugs, birds, you name it. Even a stray hawk or opossum wanders in at times. It is amazing! So. You will find that once garden season begins, I am a bit obsessed. While we have our wonderful CSA share at a local farm for our primary food source during the growing season, I grow things that we want more of or that are not available via our CSA. Things like fruit, favorite veggies, culinary herbs, herbs for tea, and lots of fresh flowers. I also focus on things that can be dried/preserved. No matter how small your space, you can supplement your groceries and have a great place for kids to wander. All of the kids on our block spend time in my garden each summer. Just about every day. They hide in there, they help me water, they pick, they play. It is a good thing.
Obviously all of these photos are not from my garden right now. But I need them. They are my inspiration. My reminders. Looking at a spring garden each year is a leap of faith, so to speak, the ultimate in optimism. To see blank and imagine full and dynamic and alive. An organic integrated permaculture garden is a big living thing. It becomes bigger than the gardener. We plant and plan and water and supplement and put it all out there, but the seeds do what they are here to do. As do insects, birds, soil microbes, and weather. The key is getting a good foundation, putting everything out there, and just being an observant caretaker from there. I have found one key to success is diversification. I don't grow a lot of any one thing. We are a family of 4. I don't need 400 pounds of squash. But I like variety. And my garden does better with it. When things are planted so close together, it helps keep the good bugs and pollinators here, and helps to keep the bad ones at bay. And when one plant is done for the season and not looking so lush, everything else is good, and something else can take its place. Also, if any one thing fails miserably in my space, there is no gaping hole. And every single year I tear out more grass. We have a green carpet path in the middle, but other than that, who needs it? 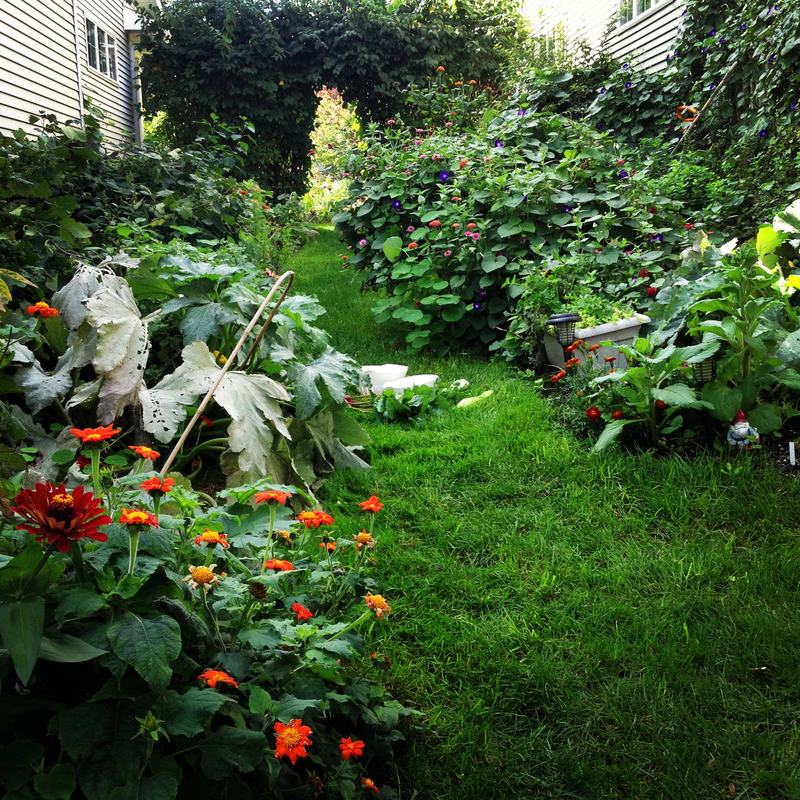 What I want to do is post a list of all of my seeds and perennials for this growing season that I have so far (I will add to it throughout the season as well). I like to see what I have. New, tried and true, colors, types. Tracking change from year to year. I also like showing how diverse even a small space can be. Don't be afraid to experiment and combine or plant close together. Find out what works in YOUR space and soil. And don't think you have to use a whole packet to start. Start a few. Save the seeds in a cool dark place to use again later in the season or even next year. Share your leftovers or trade for other varieties with friends! Go in with a group of friends on an order of many types of seeds and split them up between you all! I use all of my greens and radishes each year, but I never plant a whole packet of peppers or tomatoes - I know my space is small, I don't have the heat, and I get plenty from my CSA. So I only grow a few plants of unusual varieties I know I cannot find anywhere. So, 1. Start small. 2. Diversify. 3. Pick plants that work in your climate so you don't have to do much work to be successful. 4. Share your seeds. That is a great way to learn from other local gardeners, try new things, and experiment! Here is my 2014 list so far::
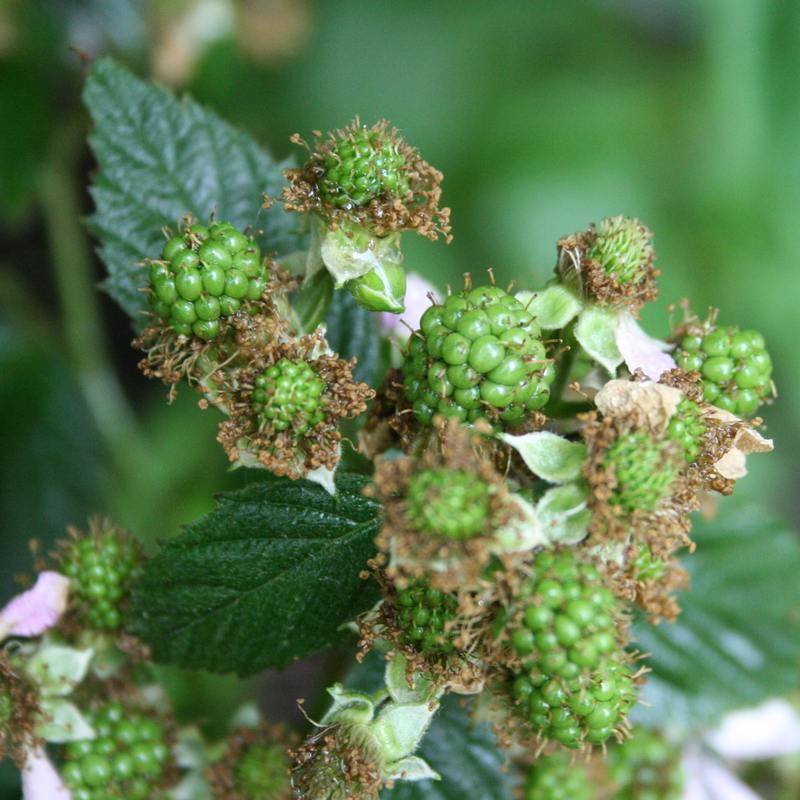
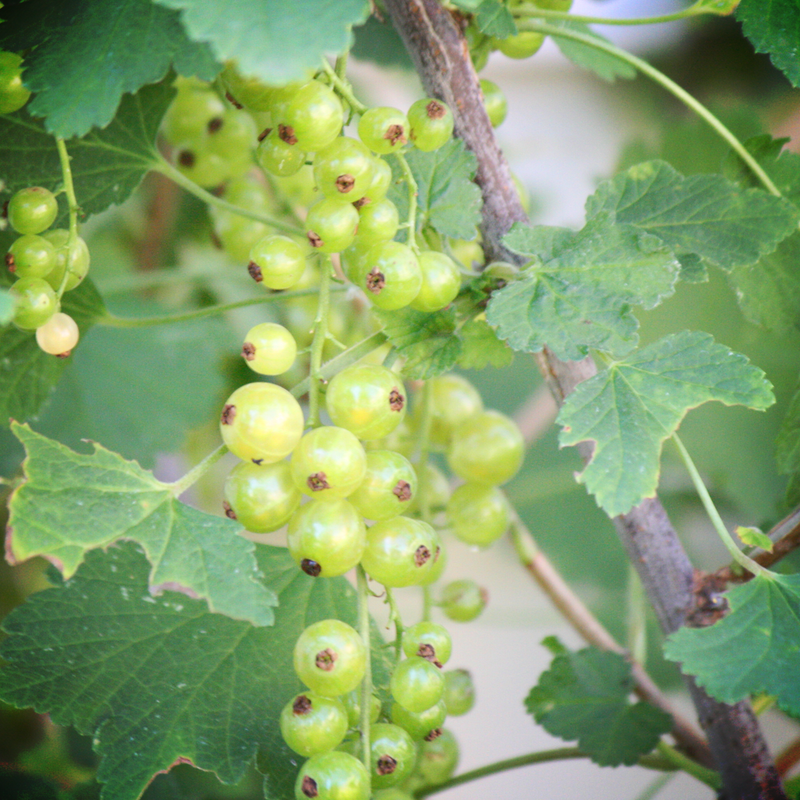
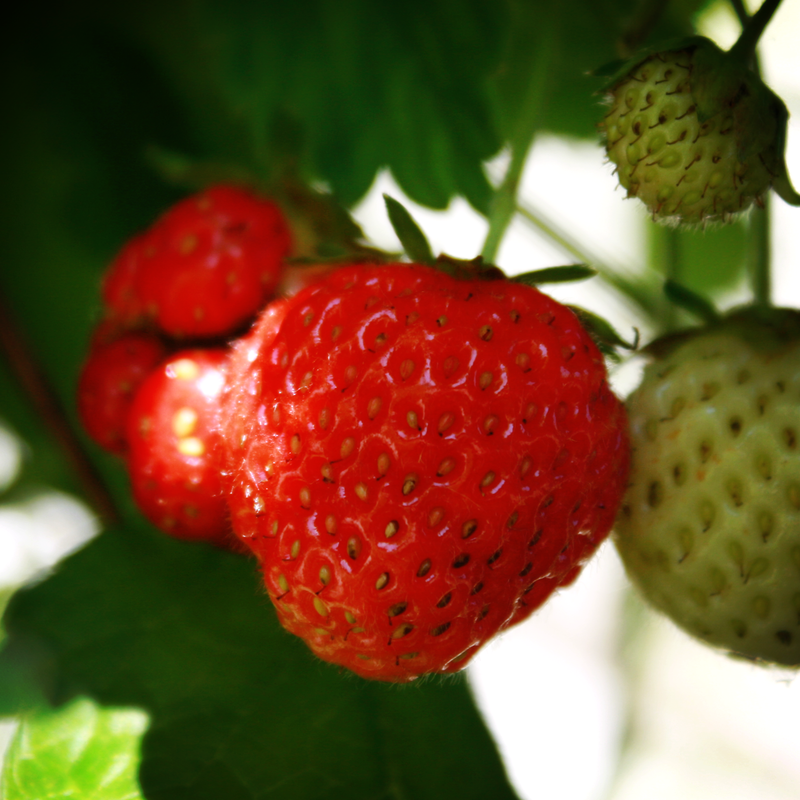
So, there is my ever-evolving and changing list from where I start today. I have a few rounds of peas, radishes, and greens in ground. It is just warming up enough to see those sprouting up. My rhubarb is tiny - but growing finally. I have some lovage, valerian, raspberries, currants, blackberries, clary sage, lemon balm, moldavian dragon head balm, strawberries, and more popping up throughout. And my tulips are just starting to bloom, and lilacs don't have buds yet (latest ever!). Can't wait! 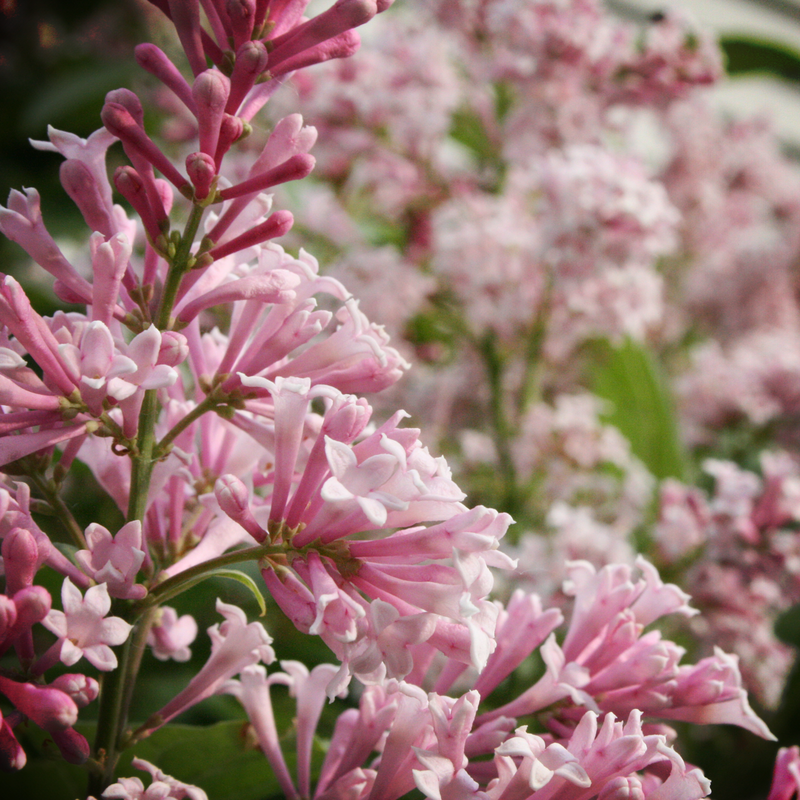 Now I have posted too many pictures. I can't get enough! I need green growing things like I need oxygen. Oh, wait.
But seriously. I live somewhere that has extreme winters, so having a green luscious dense fragrant garden full of life and bees and birds and happy kids goes a long way in the summer. My older son says we cannot ever ever ever ever (EVER!!!!!) move or leave this place - who will care for our creatures big and small? What would happen to our sanctuary? Even the smallest garden - whether a few pots or a raised bed - can be a sanctuary. Who will care for our creatures big and small if not us. So go! Plant! Plant things! And if you think you have a black thumb, remember. The sole purpose of these seeds is to live and propagate. If you give them even a somewhat appropriate habitat they will most likely do so. They are fierce warriors, these seeds. They grow through concrete in urban landscapes, in chernobyl where no humans dare to tread. They live. SO don't worry, plant! Do you have a garden? Do you have a deck? An acre? An urban lot? What do you grow where you live? Capturing my love of whole foods, combined with the activity of a bustling kitchen. A weekly collection of photos from the center of my home. * * * * * 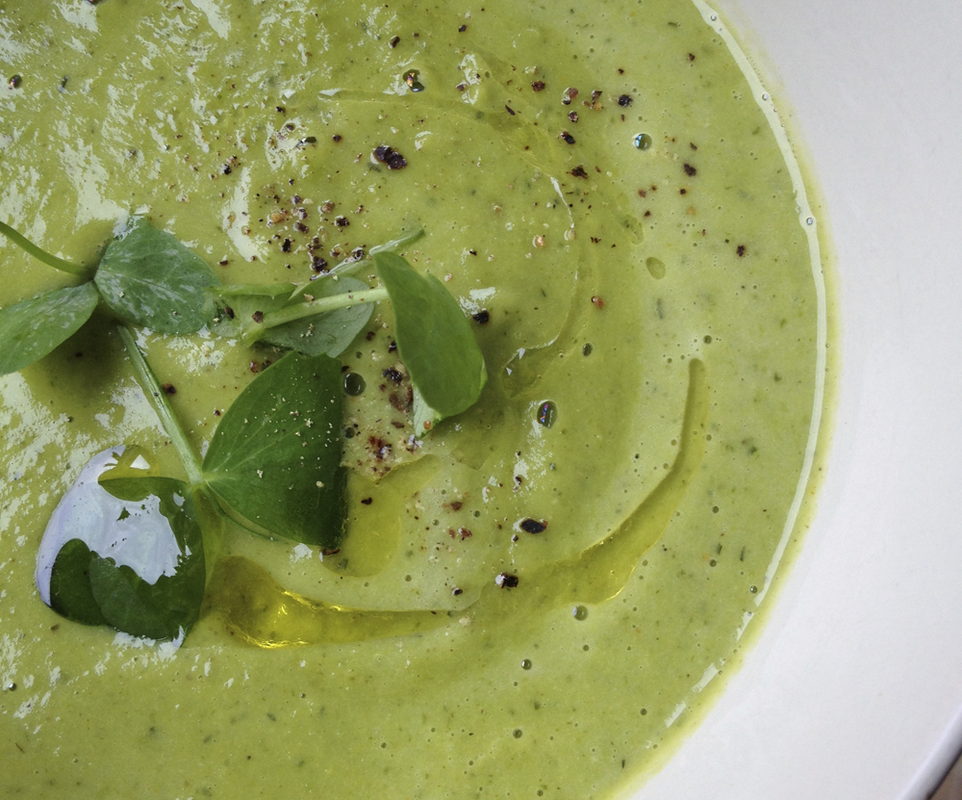 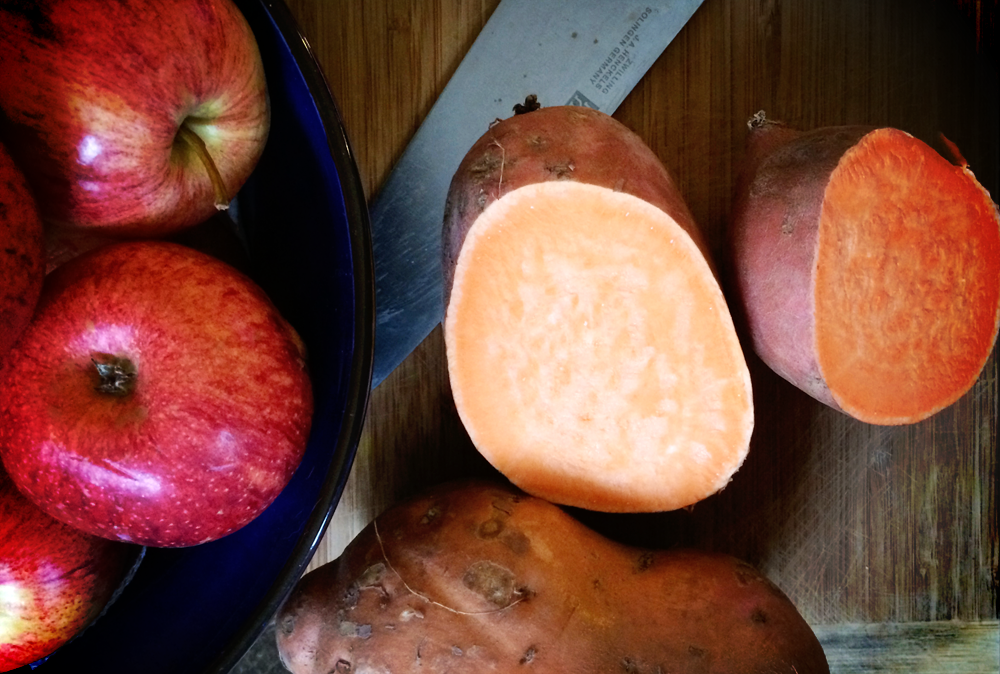 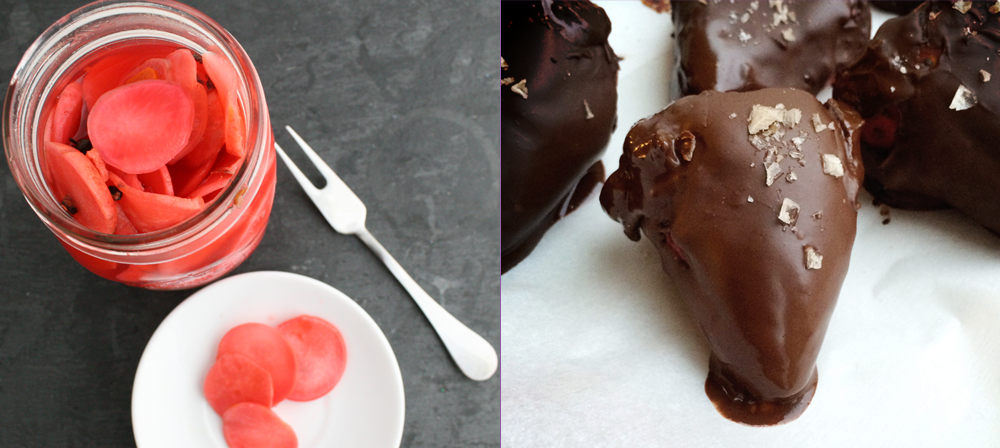 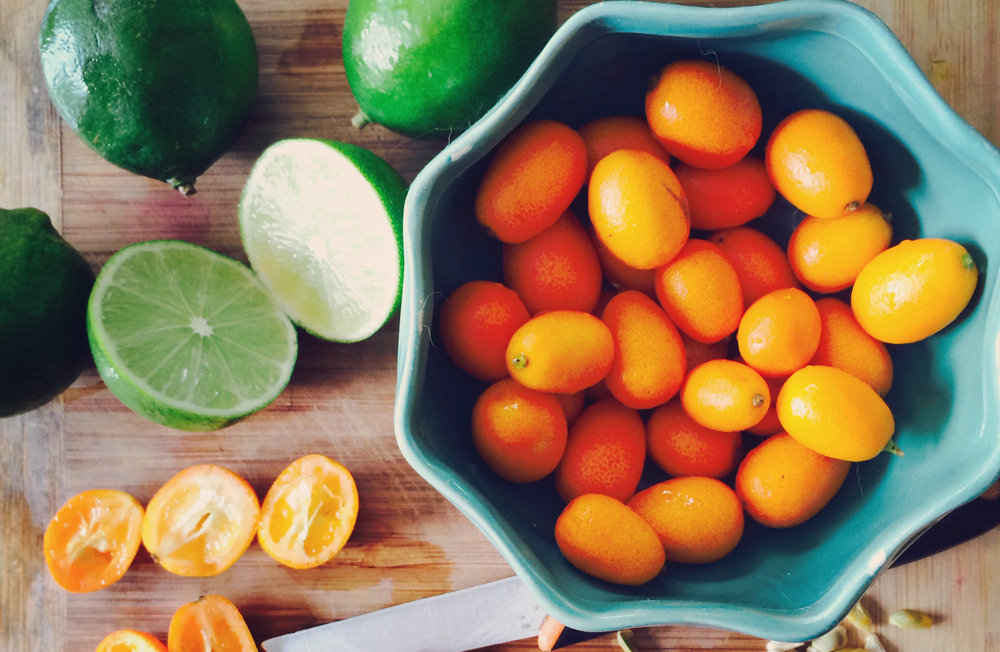 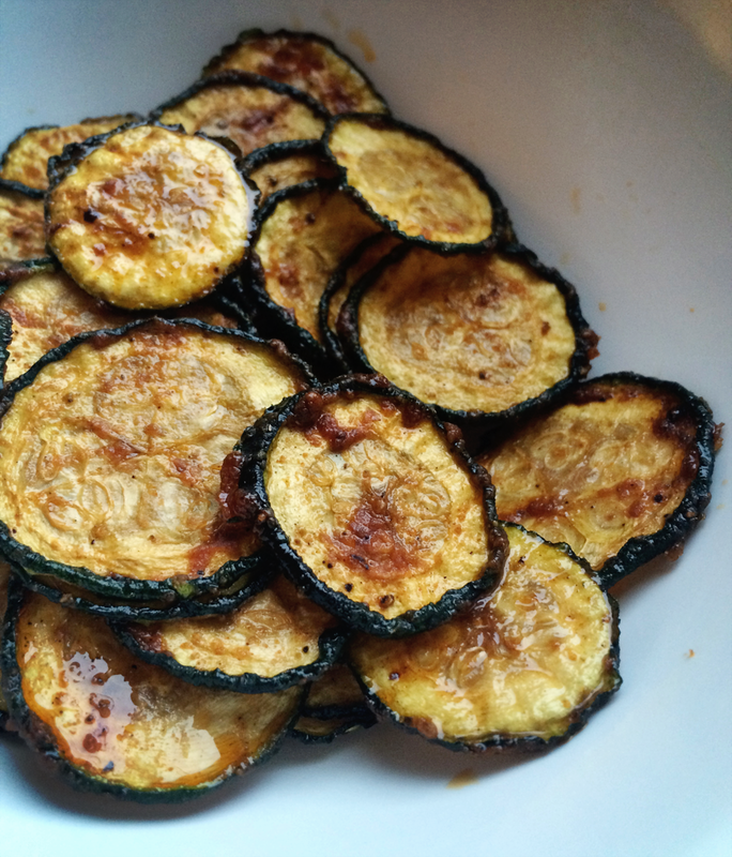 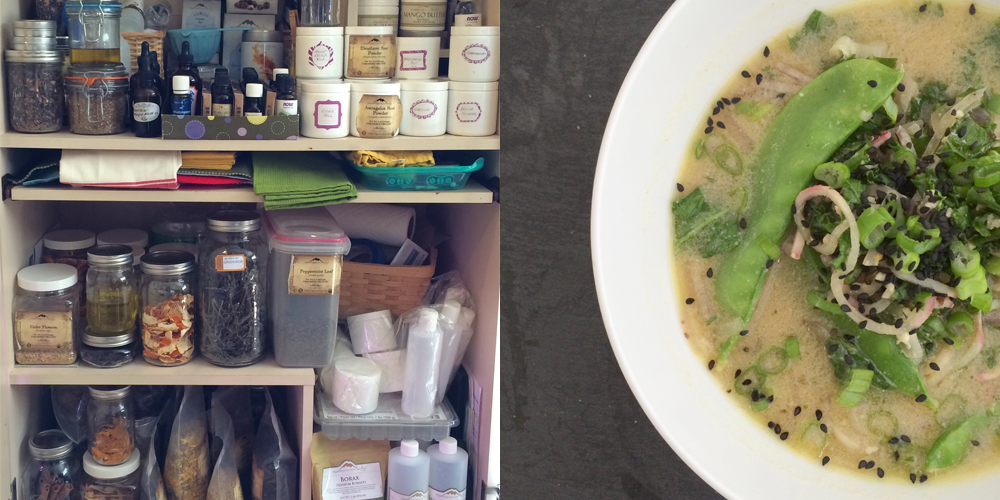 Top to bottom: spring pea soup, chopping, pickled radishes, chocolate covered strawberries with smoked flake salt, kumquat lime margarita mix in progress, zucchini chips fresh out of the dehydrator, organizing the herb cabinet, spring miso bowl.
While I would love to say all of the spring veg is from my garden, it is not (but for the hydroponic peashoots). We have had such a cold cold spring so far and we don't even have leaves on the trees yet. BUT SOON! I can't wait for garden season! Be sure to visit Heather at Beauty that Moves to see who is participating this week and get a peek into more kitchens! 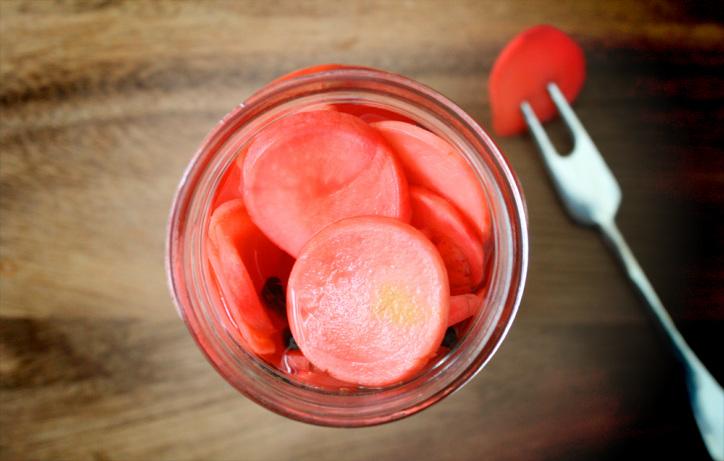 I love quick refrigerator pickles. It is a great way to make a little bit of something. It doesn't take much time or effort and you get pretty immediate results. I can pop out a few pints in between kids and garden and sunshine. And you never cook the vegetables/fruit in a water bath or pressure canner, so you always end up with such fresh and crisp flavors. I like having small batches too. So I can make new batches with the season, and not get tired of any one thing. These quick radish pickles are great on their own (I should know, I ate them non-stop as I took the photos. Ahem.), on top of a salad, as a side for just about anything, or with a cheese and meat board. SO delicious. And they are not too weird or strong for kids either. The bright pink color helps. 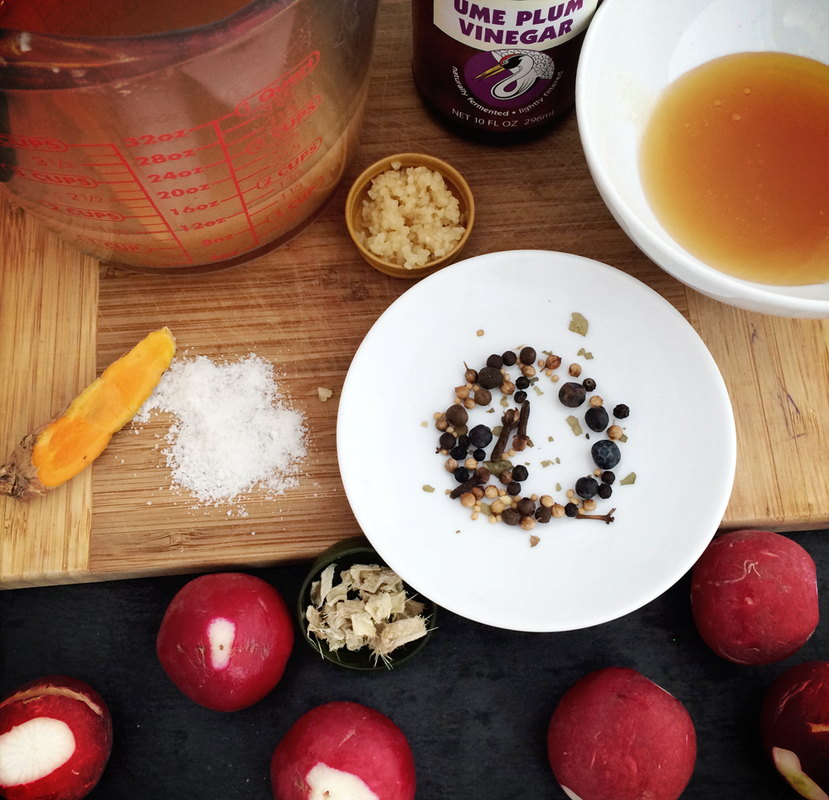 Pink Pickled Radishes (Umeboshi)Print | {wholly rooted}The perfectly pink ume plum quick pickle. The perfect combination of sweet, tangy, and crispy. Great on their own, or over a salad, on a cheese & meat board, or replacing anything that would be perfect with a pickle. {ingredients}
Slice radishes into thin rounds. Place in a colander and toss with a teaspoon or so of sea salt. Let it sit and exude liquid while you do the rest of the prep. 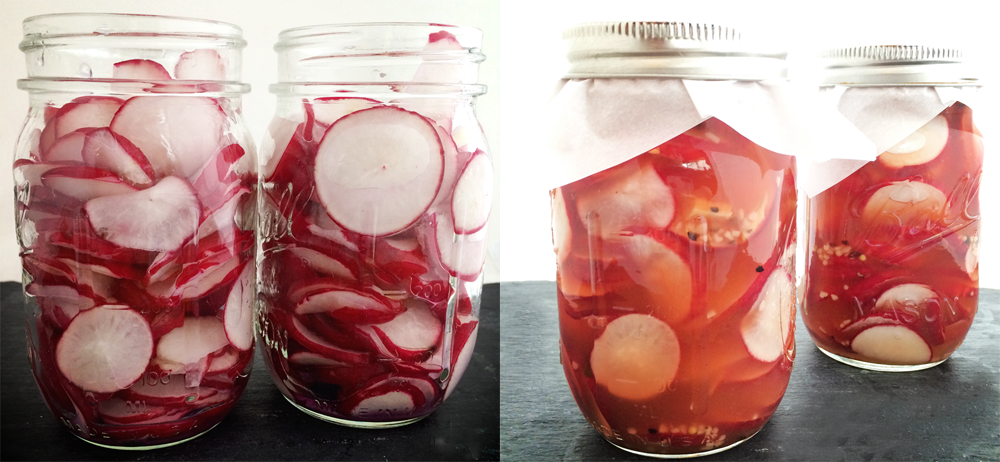 This recipe calls for ume plum vinegar. It comes from umeboshi plums. You can use all apple cider vinegar, but the ume plum vinegar adds such a great flavor and color. This vinegar adds a bit of depth so this pickle is sweet and sour and twangy and mild all at the same time. It is a good match for the peppery bite of radishes. If you don't have pickling spice you can crush 7 or 8 peppercorns and use that. I always keep pickling spice around (and it is easy to make your own!). I like one that blends clove, bay, allspice, peppercorns, juniper, coriander, mustard, dried chili, and other aromatic herbs. I make a lot of quick pickles and find that I am using it all throughout the season! 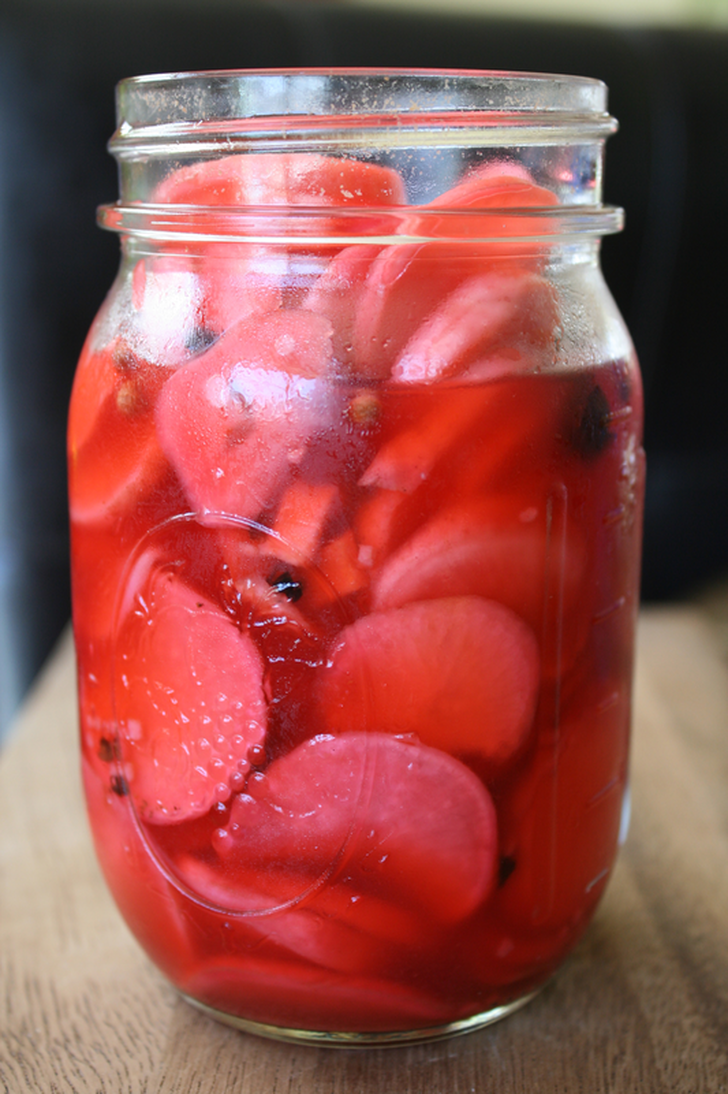 I am ridiculously excited to get into the season of dirt on my hands, planting, and harvesting from my garden. What we eat from May to November is directly related to what is fresh in our garden, and when CSA season begins, what is in our weekly share. Spring radishes always signal the beginning of gardening season to me. It is ON! Capturing my love of whole foods, combined with the activity of a bustling kitchen. A weekly collection of photos from the center of my home. * * * * * 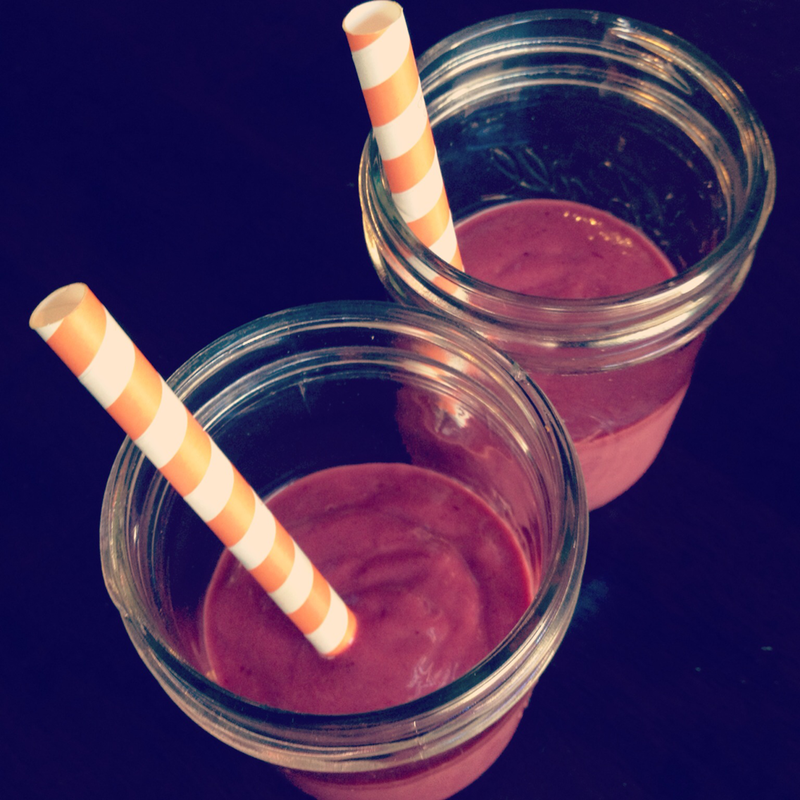
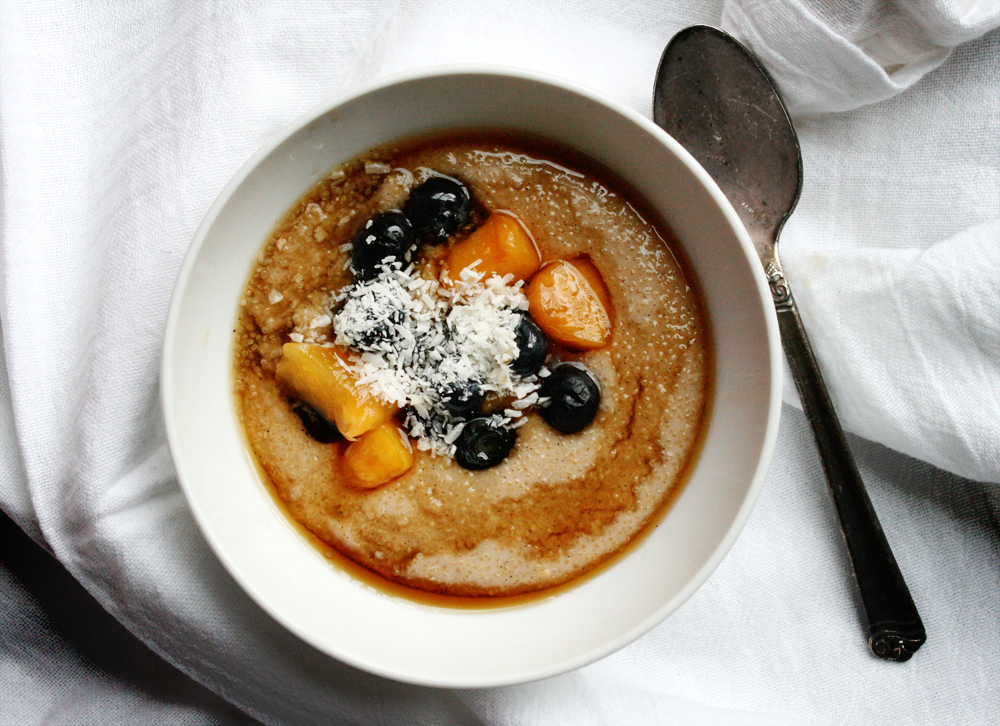
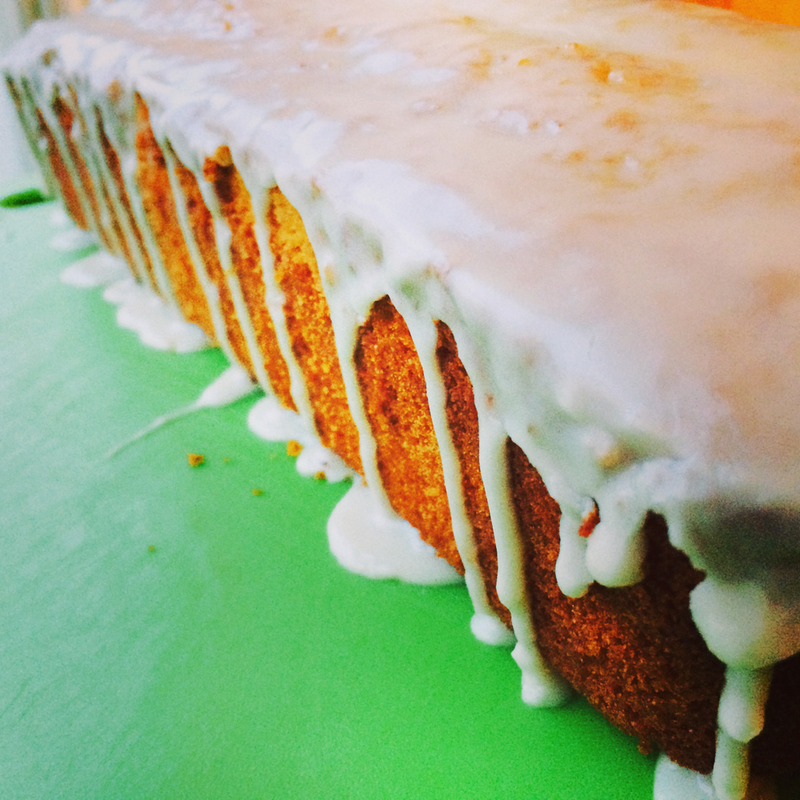
Top to bottom: Smoothies, hydroponic lettuces ready to cut, steeping tea, flax crackers on dehydrator sheet, hot amaranth with peaches, blueberries, maple syrup, and toasted coconut flakes, and GF/DF/NF lemon loaf with a lemon glaze.
Be sure to visit Heather at Beauty that Moves to see who is participating this week and get a peek into more kitchens! 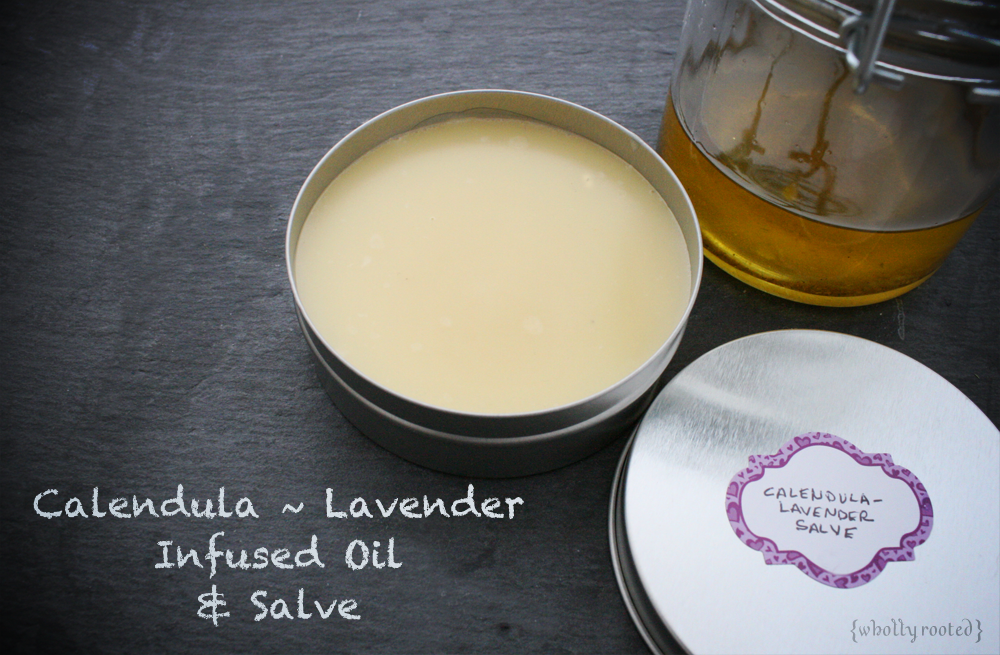
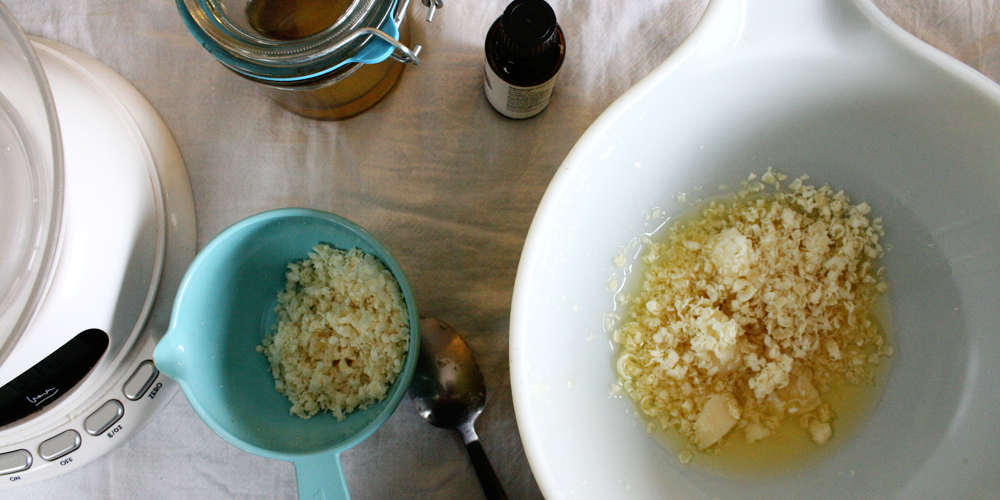
I have a 9 year old with eczema. Over the years we have tweaked his diet and have gotten him to a point where he doesn't often have the huge flare-ups he used to have (dairy and cane sugar are his triggers). His asthma has been under control too, which often goes hand in hand with the skin for him. That said, our success seems to be in part to his diet, and also our skin care and bathing regime. We have worked with his allergist and a dermatologist for a few pesky painful bits, but generally, we try to keep his skin pampered so we don't have to resort to the steroidal ointments. We have a cream and body oil we use after bath every night, but we also make a salve for spot treatment. This salve can be used by all of us for various skin applications, but I most often use it for rough patches. This base oil is made from an herbal infusion. I like using the oven method because it is gentle and easy. The process is just simply pre-heating the oven to a low 250ºF temp, and then placing your oven safe bowl of herb/oil in the oven, turning it OFF, and leaving the herbs to infuse in the oil for several hours. I find it convenient this time of year to just do it at night and leave the bowl in the oven overnight. If I am already using my oven for dinner, I just cool it down to temp and make sure it is OFF before putting the herbs in there. This method gently heats the oil, and allows me to do other things besides monitoring the temperature constantly as I do more with the stovetop or crockpot methods. Once summer arrives I usually prefer the solar method since I don't want my oven on, but the oven is so simple and perfect for most of the year. 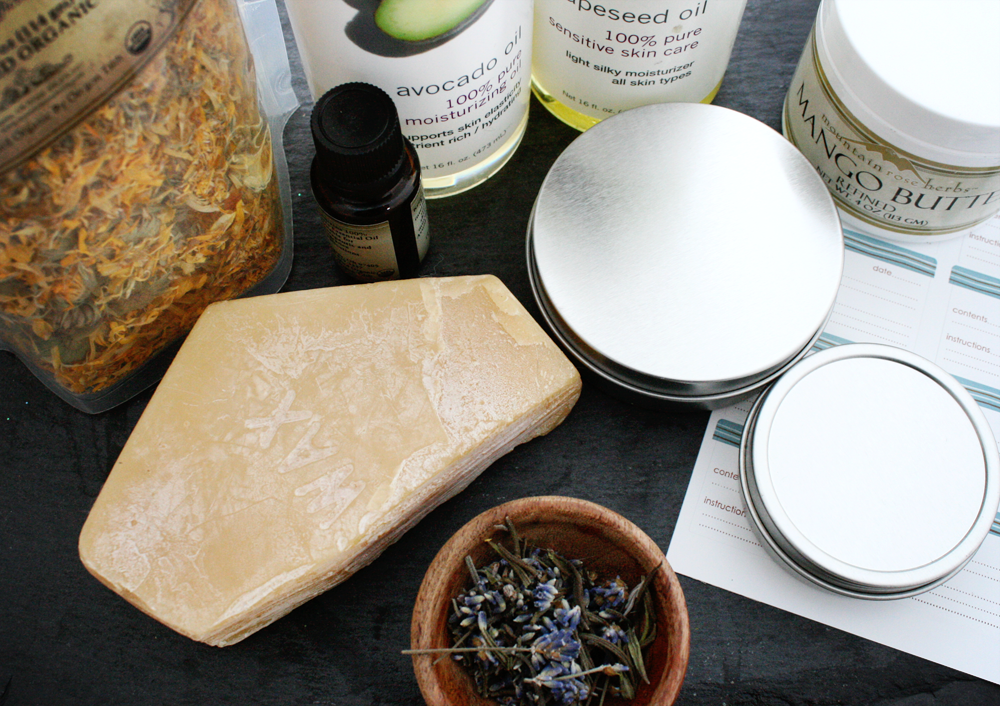
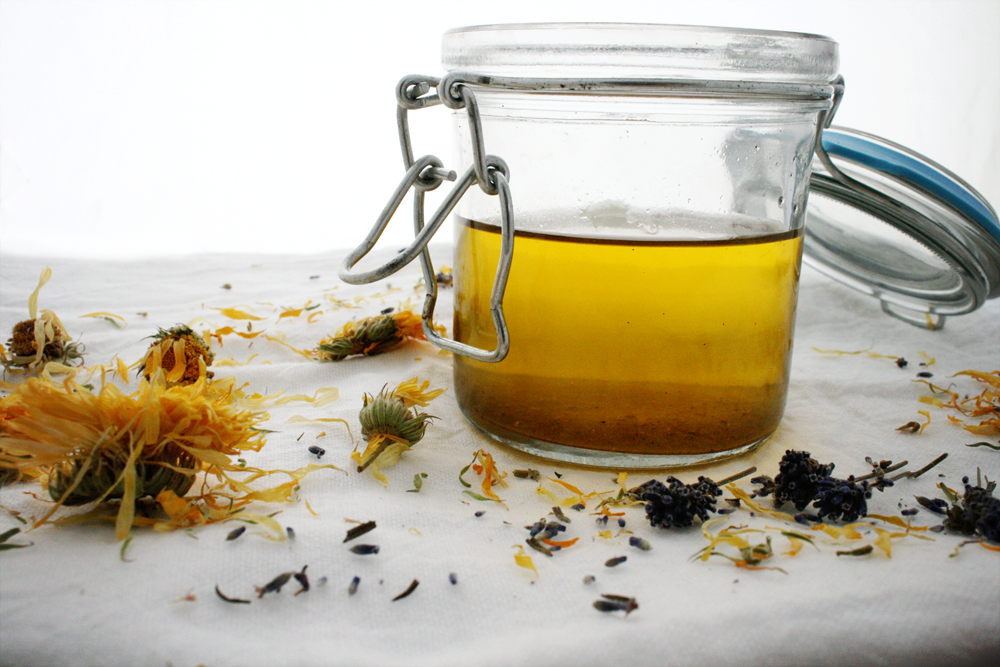
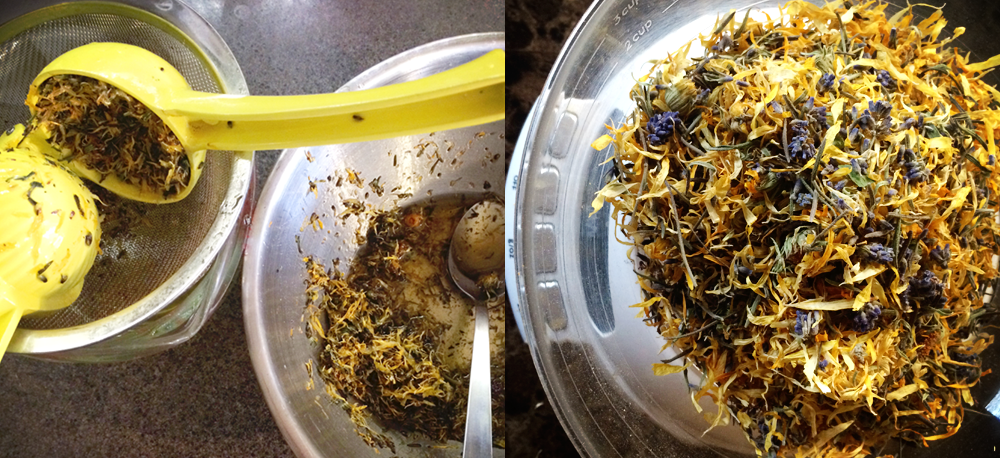
This salve I like to make uses calendula and lavender. I often vary the type of base oil I infuse depending on the time of year (each oil has different properties, absorption, etc.). Use whatever oil is safe for you and your household. This batch I used avocado oil, but I often use (organic) olive oil, grapeseed oil, or even coconut oil. {Calendula~Lavender Infused Oil} For this oil, I use 1 cup of oil to 1 cup of packed dry herbs (calendula flowers). Most often by weight is best, but I know with calendula it is a light petal based herb, and this ratio works for this infusion. I filled the cup first tightly with calendula, and added a few tablespoons of dried lavender buds. The lavender is optional, but I love it, and I dry my own each summer to use in my herbal concoctions. Place your dry herbs in an oven safe bowl. Pour over your oil. It is going to look like you don't have much oil and it at first won't even cover all the herbs. That is OK. Stir it up to get it all coated. Place in your preheated 250ºF oven, turn off the oven, close the door, and leave it for a few hours. I usually just leave it overnight. To strain just run it through a few layers of cheesecloth. Squeeze it. I like taking the ball of cheesecloth and herbs and squeezing it with my lemon squeezer. It gets out more oil than my carpal tunnel hands ever could. This is your base oil. 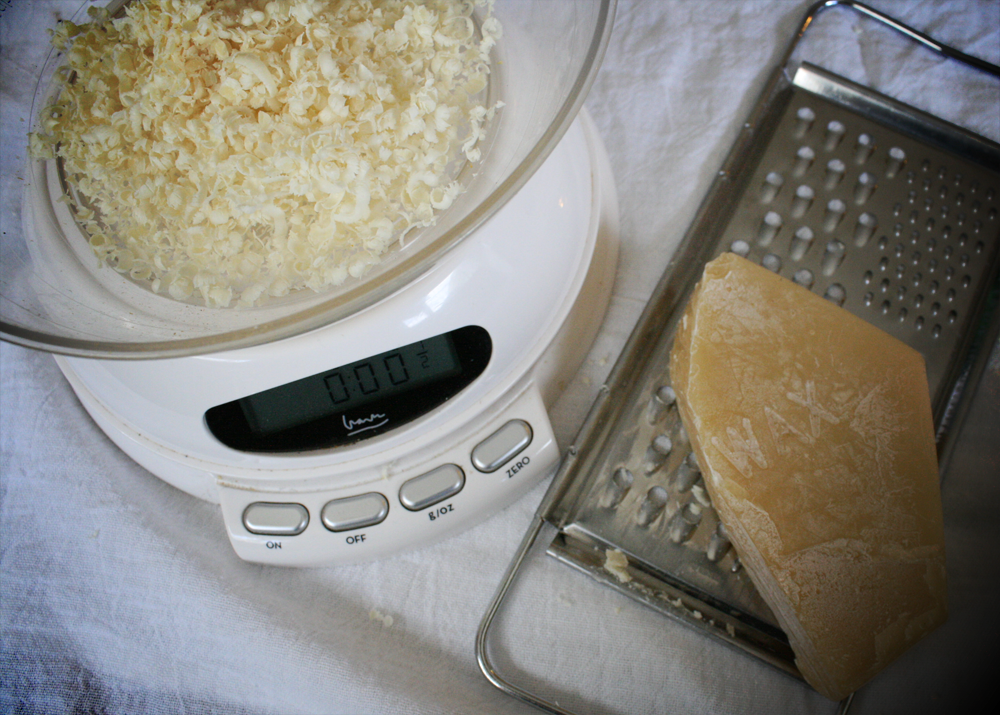
To make the salve, you can use the low temp oven method again to melt things, or do a low temp/gentle double boiler by heating water on the stove in a saucepan, and placing your oven safe bowl over the top. {Calendula~Lavender Salve} Into your oven safe bowl or double boiler :: 3 ounces of your freshly made aromatic calendula-lavender oil (you will have some left over for other good stuff) 1/2 ounce of mango butter 1/2 ounce (up to 1 ounce) of grated beeswax You may ask if the mango butter is optional - sure. You can use coconut oil for that portion (it is a room temperature solid oil, which is a nice substitute) or skip it and use just the infused oil and beeswax. Cocoa butter would work too, although the arguably wonderful scent will overpower any oils you add. Shea butter should work too, although I haven't used it since we have an allergy in the house. I have found my son likes the texture when it is a little thicker and not as oily, and the mango butter works great for us. This has a good skin feel for him. I say use a half to a full ounce of beeswax because ~ it will vary depending on how you like it. Or your climate. I use less this time of year because it is still cool and I don't want it hard as a rock and impossible to use. In the summer I use the higher quantity of beeswax because I want it to set even in moderate heat - such as in my travel bag or hiking tote. To test if you like the consistency, the trick is to melt it all together, take it off the heat/out of the oven, and let it cool right there in the bowl. After it fully cools stick your finger in there and rub some on. See how you like it. From there re-melt and tweak it if you need to. Remove it from the heat, and now add your essential oils. I used 12 drops of organic lavender essential oil. Work quickly so it doesn't all harden in your bowl. Now, just pour it into your tins. For this batch I used a single 4 ounce tin. Sometimes I use smaller tins so I can have one at home and one in my purse. I like using a lip balm tube for a small portable version that is great in a travel bag, first aid kit, or backpack. If you use a tube, be sure to label clearly it as a salve so you don't apply it to your lips! For all of my tins, I put a detailed label with ingredients, use, and date on it somewhere so I don't forget, as well as a name label on the lid. 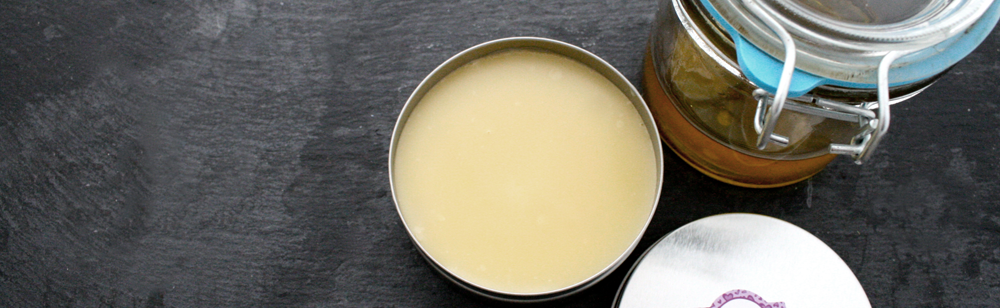
Now, let it cool. It is ready to use! My son loves it on his dry annoying patches. I love it on my garden knuckles. You know, the red dry cracking knuckles you get after digging, raking, and planting in the garden like a madwoman after a six month break where your previously gloriously hard-earned garden callouses turned into soft supple winter hands without hard use. Ahem. After you make this 4 ounce batch you will have some of that base oil left over to use in bath melts, balm, or another batch of salve! Making your own infused oils and salves is not hard, and both are a great addition to your home kit. *** Note: I use only 12 drops of lavender EO because we have tweaked it to where my son is comfortable with the scent level (and my oil infusion has some scent since I added dried lavender buds to that process). You can add up to 20 - 24 drops total comfortably for 4 ounces of oil! Calendula:
This Week In My Kitchen :: Blog Hop Capturing my love of whole foods, combined with the activity of a bustling kitchen. A weekly collection of photos from the center of my home. * * * * * 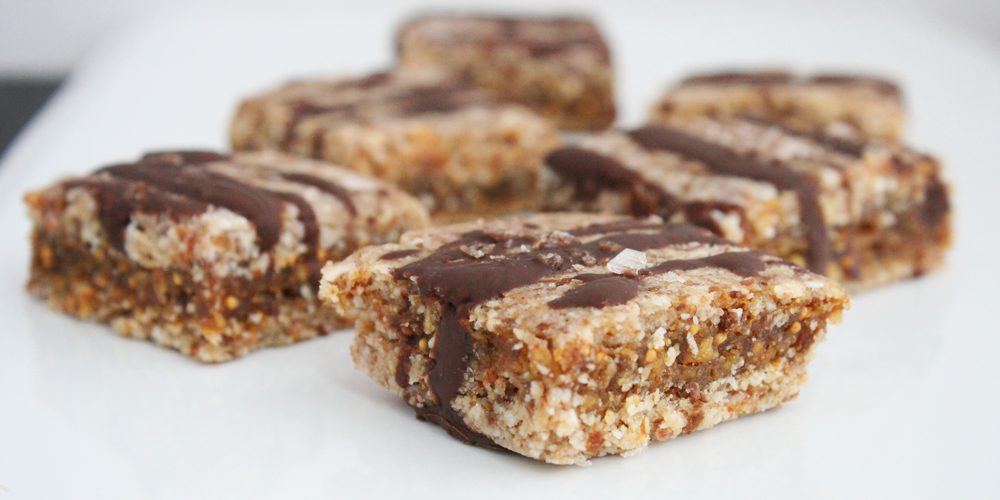 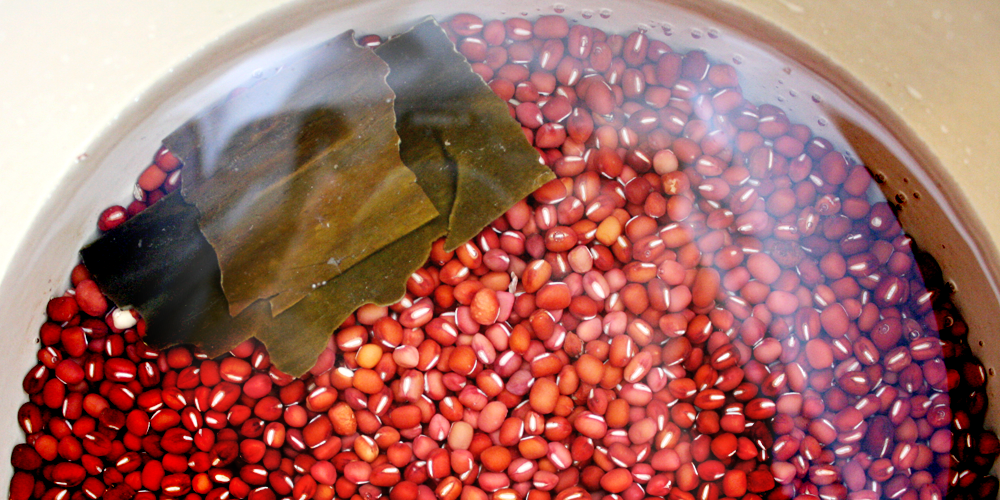
 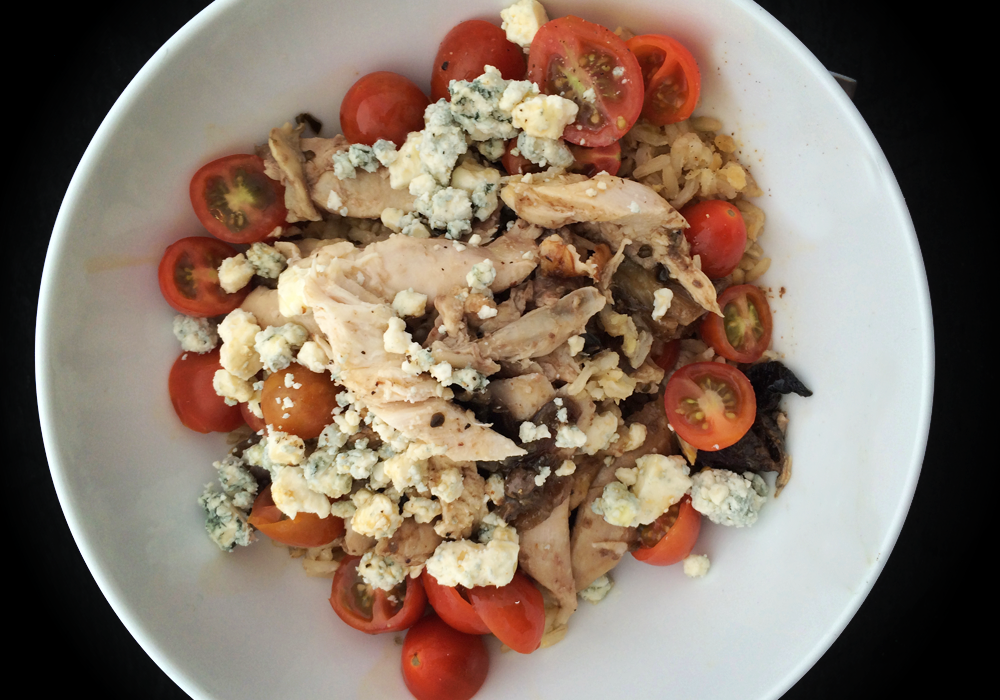  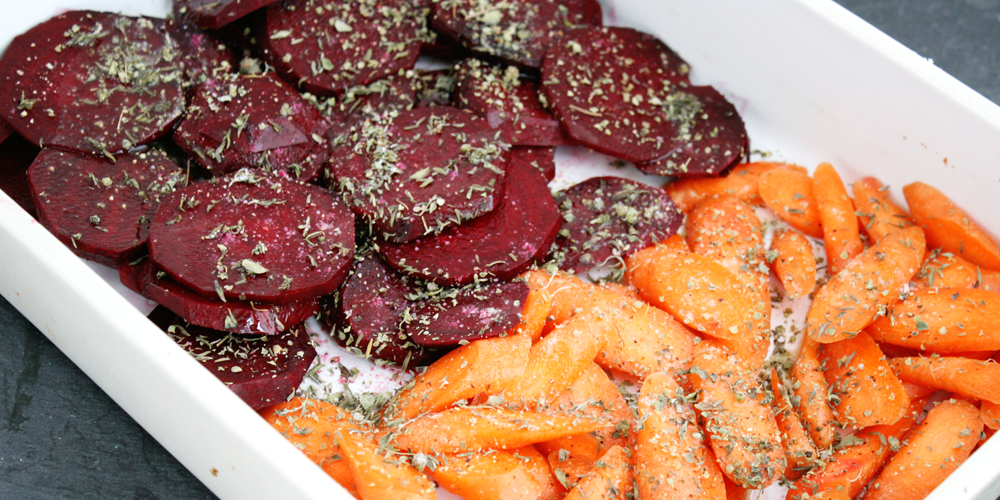 {dehydrator fig bars (recipe soon, I promise), adzuki beans soaking, blending herbal tea, soaking lemon rinds in vinegar for cleaning liquid, cider, roasted chicken over brown rice with tomatoes and bleu cheese, salve making (yes, that recipe coming soon too!), and roasting beets and carrots in the oven}
Be sure to visit Beauty That Moves to see everyone in the blog hop this week! 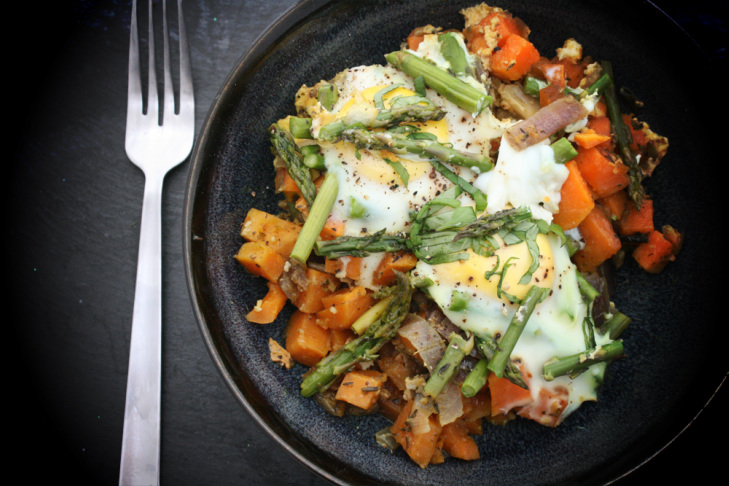
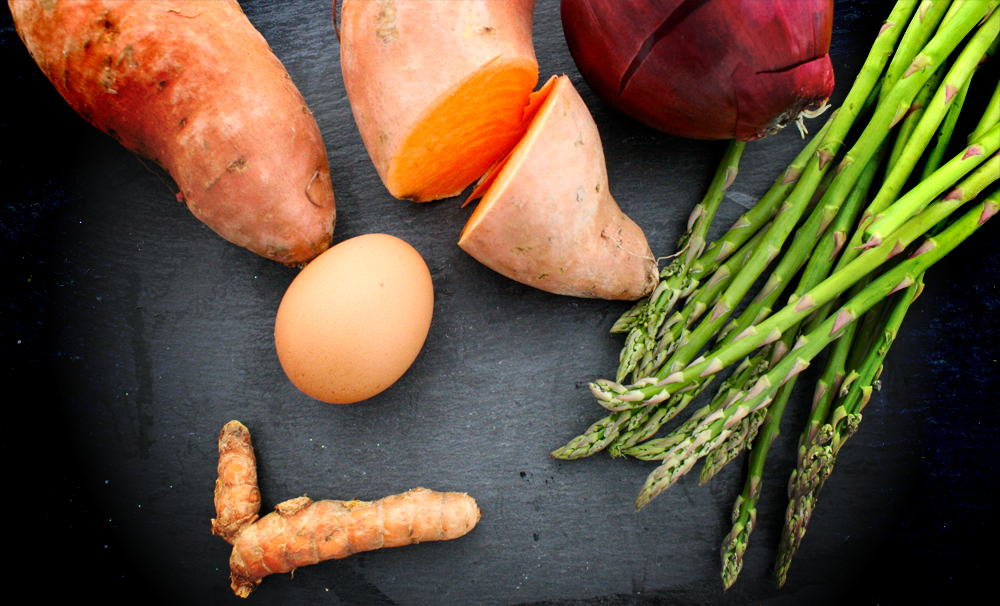
I like meals that can be put together quickly and go into a pot or oven for a bit while I do other things (like wander back to my hot cup of coffee and snuggly boys). This sweet potato egg bake is a great breakfast or brunch meal - or a breakfast for dinner kind of thing, which seems to always be a hit with the younger set. I love the sweet richness of sweet potatoes. They are a good source of fiber, iron, potassium, and vitamins like C, B6, and A - not to mention they have a lower glycemic index than white potatoes and studies have shown they may even be able to help regulate blood sugar. They are a nice replacement for white potatoes in a breakfast dish, and kids love them.
Sweet Potato Egg BakePrint |
{wholly rooted}One pot meal - great for breakfast or brunch - with sweet potatoes, onions, garlic, turmeric, asparagus, eggs, and more. Quick stovetop prep, ready out of the oven! {ingredients}
Start by sautéing 1 diced onion, 1 tsp freshly grated turmeric, and 2 cloves of minced garlic in a drizzle of olive oil in an oven safe pot on your stovetop. 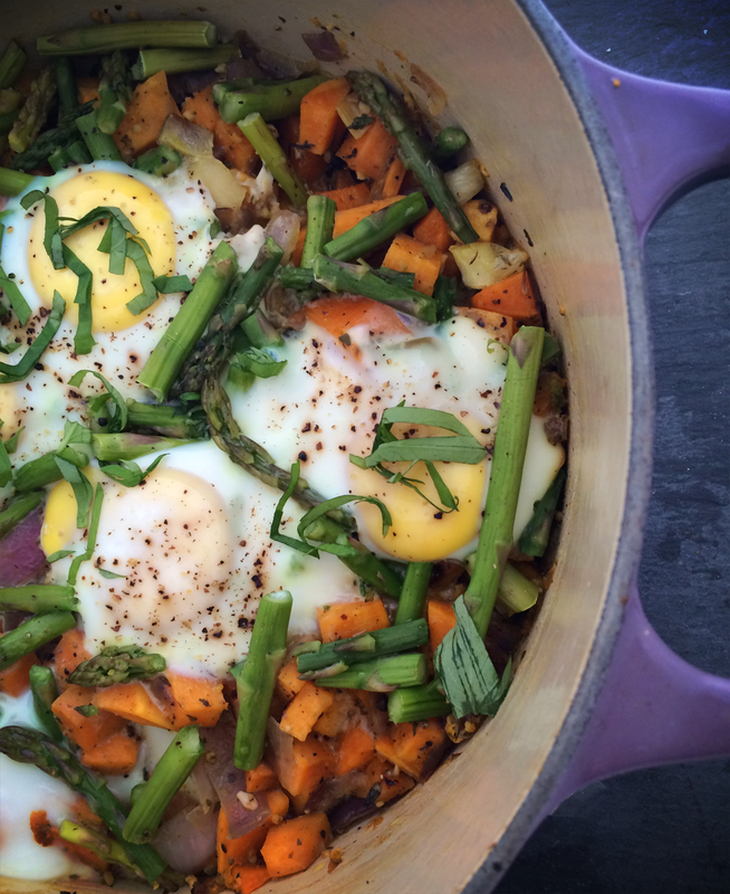
I love how the miso tastes with the sweet potatoes, and that musky light flavor that the turmeric adds. It is a nice quick one pot wonder, giving me some extra time to enjoy my morning. 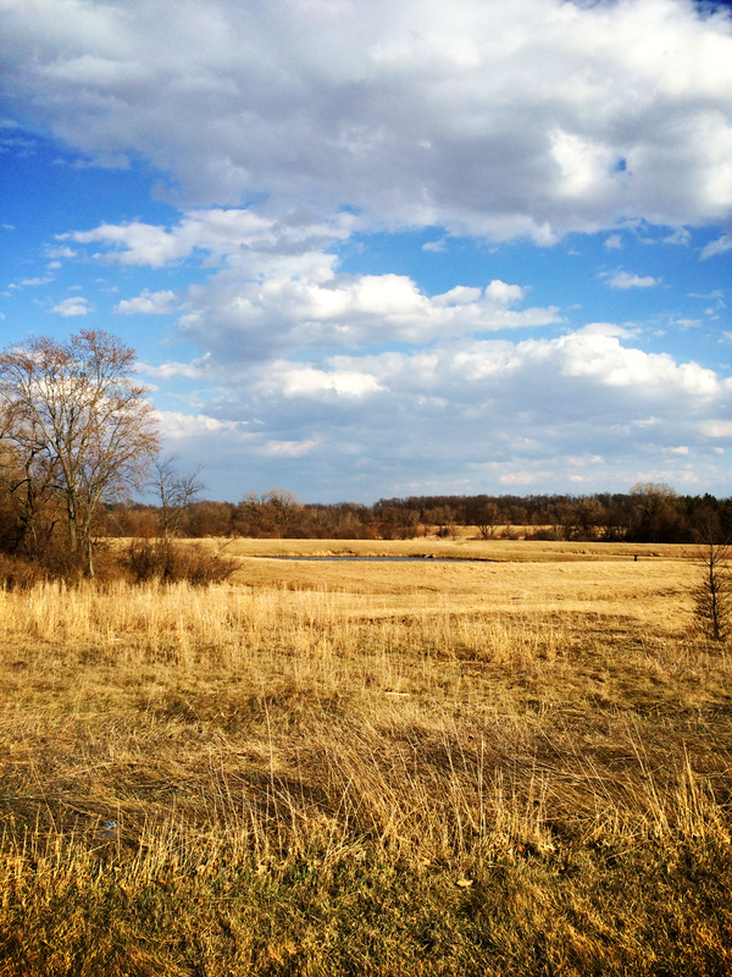 In Wisconsin, winters are long. We don't warm up much in between snow storms like some places. We go into deep freeze, and there can be over 5 months between 50-something degree weather. And this winter was colder than most. Last week we finally had some days that were edging up to almost 60! Warmest it has been since last October. When we get a week of mild DRY weather, we have to jump on it. We started playing tennis again, we visited a park a day, we went kite flying, we hiked, we walked, we wandered. We swang on swingsets, our feet touching the sky. We sat in the sun listening to the birds.  It feels good to get out and feel sunshine on our faces, breathe deeply, and walk lightly without heavy gear. Spring is a bit later this year, so nothing has been greened - yet - but it is still beautiful in its optimism. The rains came over the weekend, and we are getting some more snow (tomorrow!). But there were days we were outside, and it will tide us over until the rains work their magic and the land is green again and we can feel the grass under our feet, and the sun on our faces.  Have you ever seen anything in your life more wonderful than the way the sun, every evening, relaxed and easy, floats toward the horizon and into the clouds or the hills, or the rumpled sea, and is gone-- and how it slides again out of the blackness, every morning, on the other side of the world, like a red flower streaming upward on its heavenly oils, say, on a morning in early summer, at its perfect imperial distance-- and have you ever felt for anything such wild love-- do you think there is anywhere, in any language, a word billowing enough for the pleasure that fills you, as the sun reaches out, as it warms you as you stand there, empty-handed-- or have you too turned from this world-- or have you too gone crazy for power, for things? ~The Sun, Mary Oliver 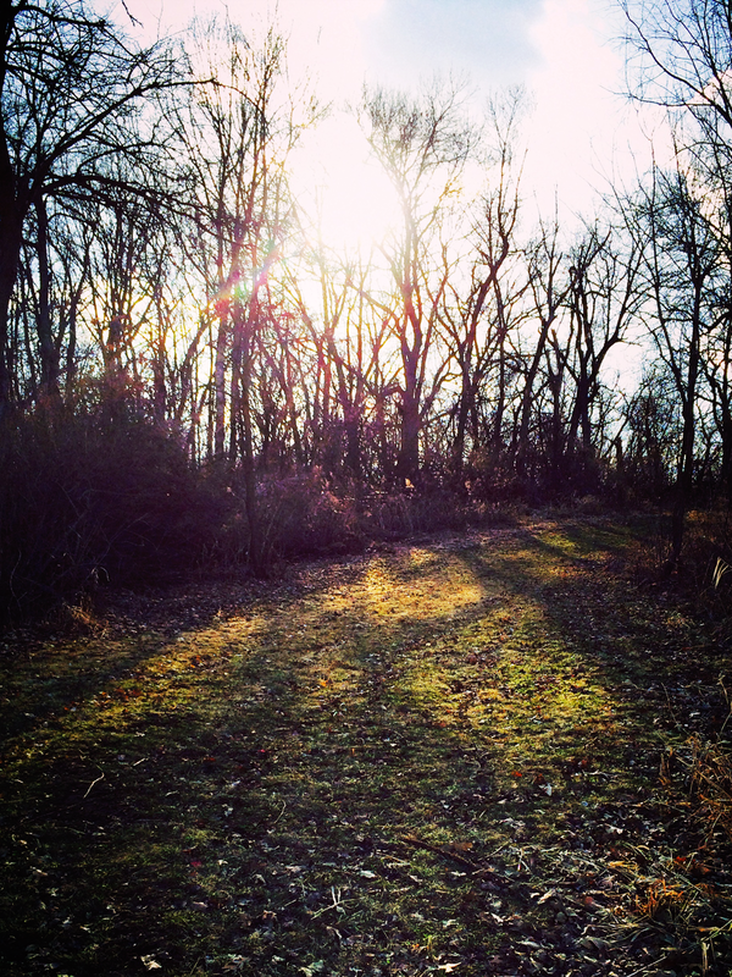 This Week In My Kitchen :: Blog Hop Capturing my love of whole foods, combined with the activity of a bustling kitchen. A weekly collection of photos from the center of my home. * * * * * 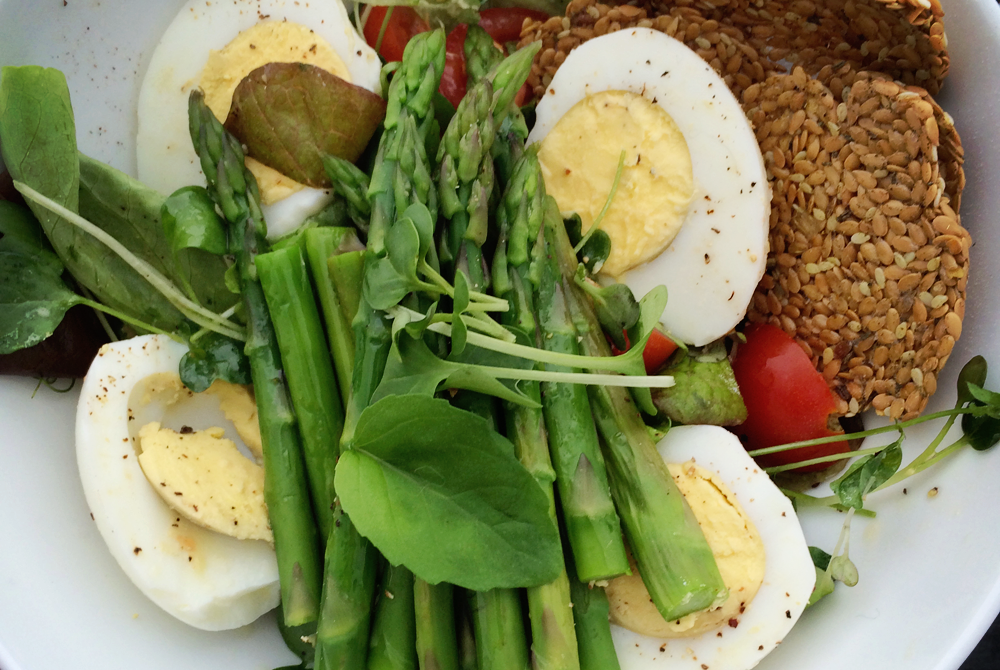
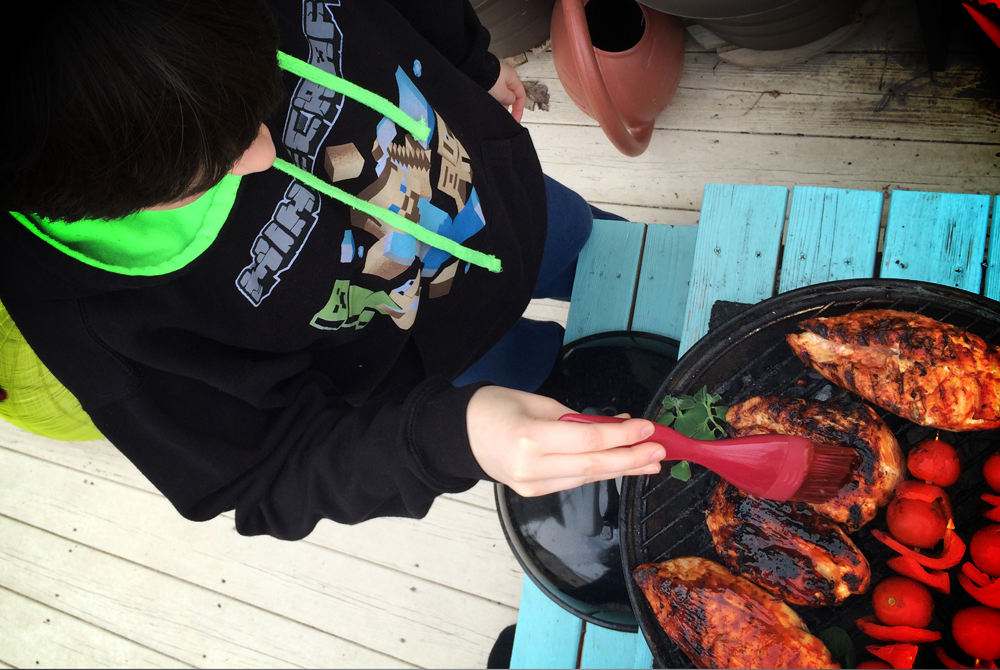
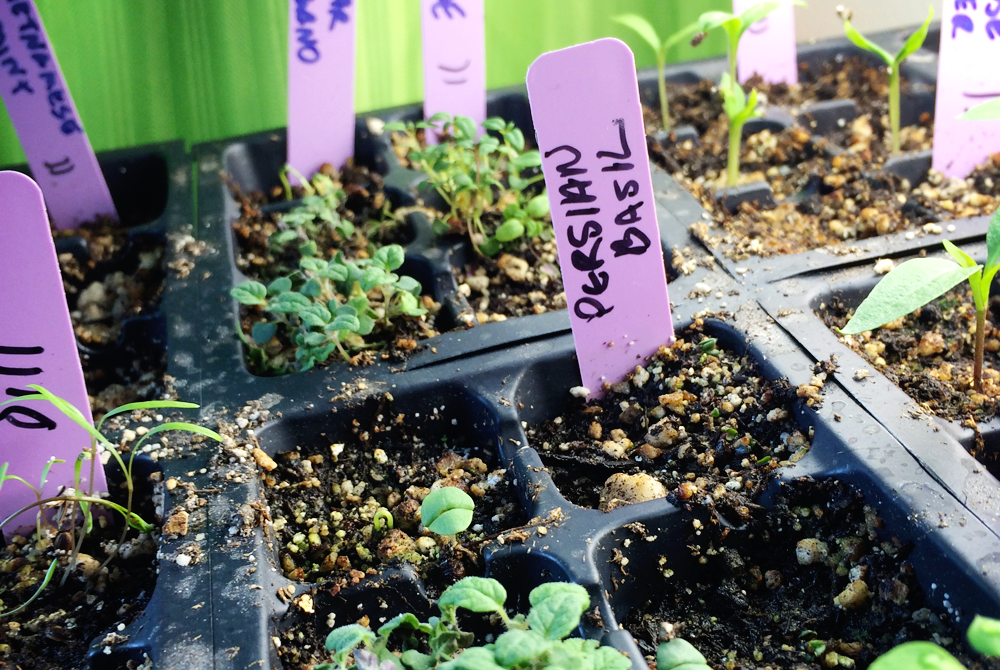
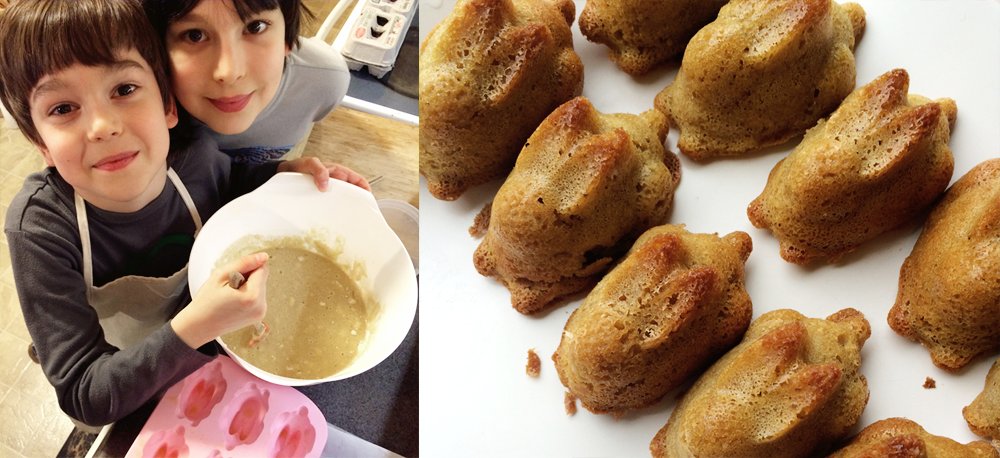


{top to bottom: spring salad, my 11 year old basting chicken breasts on the grill, infusing oil with calendula and lavender, seedlings, boys baking GF/DF bunny cakes, bottling coconut water cherry kefir, ingredients for buddha bowls} I took a break from blogging this week - internet issues and warm sunshine kept me mostly outside working in the garden, playing tennis with my boys, kite flying, and park hopping. But I remembered to take photos throughout the week of the small tidbits of kitchen that I don't always photograph. It is nice to get back into the groove this week with some kitchen love. Be sure to visit Beauty That Moves to see everyone in the blog hop this week.
Capturing my love of whole foods, combined with the activity of a bustling kitchen. A weekly collection of photos from the center of my home. * * * * *  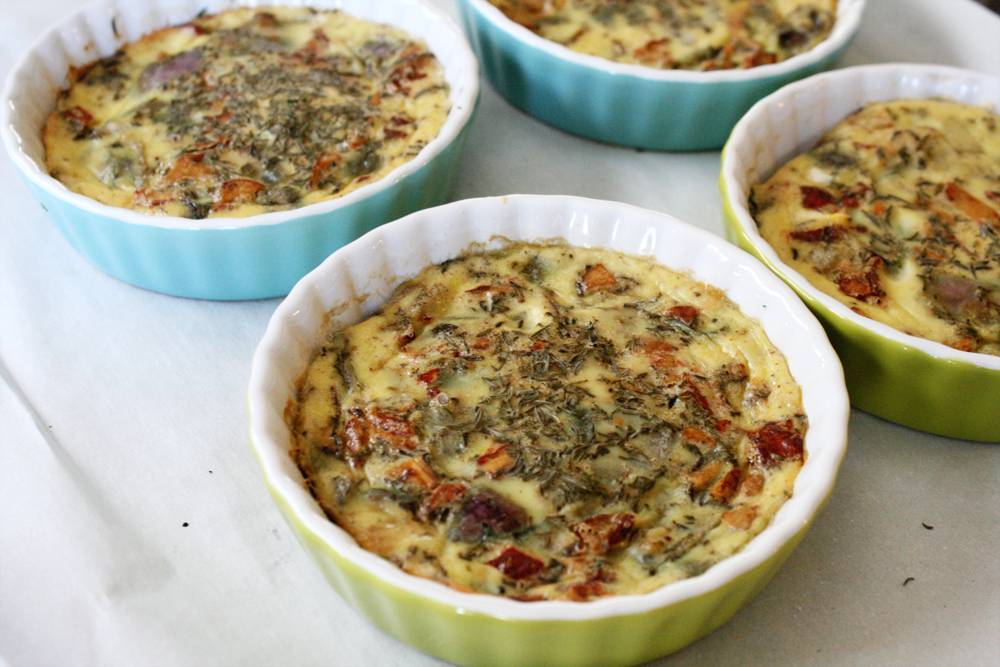 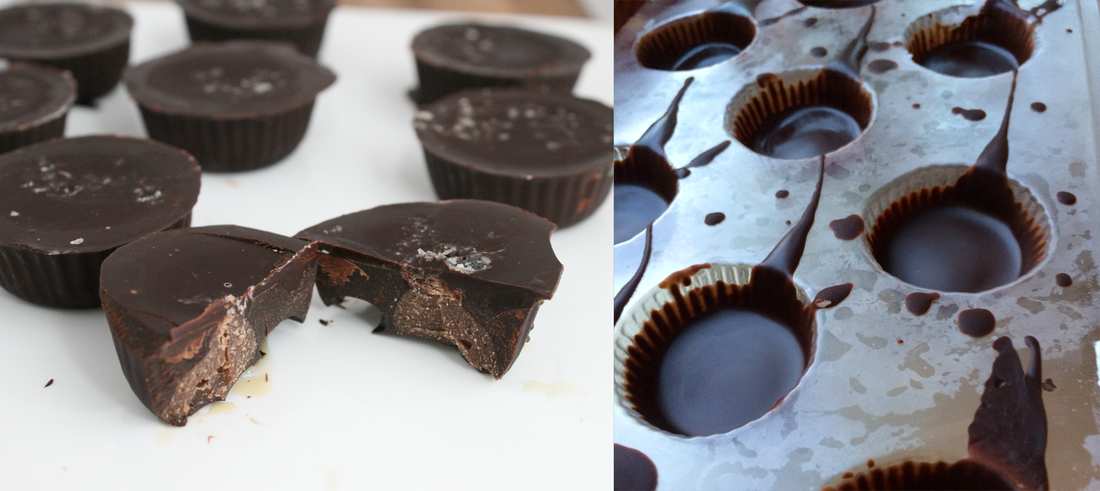   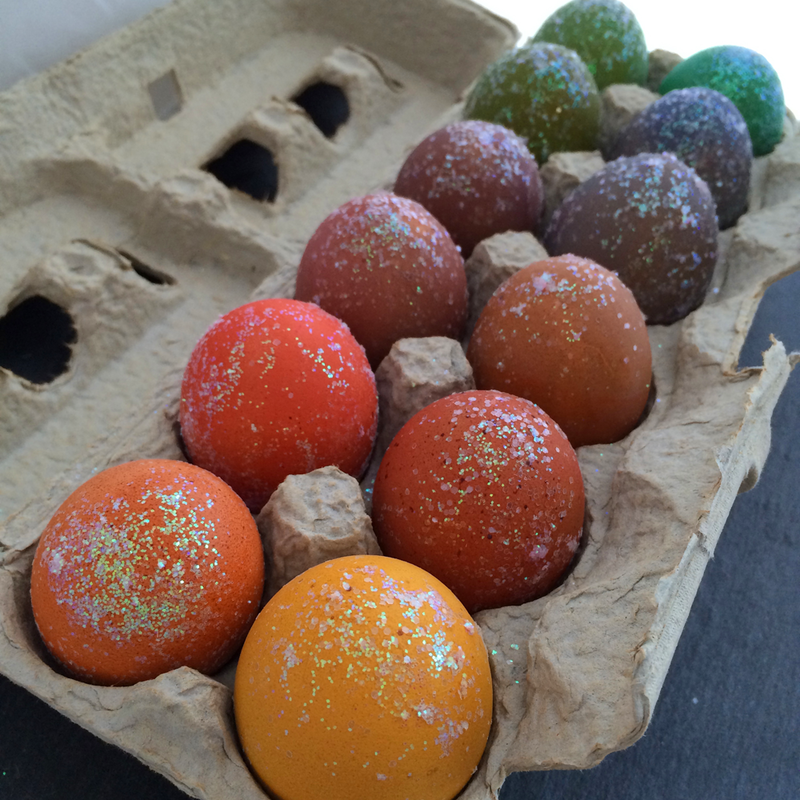  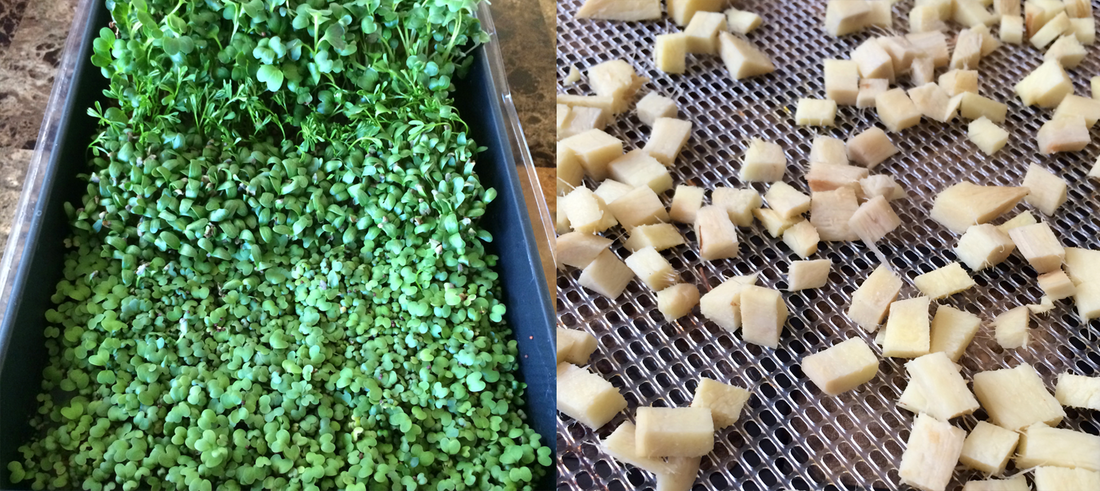  * * * * *
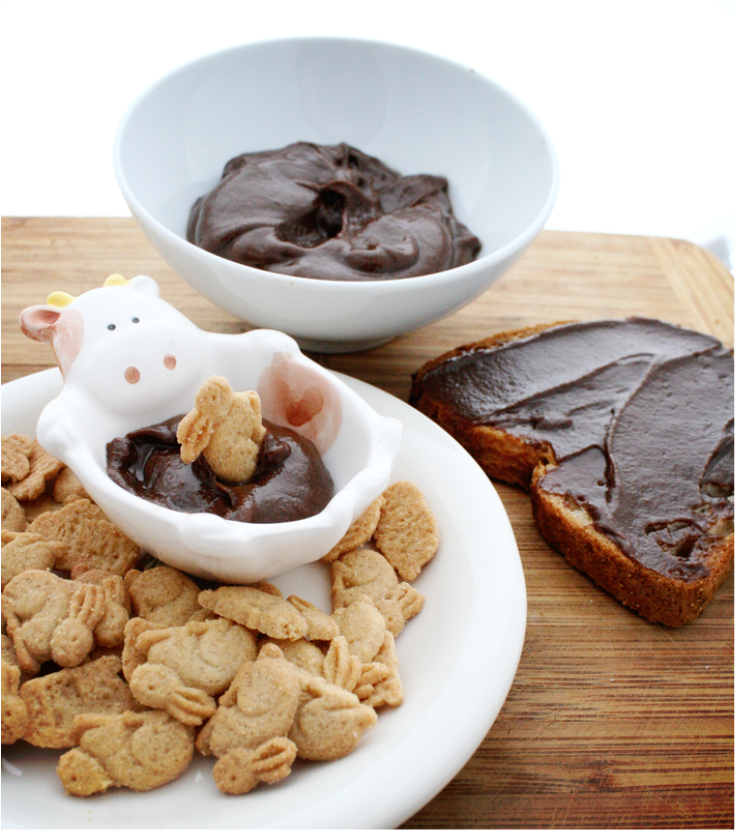
Heather at Beauty That Moves is doing a new weekly blog hop - photos from the week, no words, no recipes, just images from our kitchens. Be sure to visit This Week In My Kitchen to see her lovely images, plus links to others playing along. 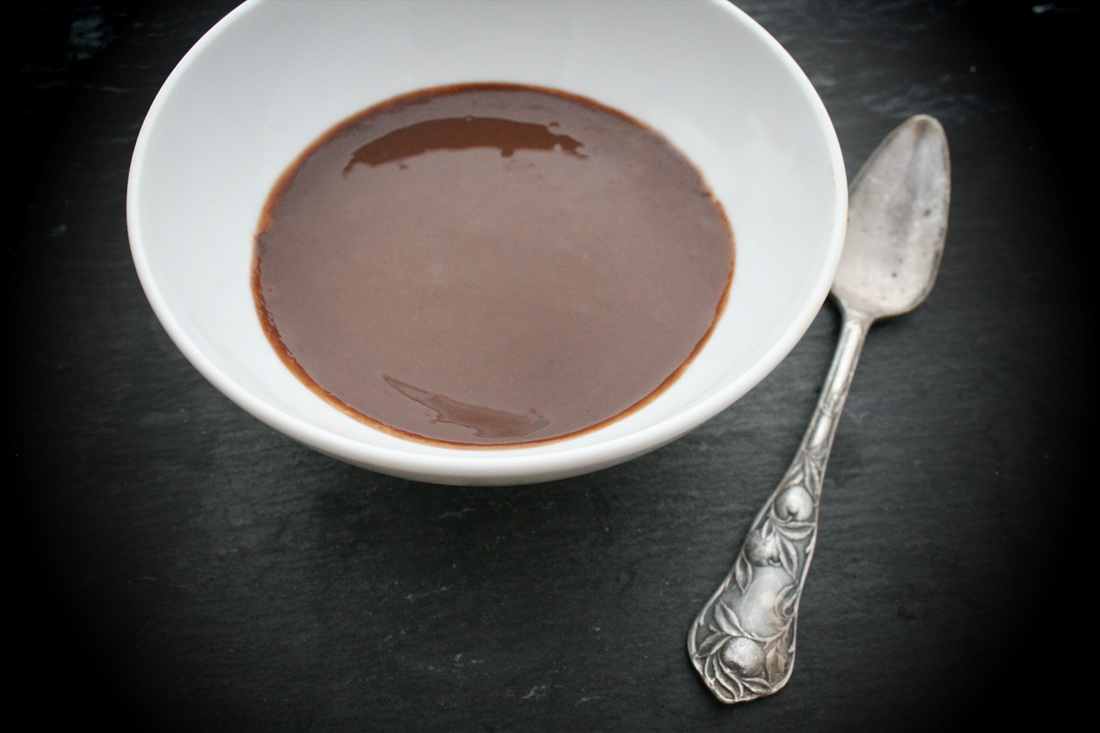 Yesterday I shared my Sun-tella spread recipe. If you cannot have seeds, I have an alternate recipe for you! It doesn't have the same creamy mouth feel as the sunflower seed butter blend, but it is a nice spreadable chocolate. I like using coconut cream because it adds a rich deep flavor and texture - more than simply mixing oil and chocolate could have. And it is a nice additional source of fiber! Coconut Chocolate SpreadPrint | {wholly rooted}A spreadable chocolate which is tasty on toast, with graham crackers, or apple slices. GF/NF/DF {ingredients}
Melt your chips and coconut cream in a double boiler. Add the maple syrup, sea salt and vanilla bean, and stir. Turn off the heat and stir in your oil. It will thicken as it cools, but will still be spreadable. Spoon into a jelly jar and store at room temperature. This is good spread on toast, as a dip for apples - or try a spoonful of it in your coffee or hot cocoa. We had some on warm GF tortillas and I can't stop putting it in my coffee. So good!
 Food allergies didn't really sneak up on us in this house. It is something I always expected with my oldest. I have a lot of allergies (as did my mother growing up) and starting at a young age he refused specific foods (they made his mouth feel "spicy"). We noticed hives/stomach issues immediately after certain foods. So we adapted. We did food elimination diets, rotations - you name it. What we hadn't quite realized along the way was how sensitive he is to even the smallest, most minute, amount; and how potentially life threatening any exposure or reaction can be. We never knew when it would be hives/vomiting or if it will be full anaphylaxis. About a year ago we realized even with how "careful" we thought we were being with what we knew he reacted to, he was getting sick even without the offending foods in his diet, elimination diets were not enough, and it was time to get more answers. Through testing, we confirmed peanut and tree nut among a long list of other allergies. I know now that many kids are super sensitive to even the tiniest of exposure such as made in the same factory on the same line. So we changed EVERYTHING about how he eats and how WE eat. We make our own foods from scratch most of the time anyway, but even with that, we found if basic pantry supplies (flours, grains, oils, juices, etc.) were made on shared equipment or in the same facility, he would have a reaction. We discovered that even if the rest of us ate his allergen that was carefully prepared and cleaned our hands and mouths immediately after, he would often still have reactions. So no more nuts, nut butters of any kind, or products containing nuts come into our home. We are careful about every ingredient we use. Now, he rarely gets sick or has reactions anymore (knock on wood), and we feel our diligence is paying off. My husband lived in Germany a few times during his childhood, and he talks longingly about having the classic chocolate-hazelnut spread on toast for breakfast and/or Kaffeeklatsch often. Not only is the modern day version of these spreads filled with mostly sugar and emulsifiers these days, but it also has dairy and nuts. Two of the top allergens in our household. So I have been working on making a nut free/dairy free version of chocolate spread that he can eat on his toast. Since my son is allergic to so many protein foods (red meats, dairy, nuts, gluten) using healthy seeds is a nice addition to our diet. Sunflower seeds have a lot of vitamins such as Vitamin E, B1, manganese, iron, selenium, calcium, folate, B6, B3, and of course protein and good fats. This recipe starts with sunbutter. You can make your own by whizzing fresh sunflower seeds in a Vitamix until it is creamy. I use sunbutter because this brand is produced in a peanut/tree nut free facility, which can be hard to verify with bulk seeds. Their employees are not even allowed to bring any peanut products in their lunches. Same thing goes with the rest of the ingredients - I use them because I have checked and he has been good with them before. This recipe is pretty simple - sunflower seed butter, coconut cream/manna, cold press grapeseed oil, chocolate chips, maple syrup, vanilla bean, and sea salt. If you have allergies, be sure to check the manufacturing processes used for your ingredients. I have links to what I have used, but remember that production processes can change and what I may have verified recently (yet again) is for our specific allergies, and also may change if you are reading this in a year or in another country. Always remember to double check! 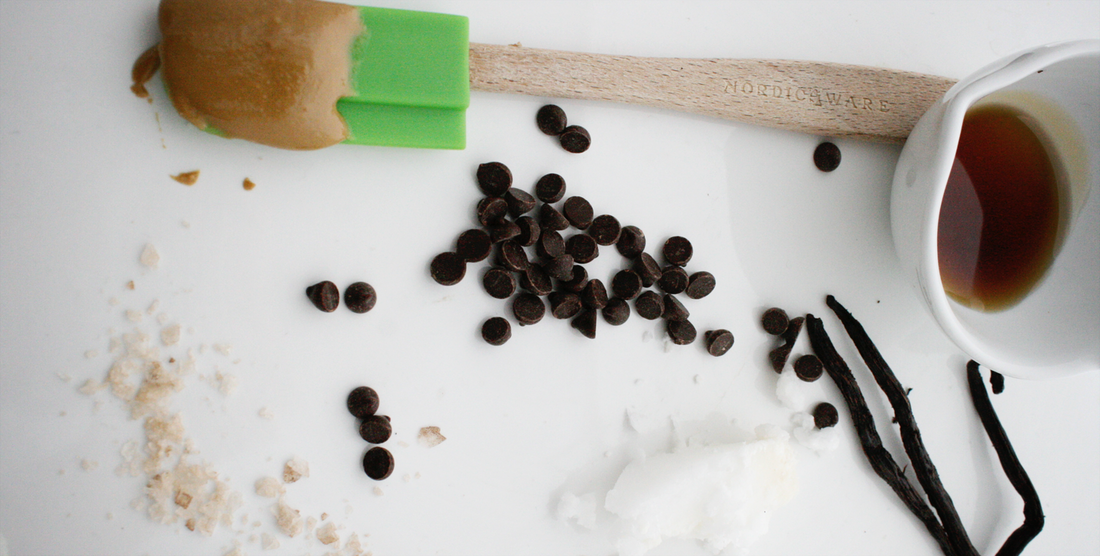 Sun-tella SpreadPrint | {wholly rooted}Delicious spreadable sunflower seed chocolate spread. Great on toast, with graham crackers, as a dip for apples, or by the spoonful. {GF/NF/DF} {ingredients}
Melt your chips and coconut cream in a double boiler. Add your vanilla bean and maple syrup. Stir well. Pour into a blender or mixer. Add your sunflower seed butter, grapeseed oil, coconut milk, and sea salt. Whiz quickly to incorporate. Don't over blend or you will get sludge. Spoon into a jelly jar and store at room temperature. Will thicken slightly as the it cools. 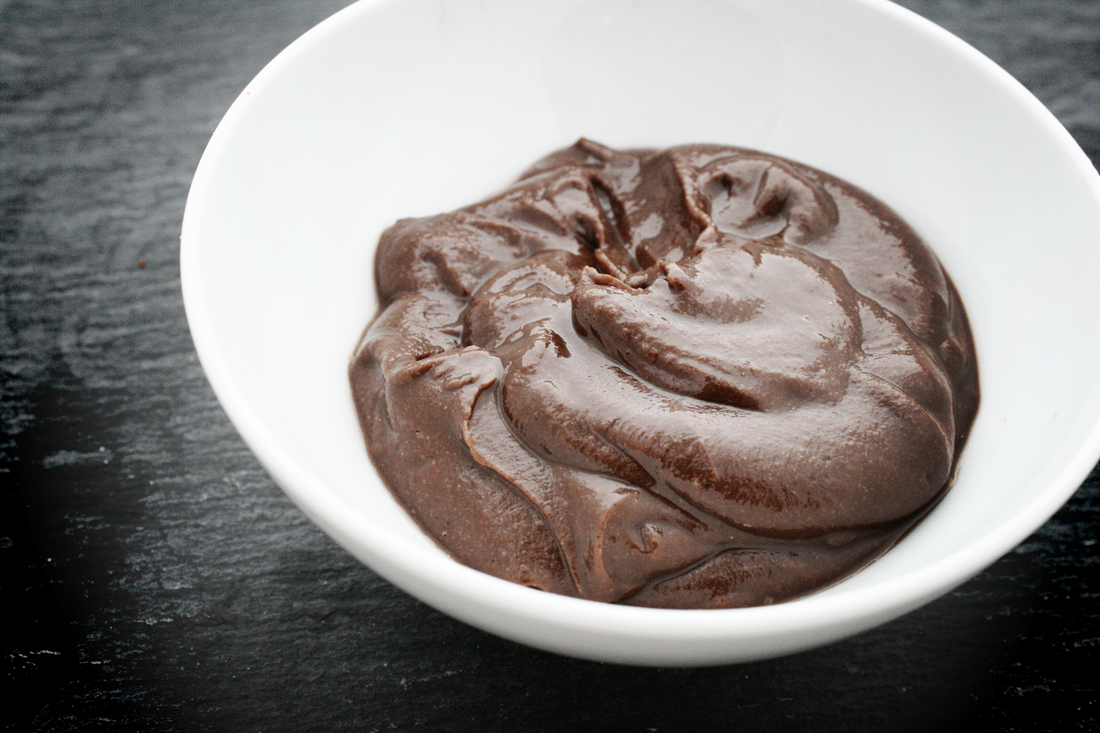 This passed the husband taste test. He has been happily eating it for breakfast and kaffeeklatsch all week. My allergy boy loved it on GF tortillas. Yum! {Tomorrow I will share my seed free coconut chocolate spread!} And another reminder to check your ingredients. I like using ingredients that I know are consistently tested and are aware of allergies. If they are specifically made for those with allergies, they are less likely to make mistakes and have more strict controls and processes in place. Oils, chocolates, and seeds can be challenging to verify as produced in a nut free facility. They are often processed with other bulk items or made in factories that make nut oils or granola bars or candies with who knows what other allergens. And "may contain" notices can be confusing. Most companies are happy to tell you if they are allergy safe and many publish allergy statements, ingredients, and labels online. So read labels, check, double check, and call or write the company if you are not sure!
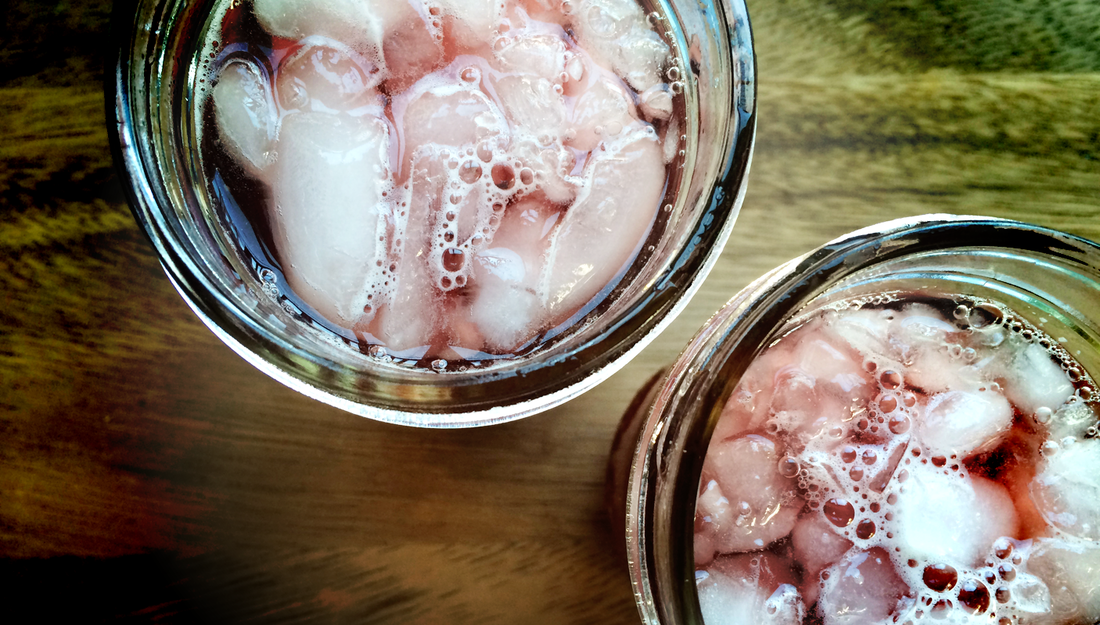
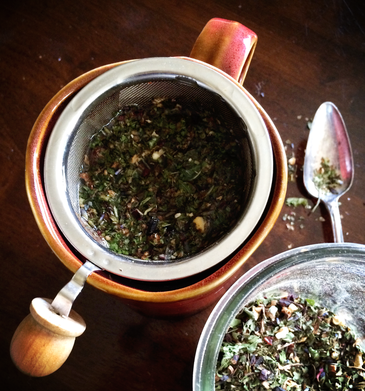
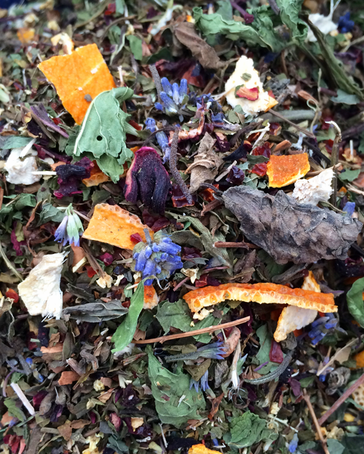
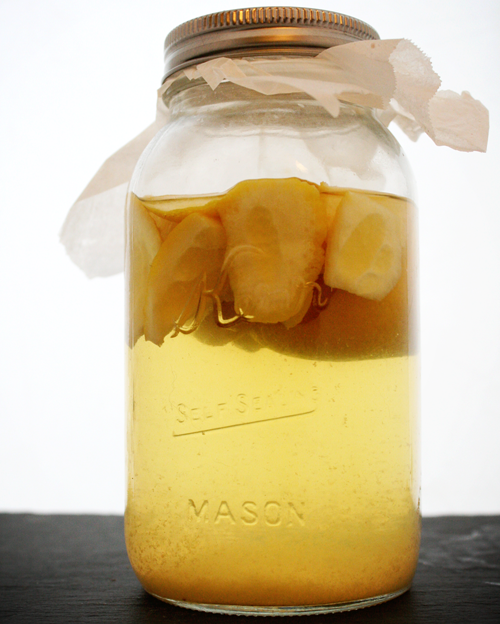
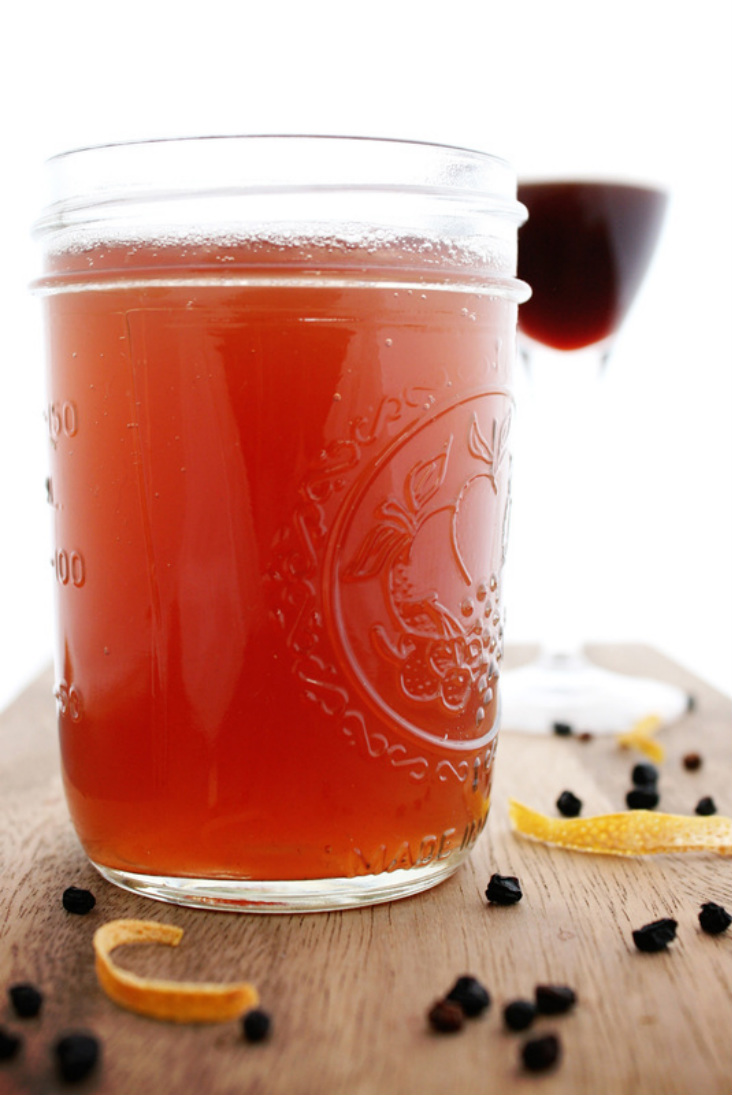 Sipping vinegars have been making a comeback within local artisan food communities. Sipping vinegars, also known as shrubs or in some variations as a switchel, have been around for a long time. During Colonial times, vinegar was used to preserve fruit for the off season and the resulting beverage was called a shrub. Switchel was another drink from that era, made from ginger, honey, vinegar, molasses, and water - also called haymaker's punch - and was often taken to the fields by farmworkers. A switchel was used like gatorade or sports drinks today - to refresh, cool, and replenish. I like them because the flavor options are endless, and they are a nice way to combine the medicinal or immune system boosting power of herbs with fizzy delicious better-than-a-can-of-soda-could-ever-be flavors. In this house we have some intolerance to corn syrup and manufactured citric acid so we don't do canned sodas. BUT we sometimes still love fizzy drinks. Water kefir, honey sweetened fruit syrups, and shrubs are our favorite homemade concoctions. This blend contains a rich combination of flavors. Elderberry, holy basil, astragalus, rose hips, ginger, citrus peel, and hibiscus. I like this in spring when we need a little immune system boost and support after a long winter and with the start of spring cold & allergy season. 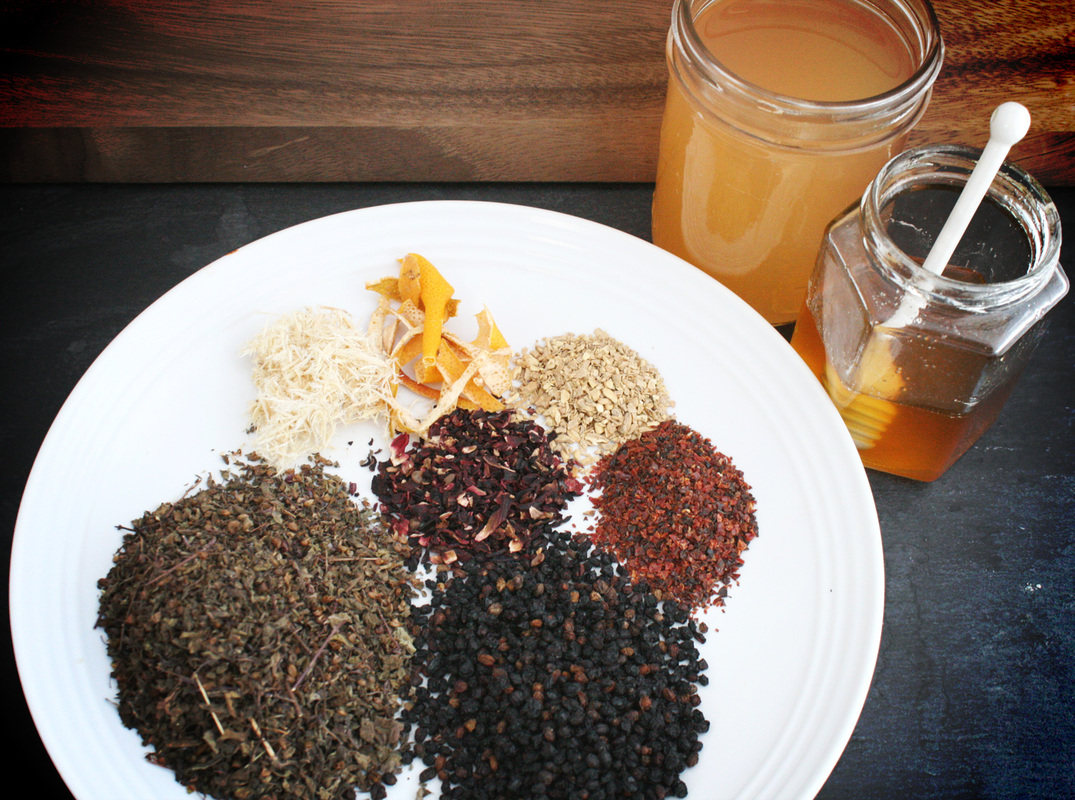 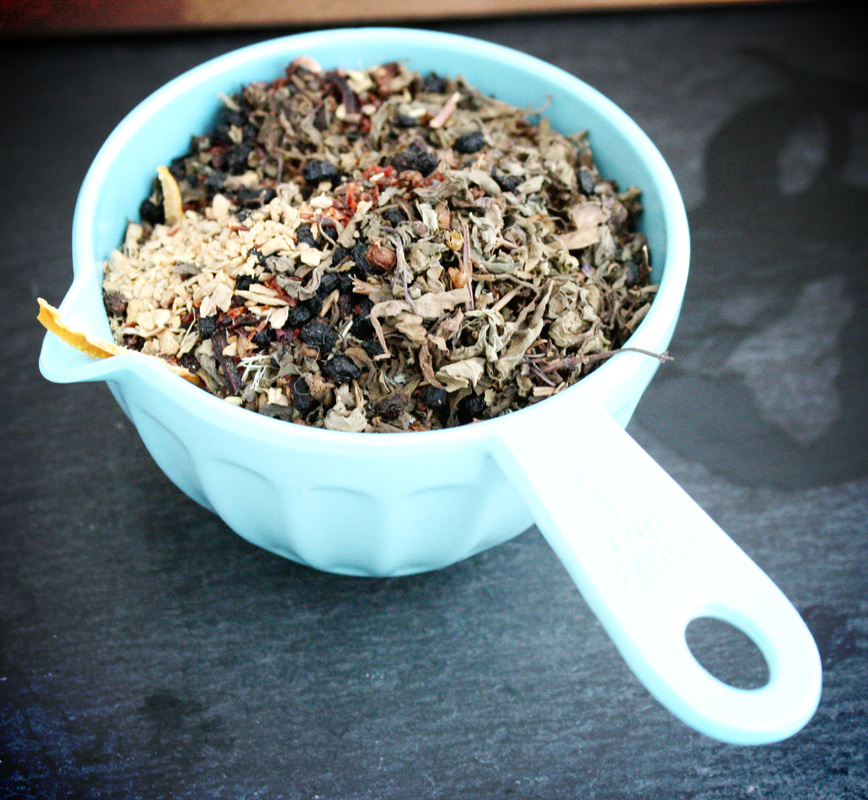 holy basil-elderberry shrubPrint | from whollyrooted.comThe ratio is basically 4:1. 4 parts honey/vinegar with 1 part herb. I measured by cup for this reason. With medicinals it is preferred to weigh not measure, but this is a beverage with some boost, so using cup measures will work just fine. {ingredients}
Add your dried herbs to a pot with 2.5 cups of vinegar. I used 2.25 cups of raw ACV (apple cider vinegar) plus .25 cups of coconut vinegar (it has a mellow sweet flavor with a lot of minerals), but you can use all ACV if you prefer. Do not use the plain white distilled vinegar you use for your cleaning or pickles. It will be gross. Champagne vinegar is an OK substitute, but ACV is your best bet.  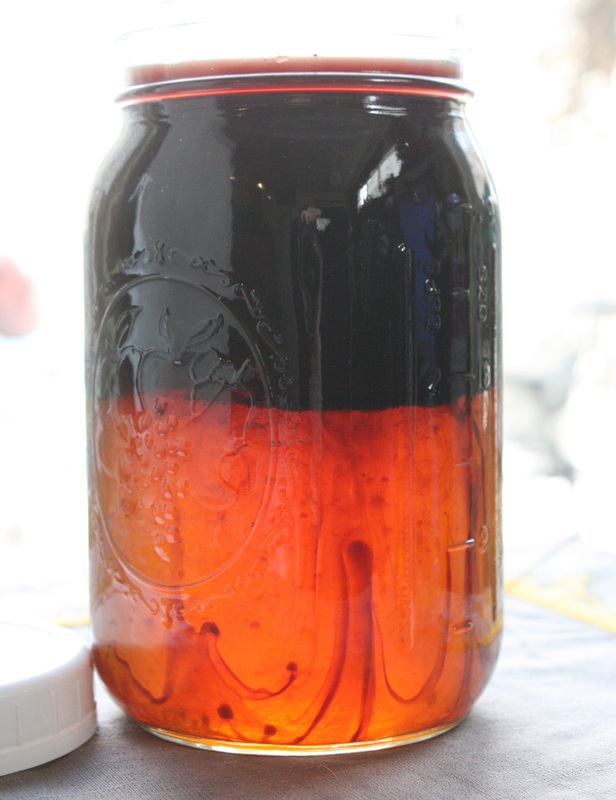 To drink, add 1/4 cup sipping vinegar to a glass, fill with sparkling water, club soda, or seltzer. Try mixing a bit into your pitcher of iced tea. Mix with sparkling wine or champagne. Or, take as a tonic by sipping a tablespoon or so in a small shot or cordial glass. For kids, the best is 1/4 cup of your shrub in a glass with ice and sparkling or soda water. 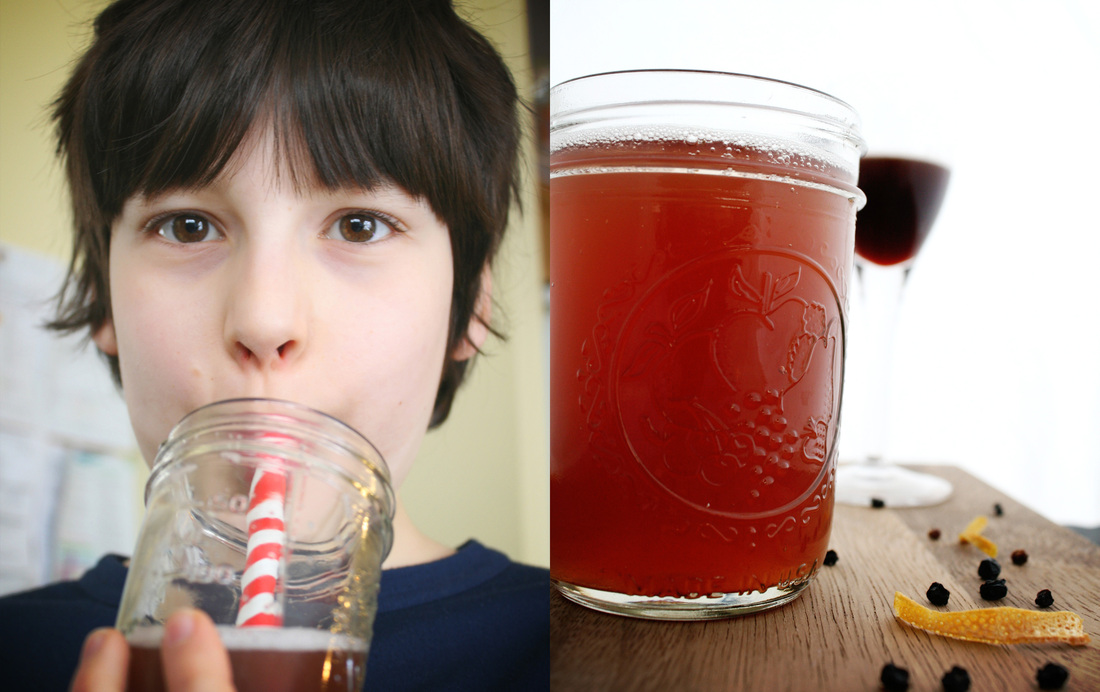 Combining the concept of alcohol free tincture or oxymels with the day to day deliciousness of a shrub means you can have a tasty refreshing fizzy soda with the benefits of the herbs! Holy Basil (ocimum sanctum) is a great adaptogenic herb that I think is underused. It has a peppery floral aroma when dried, and I think has a great flavor, especially when combined with citrus or berries. I often use it in tea blends, syrups, and vinegars. It is a nice all around herb for support.
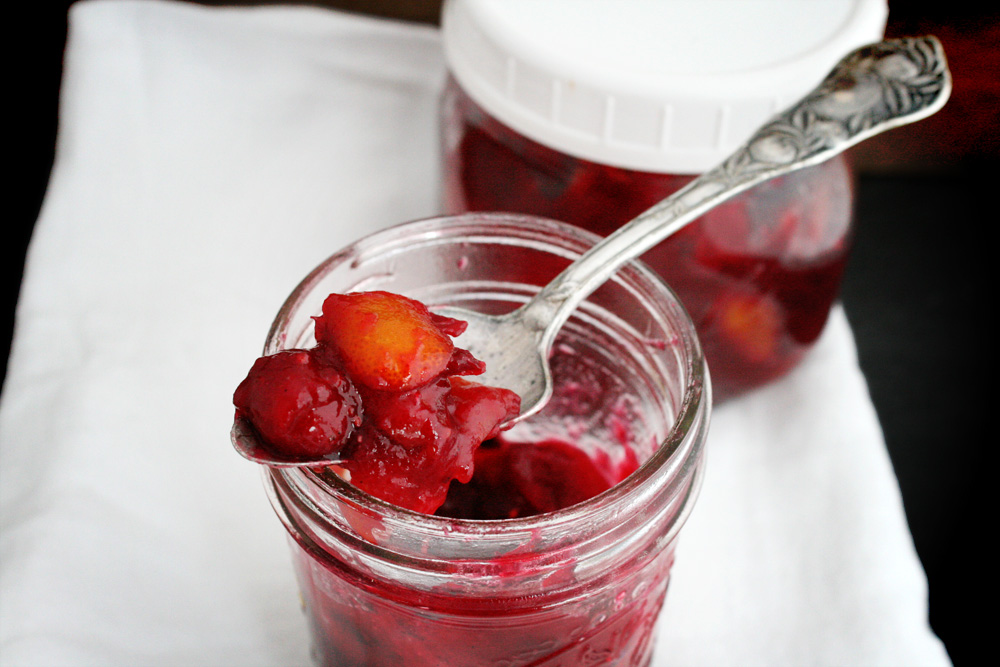 I love small batch fridge preserving. While there are many things I preserve a lot of in season, I prefer to preserve ingredients so that I can make a wide variety of flavors whenever I want. I am not a big sweet person, but I love bold unique flavors. I often make just a few pints at a time of marmalade, compote, aigre-doux, and mostarda. I like the twangy flavors to balance out the sweetness of yogurt (I love it with coconut milk yogurt) or to add flavor to things like snacks of cured meats and flax crackers. This kumquat cranberry compote is so good. It has the burst of cranberry tartness, the rich zest of citrus, with the deeper intensity of kumquat. I freeze Wisconsin cranberries in season to be used all winter if I can - but had one last bag that I had managed to keep fresh in my fridge. It goes perfectly with this short burst of kumquat season. 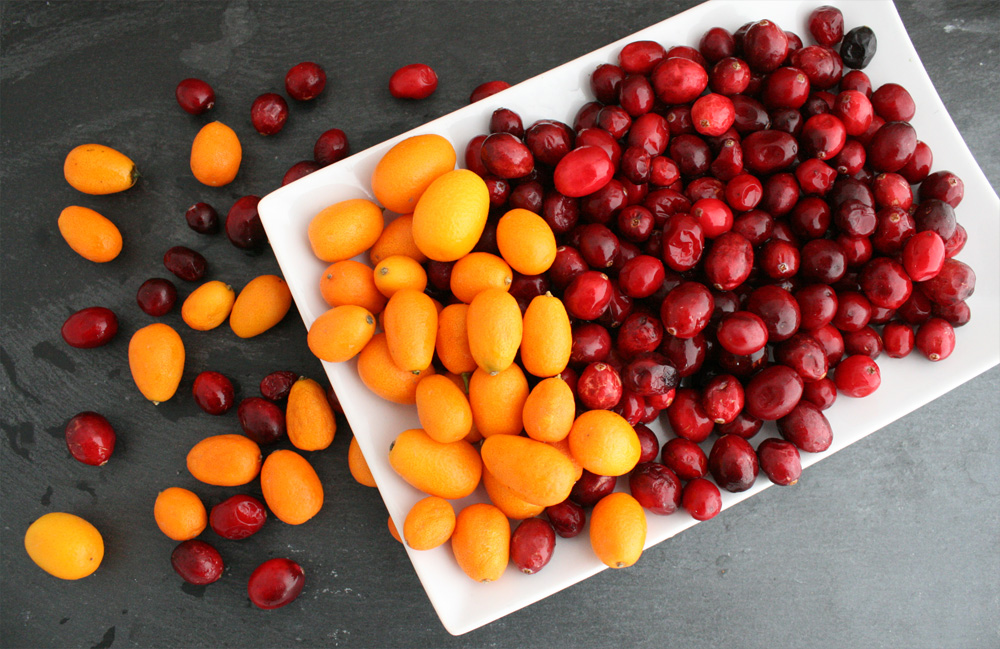 Kumquats are quirky little citrus similar in color and skin to tiny oranges, but with more of a sour pucker to them, and the fruit as well as pith and skin are edible. Kumquat are packed with anti-oxidants, vitamin C, calcium, iron, selenium, zinc, fiber, and B vitamins. And of course cranberries are full of fiber, vitamin C, antioxidants, and more as well. Having a burst of intense twangy goodness when March is long and gray is a good thing.  Kumquat Cranberry Compote This is a delicious twangy compote sweetened with honey. {ingredients}
Put your kumquat slices and cranberries into a big pot. Add the cinnamon stick, grated ginger, and vanilla bean to the pot. Crush the cloves, allspice, and cardamom with a mortar and pestle a bit (or put into a baggie and crack a few times with a rolling pin). Add the crushed spices to a tea bag or piece of cheesecloth. Tie it up and add to the pot. Add in your orange juice or whiskey. Start with 1/3 of a cup. Depending on how juicy your kumquats are, if your cranberries are fresh or frozen, or if you use OJ or whiskey, your liquid needs might slightly vary. Start with the smaller amount, add more as you are cooking if it is looking too dry. It should be just enough liquid to soften and integrate the ingredients into a thick but stirrable whole. With everything in the pot, bring to a boil and stir stir stir. Once boiling, reduce heat to medium and simmer for 15-20 minutes, stirring frequently, adding more liquid if necessary. If using whiskey the alcohol is cooking off, but leaving an amazing aroma and flavor. After 15-20 minutes on medium, stirring often, remove your cinnamon stick, vanilla bean, and spice bag. Add the honey, stir, and turn down to LOW for another 10-15 minutes. Turn off the heat, stir, and then let sit for a final 10 minutes or so to cool. It should be nice and thick and garnet. Spoon into clean jars, and refrigerate. This should keep in your refrigerator for a few weeks if you can keep yourself from eating all of it immediately. NOTE: If you use a very sweet orange juice as your liquid, you might not need as much honey. Taste it as you go! Make a zingy fresh dressing - mix a Tablespoon of the compote with a teaspoon of coconut vinegar and 2 teaspoons of extra virgin olive oil. Whisk until blended and drizzle over your salad or steamed veggies. It is fantastic over yogurt, on a cheese and meat plate, as a condiment with roasted chicken, in your morning hot cereal, or as a dressing for salads and vegetables. 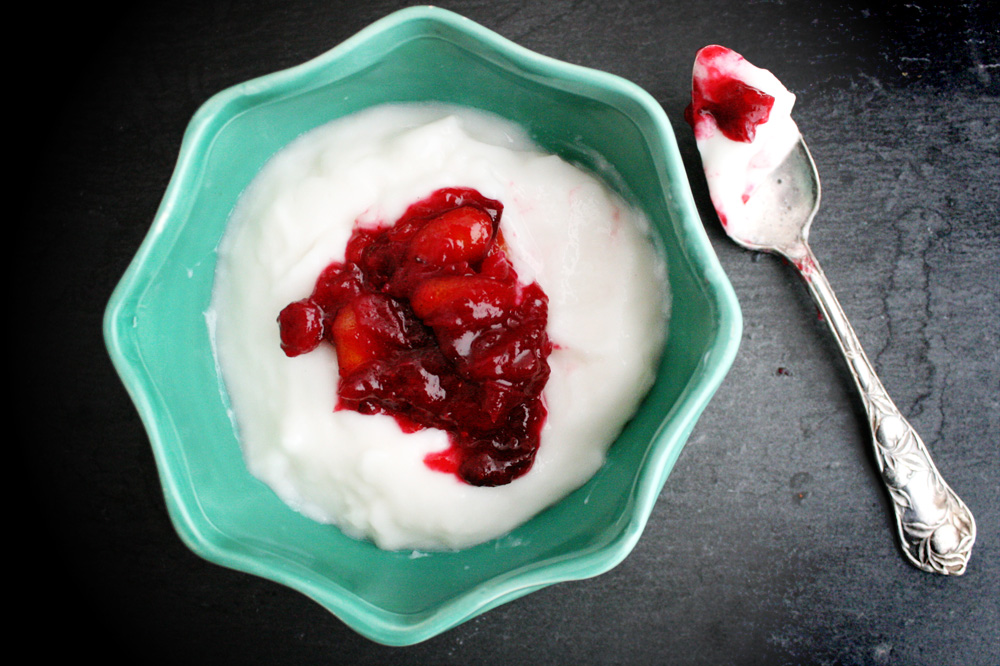 I love the color and flavor. It has a punch of twangy cranberry, the freshest citrus zest, and enough sweetness to balance the tart without being overly sweet. It is so good!
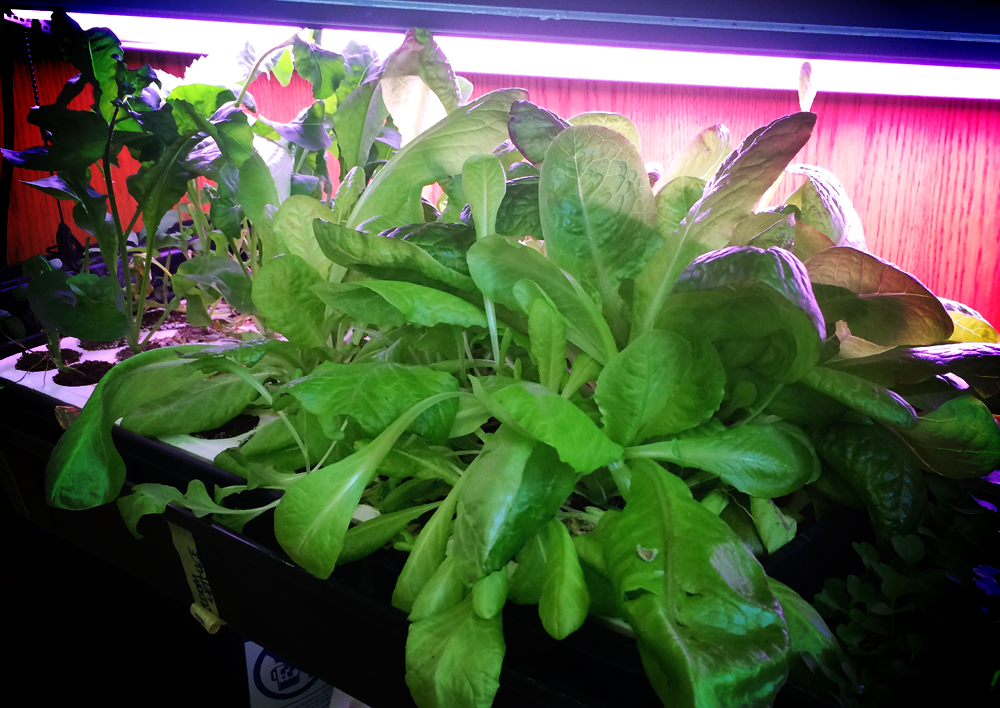
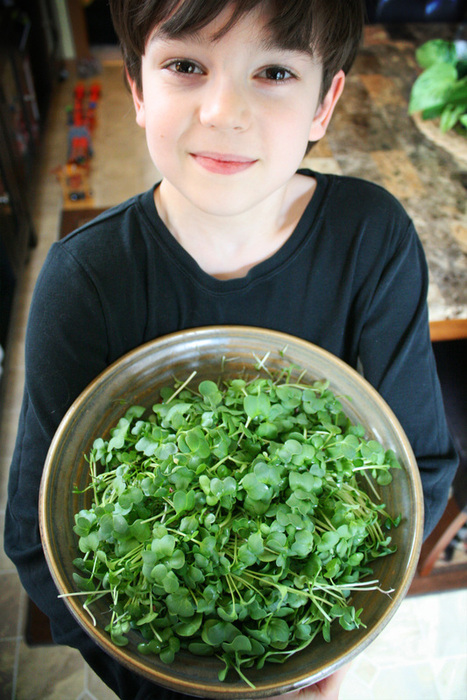
The second tray we rotate for baby greens. Peashoots, arugula, cress, head lettuce, mesclun, etc. We harvest that tray every 15-30 days or so, depending on what we are growing. So from a small two tray system in our dining room we have had fresh greens all winter. With no soil. I like it so much we are considering expanding to a larger system in our basement next winter to grow more mature culinary herbs and vegetables - although the fast seed to harvest time of microgreens and baby greens really can't be beat. 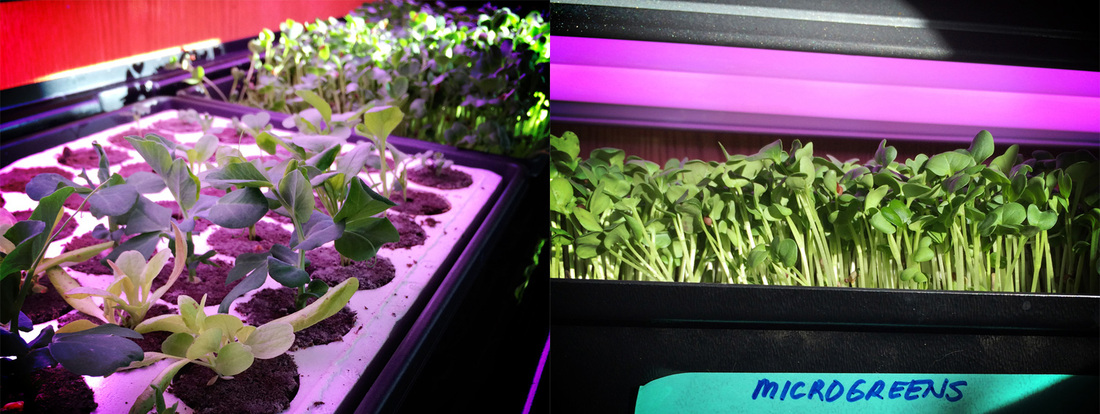
This winter we have grown everything, it seems. Mixed microgreens with radish, broccoli, cabbage, fennel, dill, mustard, fenugreek, beet, onion, kale, chard, amaranth, and more! We have harvested multiple trays of peashoots. And the baby greens! Arugula. Wrinkly crinkly cress. Dwarf pak choy. Sorrel. Shungiku. Mizuna. YUM. 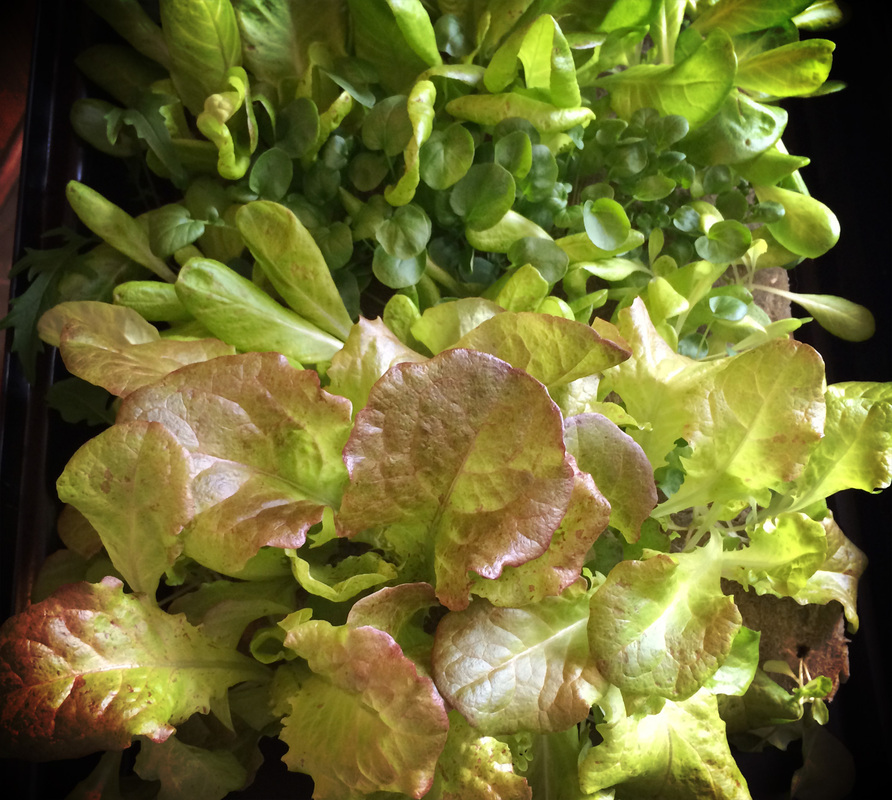
I have an excellent helper too, who loves choosing which seeds to start for microgreens, checking on our water levels and changing water, and especially cutting (his favorite part is cutting). I think both boys enjoy seeing how quickly everything grows and choosing what to grow next. 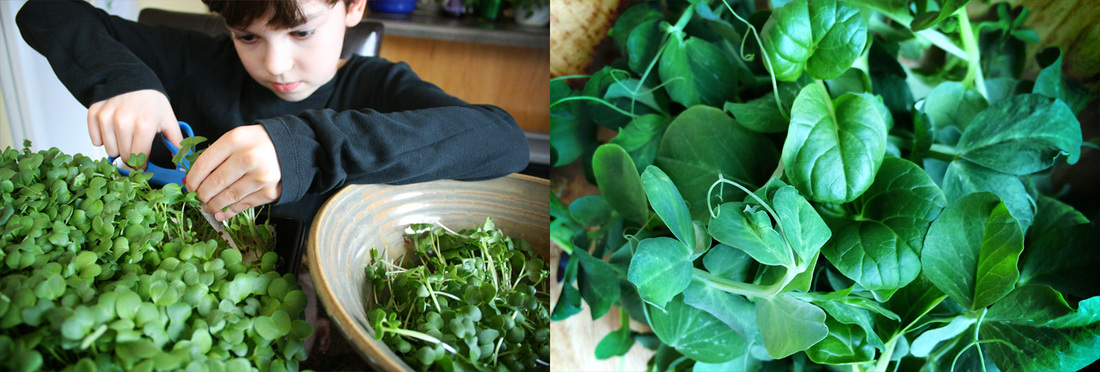
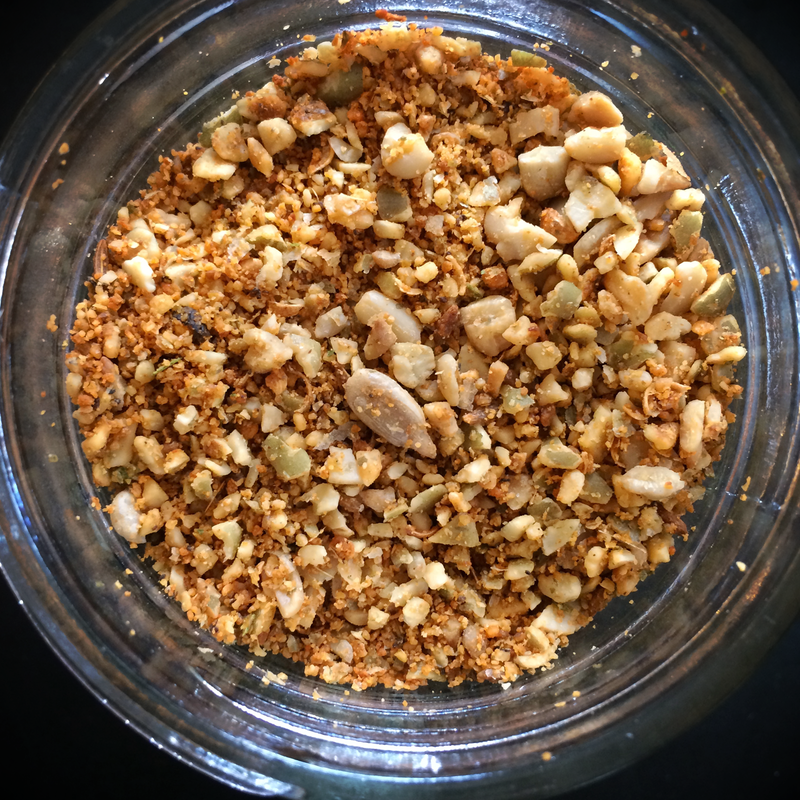
I love having fresh greens all winter. And now as hints of spring will slowly (every so slowly!) start to appear, I need the boost. I dream of salads and vegetables and herbs, but my garden won't be producing any of that for a long while still. So even though we are starting trays of seeds to plant outside, we have this more instant reward. We can see the green, we can watch the progress, we can pick and nibble whenever we like. It is so good. 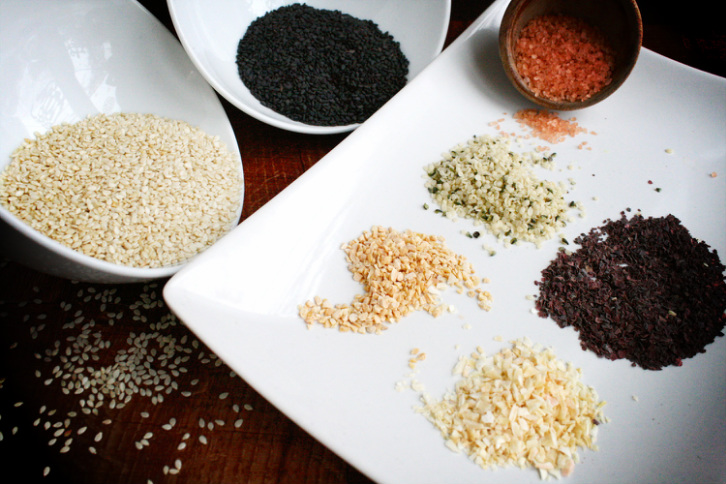 Gomasio is one of my favorite condiments made from sesame seeds and salt, often with other herbs and seaweed. It adds such a rich flavor without much salt. And for a family that doesn't eat a lot of packaged foods and uses sea salt exclusively, this also gives us iodine which is naturally found in the seaweed without any fishy flavor. It is just ... good. Every gomasio seems to have a different recipe - the variations are endless - but this is my standard go-to base recipe that I make and re-make often. I like using dulse flakes in my gomasio. Dulse is a sea vegetable which has has iron, iodine, magnesium, zinc, selenium, calcium, potassium, and a long list of other minerals. It adds so much healthy goodness without any seaweed smell. {ingredients} 1/4 cup black sesame seeds 1/4 cup white sesame seeds 1 Tbsp dulse flakes 1 Tbsp hulled hemp seeds 1 tsp dried onion 1 tsp dried garlic 1 Tbsp dried holy basil/tulsi (optional) 1 Tbsp good salt (sea salt, himalayan pink salt, alaea hawaiian salt, fleur de sel, or a smoked flake salt ... just not refined white salt) Start by toasting your sesame seeds in a dry pan on med-high. This only takes a short time - you are not cooking the seeds, just heating them to release their oils and aroma and toast lightly. Stir stir stir and remove from the heat and pour into a bowl before they start getting too dark. 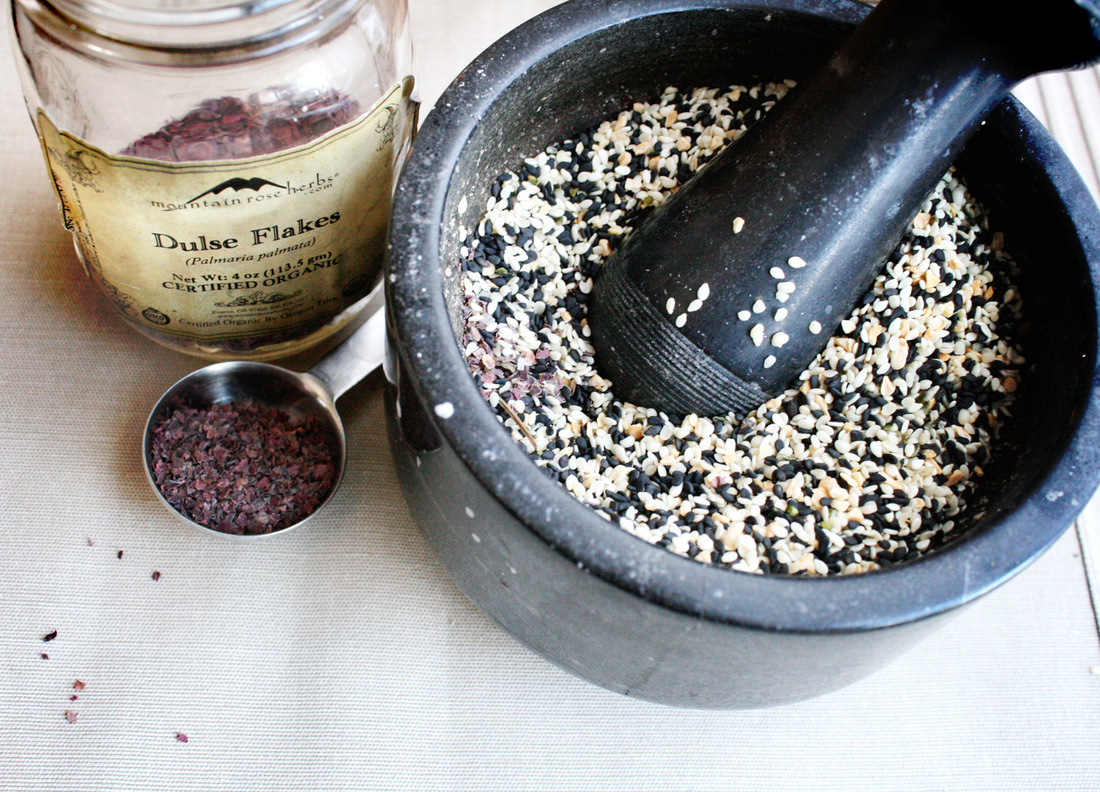 Combine all of your ingredients and gently grind together. I find a large mortar and pestle works best. You can pulse *just a few times* in your food processor, but do not over do!! You don't want to make sesame paste. You don't want a powder. You want just all of the ingredients integrated and infused with each other so they don't separate. I usually take 3-5 minutes with a mortar and pestle to gently grind it all together. Store in an air tight container - it fits perfectly in a 1/2 pint jelly jar, or put in a shaker. Sprinkle over eggs, steamed veggies, chicken, stew, soup (miso!), dips, salads, you name it. IT IS DELICIOUS!
While *more dulse* may sound like a great idea after reading about its benefits, don't. While iodine is something we all need and seaweed is common in a lot of Asian diets, it is in small amounts. Don't overdo it. This recipe has a low ratio for a reason!
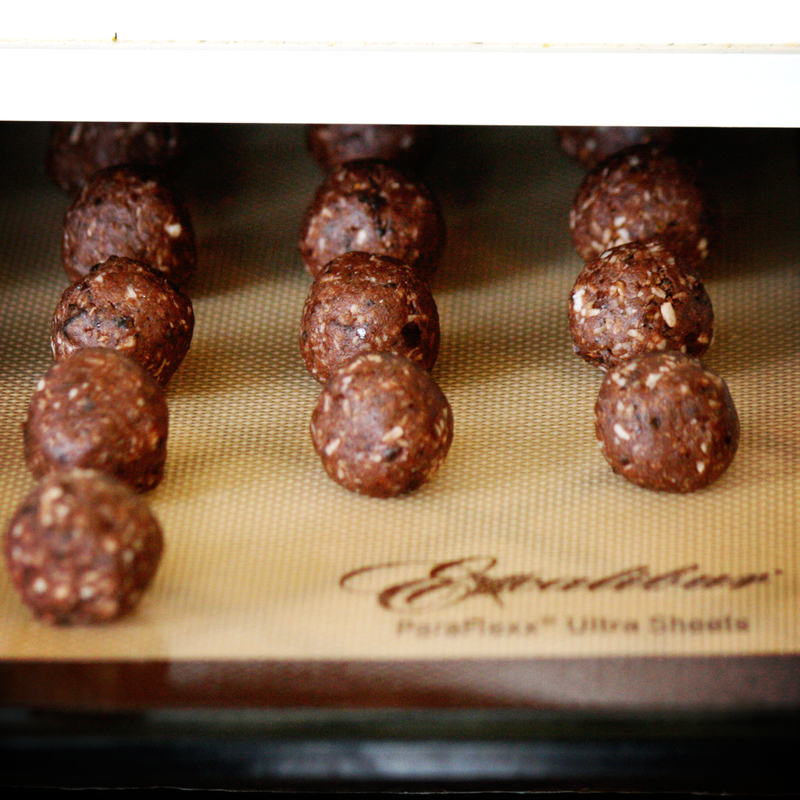
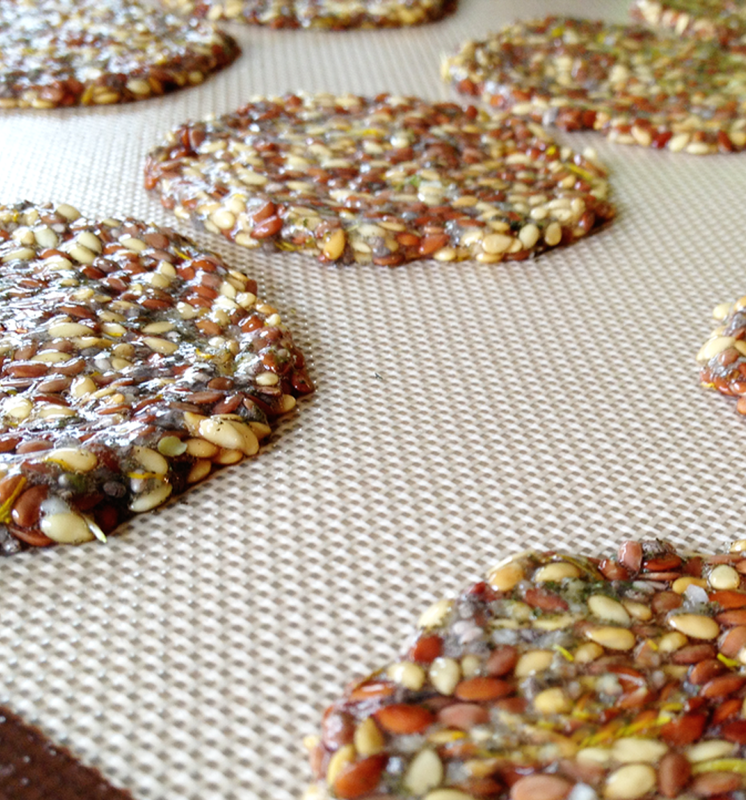
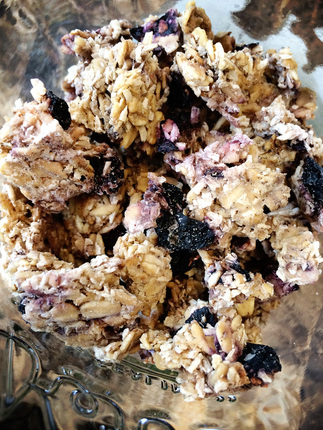
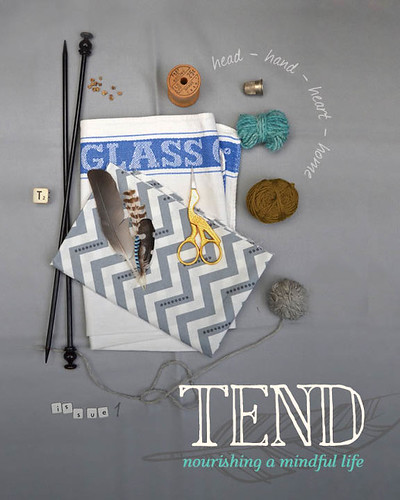 I am excited to announce a new project I have been working on which has finally launched! Almost a year ago a friend emailed me asking if I would be interested in contributing to her newest project – a magazine filled with things to do with our children, handwork, craft, gardening, homesteading, whole foods, and treading gently on this earth. Of course I said yes, and am happy to announce I am a contributing writer and Whole Foods and Herbal Health Editor for TEND Magazine, an online quarterly publication. So many talented people contributed to this premiere issue – I am proud to be a part of it! "TEND magazine aims to be at the forefront of mindful living, focusing on environmental, sustainable concerns, providing information and aspiration, driving real environmental change through change at the individual level."  "TEND magazine aims to nurture the bond between a parent and their child, between families and the earth, and between individual families to form community. It aims to strengthen the bonds and connections we have to each other and the earth, recognising and nourishing our natural dispositions to care for and educate our families in the ways that seem right to us. We aim to stir an awakening for the need to slow down, consume less and walk gently on the earth. We aim to be aspirational and utterly beautiful and design-lead. We like to grow some of our own food, support local farmers, eat as much healthy organic produce as we realistically can, gather with friends to enjoy home-cooked meals and to enjoy the bond of community. We encourage the need to consume less and make more, to envisage homesteading and sustainable living as realistic aspirations. " 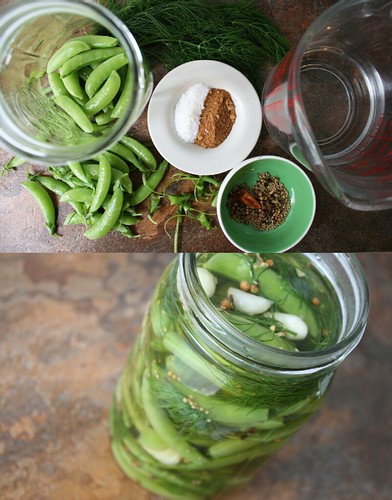 Inside this spring issue is something for everyone – ideas for the home, garden, crafting, knitting, sewing, activities and crafts for children, seeds, homesteading, whole food recipes, herbal DIY, foraging – almost 200 pages! So much goodness! The magazine website also has some lovely freebies - printable seed packets and a lovely bird drawstring bag tutorial which you can download right from the website, as well as a free bird embroidery pattern when you sign up for the newsletter!  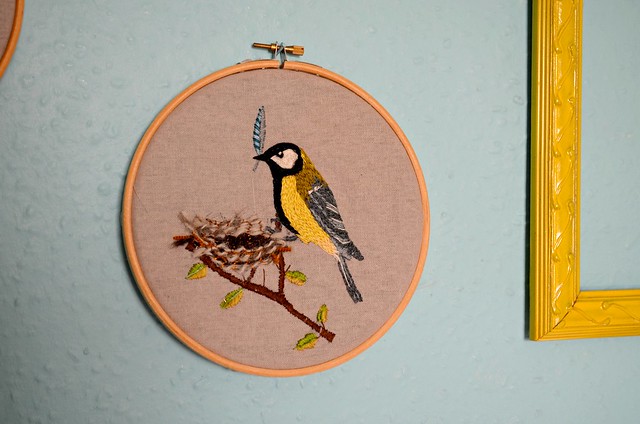 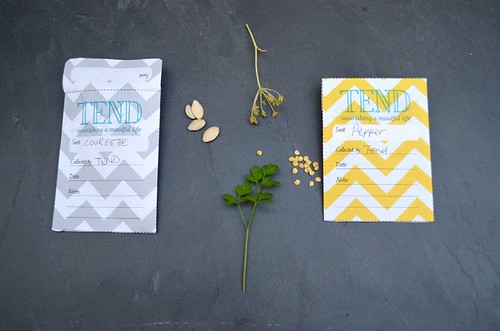 You can find TEND online at www.tendmagazine.co.uk, or visit the Facebook page (be sure to LIKE it so you can get updates! As a special bonus, leave a comment on my post here for a chance to win a free copy of the Spring issue of TEND! I will pick one winner on Friday. {closed - thanks for all of your comments!} If you don’t win, you still can receive a 20% discount on the first issue by clicking here and using the code ROOTED20 when you place your order (there is a spot to enter the code on the very last page of checkout process). Be sure to visit the other blog stops for more chances to win a free copy! 6th March Merry at Patch of Puddles 7th March Rachelle at Tales of Ted & Agnes 10th March Tif at Dottie Angel 11th March Heather at Shivaya Naturals Be sure to leave a comment! ++ March 7 - I closed the comments and have announced the winner. Don't forget - you can use the code ROOTED20 when placing your order and receive 20% off - code good through March 21. 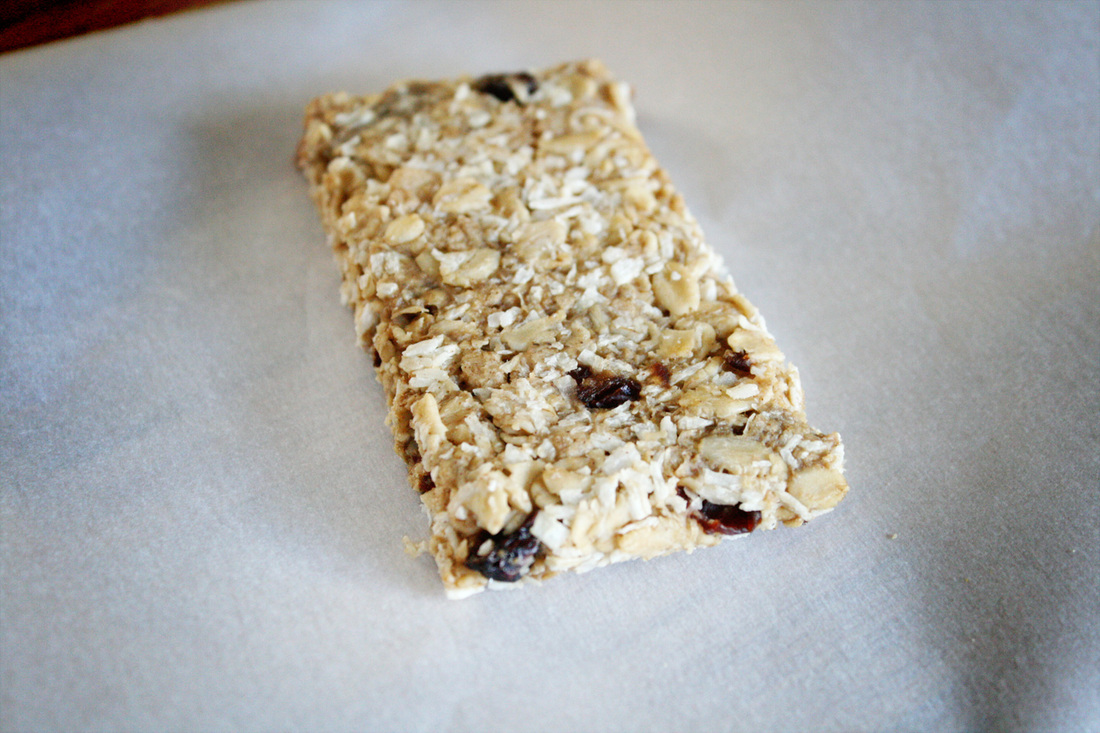 There are some staples that I try to always have on hand in the house. Flax crackers, granola or granola bars, and coconut water kefir are a few. One of the challenges of having a child with so many allergies is that often even the most simple ingredients or foods are no longer safe. Granola/granola bars is one of those things - most of the standard less expensive brands are made in facilities that also process nuts, dairy, gluten, you name it. We have found one or two trusted brands that are made in a dedicated allergen free facility, but they are not easy to find and they are expensive - not to mention flavor choices are limited. I have made this recipe as granola and/or granola bars all winter, usually about once a week. It is so good my husband eats it out of the dehydrator before it is even ready.  Dehydrator Granola BarsPrint | {wholly rooted}Allergy friendly dehydrator granola bars are a yummy treat for all ages. Crumble them to make granola - great over yogurt. If you don't have a dehydrator, don't worry - use your oven on the lowest setting. {ingredients}
Mix everything but the coconut milk together really well in a bowl. Make sure sunflower butter is fully blended - I have found using my fingers and rubbing it together with my fingers like making pie crust works great to get the sunflower butter fully blended. You can also just pulse a few times in your food processor - it will help the bars stay together but don't over whiz or you will miss the nice chunky bits.
The possibilities are endless. Once you start making this you won't be able to stop. Delicious! Tip: Don't forget to always read your packaging. Some brands of dried fruit and seeds are made in shared facilities with other allergens. Read the package or make your own! To make your own dried fruit, simply spread fresh fruit evenly on the dehydrator sheet. For berries like blueberries or raspberries use whole. For fruit like apples or bananas, remove peel, slice in 1/4 to 1/2" thick pieces and place on your dehydrator sheets. Dry in your dehydrator on fruit setting until full dry. Store in an airtight container until use!
|

denise cusackI am a certified aromatherapist, clinical herbalist, permaculture designer, organic gardener, plant conservationist, photographer, writer, designer, artist, nature lover, health justice activist, whole foods maker, and mother of two young adults in south central Wisconsin. 


Categories
All
©2007-23 Denise Cusack, all photos and text. Feel free to share my posts on FB or Twitter or online media or pin on Pinterest (thank you!), but please keep the links back to my website intact (meaning please do not take or copy my images off of this website and share them unattributed or without linking back here or use them without permission). Thank you! :)
|


 RSS Feed
