
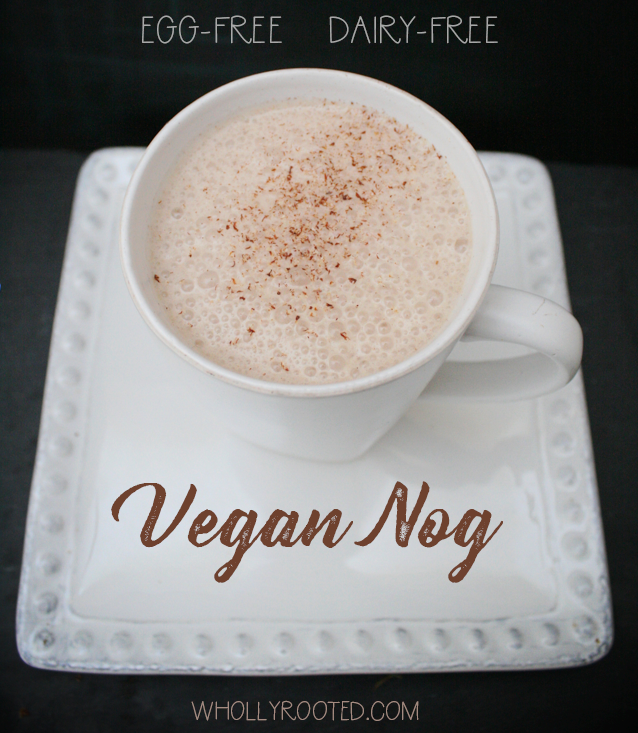
Everywhere you look in winter there is another recipe for an eggnog or boozy drink. This version is not only alcohol free, but dairy and egg free as well. Not that you couldn't add a swig of something, but it is absolutely delicious and warming all on its own.
Vegan NogPrint |
{wholly rooted}Egg & dairy free nog recipe - using medjool dates, it is even low glycemic. {ingredients}
Pour your coconut milk into a pot along with the pitted dates. We don't do dairy in the house, as my older son has a severe allergy. And quite honestly I don't want any of us in this house to follow down the road of our genetic lottery of diabetes, so I love recipes that are not only dairy free, but also use low glycemic sweeteners. The dates also are what gives the drink that thicker creaminess. If you use rice milk, it will be a little thinner, obviously, but hemp, cashew, coconut and other thicker milks have the perfect thickness!
2 Comments
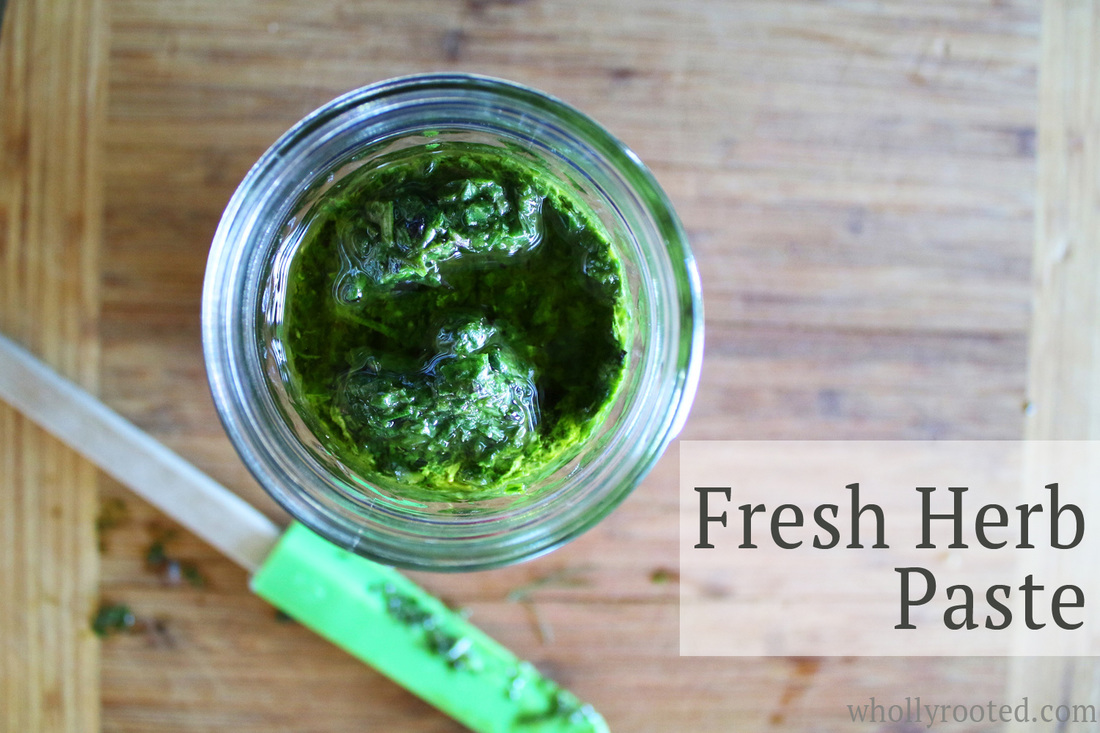
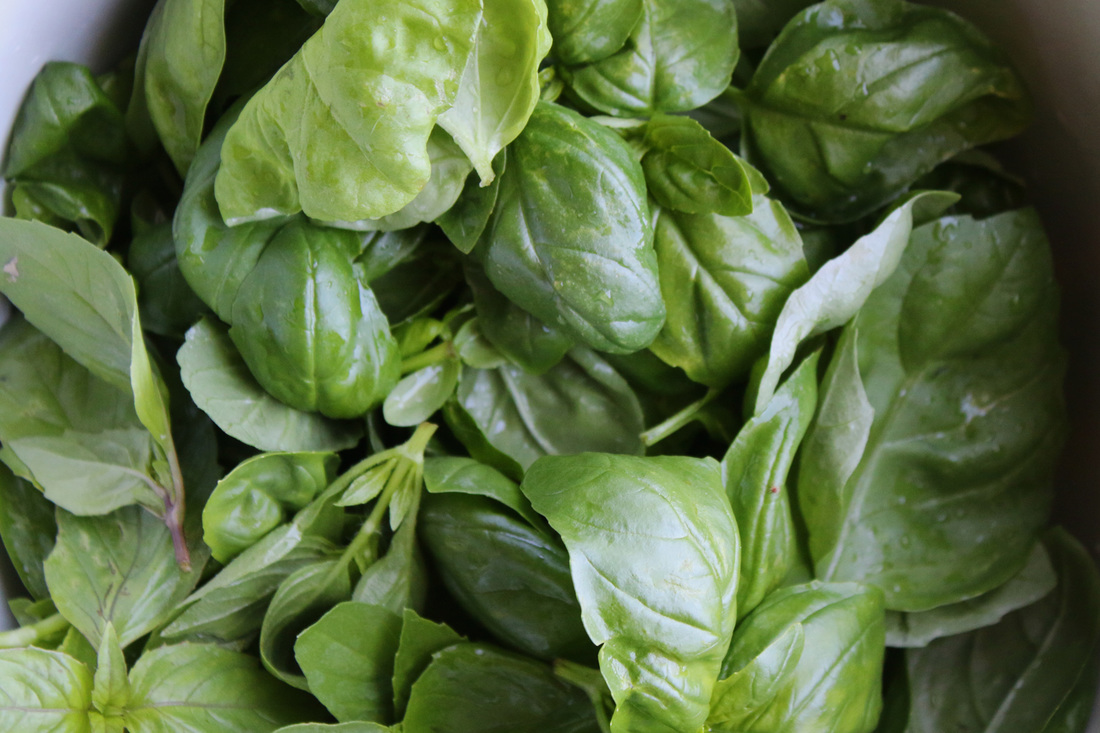
Once the gardens start producing, it can be a challenge to keep up. My dehydrator is going pretty much full-time, drying herbs, flowers, and veggies for use all winter long. Some herbs, such as basil, don't dry very well, so I make plenty of pesto to freeze. While I love pesto, I don't want my basil options to be so fixed all winter, so freezing more simple combinations means that I not only have plenty of pesto, but also have plenty of options for soup, stew, stir fry, rice and more, all fall/winter/spring. Freezing basil to preserve for winter is easy. I like to make herb pastes, which keep their fresh vibrant flavors and aromas and are super quick and easy to prepare. My husband thinks I missed an opportunity to name this recipe "Frozen Basil Bunnies" - but it isn't just basil that this works for, it is great for any fresh herbs. Although I agree that Fresh Herb Paste isn't *quite* as memorable as Frozen Basil Bunnies. Say that fast 10 times.
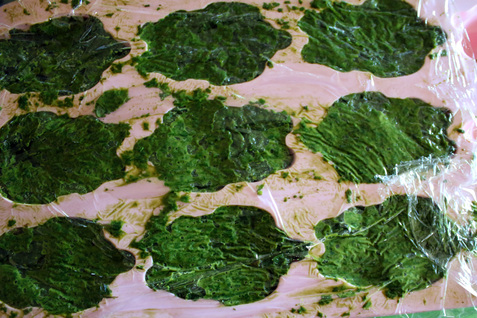
Basil is my first frozen paste because it is the herb that needs freezing the most, and I grow a LOT of it. It is so simple. Take 4 cups of freshly picked, packed basil leaves. Put them in the food processor with about 1/4 - 1/2 cup of extra virgin olive oil and about 1/2 tsp of fresh sea salt. I don't want to add too much salt so I have room for seasoning in recipes, but a little helps keep the vivid color and flavor. Whiz the basil/olive oil/salt in the food processor until fully blended. You may need to scrape the bowl down with a spatula in the middle of it to get all of the leaves. Depending on your type of basil and how packed it is when measuring, it will need as little as 1/4 cup of olive oil. The measurement is flexible just like the recipe. Add just enough oil to get it to fully whiz in the food processor! If you want fresh paste, voila, you are done. Put it into a canning jar in your fridge and use over the next week or so. You can also freeze it for longer storage. The recipe is per 4 cups of herbs because that fits into a food processor, but it whizzes down into a smaller amount, so you can keep going in batches to make as much as you like. I did 5 batches of basil paste and still have more left. Lots. O. Basil.
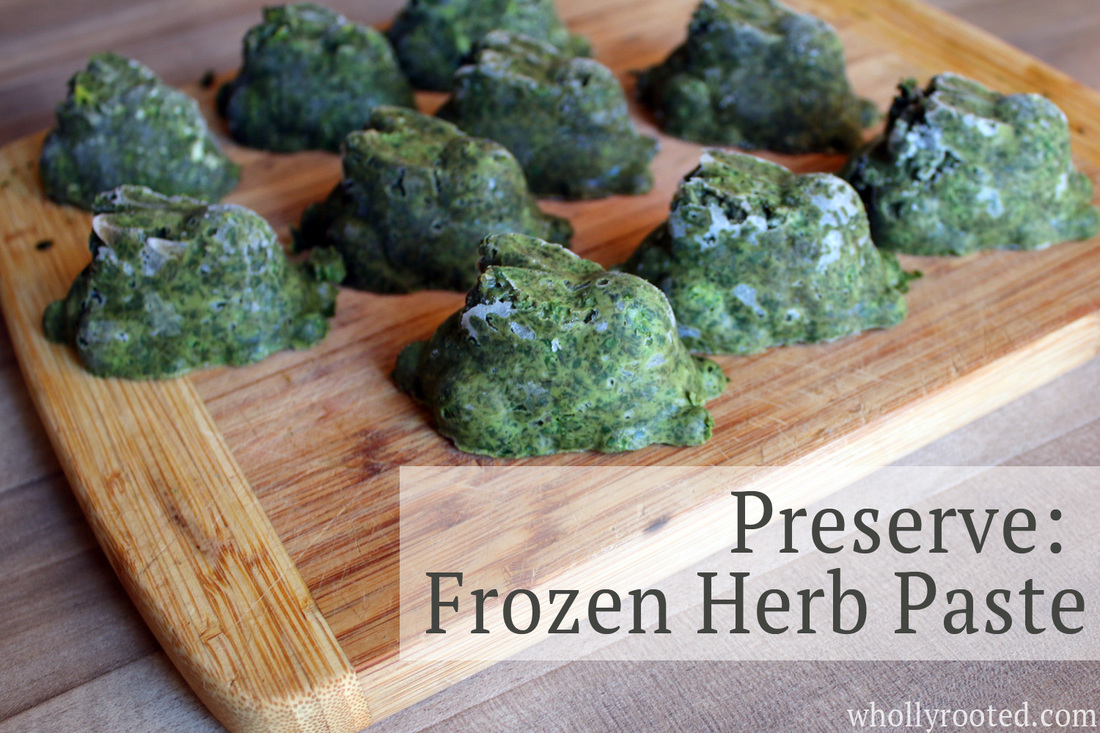
To freeze, take your paste and spoon it into ice cube trays or silicon molds and put into the freezer until frozen solid, and then pop the cubes into a freezer baggie until you need them. I like freezing in about 1/4 cup quantities as that makes it easier to only defrost what you need, rather than thawing out an entire jar. I like silicon molds because I can do bigger than an ice cube amounts. Mine are all in bunny shapes because while I have personally selected all of my herbs-only molds for my lotion bars and body bars, all of our food use silicon molds have been selected by my 11 year old, who only buys cute animal shapes. ;) So we have a whole bunch of basil bunnies in the freezer.
Fresh Herb PastePrint |
{wholly rooted}Freezing is a quick and easy way to preserve herbs for winter! {ingredients}
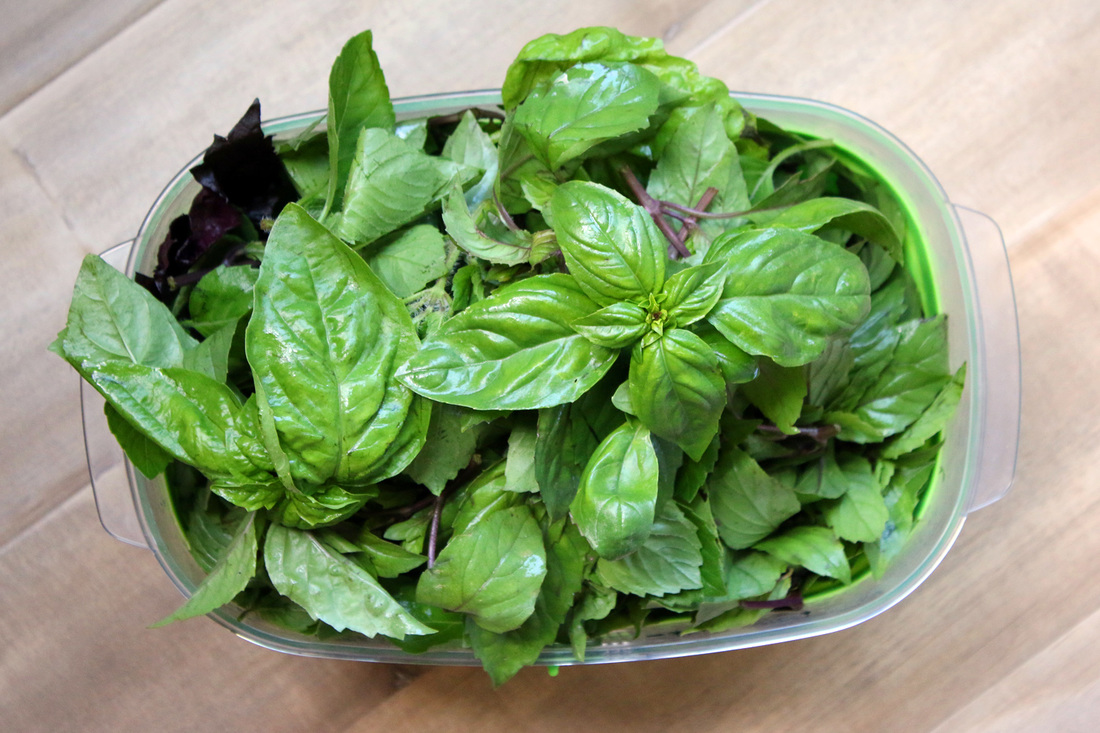
Measure 4 cups of packed fresh herbs (remove stems). 
You can do this with mixed herbs as well, of course. I made several batches that included parsley, sage, basil, rosemary, thyme, and cilantro. It is the same recipe, just vary your herbs based on your supply! Try different combos - just be sure to label!
I love growing a lot of herbs, and I love preserving them too. Since our growing season in Wisconsin is fairly short, finding many different ways to preserve things so we feel like we have a wonderful variety the rest of the year is key. Looking for other ways to preserve your herbs? Try my veggie bouillon recipe - I love making a lot of this in the summer to use all winter long. SUCH an amazing flavor! 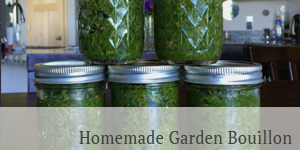
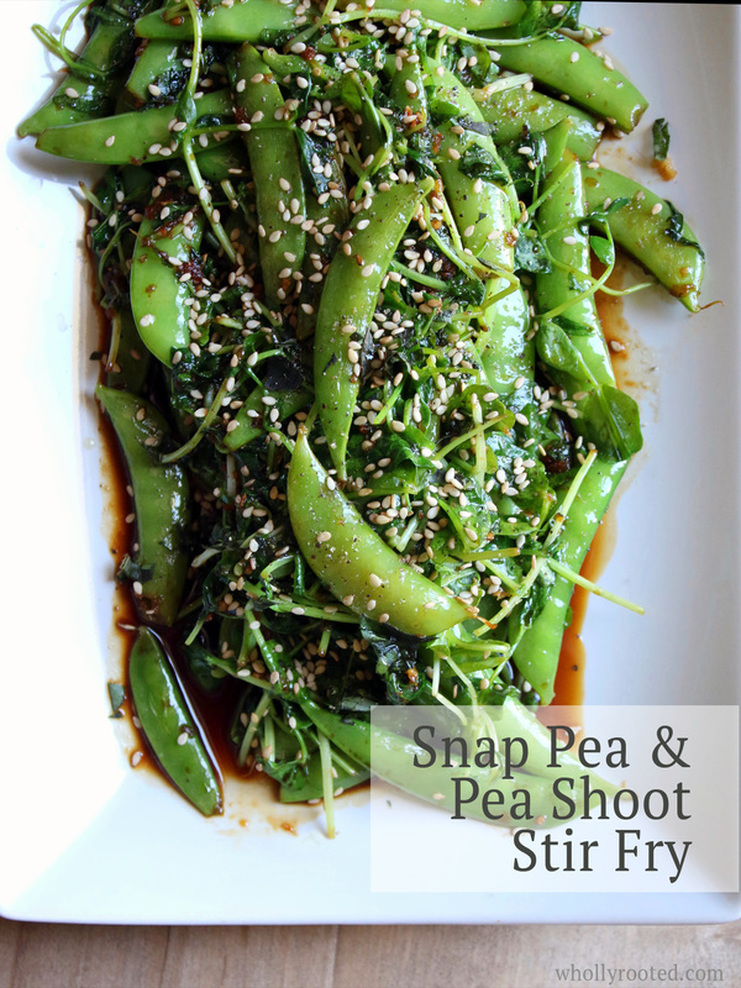
Pea season has arrived! I love the fresh green flavor of peas and pea shoots. I love to eat snap peas raw, pickled, sautéed, and steamed. I love to eat pea shoots in salads, wraps, stir fry, and tacos. We get peas and pea shoots from our CSA, but this is one of the things I also grow because...well...we just can't get enough. Pea season is short and sweet, and I like to make the most of it.
This year I am growing a new (to me) variety of pea called Magnolia Blossom Tendril Pea. It makes a lot of tendrils and fewer leaves, allowing more air flow in the peas. The flowers are so beautiful, and the plants are huge producers! My husband has been traveling for business most of the past few weeks, so he is missing out on the peastravaganza. This recipe is quick and easy and super delicious. It takes advantage of those freshly picked peas that are so tender they don't need to be boiled or overcooked at all, and are crispy and perfect with a few minutes in the skillet. I am also growing Blue Spice Basil this summer and it has quickly become a favorite. It has a rich, exotic, spicy sweet fragrance that is AMAZing (and the bugs don't touch it). It worked so well with the toasted sesame oil and ginger that I am dehydrating a batch to see how it holds up when dried. Most basil doesn't dry well and so we freeze it or make pesto to preserve it. This basil has such a different thick hairy leaf and sublime fragrance that I am curious - I would love to have a lot dried to use all winter. We shall see! 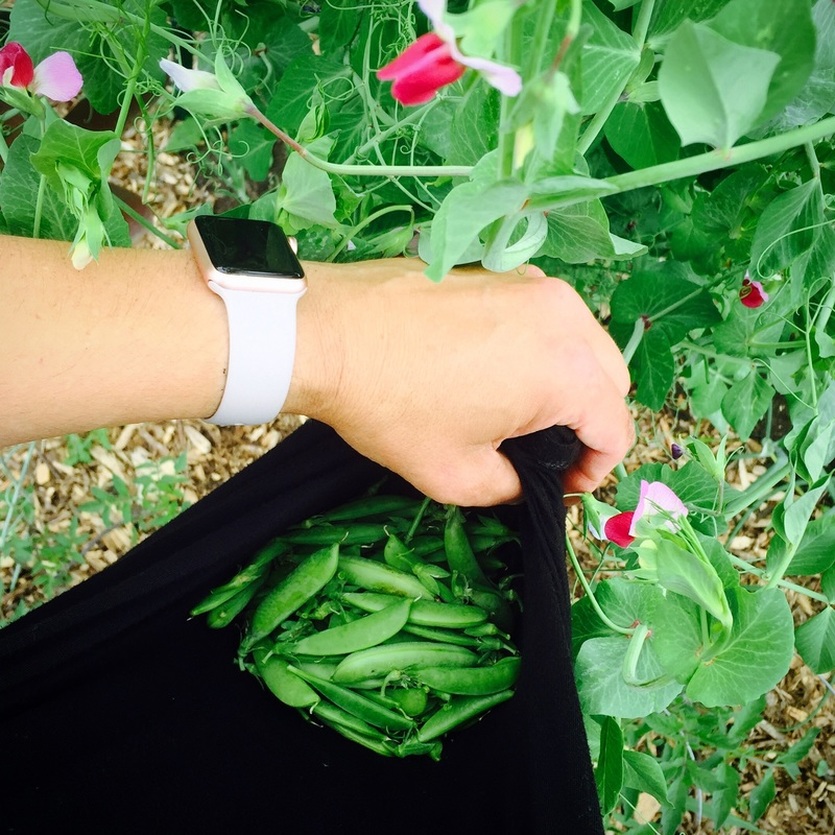
snap pea + pea shoot stir fryPrint |
{wholly rooted}This recipe is perfect for pea season - it combines fresh snap peas and pea shoots with ginger, garlic, soy, and sesame oil to make a quick and easy (and delicious) dish. Serve as a side dish, or over rice for a main vegetarian course. {ingredients}
Directions:: 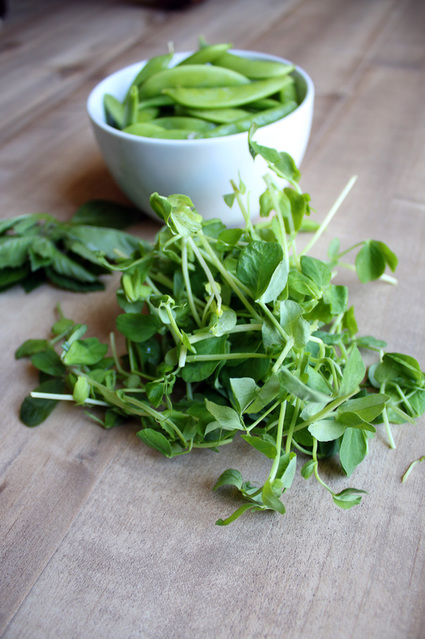
I am sure I am going to be sharing more pea recipes before our short season is over (peas make the best quick pickles!). Having pea season peak just as all of the herbs are cranking means that there are so many opportunities for different flavors and combinations. Fresh herbs and peas really do go well together as they all have that fresh green garden flavor that can't be beat. My husband will be gone for a few more days so the pea stir fry today was all mine. He had better hurry though, it has been hot and peas won't last forever! about the ingredients: Snap Peas Pea Shoots Blue Spice Basil Magnolia Blossom Tendril Pea Brown Sesame Seeds 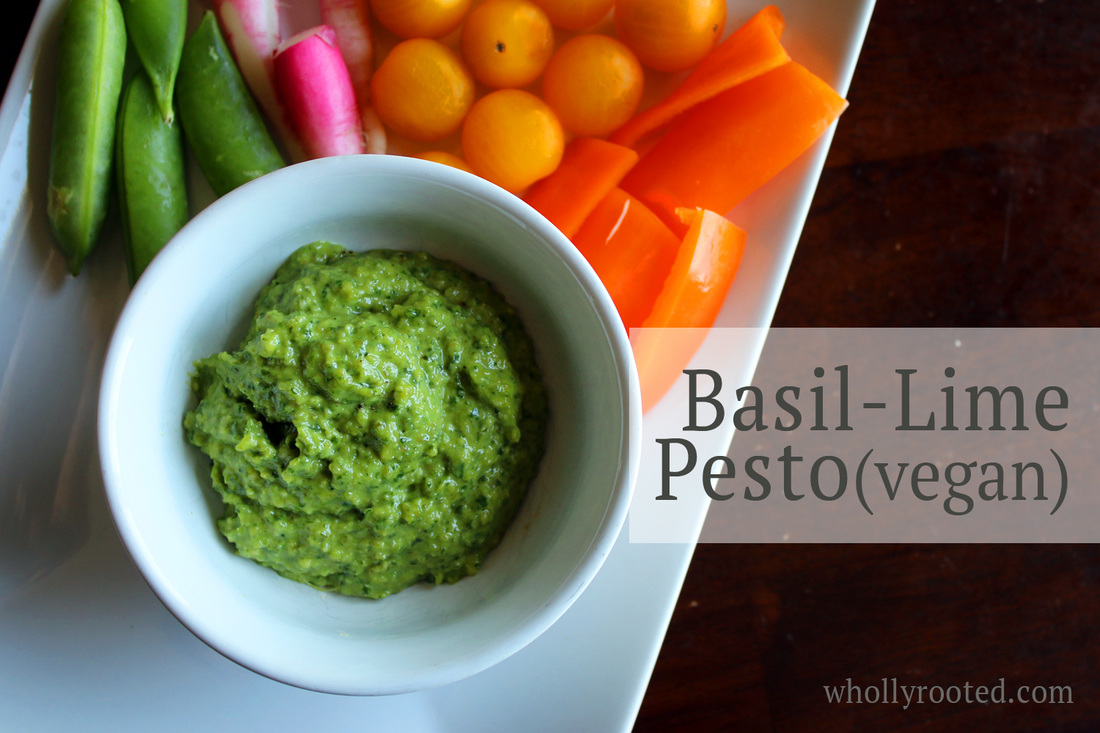
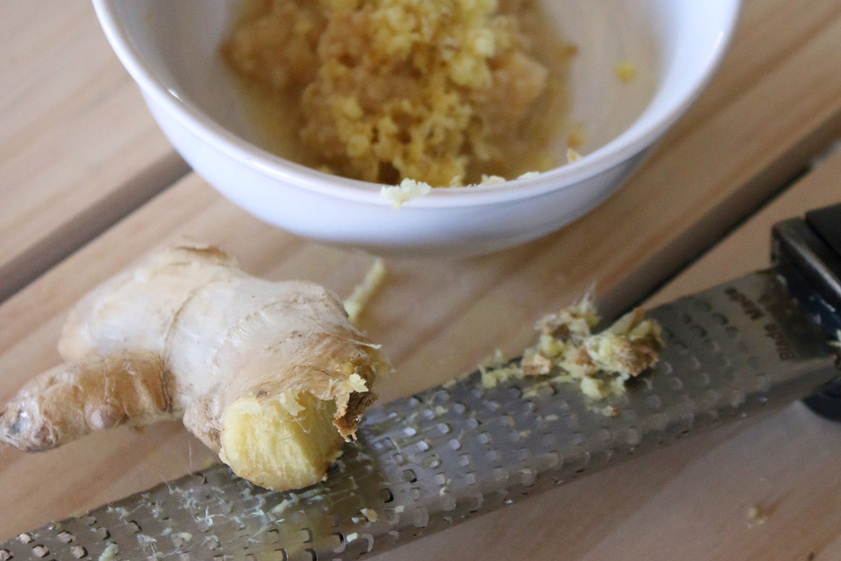
I love the beginning of CSA season. Spring arrives late in Wisconsin and it takes until June for the vegetables to really start rolling in, and it coincides with my burst of rapidly growing herbs which I planted a few weeks ago. Pesto is a favorite way to combine different flavors and use the herbs in abundance with all of the fresh vegetables. The key for me of course is the combining of different flavors. I like pesto, but we have a dairy allergy in the house AND I don't like drowning myself in mono-flavors. I love making different types of pesto so that there is fantastic variety not only for immediate consumption, but also enough to freeze/preserve for winter. This pesto is a favorite. I grow many types of basil, and no matter what type I have on hand, it works. This recipe is dairy free and combines fresh zesty flavors such as lime, ginger and garlic. I am also using cashews instead of pine nuts. Not only are they easier to find, but they are nutritious and I always have some on hand (I'm addicted to date/cashew truffles and cashew cream). You will be amazed at the flavor and want to make extra to freeze for winter! 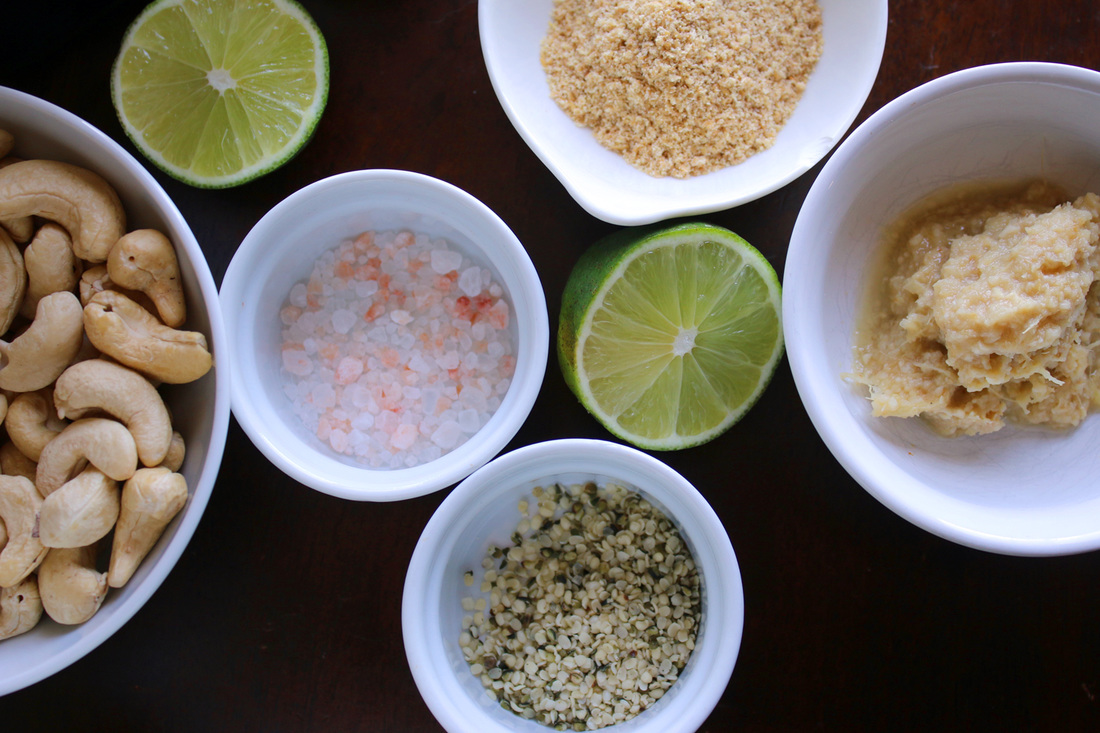
Basil-Lime PestoPrint |
{wholly rooted}There is nothing better than the taste of freshly homemade pesto with crudités, on grilled veggies, or over pasta. This version is vegan, and combines the amazing flavors of basil, lime, garlic, and ginger. The ground flax and hemp seeds make a great texture subsitute for the cheese -it is so good! GF/DF {ingredients}
First, using a food processor, pulse your raw cashews with the flax meal and hemp seeds until finely ground. 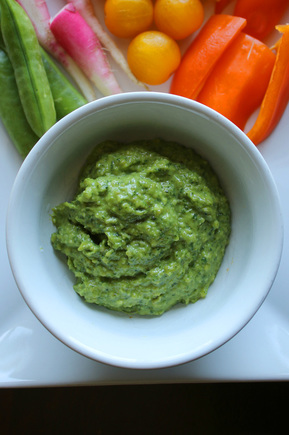
I made a single batch of this today, which will likely only last me a few days. So I am sure I will make some more as my genovese, persian, blue spice, thai, lemon, lime, lettuce leaf, and emily basils grow, grow, grow! bonus: This recipe is delicious and easy to prepare, but also packed full of good vitamins, minerals, healthy fats, fiber, and protein. Yum+. Cashews Garlic & Ginger Basil Lime |

denise cusackI am a certified aromatherapist, clinical herbalist, permaculture designer, organic gardener, plant conservationist, photographer, writer, designer, artist, nature lover, health justice activist, whole foods maker, and mother of two young adults in south central Wisconsin. 


Categories
All
©2007-23 Denise Cusack, all photos and text. Feel free to share my posts on FB or Twitter or online media or pin on Pinterest (thank you!), but please keep the links back to my website intact (meaning please do not take or copy my images off of this website and share them unattributed or without linking back here or use them without permission). Thank you! :)
|
 RSS Feed
