
Pea season has arrived! I love the fresh green flavor of peas and pea shoots. I love to eat snap peas raw, pickled, sautéed, and steamed. I love to eat pea shoots in salads, wraps, stir fry, and tacos. We get peas and pea shoots from our CSA, but this is one of the things I also grow because...well...we just can't get enough. Pea season is short and sweet, and I like to make the most of it.
This year I am growing a new (to me) variety of pea called Magnolia Blossom Tendril Pea. It makes a lot of tendrils and fewer leaves, allowing more air flow in the peas. The flowers are so beautiful, and the plants are huge producers! My husband has been traveling for business most of the past few weeks, so he is missing out on the peastravaganza. This recipe is quick and easy and super delicious. It takes advantage of those freshly picked peas that are so tender they don't need to be boiled or overcooked at all, and are crispy and perfect with a few minutes in the skillet. I am also growing Blue Spice Basil this summer and it has quickly become a favorite. It has a rich, exotic, spicy sweet fragrance that is AMAZing (and the bugs don't touch it). It worked so well with the toasted sesame oil and ginger that I am dehydrating a batch to see how it holds up when dried. Most basil doesn't dry well and so we freeze it or make pesto to preserve it. This basil has such a different thick hairy leaf and sublime fragrance that I am curious - I would love to have a lot dried to use all winter. We shall see! 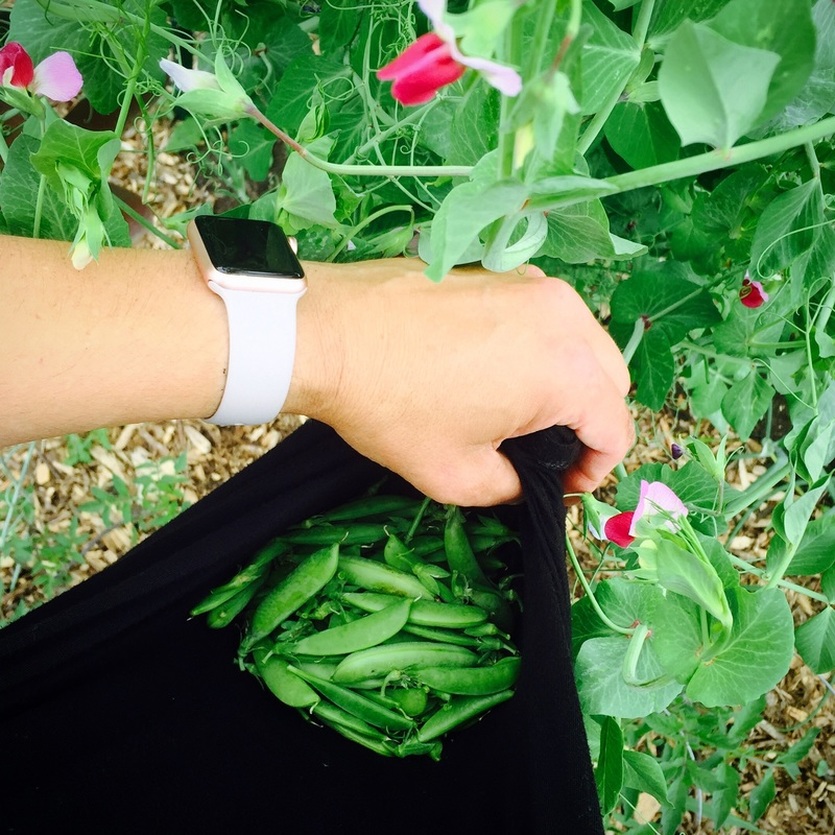
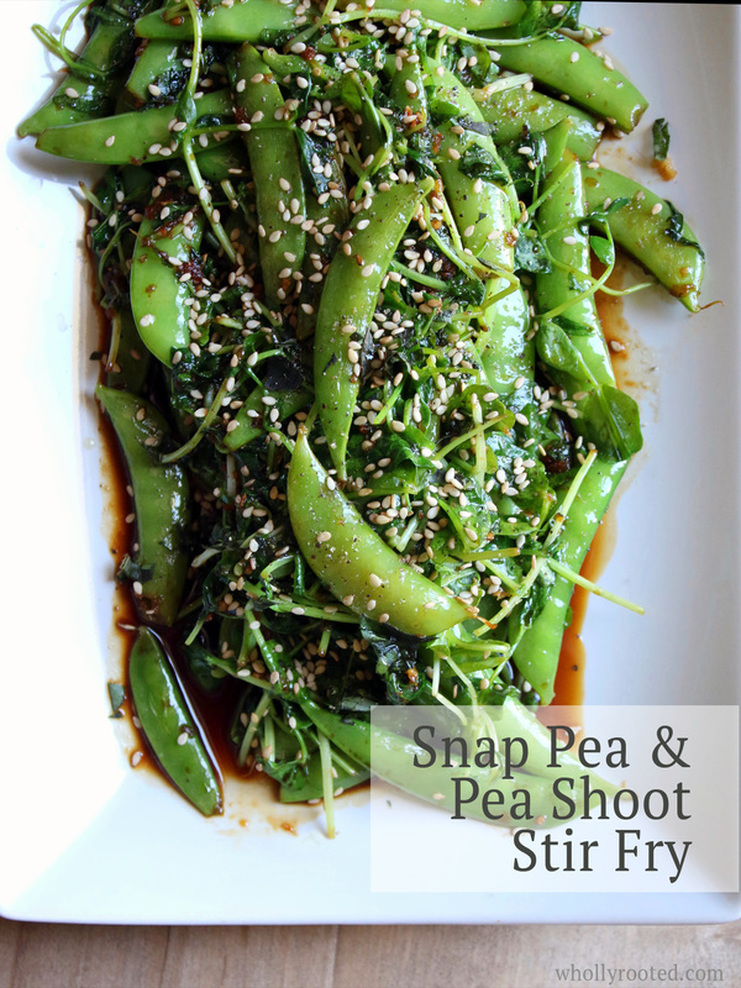
snap pea + pea shoot stir fryPrint |
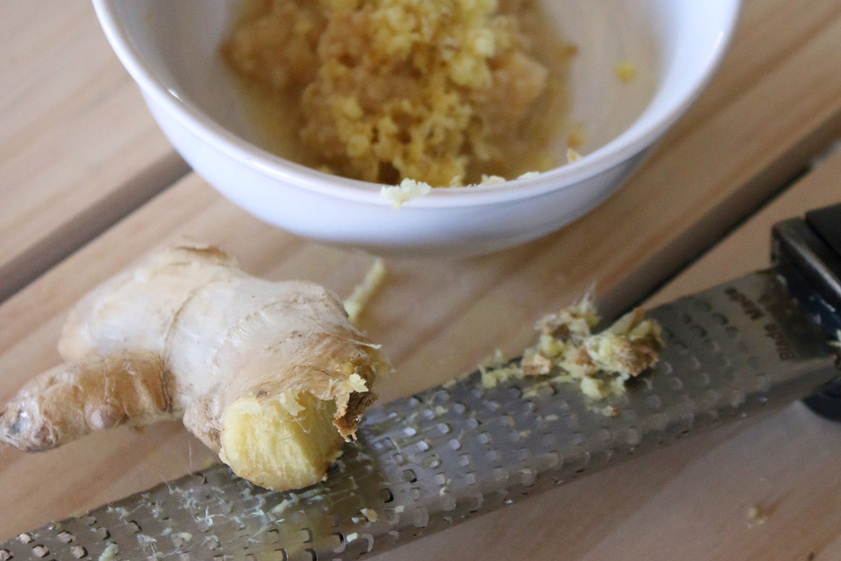
{wholly rooted}This recipe is perfect for pea season - it combines fresh snap peas and pea shoots with ginger, garlic, soy, and sesame oil to make a quick and easy (and delicious) dish. Serve as a side dish, or over rice for a main vegetarian course. {ingredients}
Directions:: 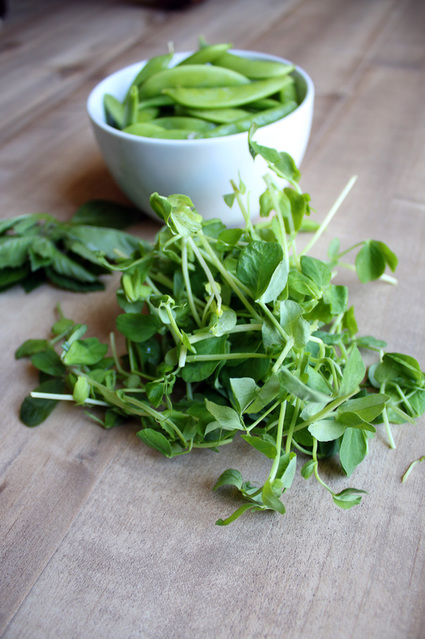
I am sure I am going to be sharing more pea recipes before our short season is over (peas make the best quick pickles!). Having pea season peak just as all of the herbs are cranking means that there are so many opportunities for different flavors and combinations. Fresh herbs and peas really do go well together as they all have that fresh green garden flavor that can't be beat. My husband will be gone for a few more days so the pea stir fry today was all mine. He had better hurry though, it has been hot and peas won't last forever! about the ingredients: Snap Peas Pea Shoots Blue Spice Basil Magnolia Blossom Tendril Pea Brown Sesame Seeds
0 Comments
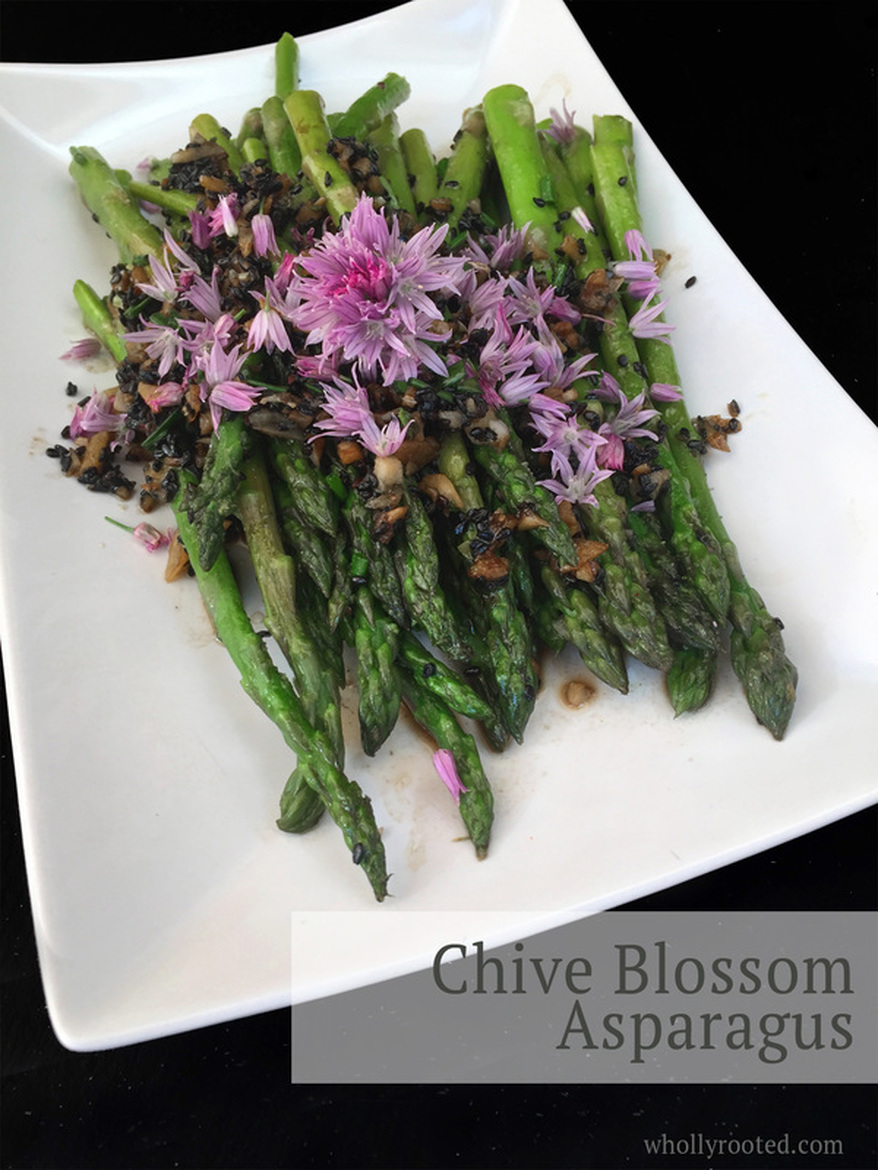
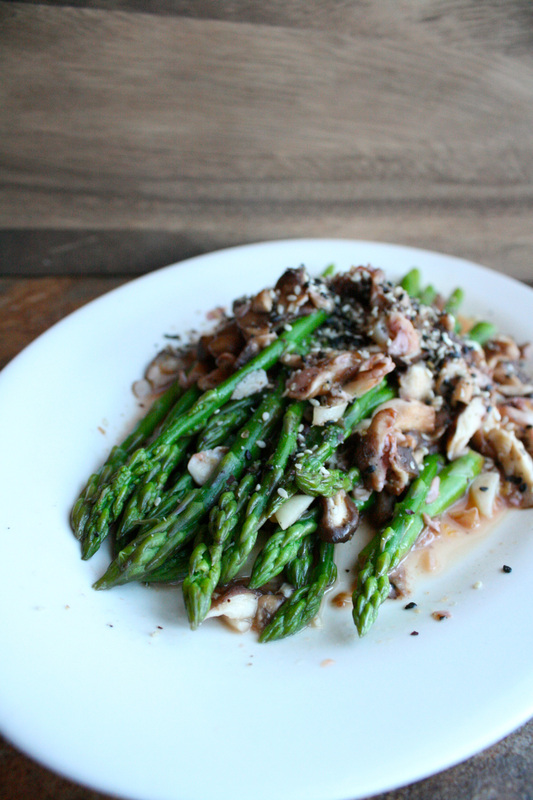
We have long winters here in Wisconsin, so when things start to grow, it is exciting. We also don't have long seasons of items once they do appear. Asparagus, rhubarb, strawberries - all are in and out quickly, so we tend to do as much as we can while they are here. I love asparagus. My husband didn't used to like it so much, but it has grown on him as I experiment and find more flavors it blends with. Asparagus and chives are amazing together. And the smoky richness of sesame oil, the salty flavor of soy, and the crunchy bite of black sesame all meld together to make an awesome asparagus dish. I usually make this as a side dish, but it is also fantastic over a bed of lettuce (or arugula!) with a little soy/sesame oil dressing drizzled over the top.
Chive Blossom AsparagusPrint |
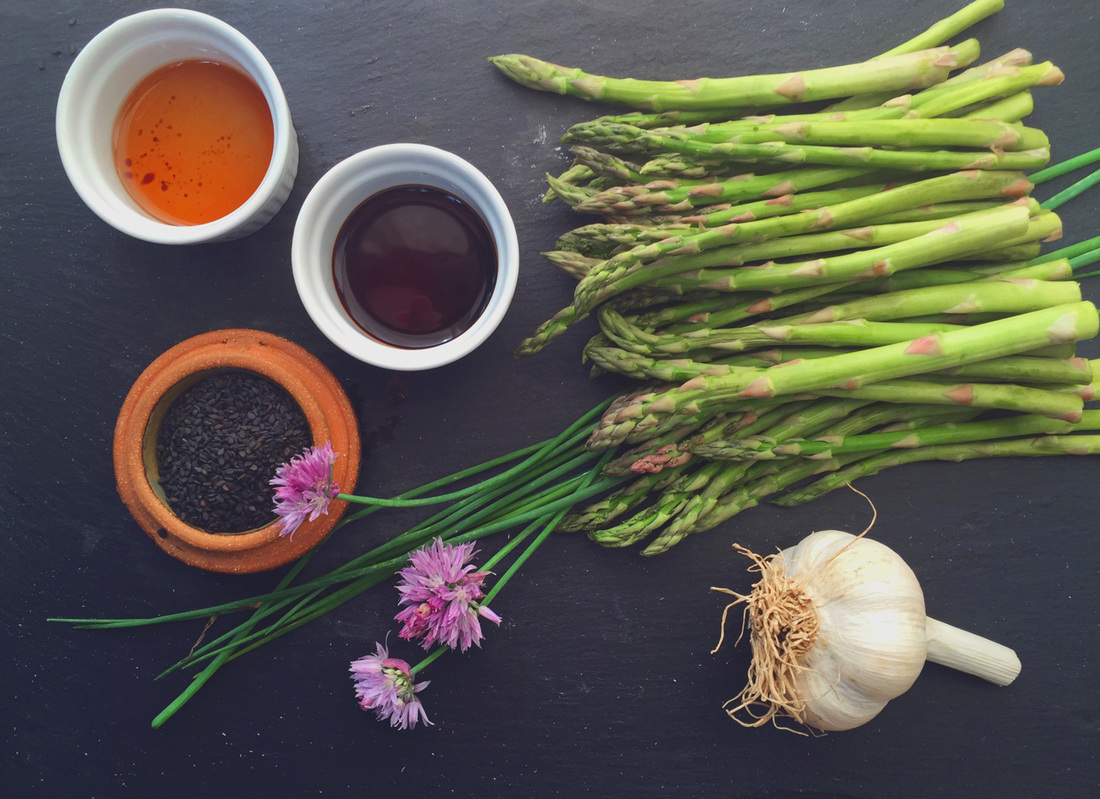
{wholly rooted}Bright green spears of asparagus are among the earliest of garden harvests. The thin, delicate spears work well with many different flavours, and are delicious steamed, grilled, as soup, pickled, and as a side dish. This recipe combines early season asparagus alongside another spring visitor – chive blossoms. {ingredients}
Blanch your asparagus for about 2 minutes in boiling water.
This recipe is quick and easy, but has a lot of flavor. A great way to combine the ingredients of spring into one fantastic dish. Chive Blossom Infused Vinegar Chives are a mid to late spring herb that are often overlooked. Chives are delicious in salads, egg dishes, sprinkled over soups, and more. Don’t forget the blossoms either. The delicate pinkish purple flower heads have a lovely onion/garlic flavor. Chive vinegar is a quick, simple way to capture some of that. 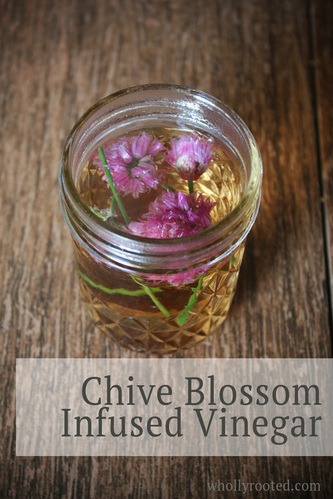
Directions:
Pack a ½ pint jar with (clean) chive blossoms, along with a few chive stems. Pour over any type of mild white vinegar you like – you can pour over room temperature vinegar, but warm the vinegar first for best results. Make sure all blossoms are fully covered. Let sit for a few days in your fridge until the blossoms have turned the vinegar a lovely shade of pink. Strain out the old chive flowers (add a few fresh ones for decoration if you wish), store in the fridge, and use in salad dressings!
Spring may seem slow to start some years, but when the first greens, herbs and veggies appear we can't get enough. Here is to spring, and fresh food from the garden!
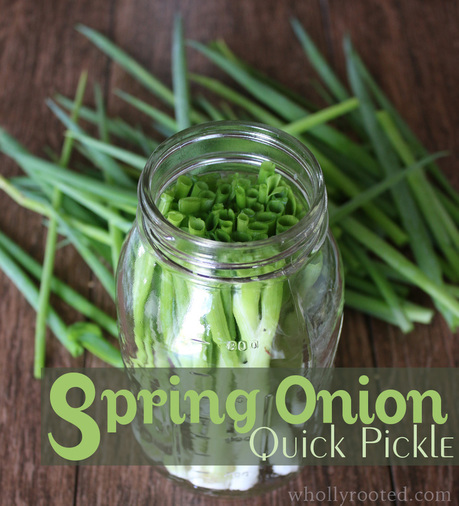
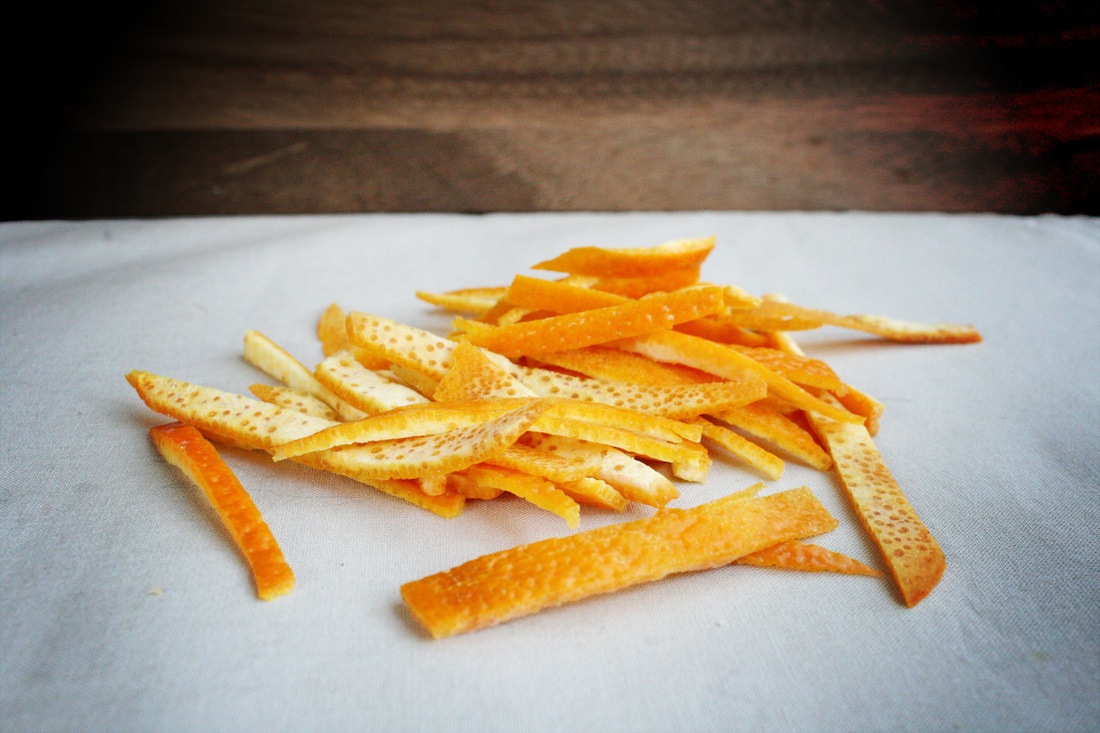
I like quick pickles. I don't have a ton of time to make dozens of jars of the same thing endlessly, and quite honestly I get bored with flavors and really like mixing it up, using what is fresh on hand, and having small batches of a variety of quick pickles to liven up meals, crudités, salads, and of course for snacks. At any given moment year-round I have a few jars of something in my fridge. Right now I have pickled cucumbers and garlic in a slightly sweet brine, and pickled daikon which are amazingly peppery and crunchy. Spring onions are one of the first things in spring that we can find here in Wisconsin, and I like pickling them so that I can spread them out throughout the summer. I like the small green brilliance of their flavor in a pickle and they work on salads, burgers, or with a plate of hummus and tomatoes. 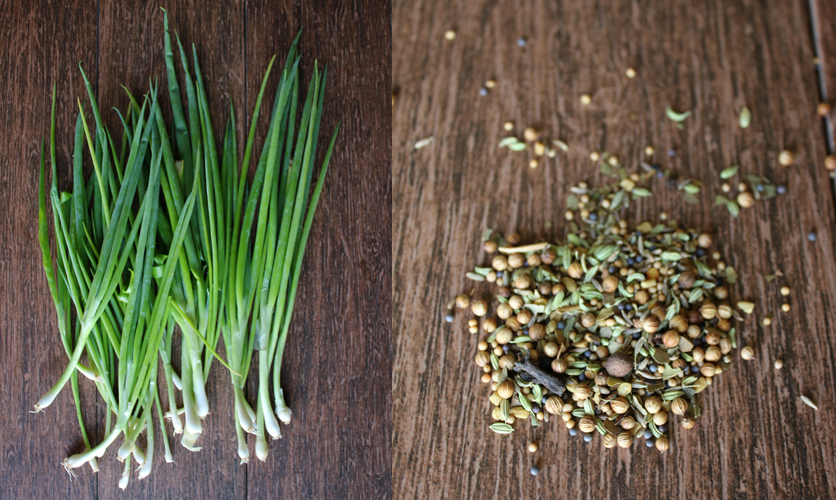
Spring Onion Quick PicklePrint |
{wholly rooted}Quick pickles are a delicious way to use the bounty of the season to create a variety of flavours and textures. This recipe uses one of the gardens earliest arrivals – spring onions, or scallions. {ingredients}
Heat water/vinegar/sugar/salt/garlic in a pot until dissolved. Let cool to room temp.
Or try this: Add some additional zesty flavor by reducing the white vinegar in the recipe above to 1 cup and add 1/2 cup umeboshi plum vinegar.
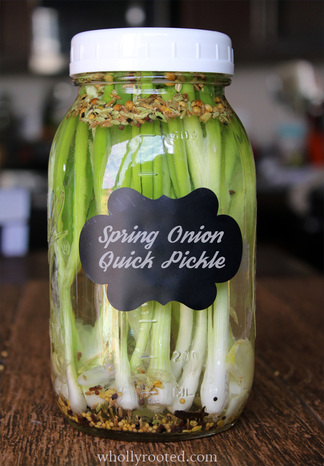
Another bonus of having a fresh pickling brine is when all of your salad greens start coming in full blast you not only have some pickled scallions to put on your salad, but you have a tasty brine to use for salad dressings. Simply mix a little pickle brine with extra virgin olive oil, s&p, and a tiny bit of grainy mustard. Stir and boom. Delicious dressing.
I know most of us have the image of a farm woman in her hot kitchen with 422 pounds of one kind of cucumber frantically pickling and canning until 3AM. But these days we can get such a wide variety of seeds and can easily grow such a diversity of herbs, fruit, and vegetables, that we don't need to mono-pickle. Small batch pickling is a quick, easy, and delicious way to preserve the extras, the favorites, and the flavors of the season! Spring comes so slowly after a long winter, but jumping back into the garden and kitchen to start preserving again feels good. After a long winter it feels pretty much like a big TA-DAAAAA! 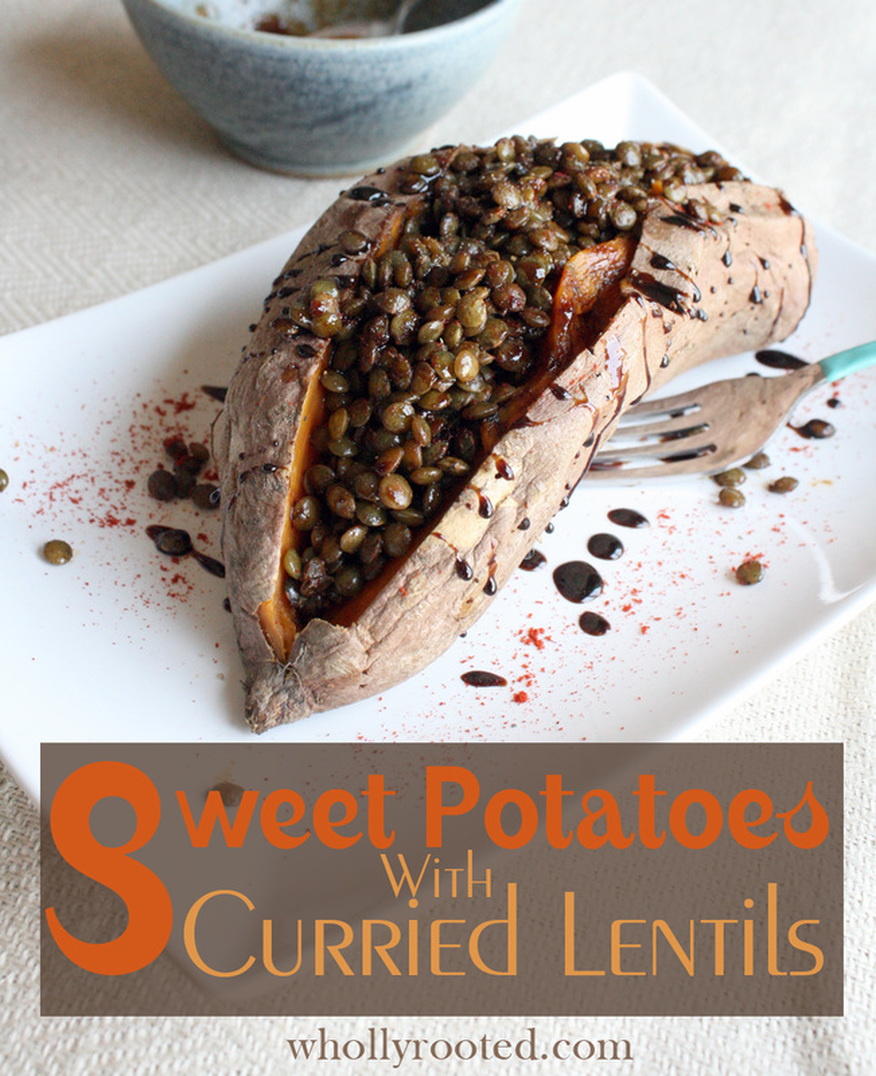
A favorite staple in our fall CSA share each week is sweet potatoes. Sweet potatoes are a fantastic fall and winter food. They are packed with vitamin A, vitamin C, manganese, B vitamins, potassium, fiber, and more. They are healthy, delicious, and can be dressed hundreds of ways. They can be baked, boiled, added to stews, stuffed, and used in savory or sweet dishes. A simple yet delicious way to enjoy sweet potatoes is baked with a filling in the middle. This recipe is simple and the taste is warming and rich. I often bake a bunch of sweet potatoes at once over the weekend, and then keep them in the refrigerator for daily lunches. It is easy to re-heat and top with whatever you like. Perfect "fast food" ~ yum. 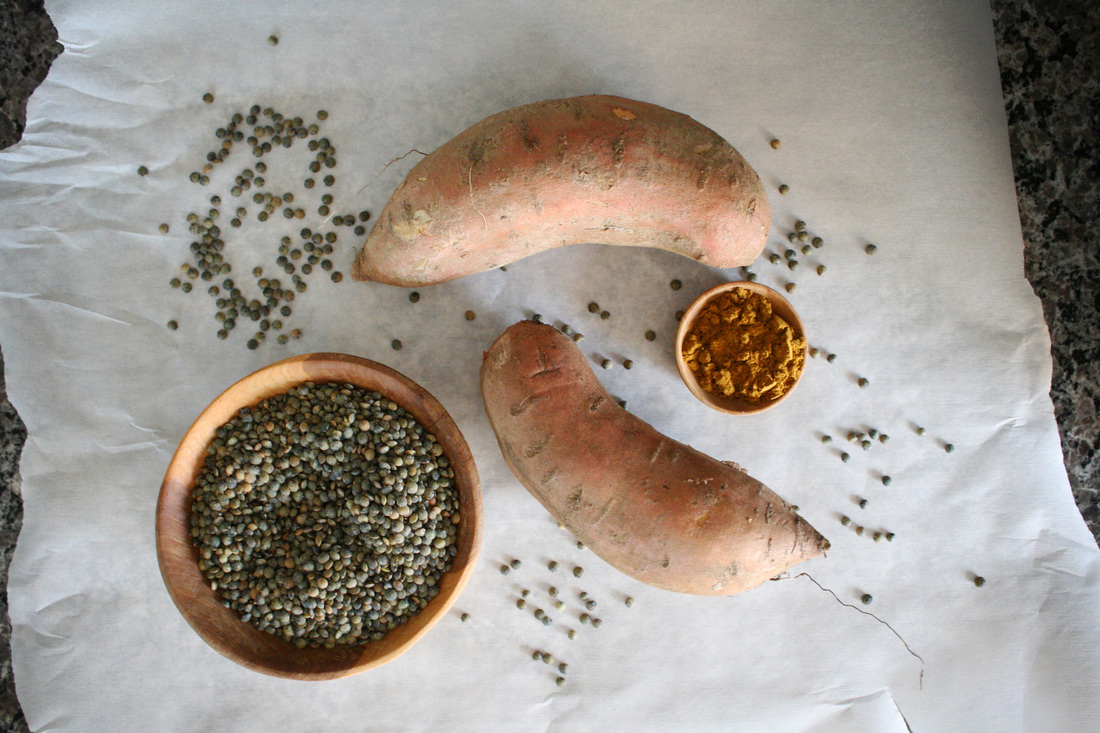
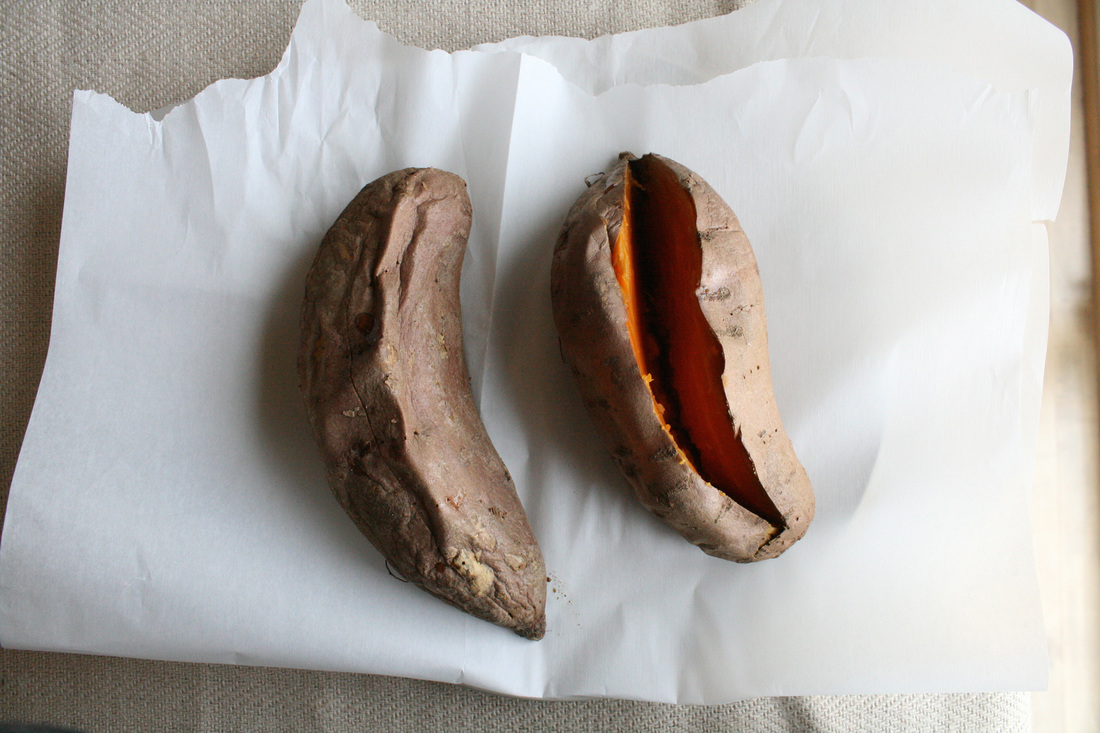
Sweet Potatoes with Curried LentilsPrint |
{wholly rooted}This recipe takes advantage of the smoky sweetness of sweet potatoes by combining with lentils and curry. This is a rich and warming meal, perfect on a chilly day. {ingredients}
Sweet Potatoes: 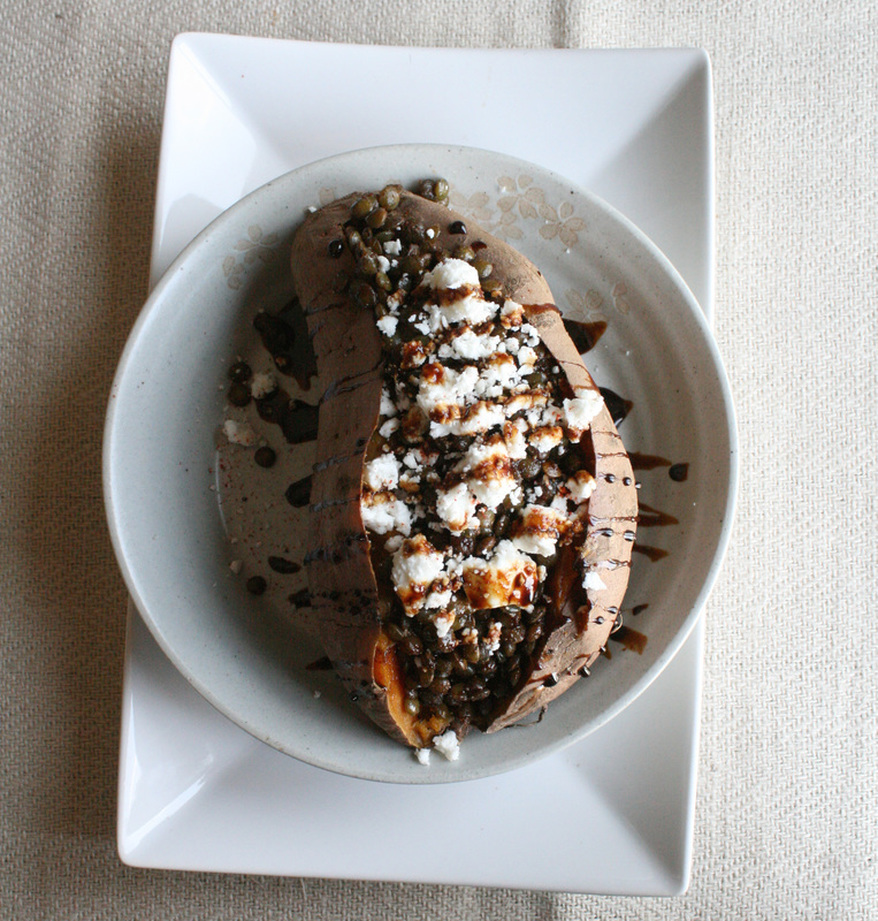
Sweet potatoes are great for autumn and winter potlucks. Try setting up a create-your-own-sweet potato bar. Roast the sweet potatoes and serve them next to an assortment of toppings and let everyone make their own. I use sweet potatoes a few times a week in fall and then worry I won't have enough to last all winter long. I know we have a few more fall CSA shares before our season is over, so I plan to stock up!
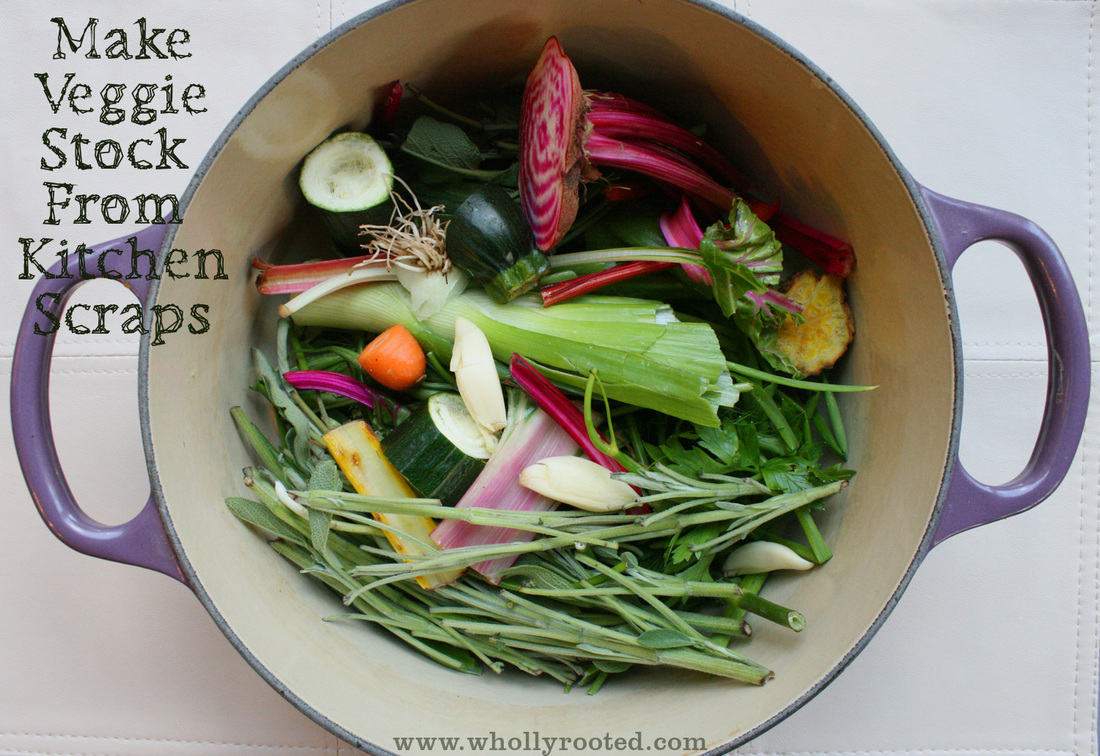 This is the time of year when we all have a lot of veggie scraps. Peels, ends, stems, and stalks. Before you compost those perfectly fresh scraps, think about making fresh veggie stock. It is a great way to use all of the healthy fresh ends and peels and pieces. The stock can then be used for making everything from soups and stews to casseroles or even used as the pasta/rice/grains water. By using scaps, you are saving a lot of usable food from the garbage bin or compost pile and turning it into liquid nutrients for the whole family. The easiest way to make fresh vegetable stock is to save all of your kitchen scraps as you meal prep throughout the week and store them in a jar or bag in the fridge until you are ready to use (or the freezer if not using within a few days). I tend to prep all of our CSA box on Wednesdays along with community garden picks from Tuesday, so that everything is ready to use for the rest of the week. I can easily fill a whole pot with stems, peels, and ends every Wednesday from June to November. Veggies that are good for stock making include onion ends, scallion bits, carrot skins and tops, celery bottoms, beet greens, pea pods, swiss chard stalks, green bean tips, zucchini peels and ends, and all stems from herbs like parsley, thyme, sage, savory, rosemary, or basil. Skip the stronger cruciferous veggies, as they can add an unpleasant aroma to stock (cabbage, broccoli, cauliflower, brussel sprouts). I use kale stems just fine though. The key is to use fresh scraps - nothing bad or moldy - your stock will taste like what you put in it.  So fill a 3-4 quart stockpot with your leftover veggies and herbs. Add a bay leaf or two, a few peppercorns, a teaspoon or so of pickling spices (coriander, cumin, dill, clove), and 2-3 cloves of garlic. I also like a little dried chili pepper. If you have a lot of only one type of veggie, add a carrot, a stalk or two of celery, and an onion. Fill with enough water to cover the veggies/herbs (don't worry if you have a few stalks sticking out, it will cook down). Bring just to a gentle simmer on medium (not a hard boil), reduce heat, and simmer on low for 1-2 hours. Strain all of the stock to remove vegetables, herbs, and spices. Pour the liquid into sterilized canning jars or freezer jars. Let them cool to room temperature first, and then freeze immediately or store in the fridge if you will be using within a week or two. Makes approximately 2 quarts/2 litres. 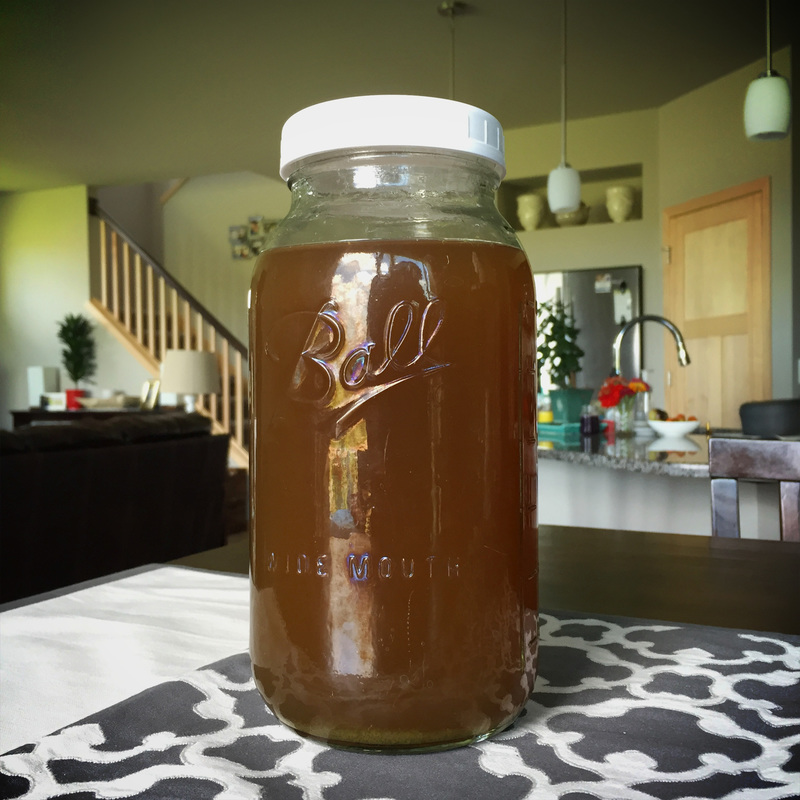 Of course you can save chicken bones and make chicken stock too. I find that with all of the garden and CSA bounty my husband and I eat a lot of vegan meals in the summer. The boys have a lot of poultry since there are mammal meat and dairy allergies in the house, but there is only so much bird a girl can take (and I love summer bounty!). So for me, having fresh vegetable stock which can be used for cooking anything and everything is so convenient and really adds great flavor to everything. This veggie stock + the vegetable bouillon I make is a great base staple for just about any recipe. So don't toss the scraps! Make veggie stock! 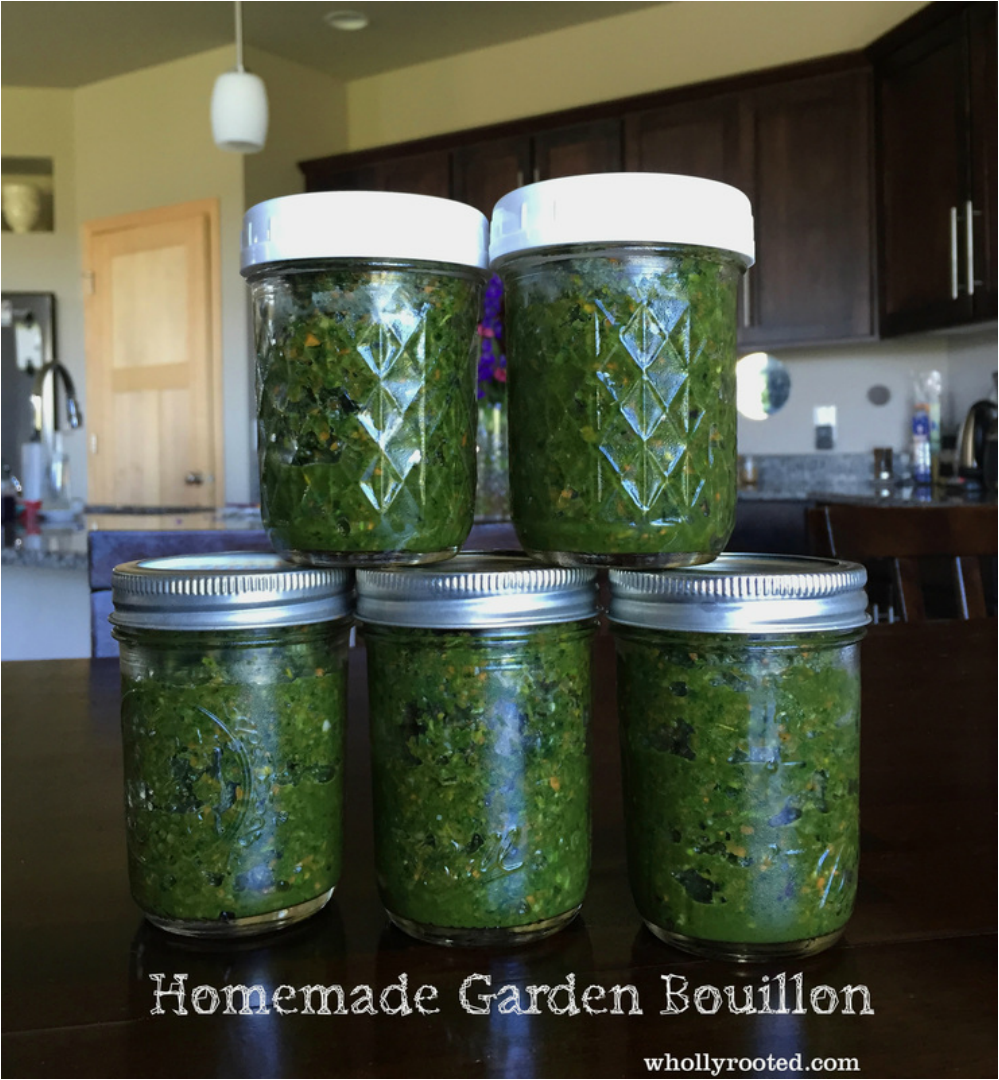
Long ago I found a recipe for bouillon in the River Cottage Preserves Handbook. A lightbulb went off, and I have been making my own version of veggie bouillon ever since. By blending all of the freshest herbs and vegetables in peak summer and preserving them with salt, you save that crisp fresh flavor which is fantastic in winter when making soups and stews. When you think of bouillon you probably imagine a hard dry cube - but this is more of a thick paste. You use it like you use a cube though, by stirring a spoonful into your recipe when making soups, broth, stews, or even pasta. This is very salty as bouillon should be, and the salt is what preserves the green vibrant flavors – a little goes a long way. I call my version garden bouillon because I use many things found in my garden. I like to make several batches over the summer so that I have enough to last all winter. Keep a jar in the fridge for using now, and freeze the rest. This has a high level of salt so it will never freeze quite solid, so you can still spoon out some even fresh from the freezer. I like to freeze in 1 cup jars so that I can pull one out at a time throughout the year. A food processor is the best tool for the job. 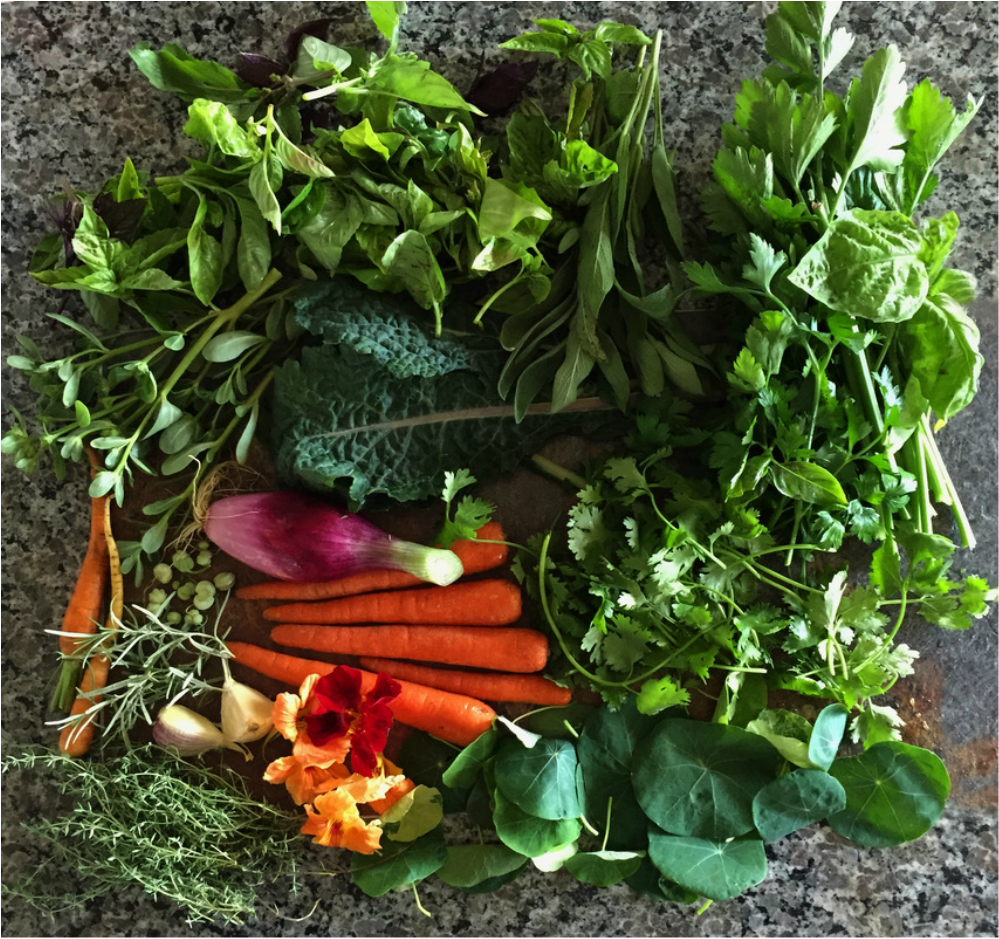
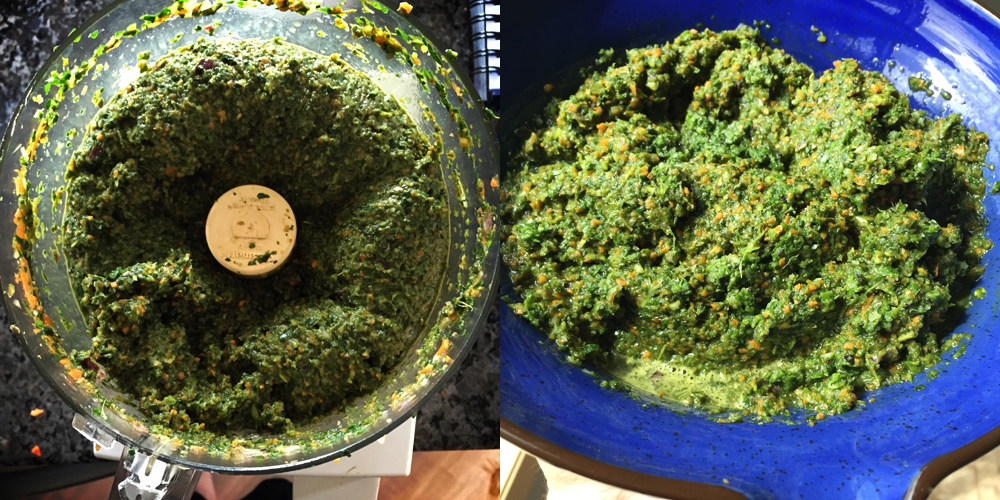
Homemade Garden BouillonPrint |
{wholly rooted}The nice thing about homemade bouillon is that you use what YOU have in your garden. Just think about what flavors go well together. I love adding extras like kale, purslane, nasturtiums (leaves, flowers, capers), coriander heads going to seed, celery root, leeks, and anything else in season at the time that adds a nice punch of flavor plus lots of great vitamins and minerals. I always start with the base aromatics of onion, garlic, carrot, and celery, and then add additional flavors from there. So make your own combo - the main thing to remember is to have a 4:1 ratio of herb/veggies to salt. So for every 400 grams of herbs/veggies/flowers, use approximately 100 grams of good quality sea salt. {ingredients}
This is approximately 780+/- grams of veg/herb, so I blended in just under 200 grams of good quality celtic sea salt. I will make a few more batches as the summer goes along, using what I have fresh and in season. This is a great way to preserve the fresh, vibrant summer flavors, to use long into the winter! 
We had a very busy week, with appointments for A and doing some weekend travel to visit Fermilab and other fun spots. CSA day always seems to reign me in no matter how busy we have been, and give me a sense of summer ticking away, pickup day by pickup day. 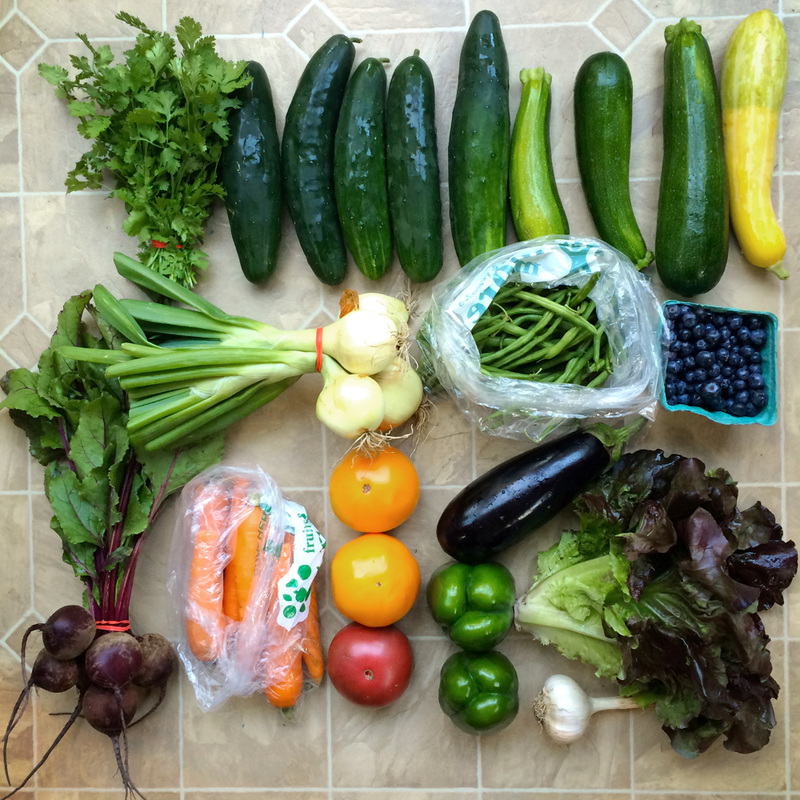
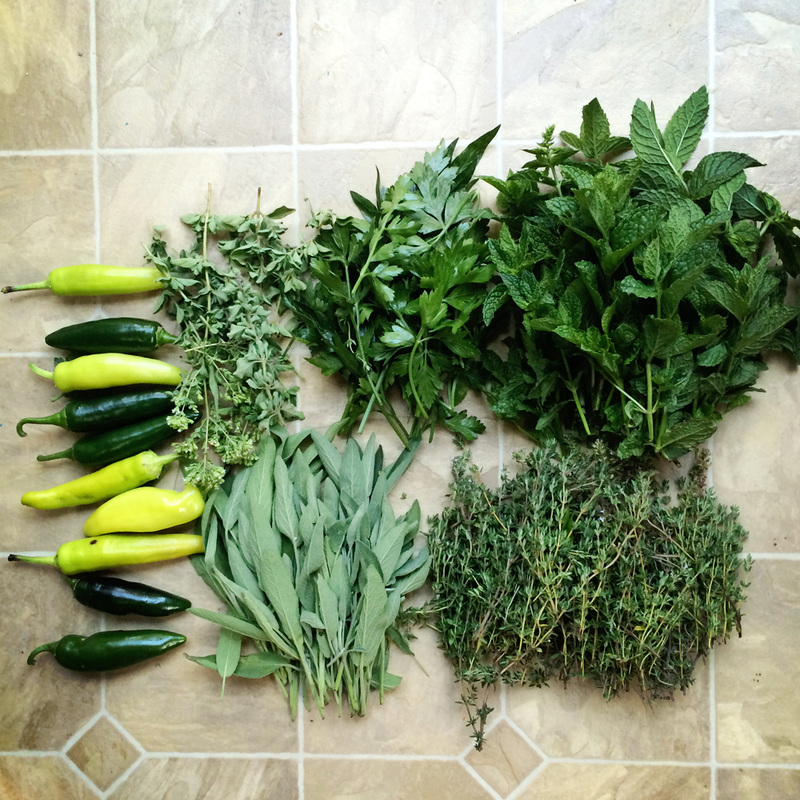
CSA Week 8 (8!!!):: cilantro, cucumbers, zucchini, blueberries, green beans, onions, beets, carrots, tomatoes, green peppers, eggplant, lettuce, and garlic. I skipped the fennel, as it is not very popular in this house. U-Pick:: hot peppers, oregano, parsley, mint, sage, thyme, and, of course, flowers. 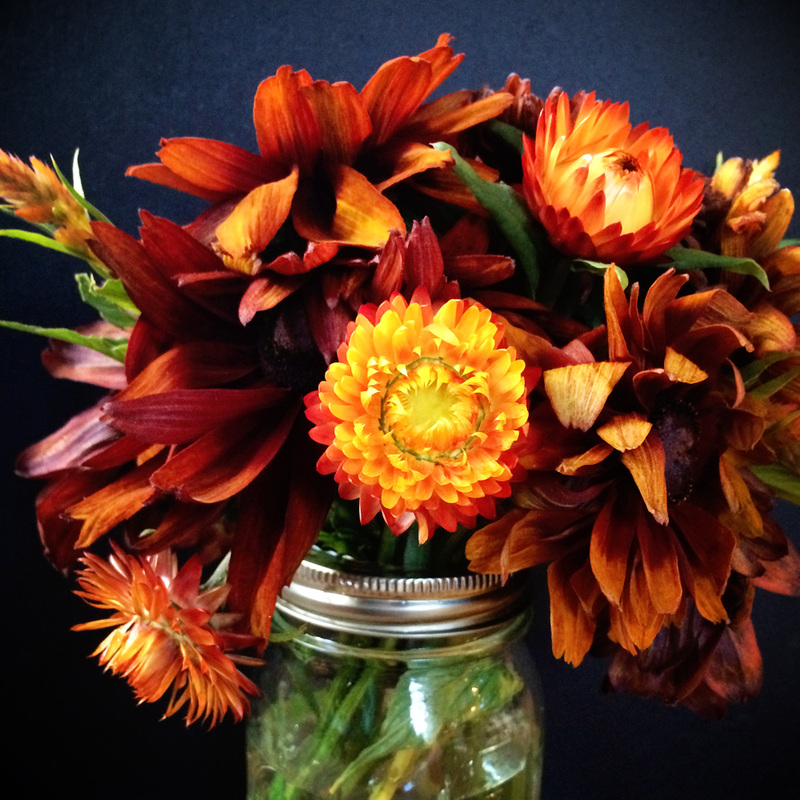
It is almost August! Time flies. In no time at all we will be overloaded with tomatoes and corn, and not long after winter squash and root vegetables. Week by week, ticking through summer. What is in season where you live?
This week we have had a huge cool down with chilly mornings and cold rain. Today was sunny and perfect. Just right for wandering the herb rows picking, gathering flowers, and working in the kitchen. I know the heat will return, but what a treat to have cool weather in July. 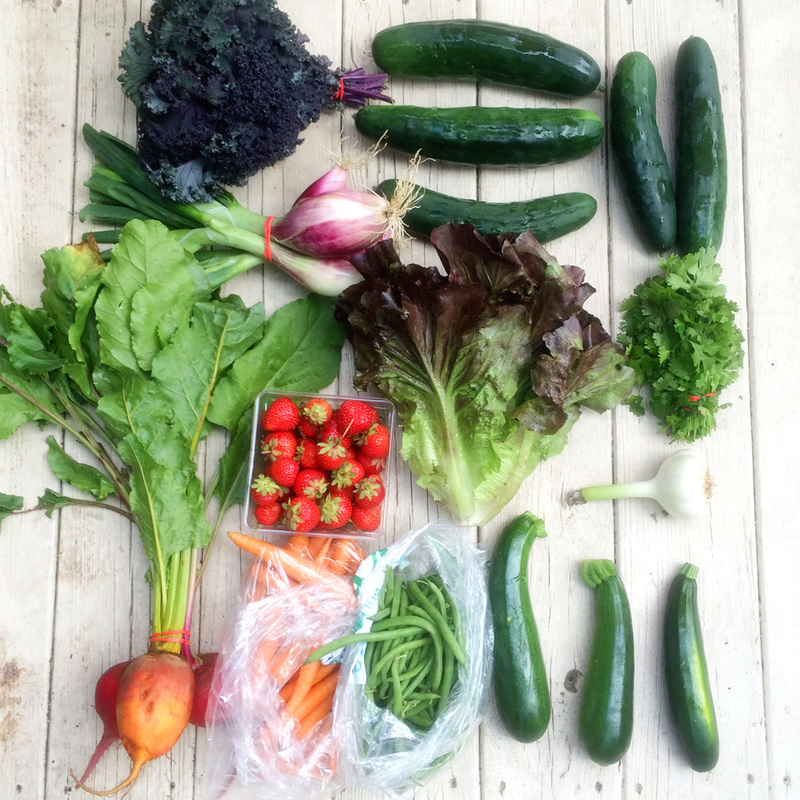 CSA WEEK 6: summer crisp lettuce, green beans, strawberries, carrots, cilantro, summer squash, torpedo onions, kale, beets, fresh garlic, cucumbers 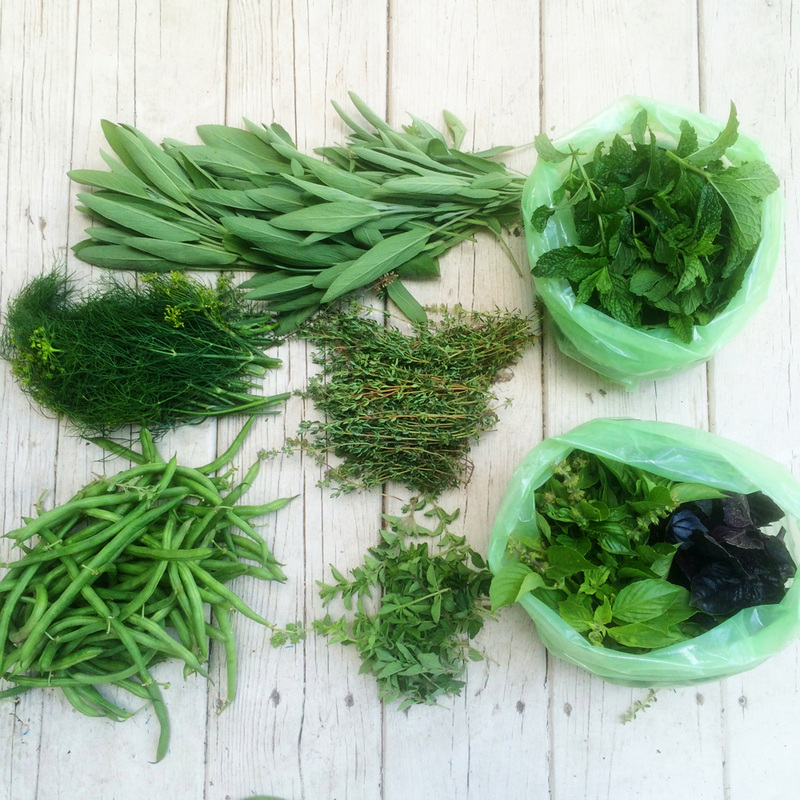 U-Pick Herbs and Extras: sage, mint, basil, oregano, thyme, green beans, dill 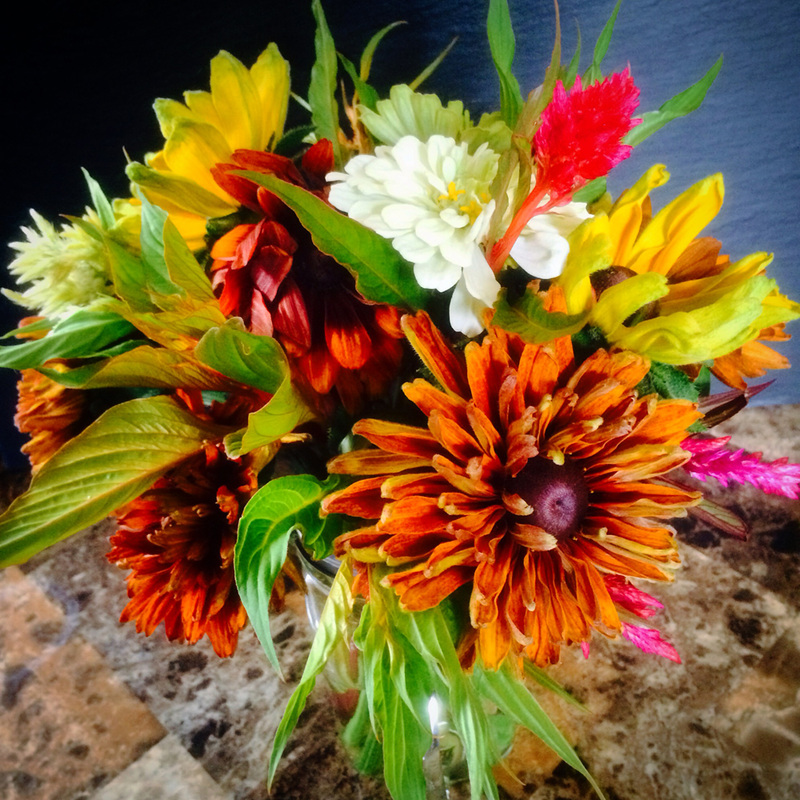 And of course the flowers. I grow flowers at home too, but don't get all of the full sun so mine are always later. I love that the CSA we belong to has row after row of flowers to pick from right in front of the barn. THis week I was drawn to the lovely golds and oranges and whites. SO beautiful!
What is in season in your area? 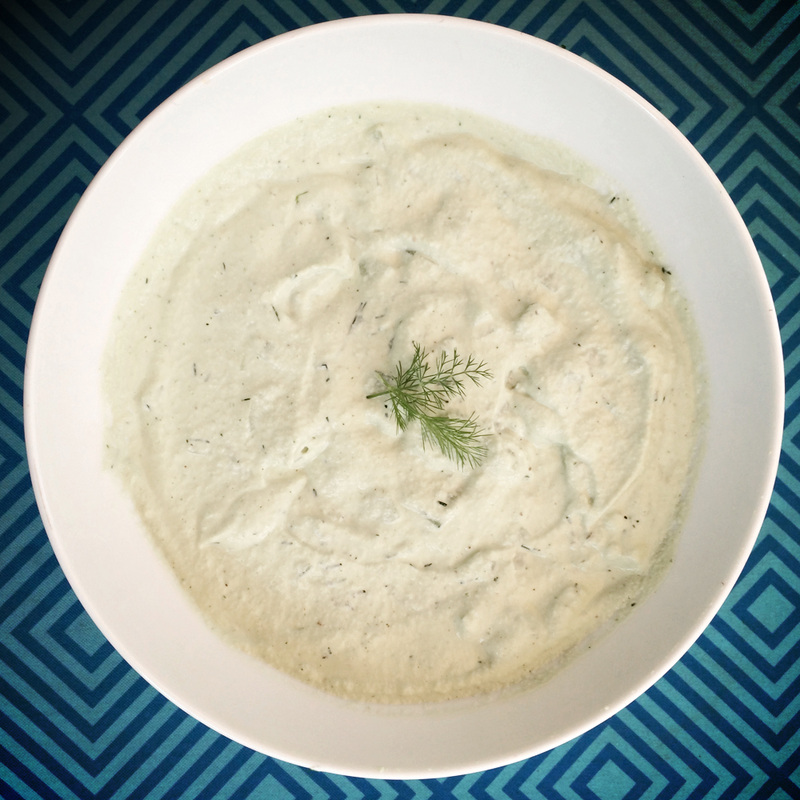
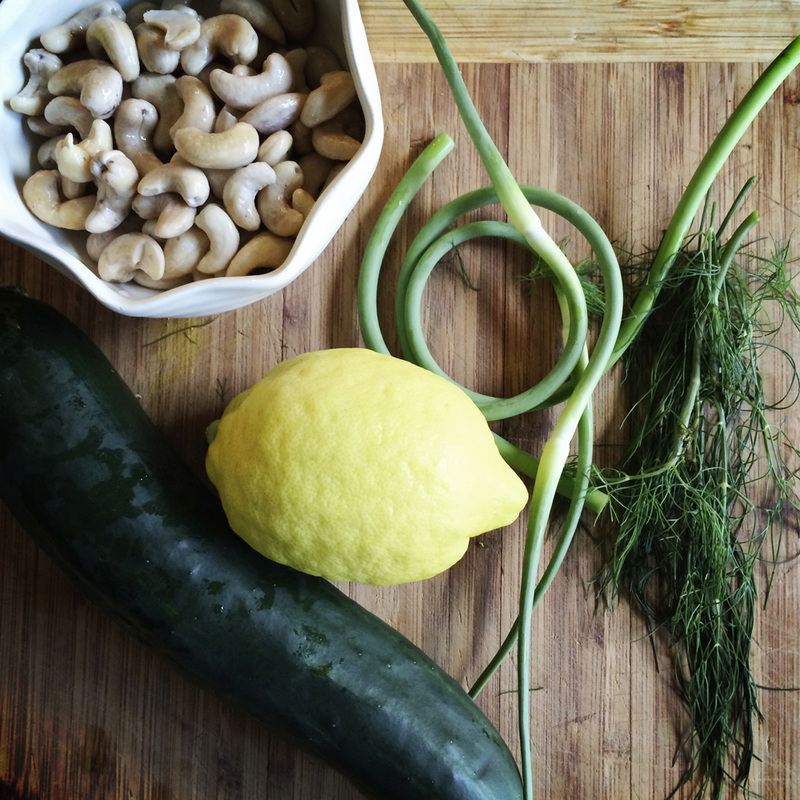
My entire childhood I was dairy-free. Not in the era of coconut yogurt and almond milk and vegan butter. But in the era of everything tastes like cardboard might as well skip it. I remember having horchata in Chicago once which changed my idea of milk-like drinks forever. I had a few years where I could almost tolerate certain types of dairy (if I didn't mind feeling crappy the next few days) and then I was vegan for many years. With my 11 year old it is a severe life-threatening allergy, so we are now very strict about the dairy. We try to keep it out of the house completely, as he reacts severely to even small amounts of contact. Since I didn't grow up on dairy and avoided it for decades, I don't really "miss" anything - but there are some foods I remember fondly and have re-created over the years. Tzatziki is one of those things. It reminds me of my years living in the Andersonville area in Chicago (a neighborhood full of amazing swedish, greek, and middle eastern restaurants ). This recipe is perfect in summer -and is my favorite dairy free tzatziki. It has the texture, taste, and smell. It is delicious with crisp vegetables. Drop a dollop in chilled cucumber soup. It even makes a great salad dressing. The base is cashews, which gives it a rich flavor and a protein boost.
Dairy-Free TzatzikiPrint |
{wholly rooted}This tzatziki has the creamy tang of a traditional recipe, but is dairy free! Serve with lamb or chicken, as a dip for fresh veggies, with pita chips, or as a dollop over chilled summer soups. Delicious. {ingredients}
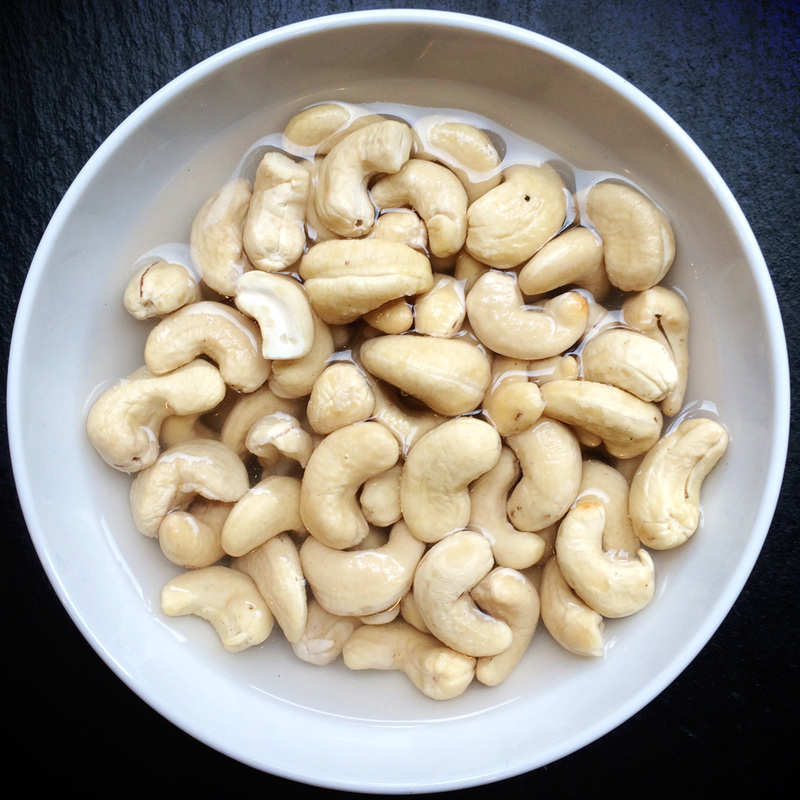
To soak the cashews: Put 1 cups of raw cashews in a canning jar or bowl, cover with hot water from your kettle (meaning hotter than tap but not boiling), let soak 1-4 hours. Drain. 
To make a dressing, take a few tablespoons of the tzatziki, add equal amount olive oil, and a teaspoon or two of good vinegar. Add a pinch of salt and pepper, and then mix well. It is creamy and delicious! 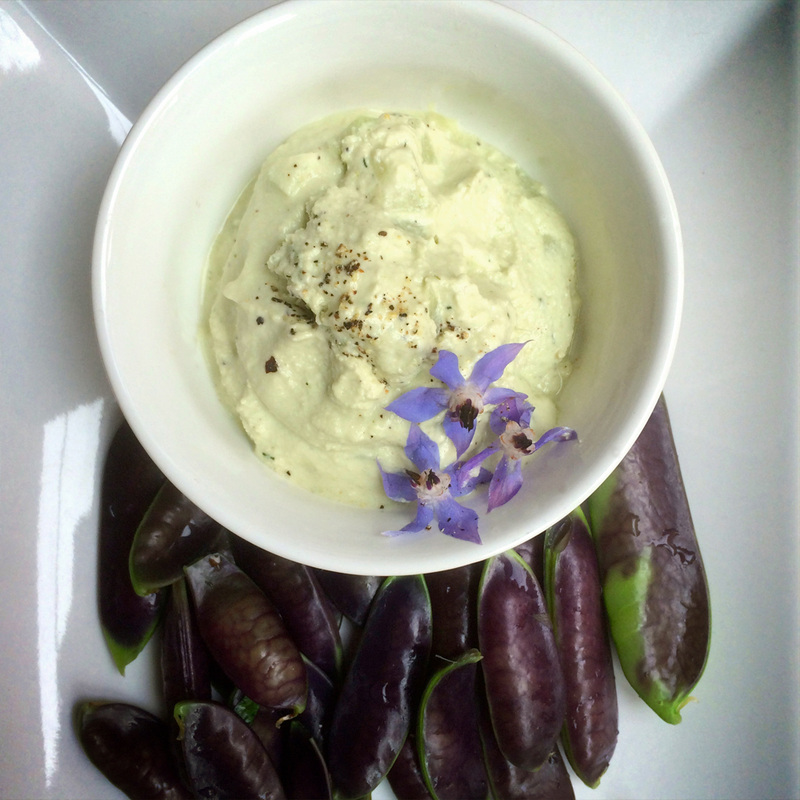
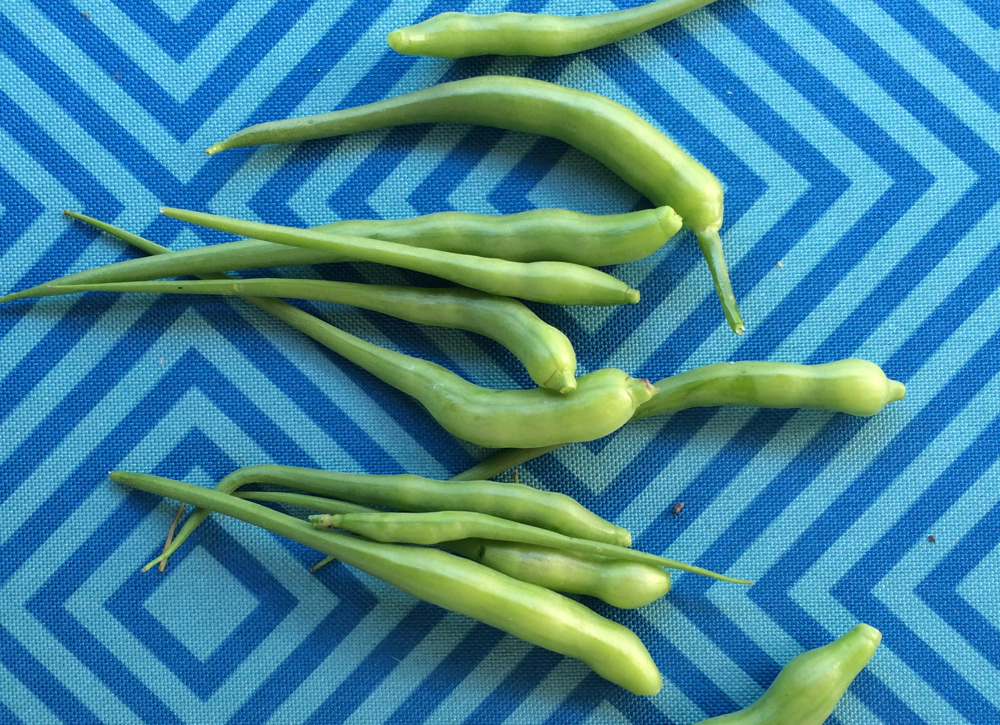
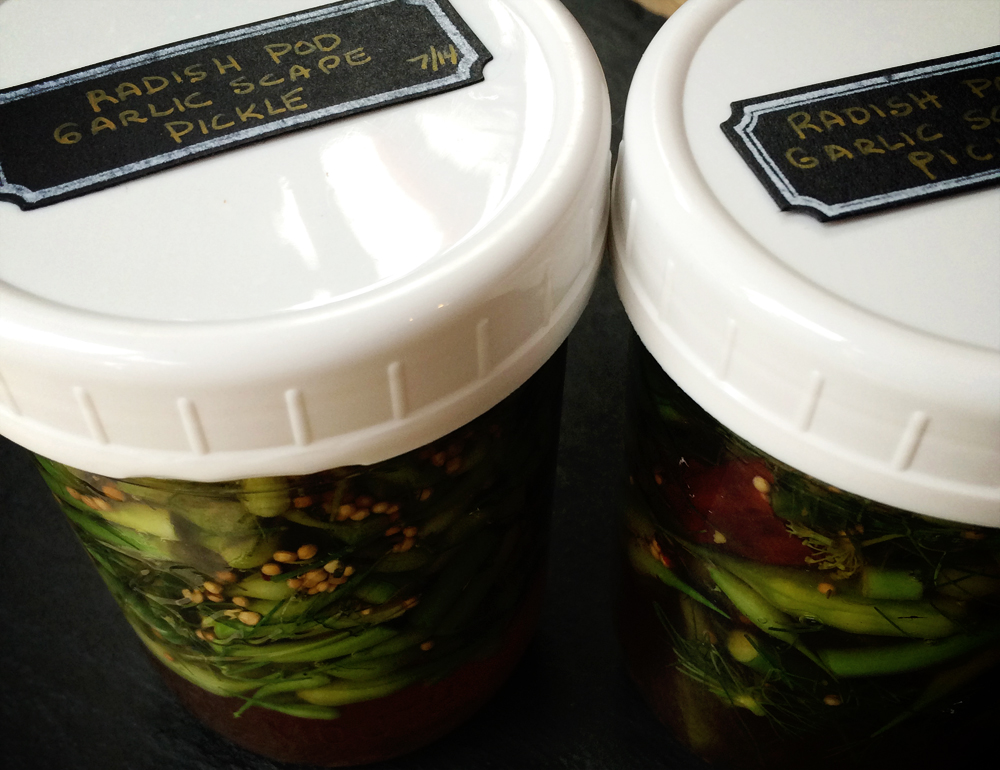
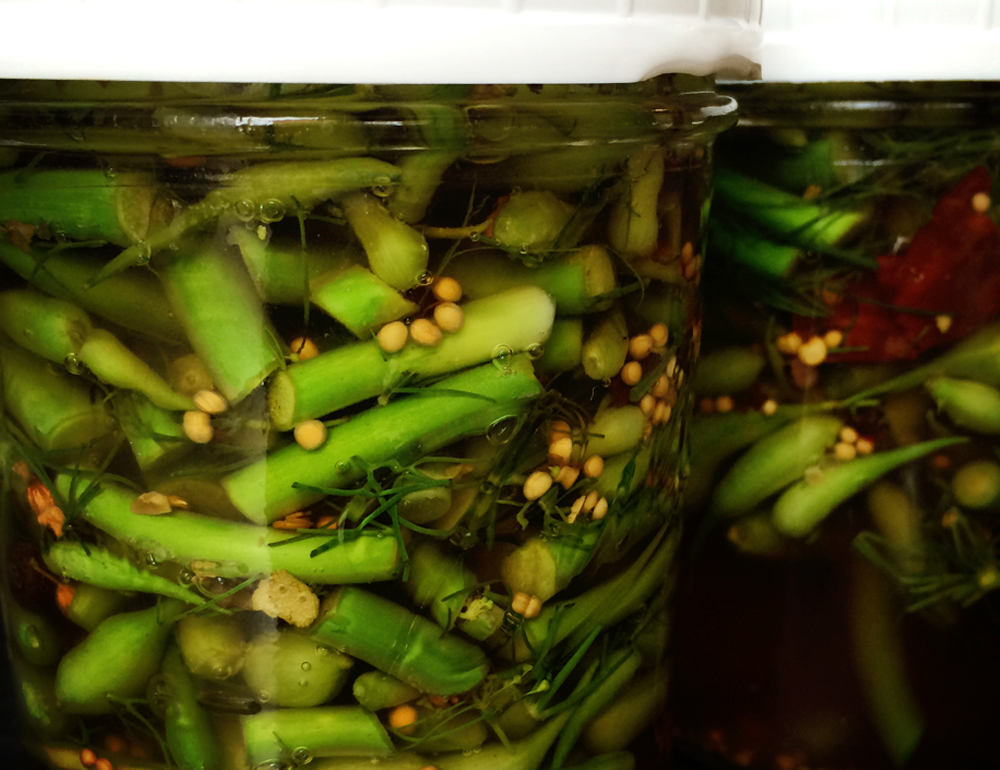
While I like pickles, I like finding other ways to use our abundance of cucumbers throughout the summer. I like to keep a chilled bowl of this in the fridge in season so it is always ready for a snack, with a meal, or over a salad!  I know I have mentioned a dozen times how much I love quick easy refrigerator pickles. I can make small batches. It is fast. It is easy. I can have a nice variety of pickled things in my fridge at any given moment. I can use what I grow in my own garden NOW or whatever is excess in my weekly CSA (without hoarding mountains of produce in my kitchen until I have enough to toil sweating over a hot stove for hours to make huge batches). This pickle is using radish pods and garlic scapes. Garlic scapes are those lovely little green curly-Q's which have a mild garlic flavor. Radish pods? Well, those are the seed pods your radish plants shoot up by the flowers when they bolt. They are very tasty - they have a mild pure radish flavor, a lovely snap crunch, and look like little alien pods. Yum. I am growing a variety of radish specifically for its bigger seed pods - Rat's Tail Radish - but all radishes will do this when you let them go to seed, they will just vary in size. I love these, so I always have a few rows that I let flower. Not only are these radish flowers sometimes the earliest bloomers for my pollinators, but when our Wisconsin weather goes from frigid to boiling in a week this is what often happens. So this is what you call win-win. 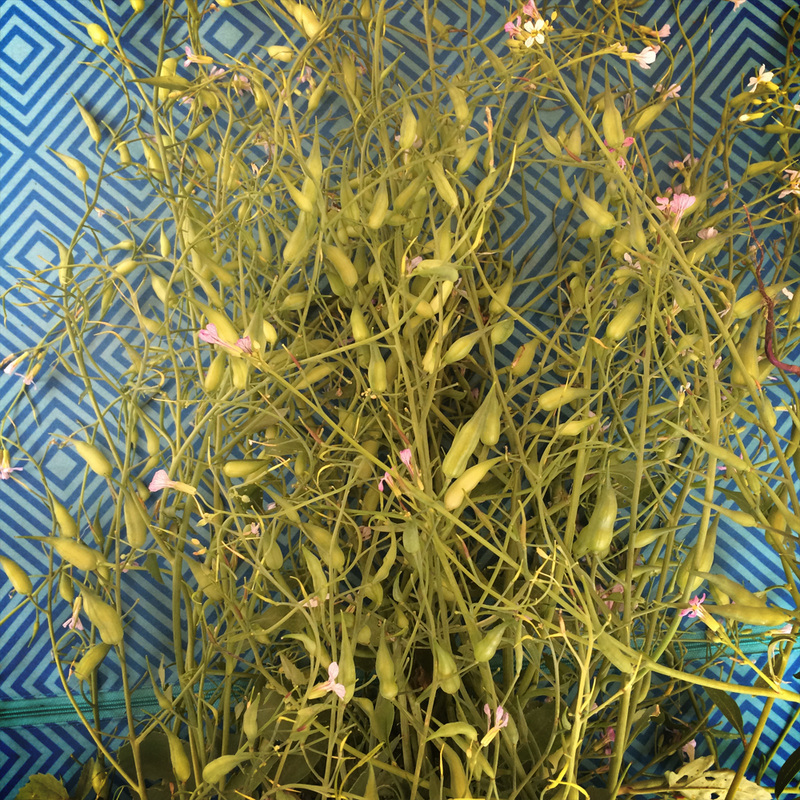 To harvest these you just pull the whole gangly plant up from the root and then pick off each little pod. Super simple. My husband and I pick 5, eat 2. They are so good raw. All you need to do once you have picked the pods off is rinse and soak in some salted cold water until you are ready with your other ingredients. This recipe is what I love about refrigerator pickles. The amounts are not too exact. Equal vinegar and water, enough liquid to cover the pods/scapes in the canning jars, salt/sugar/pickling spices/dill. Quick to put together. Some time in the refrigerator to get those flavors going. We have been eating these sprinkled over our salads, as a side with veggies or crackers, on a turkey burger, in chicken salad. Really. So good. 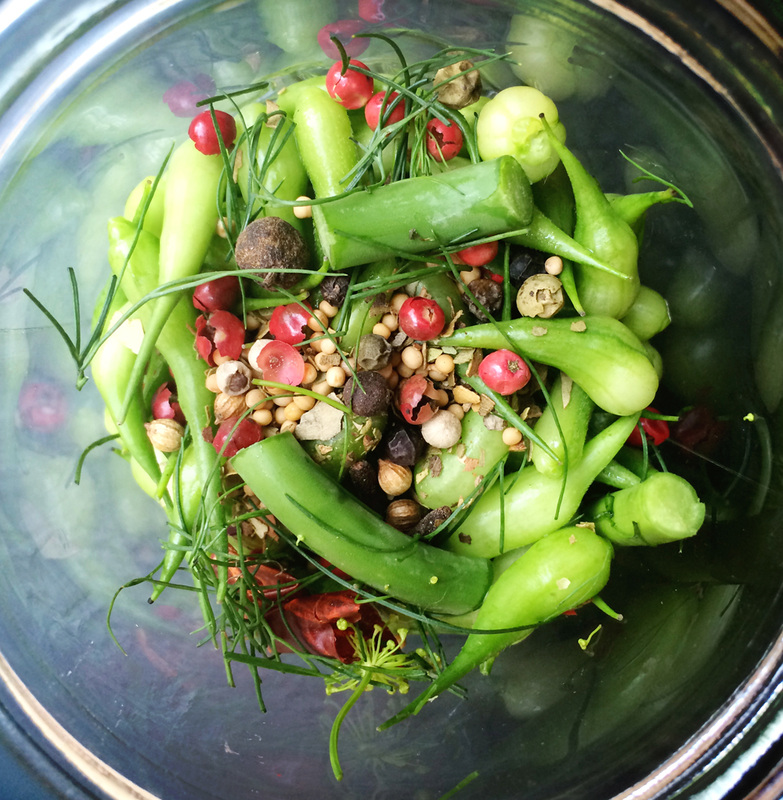 Radish Pod-Garlic Scape Refrigerator PicklePrint | {wholly rooted}Quick, crisp, and delicious, this refrigerator pickle is a favorite. Use anywhere you would use a pickle, or just pop them in your mouth from the jar. Yum. {ingredients}
In a bowl mix your radish pods and cut garlic scapes. Add these to your canning jar or jars, sprinkling in the peppercorns and dill equally as you fill. Depending on how wide/plump your scapes and radish pods are, this quantity should fill two pint canning jars within an inch or two of the top. As this is a quick refrigerator pickle, the exact quantity isn't as important, just having enough liquid to cover is.
I love combining the flavors of interesting veggies, and this radish pod and garlic scape pickle does just that. It is different but yet still tastes like a nice crispy crunchy pickle. Delicious! Capturing my love of whole foods, combined with the activity of a bustling kitchen. A weekly collection of photos from the center of my home. * * * * * 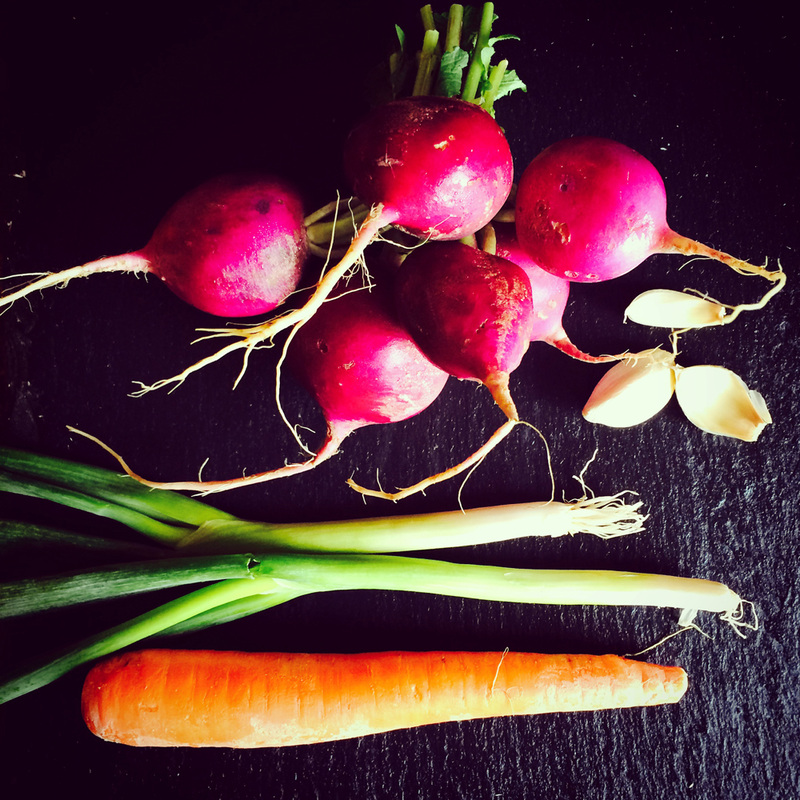
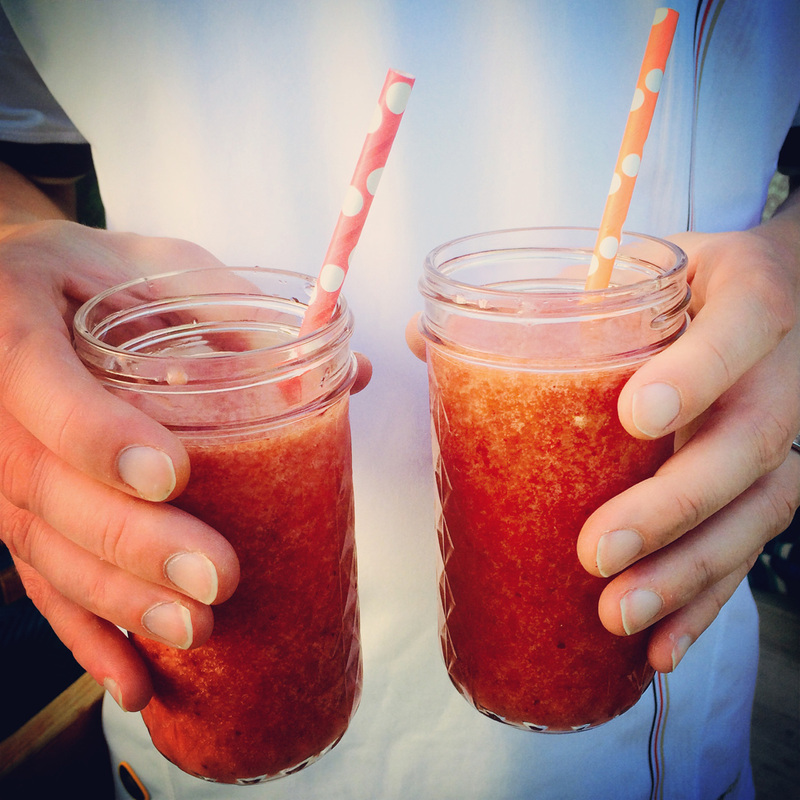

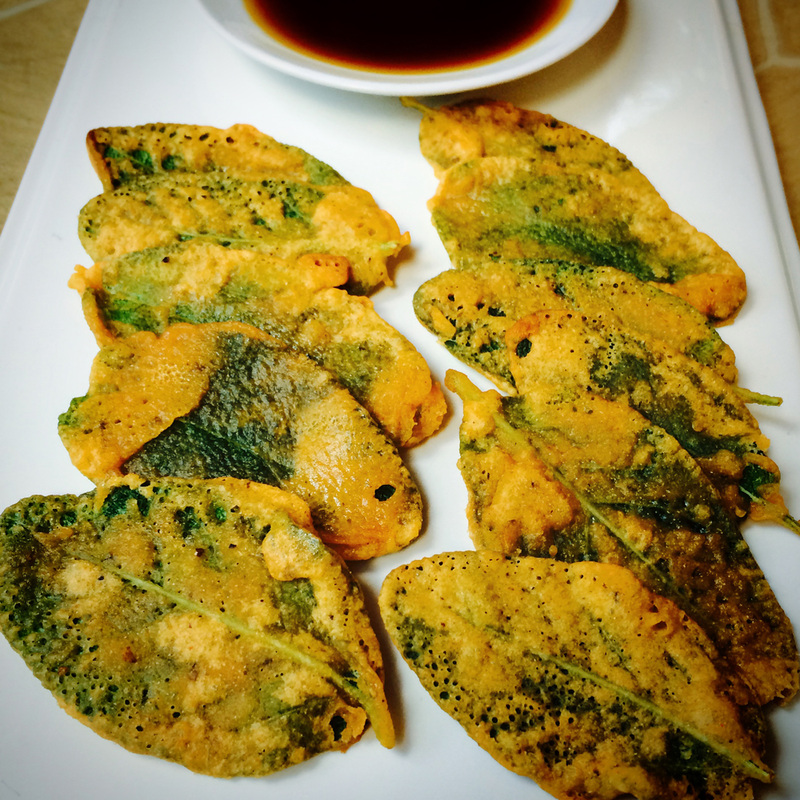
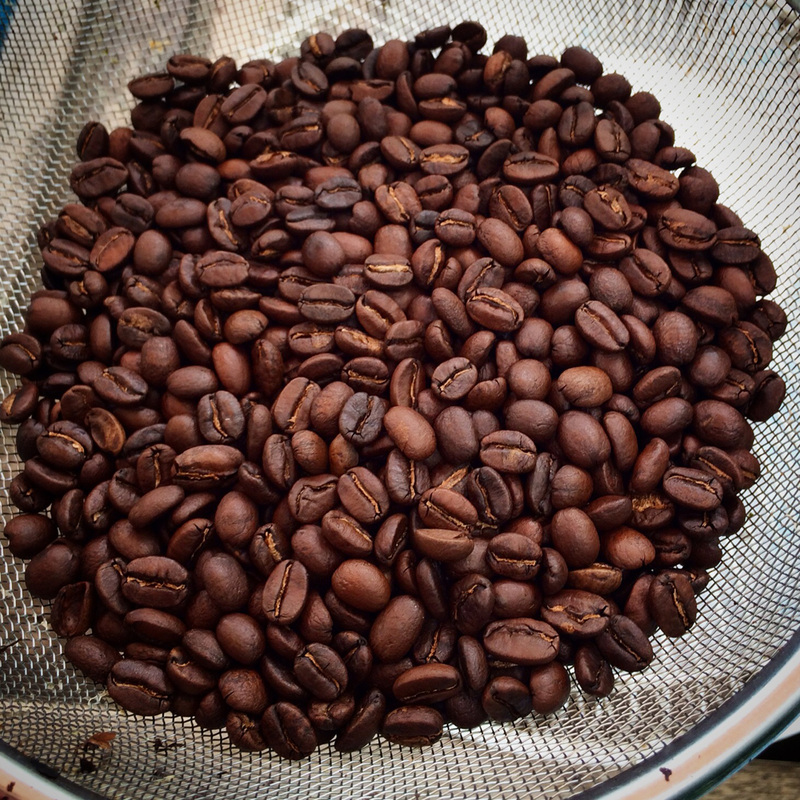
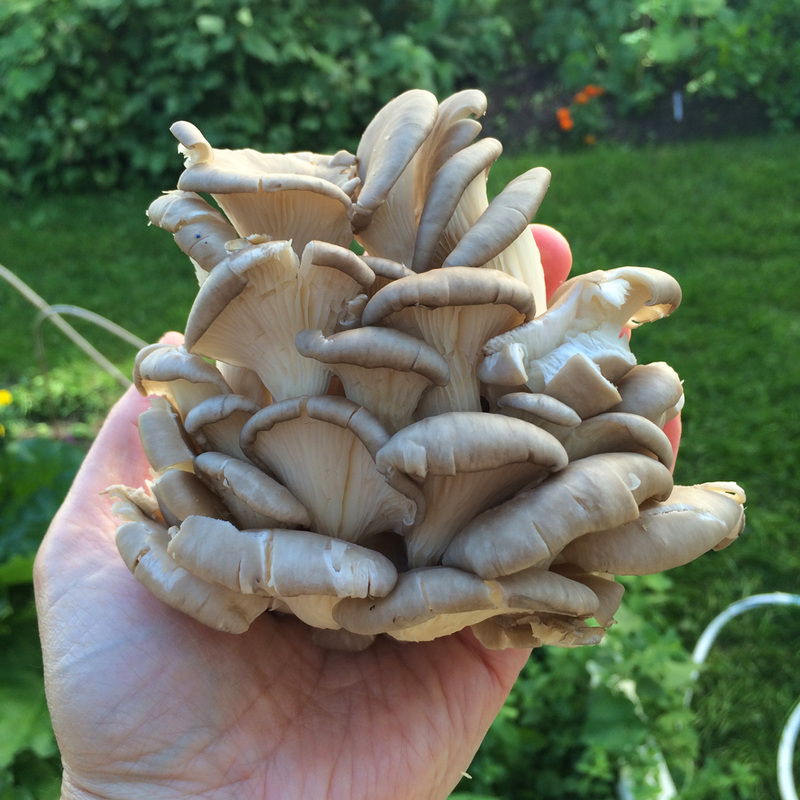
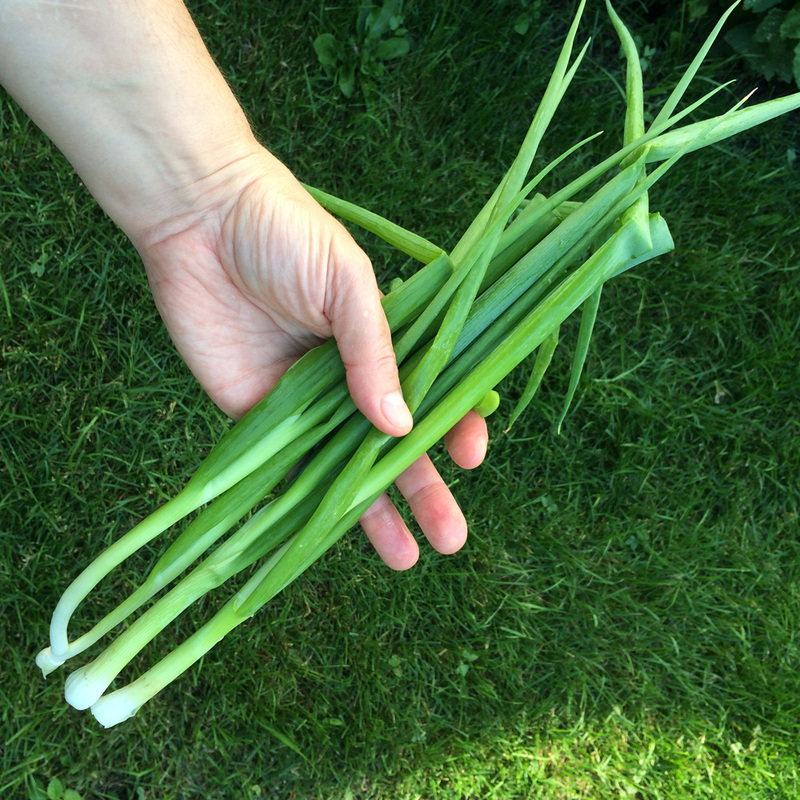
top to bottom: radish slaw fixin's, mushrooms, scallions from the garden, rat's tail radish (our new garden favorite), peas, margaritas (best when fresh picked ingredients are used!), strawberry ginger syrup in process for homemade soda, crispy sage leaves with coconut aminos, and our home roasted coffee beans.
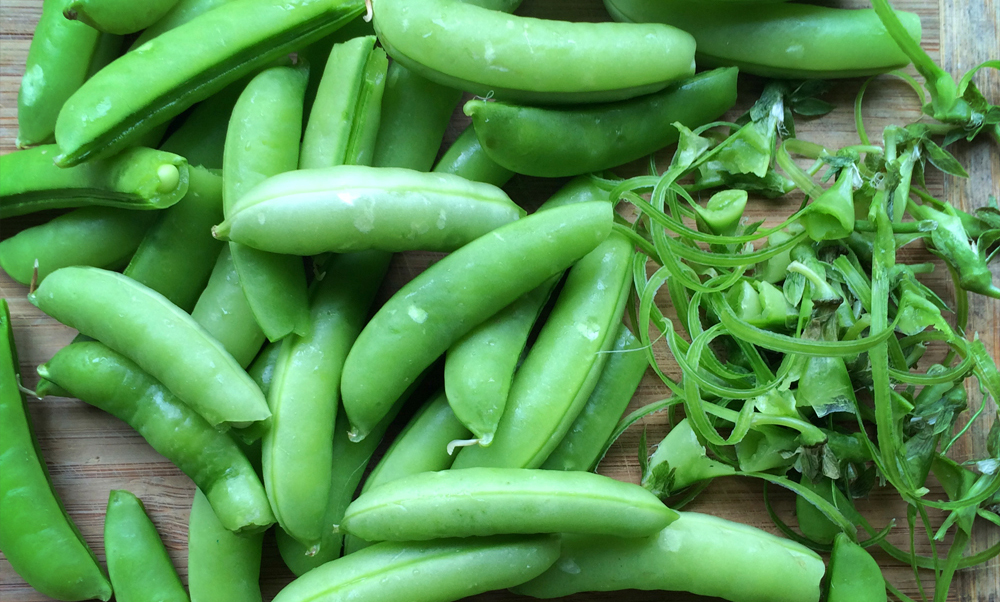
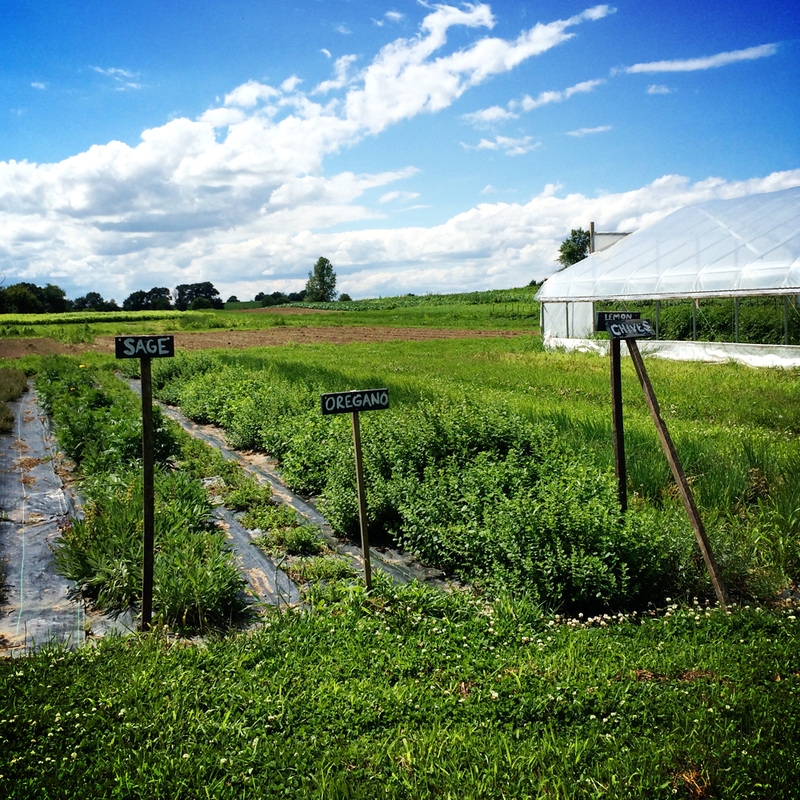
In the summer there is so much making. So I thought this week I would focus on ingredients and didn't take many meal shots. There has been so much rain rain rain that there are now swarms of mosquitoes. So garden excursions are quick and involve a lot of smacking and waving. But so much is ready every day that it is worth it. I think. This week will involve a lot of weeding and pickling, I think. We are loving the rat's tail radishes this year. With the sudden heat blast not long ago a lot of our other radishes bolted and I let them flower for pollinators. But the rat's tails are perfect no matter the temps and the perfect crisp radish flavor with the pea texture is fantastic. I know they could get a bit bigger, but I was impatient and we are eating even more of them today. I'm definitely planting a lot more of those! Be sure to visit Heather at Beauty that Moves for all of those in the blog hop this week! 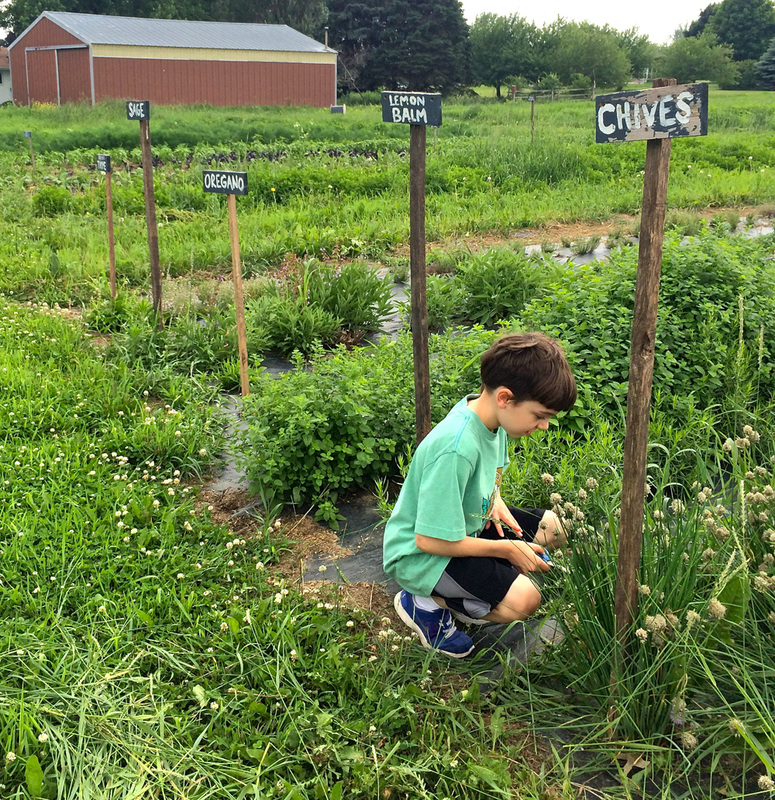 We are getting into the groove of our weekly CSA again. It feels good to chat with the people in line - the question is always WHAT DO I DO WITH THIS? Give a few ideas, chit chat. G is the boss of the CSA line. He selects each item out of every bin to be sure he has the exact one he wants - I only get to be the bag holder - while A visits the chicken coop. We then grab scissors from the rack and walk out to the herb field. Later in the season we will have veggies to pick too, but this time of year we pick some chives, oregano, sage, thyme, basil, dill, mint. I grow a lot of variety in my garden, but with such a small space that isn't full sun, many of the more mediterranean heat loving herbs don't do so well, so having a CSA which has fields to pick from is wonderful. That saves my pot real estate for unusual varieties that I cannot find anywhere else - like my holy basil or pineapple sage. After filling our bag with what we will use this week, we wander back to the car and the short but beautiful rural drive home. Having a CSA makes us conscious of our time every Wednesday. It will take awhile to process everything - rinse, cut, bag, store. What to make for dinner now, what to put away for the rest of the week. What can go right into the dehydrator. Love it. 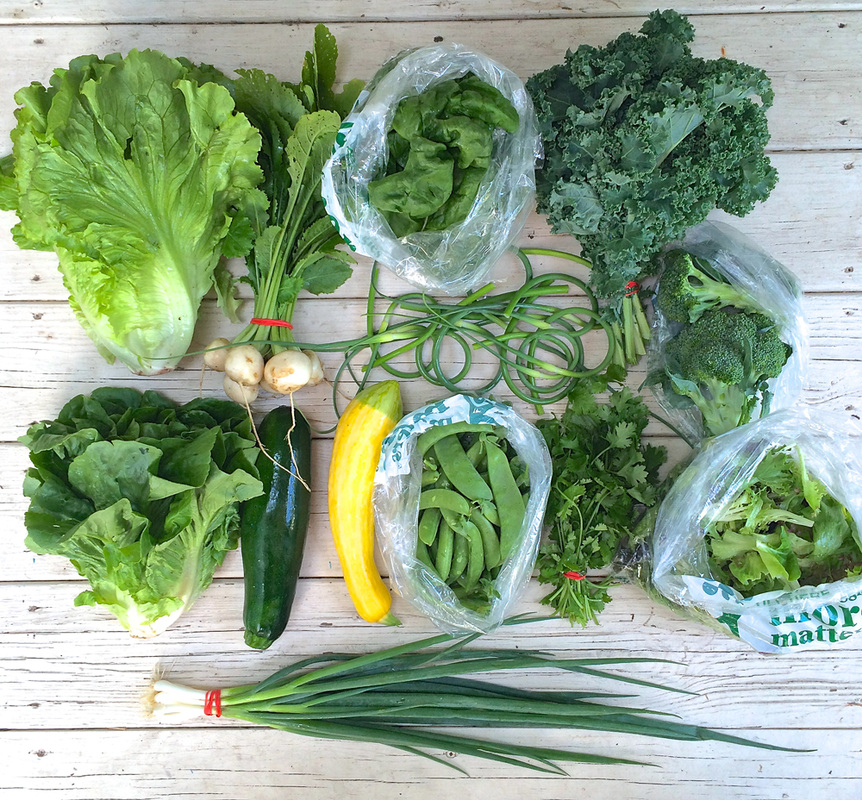 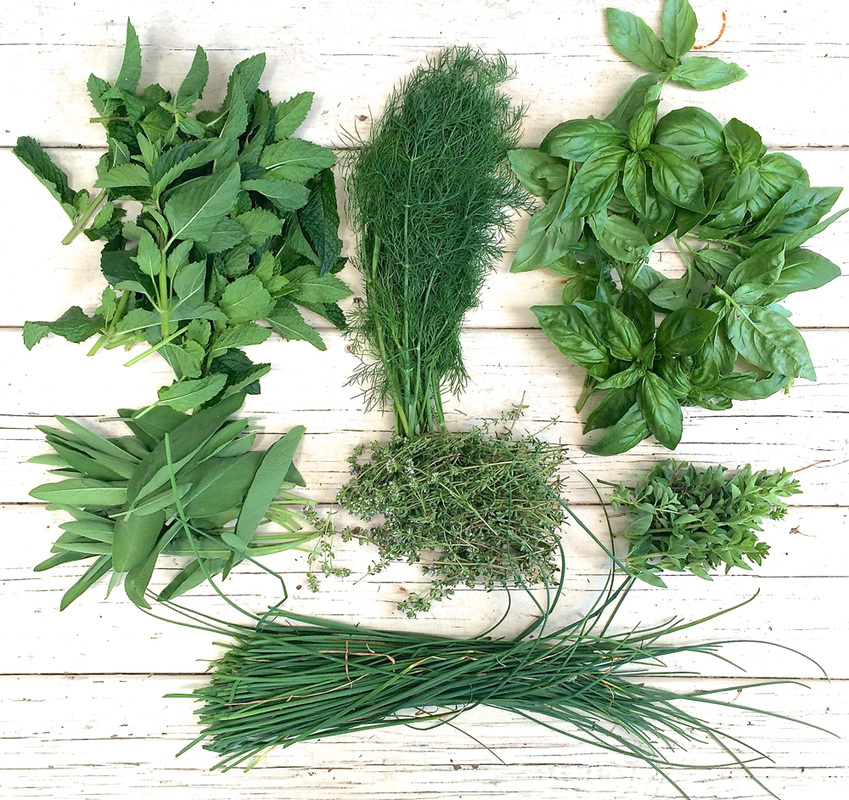 in our share this week: summer crisp lettuce, sugar snap peas, kale, broccoli, cilantro, summer squash, scallions, hakurai turnips, salad mix, garlic scapes, spinach. u-pick mint, dill, basil, oregano, thyme, chives, sage.
What is in your farm share this week, or in season locally where you live? 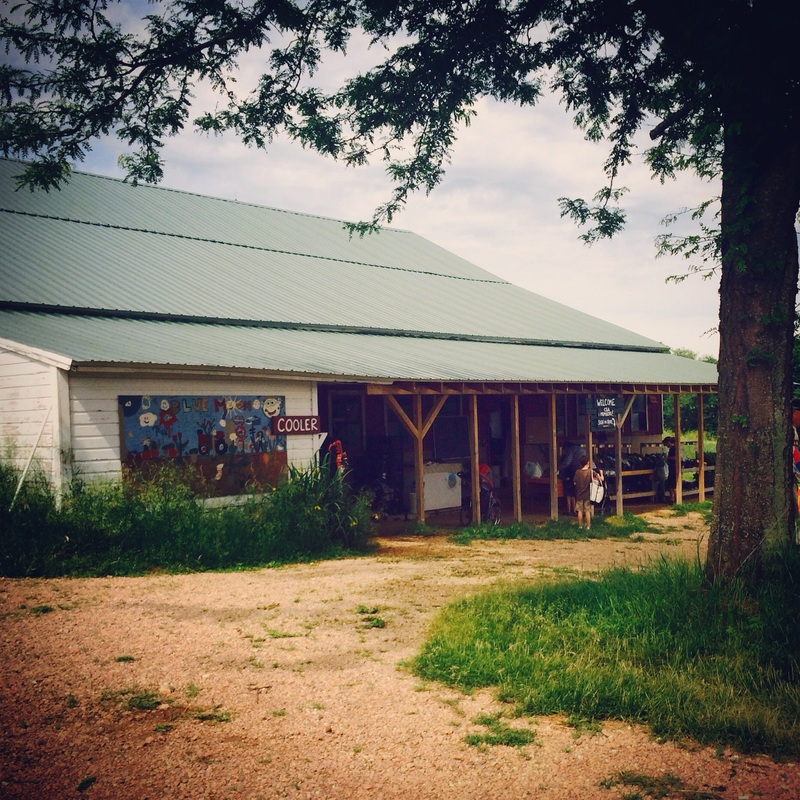 I know! I missed week 1! In all our decade+ of having CSA shares this was the first pickup we have ever missed. When we had to choose between CSA pickup and time away for that whirlwind 50 hour Minneapolis trip...the choice was easy. We have only a few short months in summer when my husband has a somewhat normal work schedule and when September gets here he will burrow away and we won't see him much until the holiday break! So, we missed our pickup. Our CSA farm donated our share last week to the local food pantry, so I feel better knowing someone got some organic goodness last week. So this week we were particularly enthusiastic about going to get our weekly share. For those of you outside of the US, CSA means Community Supported Agriculture, and it is basically where you buy a "share" of a whole growing season of produce from a local farm. This means that each week we get our "share" of produce. Some CSA models have urban dropoff locations - places to get your box right in town from someone who hosts a pick up spot. We have always preferred on farm pick up, and living at the edge of the city makes that convenient for us. My boys get to visit a farm each week, we get to know our farmer, and we have freshly picked organic produce from June to November. The CSA farm we have now is wonderful, and we have been with them for several years. When I say I love our CSA, I am not exaggerating! Seriously. Love. 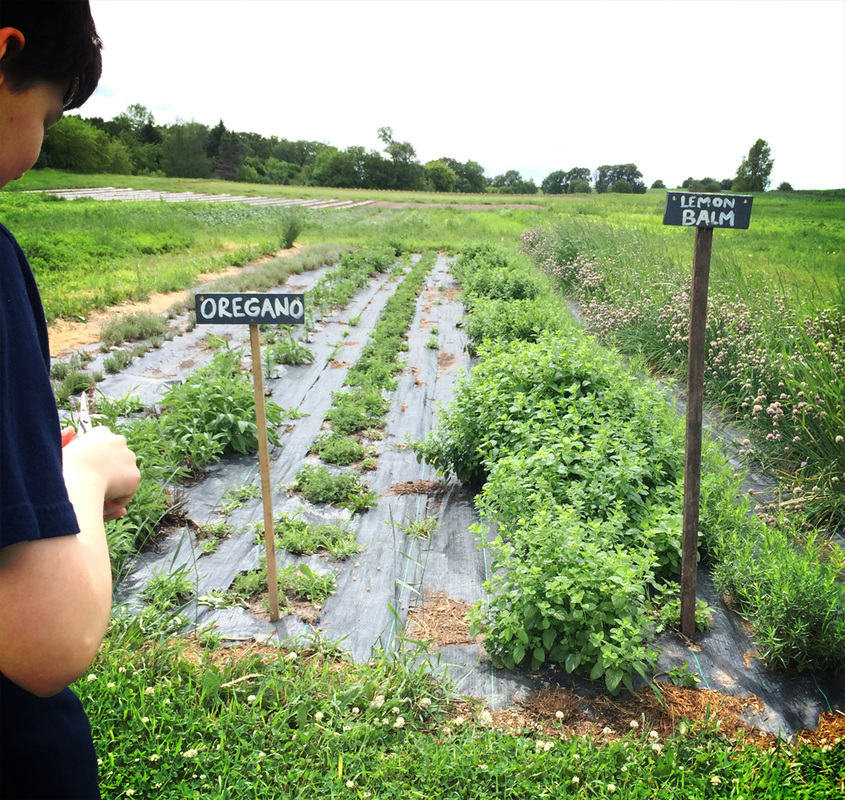 So today was comfort and routine and everything good about summer. Both boys were so happy to carry the bags, load up one of this, one of this, 10 of this, 2 of this. They chatted with people. They visited the chickens. We went to the u-pick herb field area to pick some fresh herbs for use throughout the week. Everything was green and smelled of mud. If you have followed my previous blogs or instagram feed you know that I love to post my CSA share each week for the whole season. I also love to post in season recipes from what is in season and that is most likely in your box or market stand. I also would love to hear what you have in season in your area if you have a CSA share, farm box, or buy from local farm stands or markets! 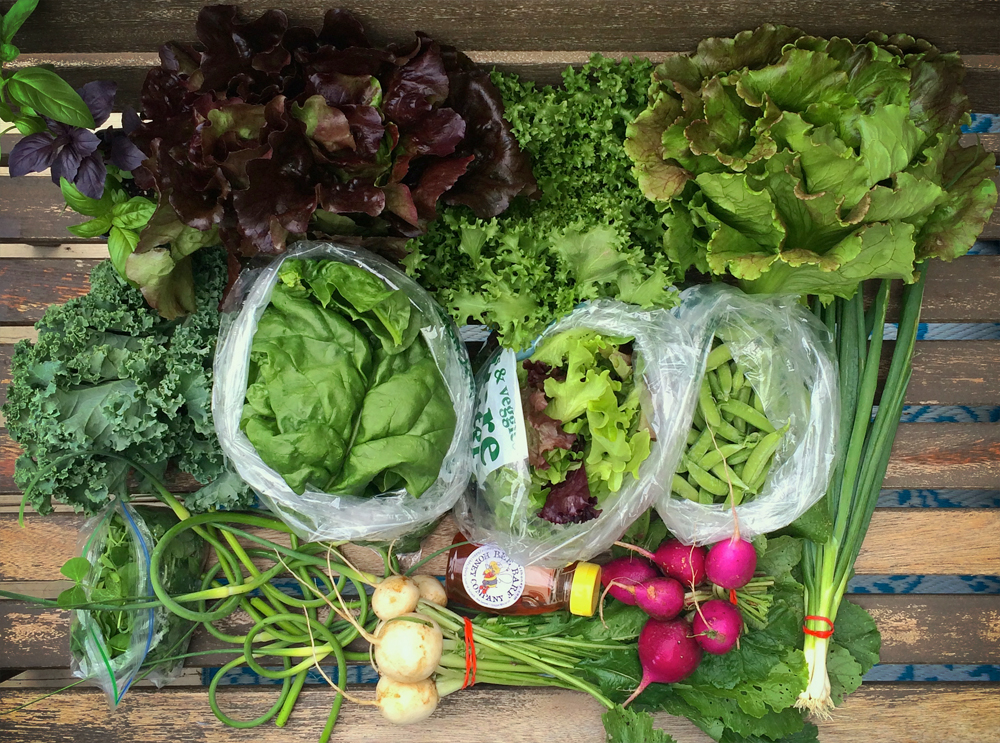 CSA Box 2: head lettuces, green curly kale, spinach, sugar snap peas, radishes, pea shoots, scallions, hakurai turnips, salad mix, garlic scapes (garlic scape pesto or lacto-fermented garlic scapes), honey 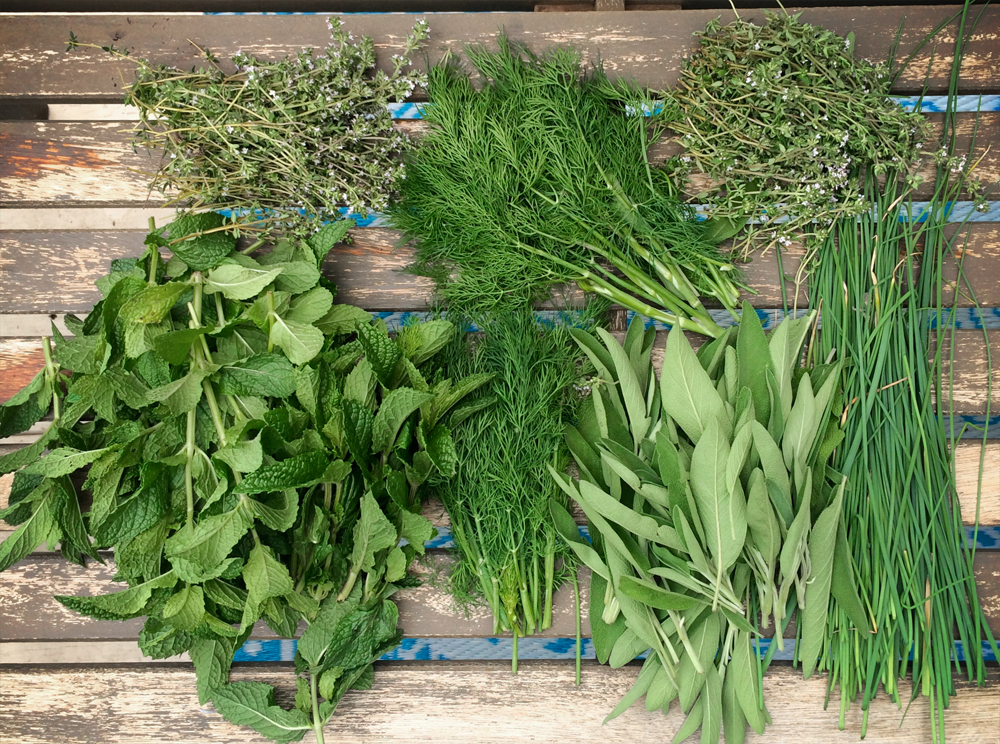 U-Pick: mint, thyme, dill, sage, chives
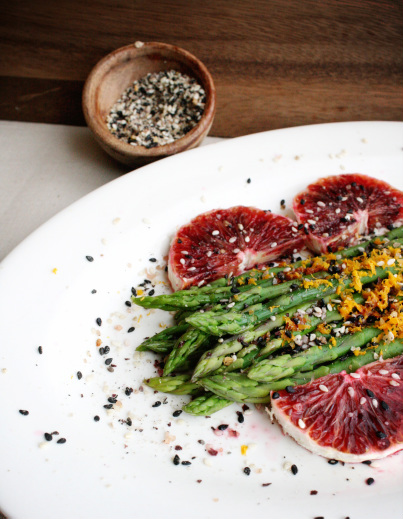
This is when I start to feel that hum - when the CSA and garden are going strong and spare moments are spent picking or weeding or preserving. Thank you, June. ++ Do you have a CSA share/farm box? What is in season in your area right now? 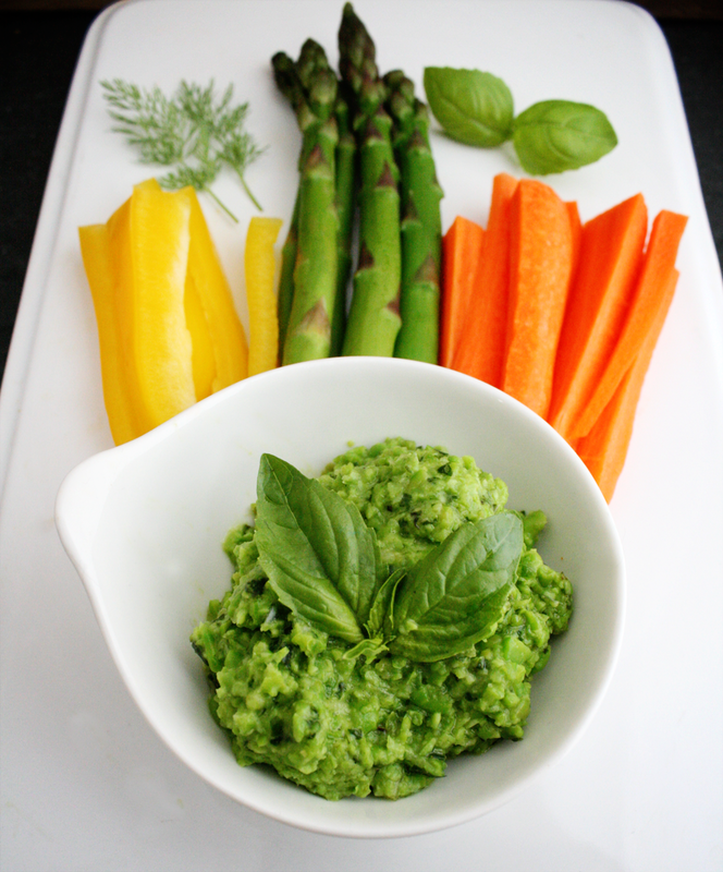 I love when the first crisp green vegetables and herbs come up in spring. I have a good month or more where I cannot get enough of peas. I also love pesto - although in a house of various allergies and intolerances, we cannot do the pine nuts or cheese - and I find myself making vegan pesto variations from May to November. This is my favorite spring pesto, and is fantastic as a spread on a crudités platter, over pasta, or smeared on a piece of freshly toasted bread of choice with a sprig of fresh dill and a drizzle of olive oil. I even love it over steamed veggies or fish. This takes everything that we love about peas - their sweet freshness and tender bite - and ramps it up a few notches to an amazing flavor that tastes purely of spring. 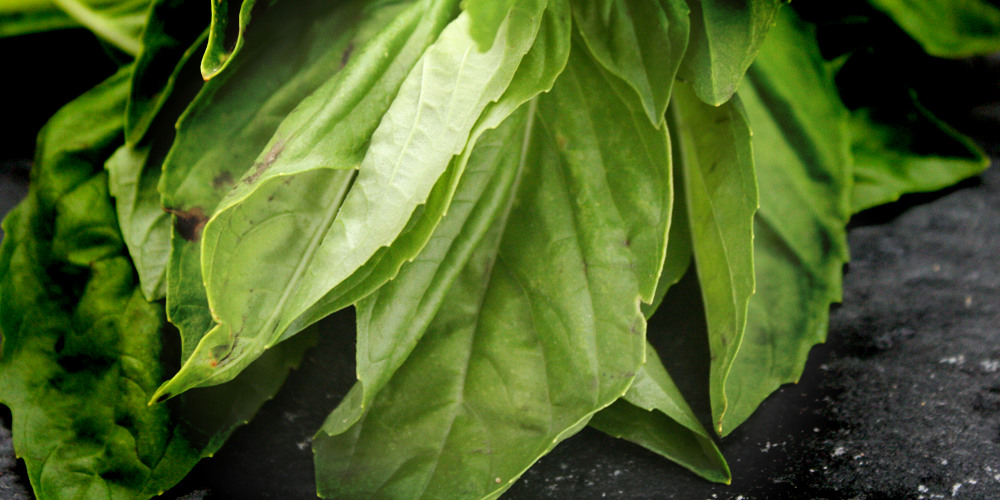 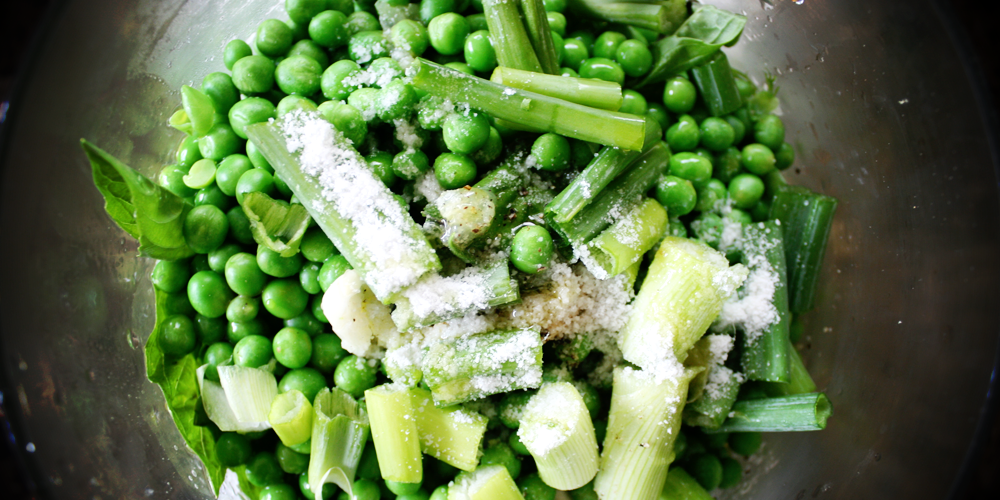 Vegan Pea PestoPrint | {wholly rooted}This vegan pea pesto tastes like spring. Whether on a crudités plate, spread on warm crostini, or served over fish or steamed vegetables, this pesto adds delicious flavor to your dish. GF/DF/NF {ingredients}
Bring 2 cups of water to a simmer on your stove top. Add your peas to the simmering water, and let cook for only about 2 or so minutes for fresh peas, a short while longer if using frozen. Strain and rinse with cool water. Drain. Pour your peas into a food processor, along with the garlic, olive oil, sea salt, pepper, lemon, spring onion, and fresh herbs. Pulse in your food processor until mostly smooth. Do not over whiz - you want a spreadable pesto with some texture left. Taste, add additional salt and pepper to taste. Serve immediately, or store in an airtight container in your refrigerator and eat within a few days. 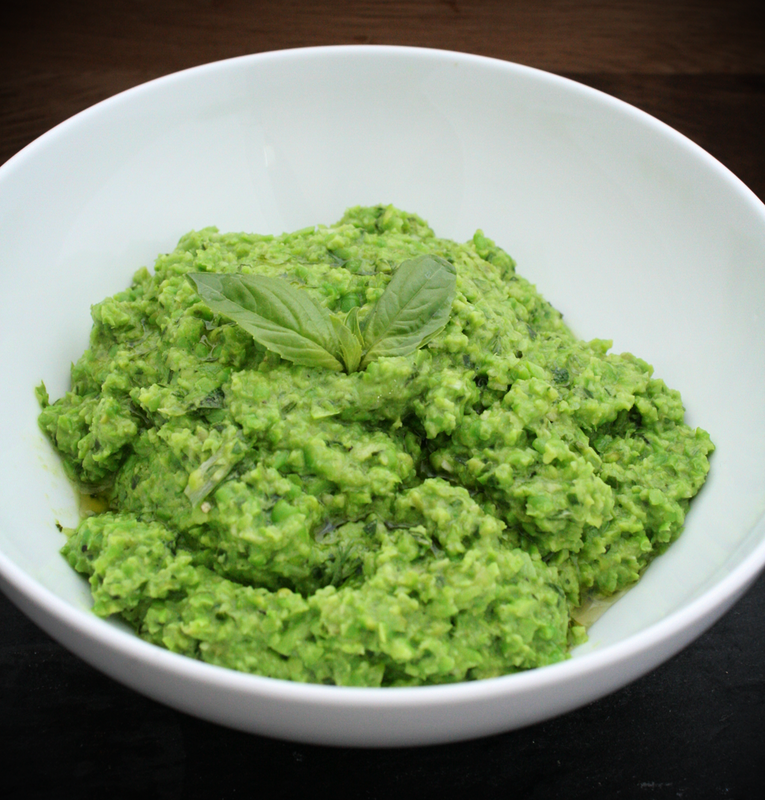 Of course I ate the entire platter of crispy veggies and steamed asparagus with that top shot of pea pesto the moment I was done taking photos. Ahem. Lunch. I made myself put away the rest of the pesto to serve with dinner tonight. Of course since this only takes a few minutes to make, I could just make another batch if this one mysteriously disappears. 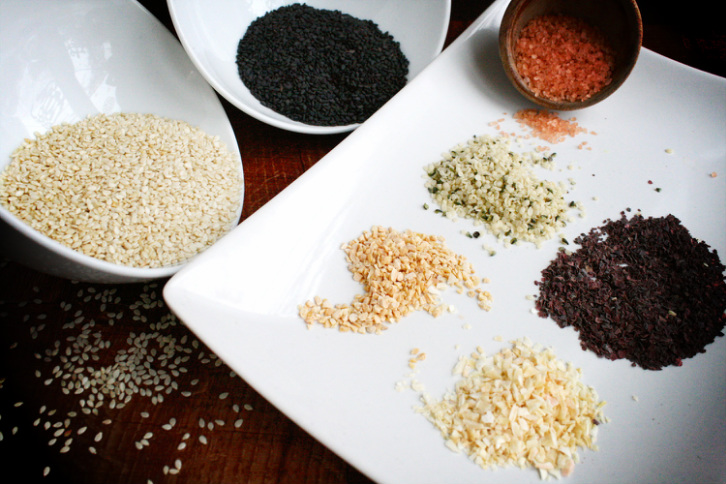 Gomasio is one of my favorite condiments made from sesame seeds and salt, often with other herbs and seaweed. It adds such a rich flavor without much salt. And for a family that doesn't eat a lot of packaged foods and uses sea salt exclusively, this also gives us iodine which is naturally found in the seaweed without any fishy flavor. It is just ... good. Every gomasio seems to have a different recipe - the variations are endless - but this is my standard go-to base recipe that I make and re-make often. I like using dulse flakes in my gomasio. Dulse is a sea vegetable which has has iron, iodine, magnesium, zinc, selenium, calcium, potassium, and a long list of other minerals. It adds so much healthy goodness without any seaweed smell. {ingredients} 1/4 cup black sesame seeds 1/4 cup white sesame seeds 1 Tbsp dulse flakes 1 Tbsp hulled hemp seeds 1 tsp dried onion 1 tsp dried garlic 1 Tbsp dried holy basil/tulsi (optional) 1 Tbsp good salt (sea salt, himalayan pink salt, alaea hawaiian salt, fleur de sel, or a smoked flake salt ... just not refined white salt) Start by toasting your sesame seeds in a dry pan on med-high. This only takes a short time - you are not cooking the seeds, just heating them to release their oils and aroma and toast lightly. Stir stir stir and remove from the heat and pour into a bowl before they start getting too dark. 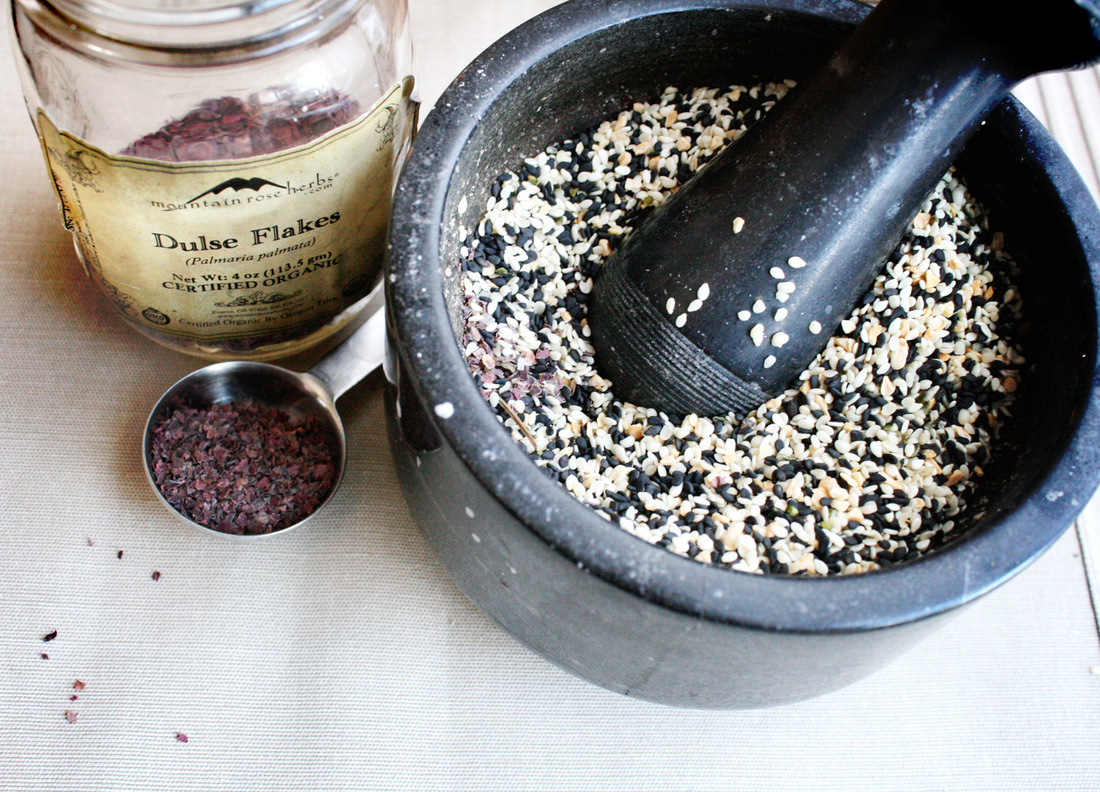 Combine all of your ingredients and gently grind together. I find a large mortar and pestle works best. You can pulse *just a few times* in your food processor, but do not over do!! You don't want to make sesame paste. You don't want a powder. You want just all of the ingredients integrated and infused with each other so they don't separate. I usually take 3-5 minutes with a mortar and pestle to gently grind it all together. Store in an air tight container - it fits perfectly in a 1/2 pint jelly jar, or put in a shaker. Sprinkle over eggs, steamed veggies, chicken, stew, soup (miso!), dips, salads, you name it. IT IS DELICIOUS!
While *more dulse* may sound like a great idea after reading about its benefits, don't. While iodine is something we all need and seaweed is common in a lot of Asian diets, it is in small amounts. Don't overdo it. This recipe has a low ratio for a reason!
|

denise cusackI am a certified aromatherapist, clinical herbalist, permaculture designer, organic gardener, plant conservationist, photographer, writer, designer, artist, nature lover, health justice activist, whole foods maker, and mother of two young adults in south central Wisconsin. 


Categories
All
©2007-23 Denise Cusack, all photos and text. Feel free to share my posts on FB or Twitter or online media or pin on Pinterest (thank you!), but please keep the links back to my website intact (meaning please do not take or copy my images off of this website and share them unattributed or without linking back here or use them without permission). Thank you! :)
|

 RSS Feed
