
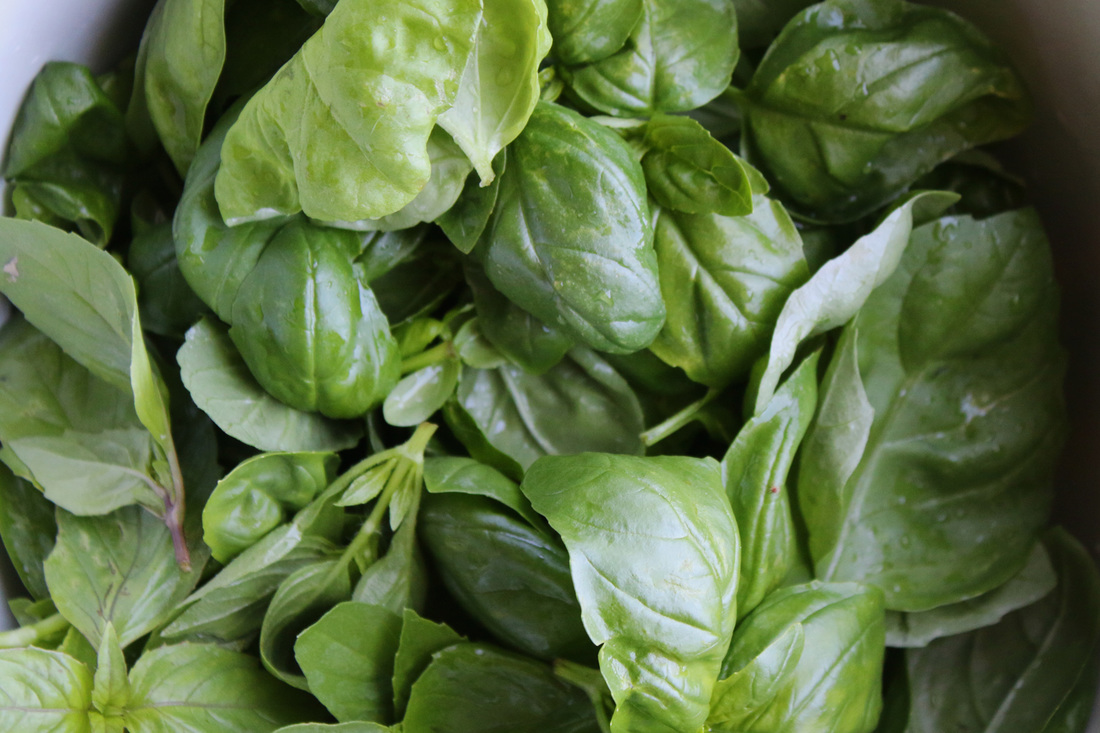
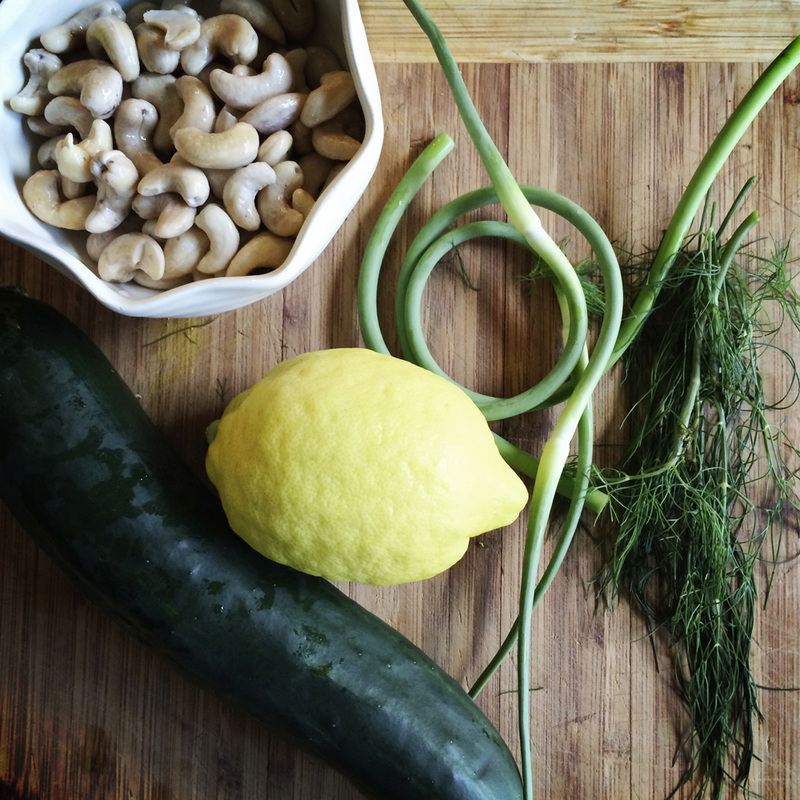
I love the beginning of CSA season. Spring arrives late in Wisconsin and it takes until June for the vegetables to really start rolling in, and it coincides with my burst of rapidly growing herbs which I planted a few weeks ago. Pesto is a favorite way to combine different flavors and use the herbs in abundance with all of the fresh vegetables. The key for me of course is the combining of different flavors. I like pesto, but we have a dairy allergy in the house AND I don't like drowning myself in mono-flavors. I love making different types of pesto so that there is fantastic variety not only for immediate consumption, but also enough to freeze/preserve for winter. This pesto is a favorite. I grow many types of basil, and no matter what type I have on hand, it works. This recipe is dairy free and combines fresh zesty flavors such as lime, ginger and garlic. I am also using cashews instead of pine nuts. Not only are they easier to find, but they are nutritious and I always have some on hand (I'm addicted to date/cashew truffles and cashew cream). You will be amazed at the flavor and want to make extra to freeze for winter! 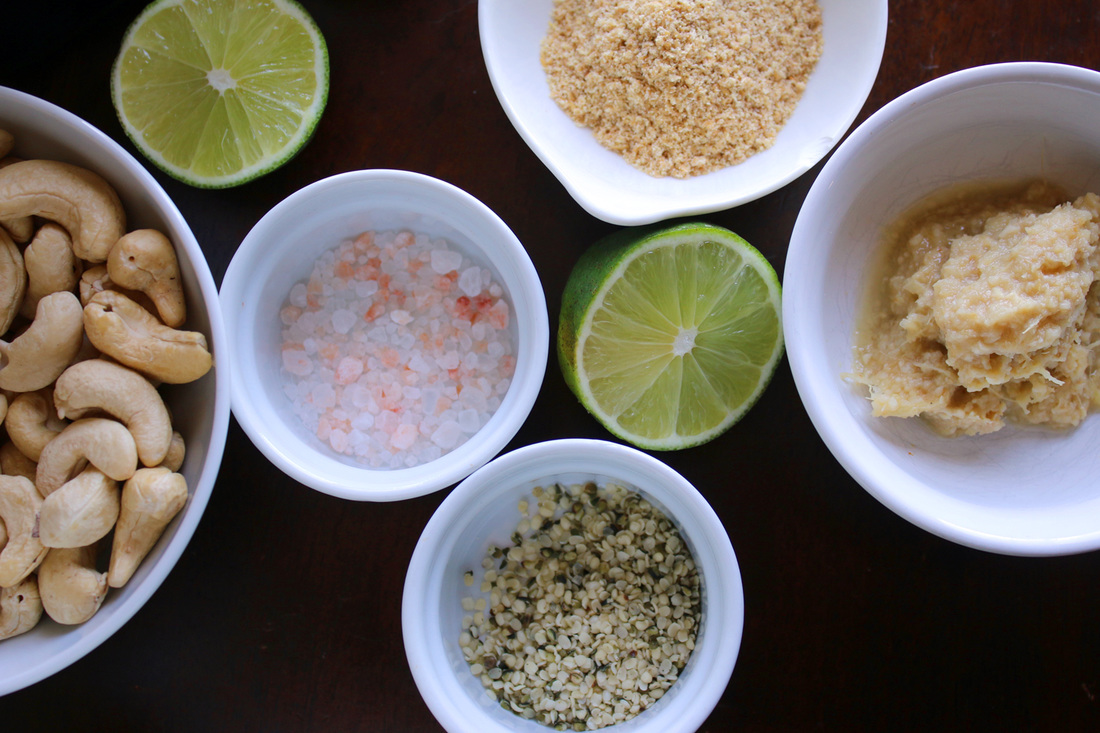
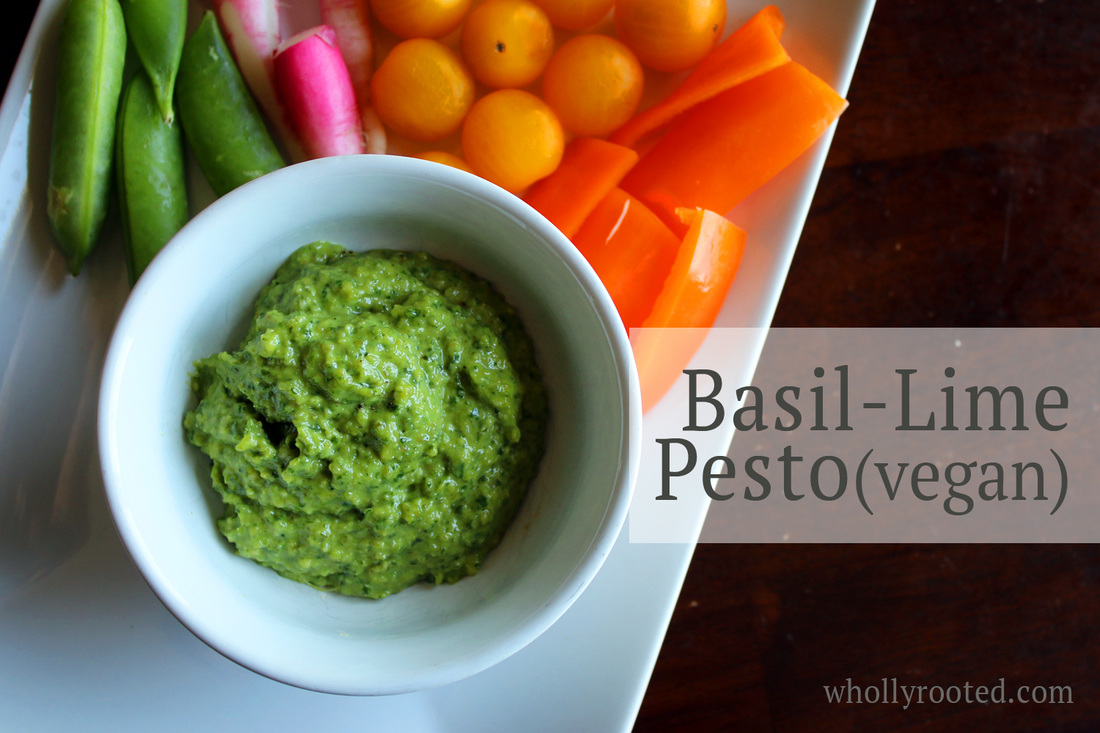
Basil-Lime PestoPrint |
{wholly rooted}There is nothing better than the taste of freshly homemade pesto with crudités, on grilled veggies, or over pasta. This version is vegan, and combines the amazing flavors of basil, lime, garlic, and ginger. The ground flax and hemp seeds make a great texture subsitute for the cheese -it is so good! GF/DF {ingredients}
First, using a food processor, pulse your raw cashews with the flax meal and hemp seeds until finely ground. 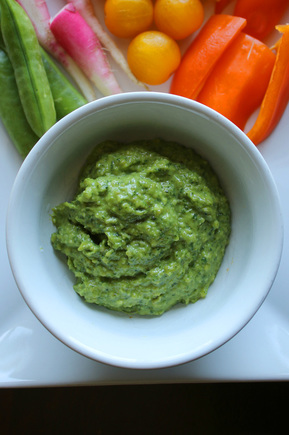
I made a single batch of this today, which will likely only last me a few days. So I am sure I will make some more as my genovese, persian, blue spice, thai, lemon, lime, lettuce leaf, and emily basils grow, grow, grow! bonus: This recipe is delicious and easy to prepare, but also packed full of good vitamins, minerals, healthy fats, fiber, and protein. Yum+. Cashews Garlic & Ginger Basil Lime
0 Comments
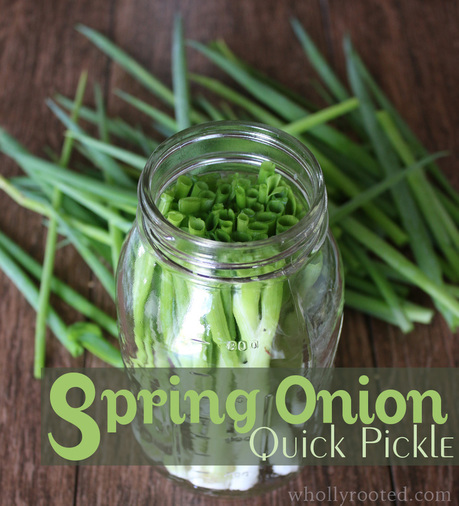
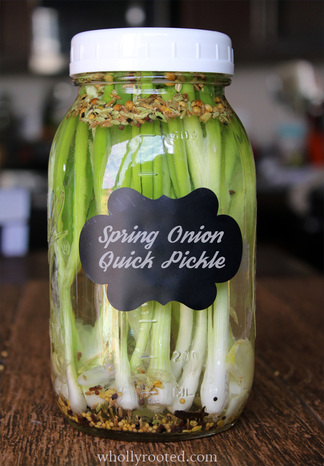
I like quick pickles. I don't have a ton of time to make dozens of jars of the same thing endlessly, and quite honestly I get bored with flavors and really like mixing it up, using what is fresh on hand, and having small batches of a variety of quick pickles to liven up meals, crudités, salads, and of course for snacks. At any given moment year-round I have a few jars of something in my fridge. Right now I have pickled cucumbers and garlic in a slightly sweet brine, and pickled daikon which are amazingly peppery and crunchy. Spring onions are one of the first things in spring that we can find here in Wisconsin, and I like pickling them so that I can spread them out throughout the summer. I like the small green brilliance of their flavor in a pickle and they work on salads, burgers, or with a plate of hummus and tomatoes. 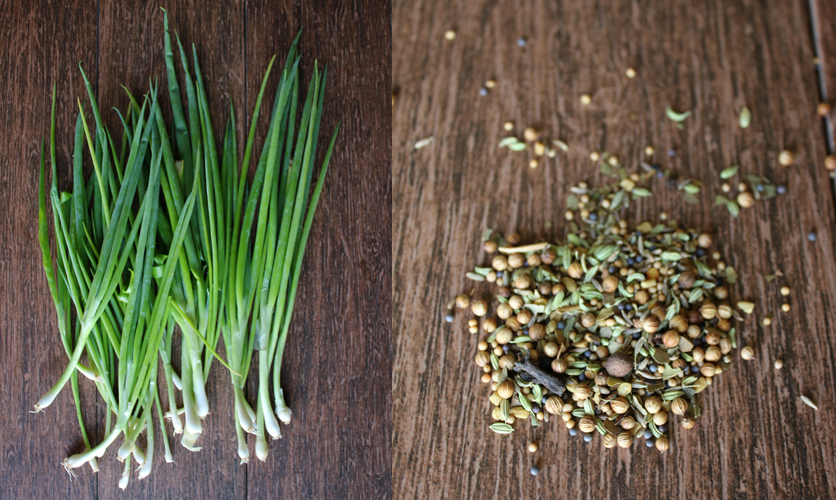
Spring Onion Quick PicklePrint |
{wholly rooted}Quick pickles are a delicious way to use the bounty of the season to create a variety of flavours and textures. This recipe uses one of the gardens earliest arrivals – spring onions, or scallions. {ingredients}
Heat water/vinegar/sugar/salt/garlic in a pot until dissolved. Let cool to room temp.
Or try this: Add some additional zesty flavor by reducing the white vinegar in the recipe above to 1 cup and add 1/2 cup umeboshi plum vinegar.
Another bonus of having a fresh pickling brine is when all of your salad greens start coming in full blast you not only have some pickled scallions to put on your salad, but you have a tasty brine to use for salad dressings. Simply mix a little pickle brine with extra virgin olive oil, s&p, and a tiny bit of grainy mustard. Stir and boom. Delicious dressing.
I know most of us have the image of a farm woman in her hot kitchen with 422 pounds of one kind of cucumber frantically pickling and canning until 3AM. But these days we can get such a wide variety of seeds and can easily grow such a diversity of herbs, fruit, and vegetables, that we don't need to mono-pickle. Small batch pickling is a quick, easy, and delicious way to preserve the extras, the favorites, and the flavors of the season! Spring comes so slowly after a long winter, but jumping back into the garden and kitchen to start preserving again feels good. After a long winter it feels pretty much like a big TA-DAAAAA! 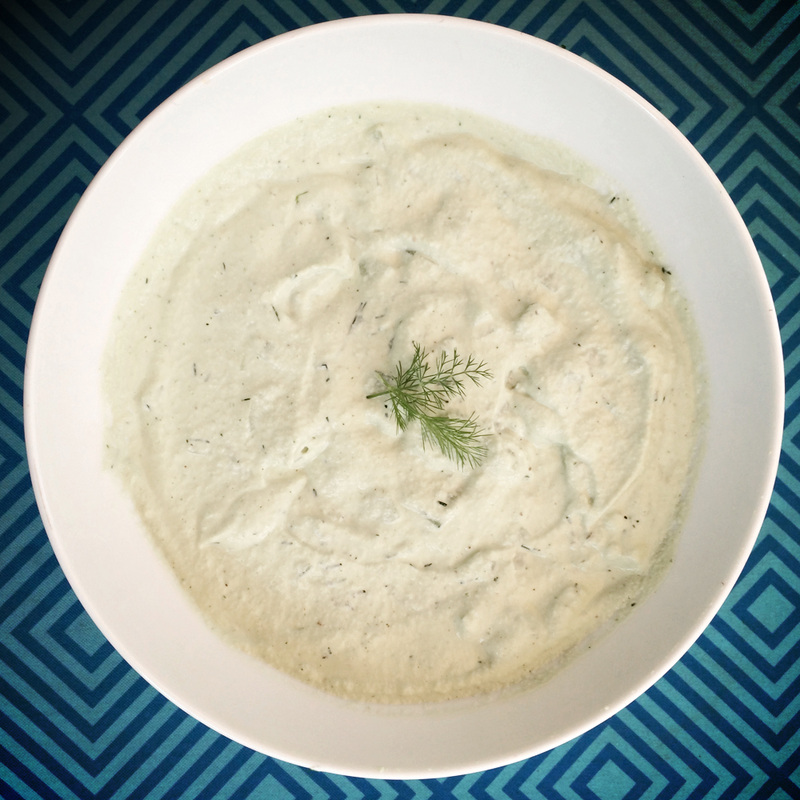
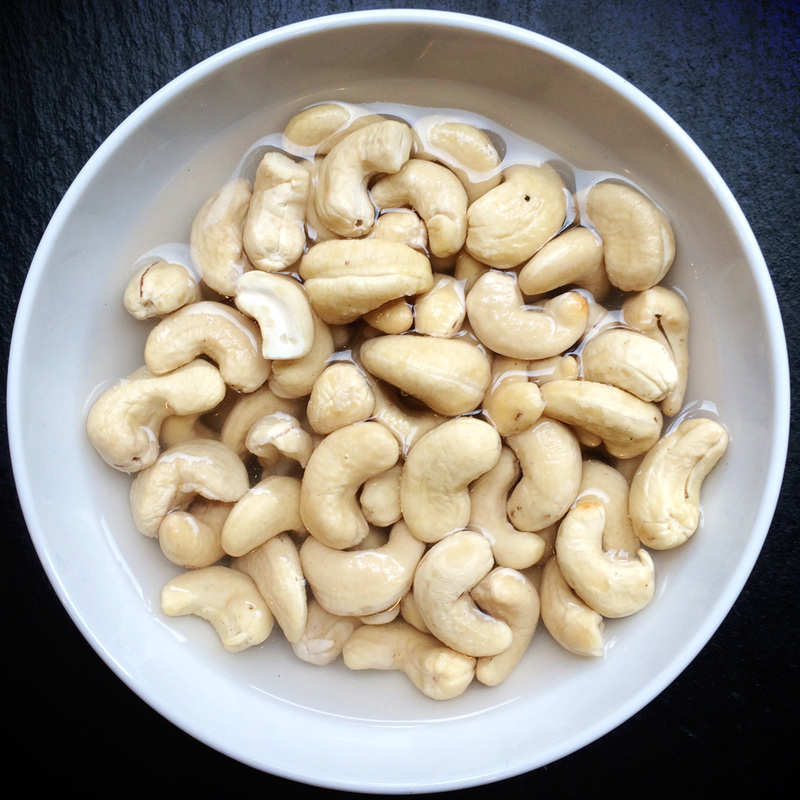
My entire childhood I was dairy-free. Not in the era of coconut yogurt and almond milk and vegan butter. But in the era of everything tastes like cardboard might as well skip it. I remember having horchata in Chicago once which changed my idea of milk-like drinks forever. I had a few years where I could almost tolerate certain types of dairy (if I didn't mind feeling crappy the next few days) and then I was vegan for many years. With my 11 year old it is a severe life-threatening allergy, so we are now very strict about the dairy. We try to keep it out of the house completely, as he reacts severely to even small amounts of contact. Since I didn't grow up on dairy and avoided it for decades, I don't really "miss" anything - but there are some foods I remember fondly and have re-created over the years. Tzatziki is one of those things. It reminds me of my years living in the Andersonville area in Chicago (a neighborhood full of amazing swedish, greek, and middle eastern restaurants ). This recipe is perfect in summer -and is my favorite dairy free tzatziki. It has the texture, taste, and smell. It is delicious with crisp vegetables. Drop a dollop in chilled cucumber soup. It even makes a great salad dressing. The base is cashews, which gives it a rich flavor and a protein boost.
Dairy-Free TzatzikiPrint |
{wholly rooted}This tzatziki has the creamy tang of a traditional recipe, but is dairy free! Serve with lamb or chicken, as a dip for fresh veggies, with pita chips, or as a dollop over chilled summer soups. Delicious. {ingredients}
To soak the cashews: Put 1 cups of raw cashews in a canning jar or bowl, cover with hot water from your kettle (meaning hotter than tap but not boiling), let soak 1-4 hours. Drain. 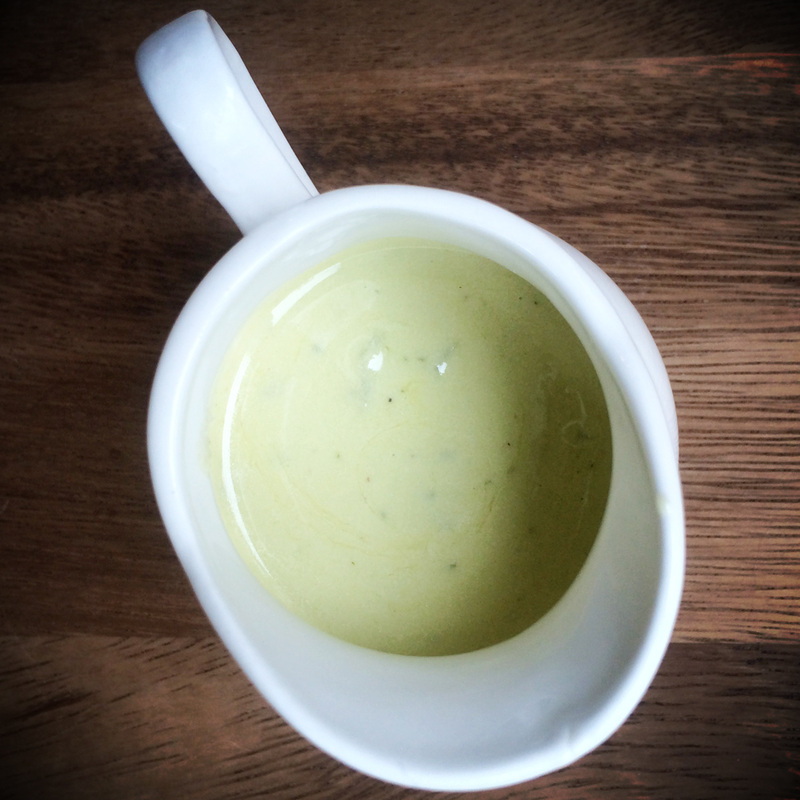
To make a dressing, take a few tablespoons of the tzatziki, add equal amount olive oil, and a teaspoon or two of good vinegar. Add a pinch of salt and pepper, and then mix well. It is creamy and delicious! 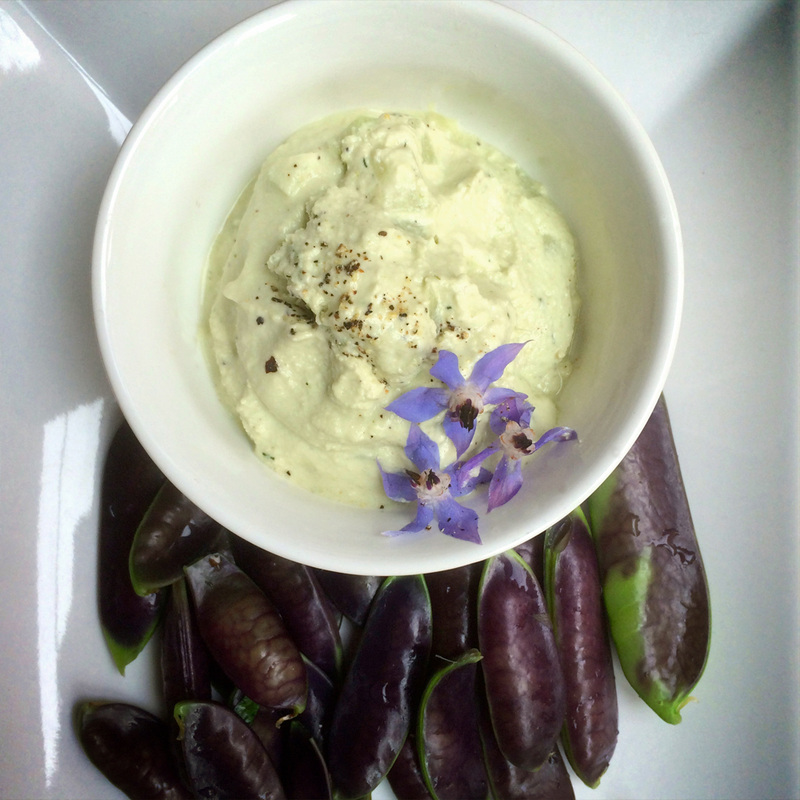
While I like pickles, I like finding other ways to use our abundance of cucumbers throughout the summer. I like to keep a chilled bowl of this in the fridge in season so it is always ready for a snack, with a meal, or over a salad! 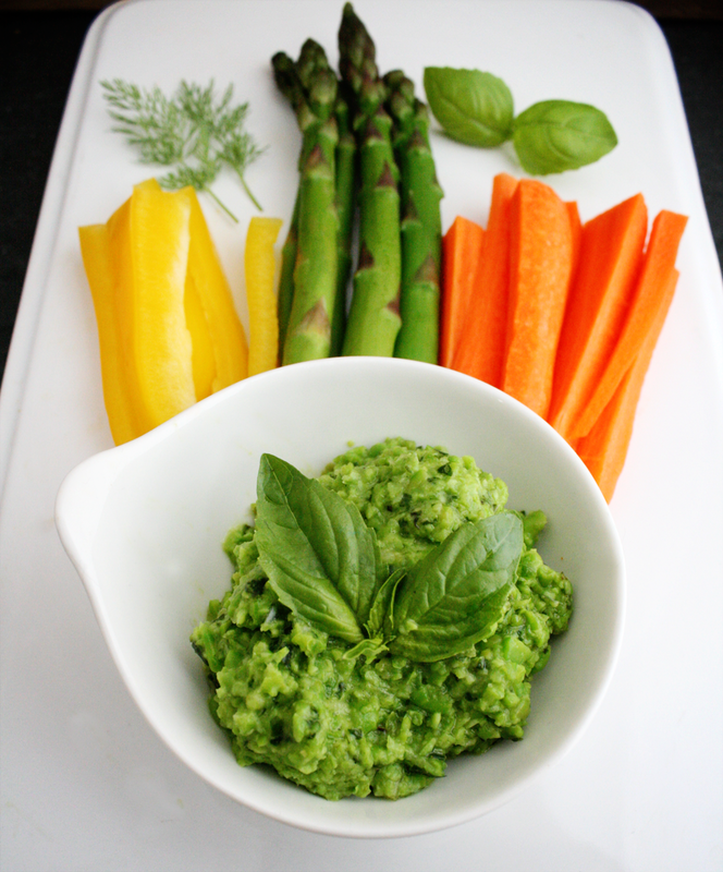 I love when the first crisp green vegetables and herbs come up in spring. I have a good month or more where I cannot get enough of peas. I also love pesto - although in a house of various allergies and intolerances, we cannot do the pine nuts or cheese - and I find myself making vegan pesto variations from May to November. This is my favorite spring pesto, and is fantastic as a spread on a crudités platter, over pasta, or smeared on a piece of freshly toasted bread of choice with a sprig of fresh dill and a drizzle of olive oil. I even love it over steamed veggies or fish. This takes everything that we love about peas - their sweet freshness and tender bite - and ramps it up a few notches to an amazing flavor that tastes purely of spring. 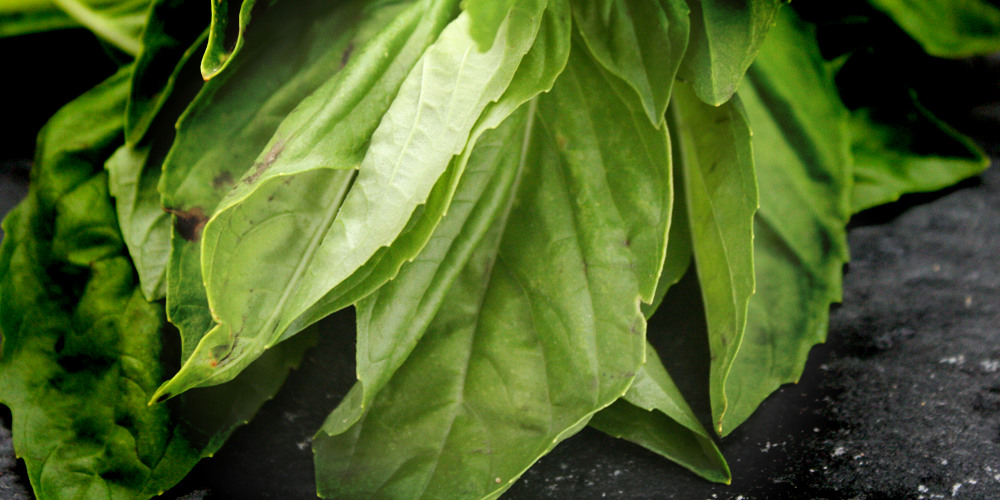 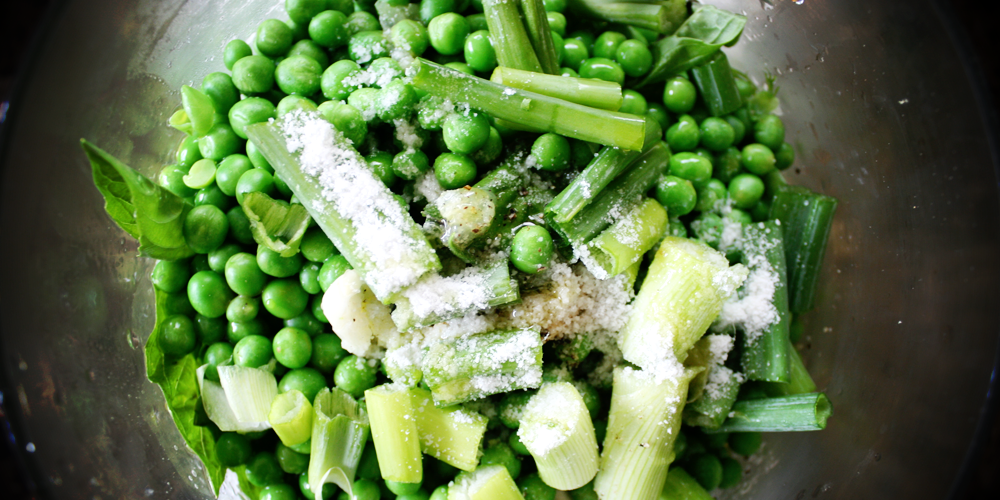 Vegan Pea PestoPrint | {wholly rooted}This vegan pea pesto tastes like spring. Whether on a crudités plate, spread on warm crostini, or served over fish or steamed vegetables, this pesto adds delicious flavor to your dish. GF/DF/NF {ingredients}
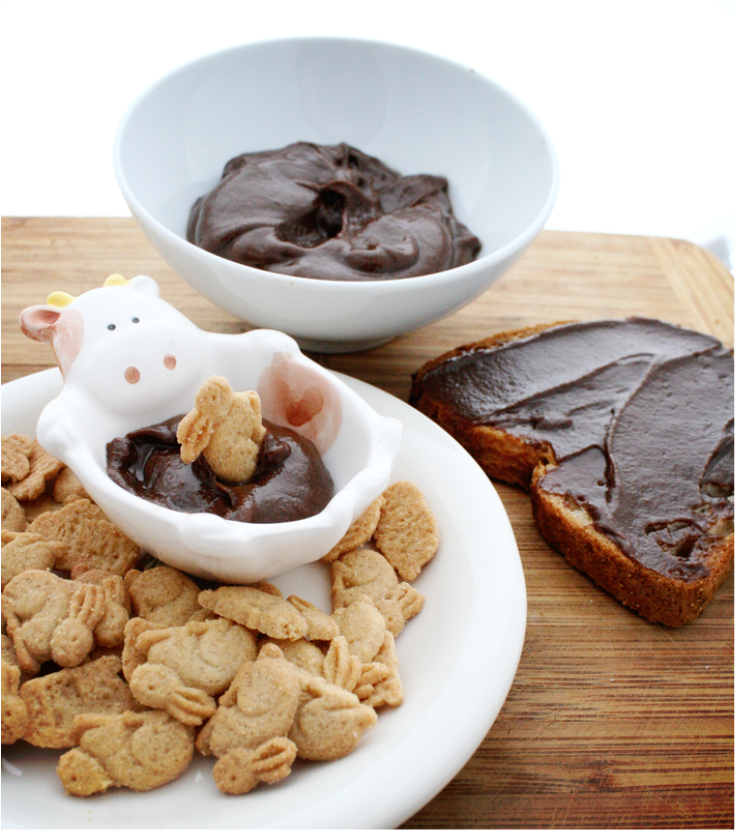
Bring 2 cups of water to a simmer on your stove top. Add your peas to the simmering water, and let cook for only about 2 or so minutes for fresh peas, a short while longer if using frozen. Strain and rinse with cool water. Drain. Pour your peas into a food processor, along with the garlic, olive oil, sea salt, pepper, lemon, spring onion, and fresh herbs. Pulse in your food processor until mostly smooth. Do not over whiz - you want a spreadable pesto with some texture left. Taste, add additional salt and pepper to taste. Serve immediately, or store in an airtight container in your refrigerator and eat within a few days. 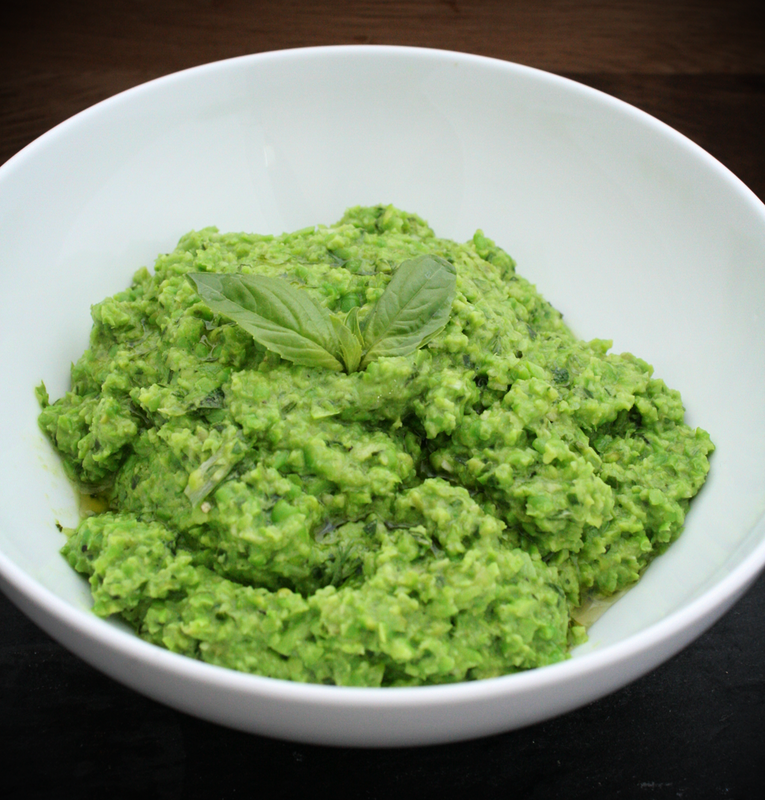 Of course I ate the entire platter of crispy veggies and steamed asparagus with that top shot of pea pesto the moment I was done taking photos. Ahem. Lunch. I made myself put away the rest of the pesto to serve with dinner tonight. Of course since this only takes a few minutes to make, I could just make another batch if this one mysteriously disappears. 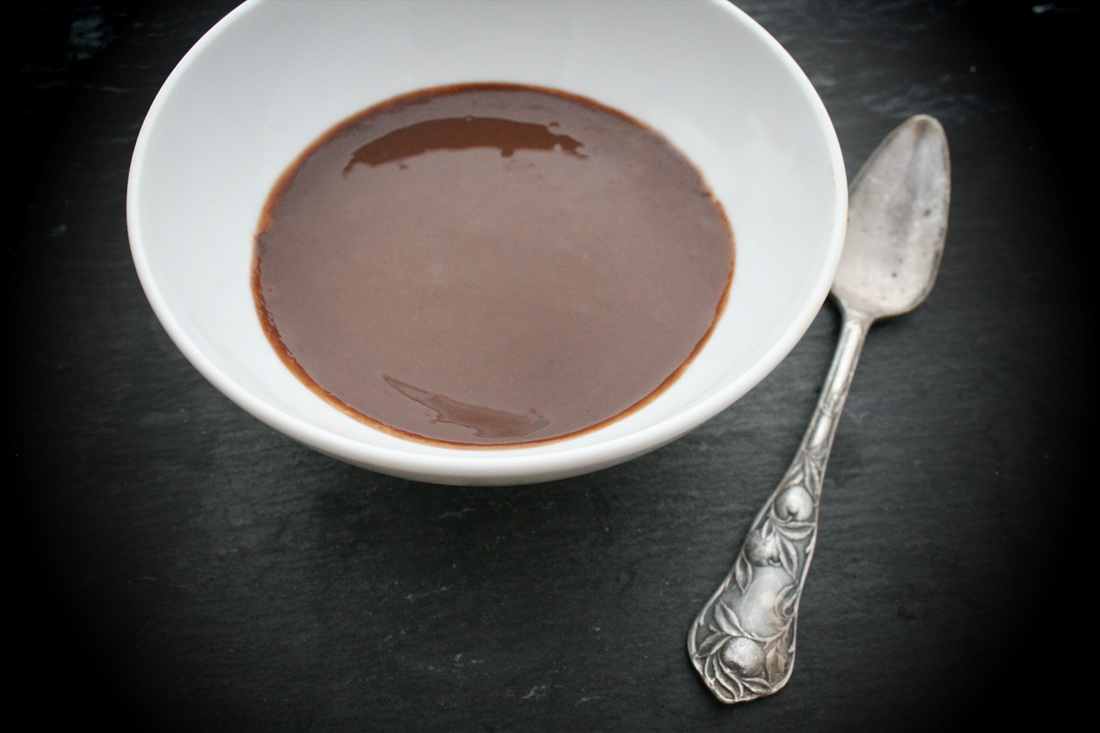 Yesterday I shared my Sun-tella spread recipe. If you cannot have seeds, I have an alternate recipe for you! It doesn't have the same creamy mouth feel as the sunflower seed butter blend, but it is a nice spreadable chocolate. I like using coconut cream because it adds a rich deep flavor and texture - more than simply mixing oil and chocolate could have. And it is a nice additional source of fiber! Coconut Chocolate SpreadPrint | {wholly rooted}A spreadable chocolate which is tasty on toast, with graham crackers, or apple slices. GF/NF/DF {ingredients}
Melt your chips and coconut cream in a double boiler. Add the maple syrup, sea salt and vanilla bean, and stir. Turn off the heat and stir in your oil. It will thicken as it cools, but will still be spreadable. Spoon into a jelly jar and store at room temperature. This is good spread on toast, as a dip for apples - or try a spoonful of it in your coffee or hot cocoa. We had some on warm GF tortillas and I can't stop putting it in my coffee. So good!
 Food allergies didn't really sneak up on us in this house. It is something I always expected with my oldest. I have a lot of allergies (as did my mother growing up) and starting at a young age he refused specific foods (they made his mouth feel "spicy"). We noticed hives/stomach issues immediately after certain foods. So we adapted. We did food elimination diets, rotations - you name it. What we hadn't quite realized along the way was how sensitive he is to even the smallest, most minute, amount; and how potentially life threatening any exposure or reaction can be. We never knew when it would be hives/vomiting or if it will be full anaphylaxis. About a year ago we realized even with how "careful" we thought we were being with what we knew he reacted to, he was getting sick even without the offending foods in his diet, elimination diets were not enough, and it was time to get more answers. Through testing, we confirmed peanut and tree nut among a long list of other allergies. I know now that many kids are super sensitive to even the tiniest of exposure such as made in the same factory on the same line. So we changed EVERYTHING about how he eats and how WE eat. We make our own foods from scratch most of the time anyway, but even with that, we found if basic pantry supplies (flours, grains, oils, juices, etc.) were made on shared equipment or in the same facility, he would have a reaction. We discovered that even if the rest of us ate his allergen that was carefully prepared and cleaned our hands and mouths immediately after, he would often still have reactions. So no more nuts, nut butters of any kind, or products containing nuts come into our home. We are careful about every ingredient we use. Now, he rarely gets sick or has reactions anymore (knock on wood), and we feel our diligence is paying off. My husband lived in Germany a few times during his childhood, and he talks longingly about having the classic chocolate-hazelnut spread on toast for breakfast and/or Kaffeeklatsch often. Not only is the modern day version of these spreads filled with mostly sugar and emulsifiers these days, but it also has dairy and nuts. Two of the top allergens in our household. So I have been working on making a nut free/dairy free version of chocolate spread that he can eat on his toast. Since my son is allergic to so many protein foods (red meats, dairy, nuts, gluten) using healthy seeds is a nice addition to our diet. Sunflower seeds have a lot of vitamins such as Vitamin E, B1, manganese, iron, selenium, calcium, folate, B6, B3, and of course protein and good fats. This recipe starts with sunbutter. You can make your own by whizzing fresh sunflower seeds in a Vitamix until it is creamy. I use sunbutter because this brand is produced in a peanut/tree nut free facility, which can be hard to verify with bulk seeds. Their employees are not even allowed to bring any peanut products in their lunches. Same thing goes with the rest of the ingredients - I use them because I have checked and he has been good with them before. This recipe is pretty simple - sunflower seed butter, coconut cream/manna, cold press grapeseed oil, chocolate chips, maple syrup, vanilla bean, and sea salt. If you have allergies, be sure to check the manufacturing processes used for your ingredients. I have links to what I have used, but remember that production processes can change and what I may have verified recently (yet again) is for our specific allergies, and also may change if you are reading this in a year or in another country. Always remember to double check! 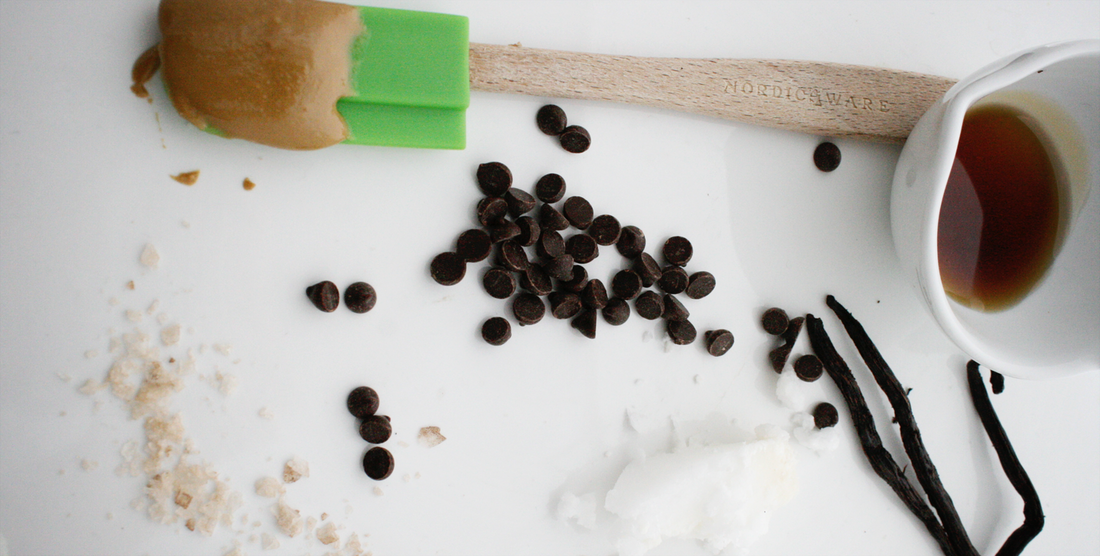 Sun-tella SpreadPrint | {wholly rooted}Delicious spreadable sunflower seed chocolate spread. Great on toast, with graham crackers, as a dip for apples, or by the spoonful. {GF/NF/DF} {ingredients}
Melt your chips and coconut cream in a double boiler. Add your vanilla bean and maple syrup. Stir well. Pour into a blender or mixer. Add your sunflower seed butter, grapeseed oil, coconut milk, and sea salt. Whiz quickly to incorporate. Don't over blend or you will get sludge. Spoon into a jelly jar and store at room temperature. Will thicken slightly as the it cools. 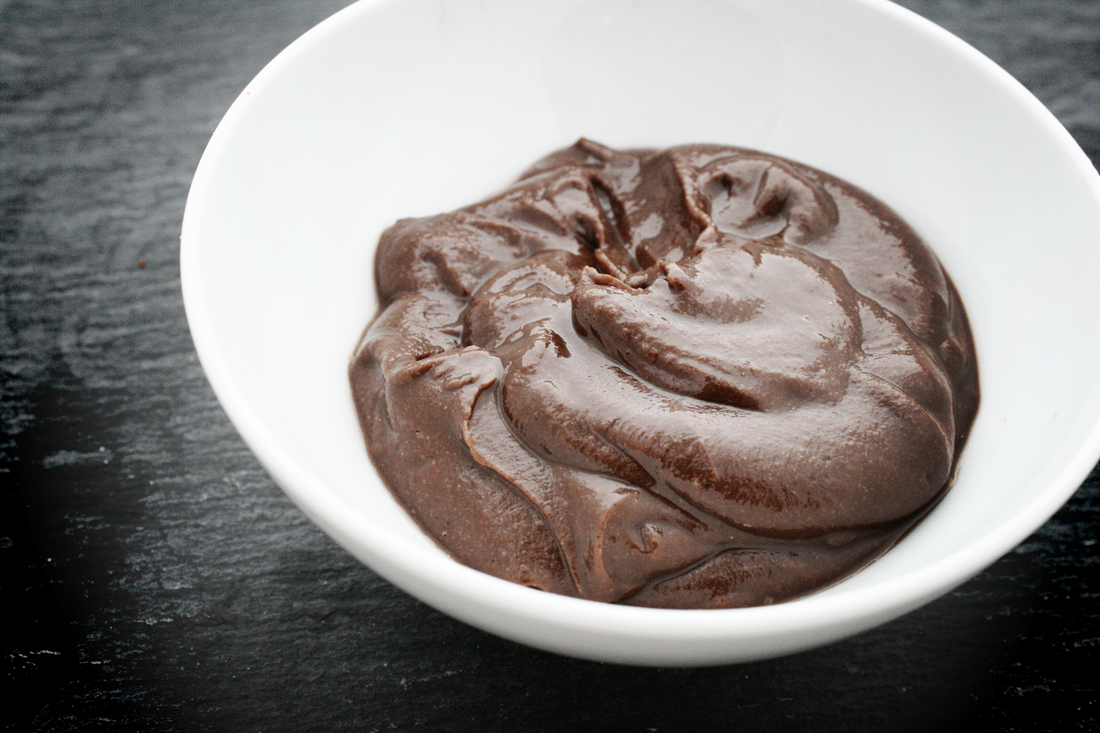 This passed the husband taste test. He has been happily eating it for breakfast and kaffeeklatsch all week. My allergy boy loved it on GF tortillas. Yum! {Tomorrow I will share my seed free coconut chocolate spread!} And another reminder to check your ingredients. I like using ingredients that I know are consistently tested and are aware of allergies. If they are specifically made for those with allergies, they are less likely to make mistakes and have more strict controls and processes in place. Oils, chocolates, and seeds can be challenging to verify as produced in a nut free facility. They are often processed with other bulk items or made in factories that make nut oils or granola bars or candies with who knows what other allergens. And "may contain" notices can be confusing. Most companies are happy to tell you if they are allergy safe and many publish allergy statements, ingredients, and labels online. So read labels, check, double check, and call or write the company if you are not sure!
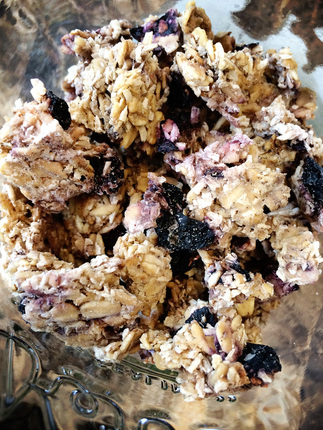
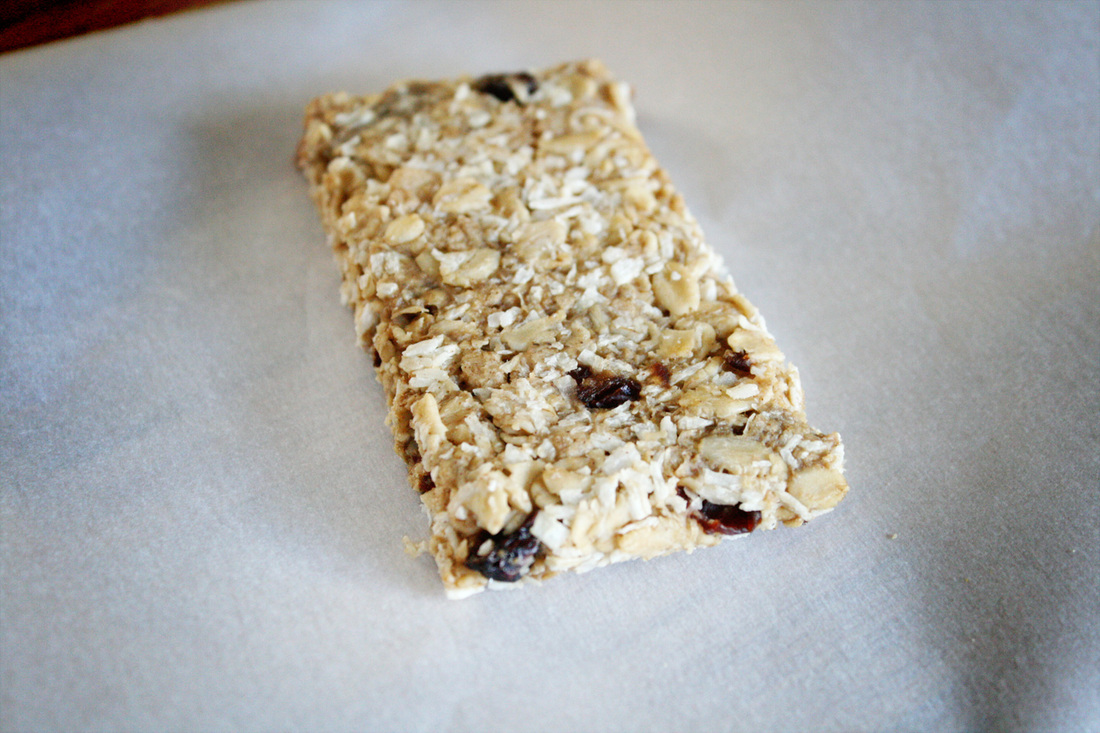 There are some staples that I try to always have on hand in the house. Flax crackers, granola or granola bars, and coconut water kefir are a few. One of the challenges of having a child with so many allergies is that often even the most simple ingredients or foods are no longer safe. Granola/granola bars is one of those things - most of the standard less expensive brands are made in facilities that also process nuts, dairy, gluten, you name it. We have found one or two trusted brands that are made in a dedicated allergen free facility, but they are not easy to find and they are expensive - not to mention flavor choices are limited. I have made this recipe as granola and/or granola bars all winter, usually about once a week. It is so good my husband eats it out of the dehydrator before it is even ready.  Dehydrator Granola BarsPrint | {wholly rooted}Allergy friendly dehydrator granola bars are a yummy treat for all ages. Crumble them to make granola - great over yogurt. If you don't have a dehydrator, don't worry - use your oven on the lowest setting. {ingredients}
Mix everything but the coconut milk together really well in a bowl. Make sure sunflower butter is fully blended - I have found using my fingers and rubbing it together with my fingers like making pie crust works great to get the sunflower butter fully blended. You can also just pulse a few times in your food processor - it will help the bars stay together but don't over whiz or you will miss the nice chunky bits.
The possibilities are endless. Once you start making this you won't be able to stop. Delicious! Tip: Don't forget to always read your packaging. Some brands of dried fruit and seeds are made in shared facilities with other allergens. Read the package or make your own! To make your own dried fruit, simply spread fresh fruit evenly on the dehydrator sheet. For berries like blueberries or raspberries use whole. For fruit like apples or bananas, remove peel, slice in 1/4 to 1/2" thick pieces and place on your dehydrator sheets. Dry in your dehydrator on fruit setting until full dry. Store in an airtight container until use!
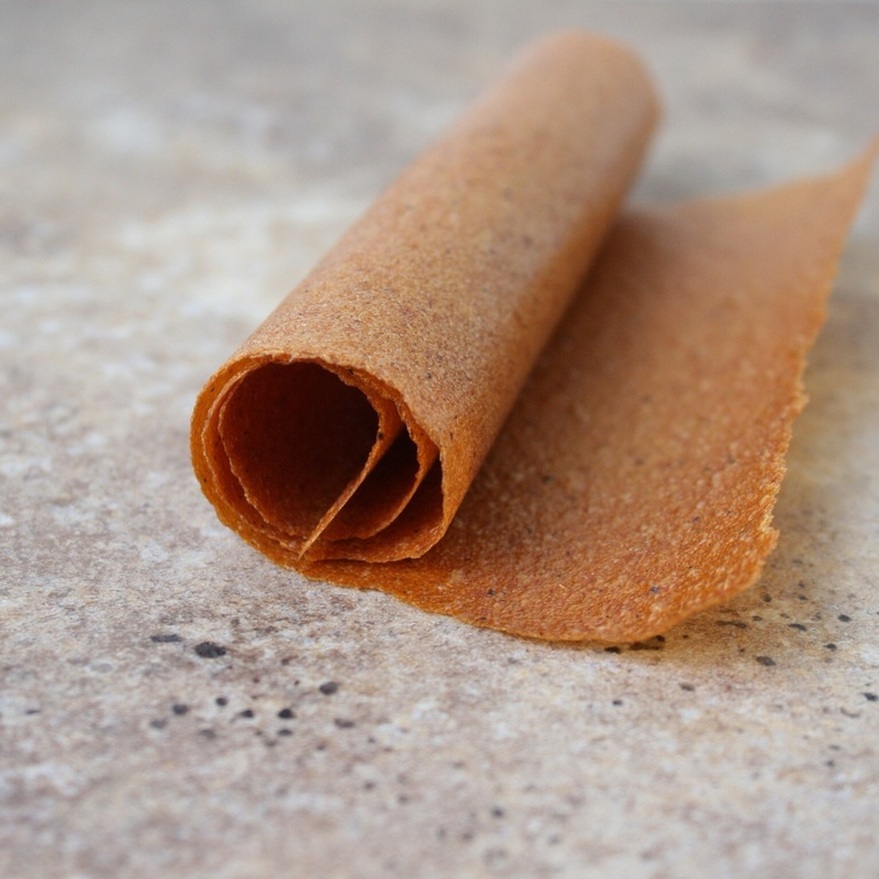 Fruit leather is a great way to preserve the season. Whether you have a case or a bowl of fruit, a few trays of the intense essence of ripe summer are at your fingertips. And by making your own, you don't need preservatives or loads of sugar. While kids love fruit leather, I send my husband off on business trips with a bag of it too, and it is shared and enjoyed immediately.
Vanilla Nectarine Leather Remove pit from 10 ripe nectarines. Combine nectarines and the seeds from one scraped vanilla bean In a blender or Vitamix, Blend on high for 30 seconds until fully liquidated and peel is gone. Taste. Ripe sweet fruit will not need sweetener, but some fruit may need a *little* drizzle of honey or maple syrup. Spread onto two lined dehydrator sheets, and dry on fruit leather setting until it is dry enough to peel without tearing, usually 2 hours or so. Peel gently and flip over on the dehydrator sheet, and continue to dry until no longer sticky but pliable. Cut into strips and roll into parchment paper while still warm. Store in airtight container! |

denise cusackI am a certified aromatherapist, clinical herbalist, permaculture designer, organic gardener, plant conservationist, photographer, writer, designer, artist, nature lover, health justice activist, whole foods maker, and mother of two young adults in south central Wisconsin. 


Categories
All
©2007-23 Denise Cusack, all photos and text. Feel free to share my posts on FB or Twitter or online media or pin on Pinterest (thank you!), but please keep the links back to my website intact (meaning please do not take or copy my images off of this website and share them unattributed or without linking back here or use them without permission). Thank you! :)
|
 RSS Feed
