
|
Summer is about warm sunny days spent at the beach, park or in the garden and steamy nights full of fireflies and mosquitoes. Cold, refreshing drinks don’t only cool us down when we are overheated, but also replenish all of the much needed nutrients lost when we have been in the sunshine working all day. These drinks are both refreshing and nourishing. Replenish our depleted reserves, while also tasting amazing. I published these recipes many years ago and I thought I would share again as it heats up and I'm in the kitchen concocting things to cool down and refresh. 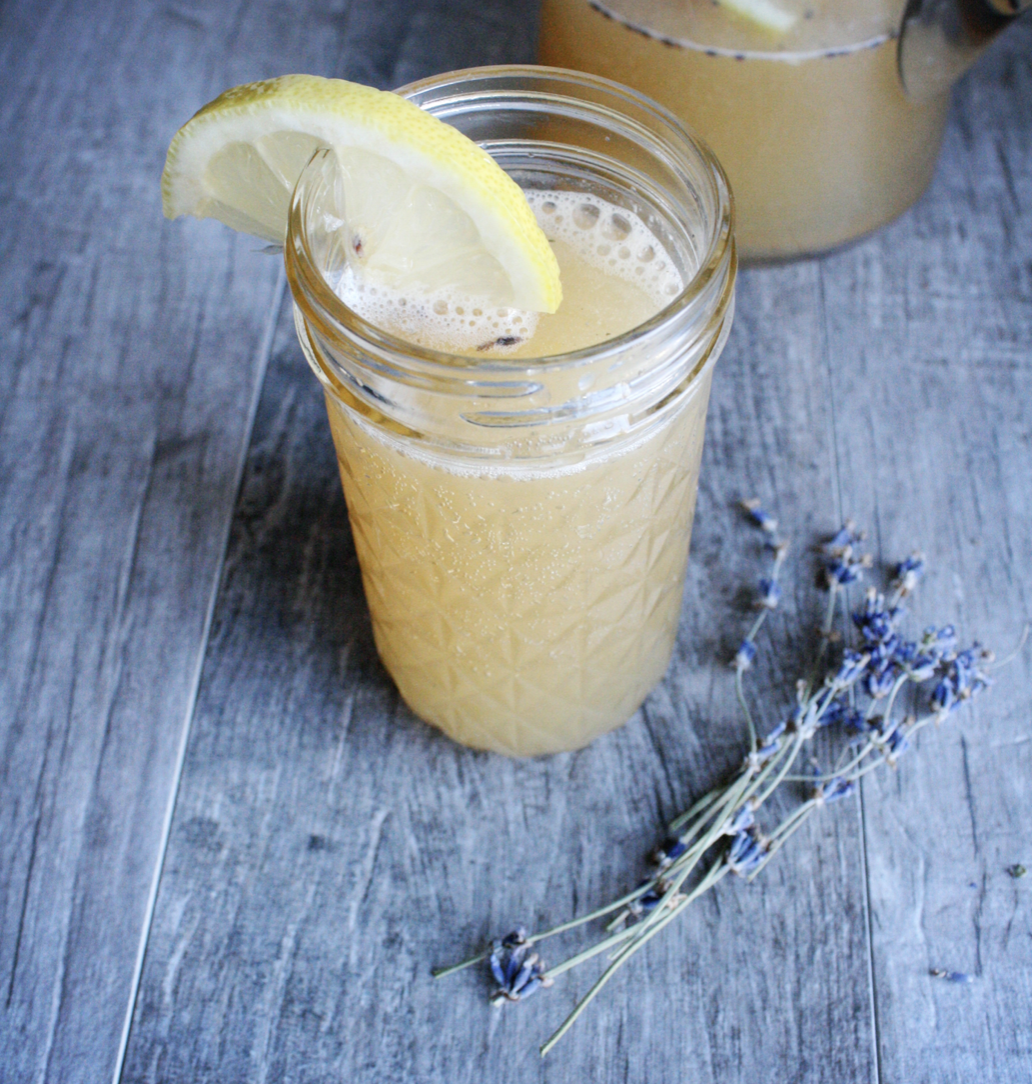 Fizzy Kombucha Lavender Lemonade Juice of 4 lemons 2 cups/475 mL kombucha (citrus is nice) 1/2 cups/118 mL lavender honey 1-2 cups/235-475 mL of water Mix your fresh lemon juice and lavender honey in a small pitcher. Add the kombucha. Stir gently. If you plan to drink straight chilled with the kombucha, then add the water to taste. If you plan to pour over ice, you can leave a little more concentrated, drinking chilled no ice, you may want the higher water amount. Be sure to taste and add more water or honey as needed - depending on how big and juicy your lemons are and the flavour of your kombucha you may want to tweak just a bit to taste. If you are making a pitcher for a party or picnic, the best bet for optimum carbonation is to pre-make the lemon/honey/water base and keep it chilled, and then add the kombucha to the base blend right before serving! Serve cold. A few lavender buds and a slice of lemon make a nice garnish. Lavender Honey To make lavender honey, gently warm your 1/2 cup/ 118 mL of honey (LOW - no boiling!) with 2 Tbsp of dried lavender buds added. Let sit for 20-30 minutes on *very low* heat and then strain. The honey will be infused with the lavender aroma and flavour. Tip: Add your honey to the lemon mix when slightly warm so that it will stir in and not sink the bottom. Whisking while slowly pouring it in helps too. 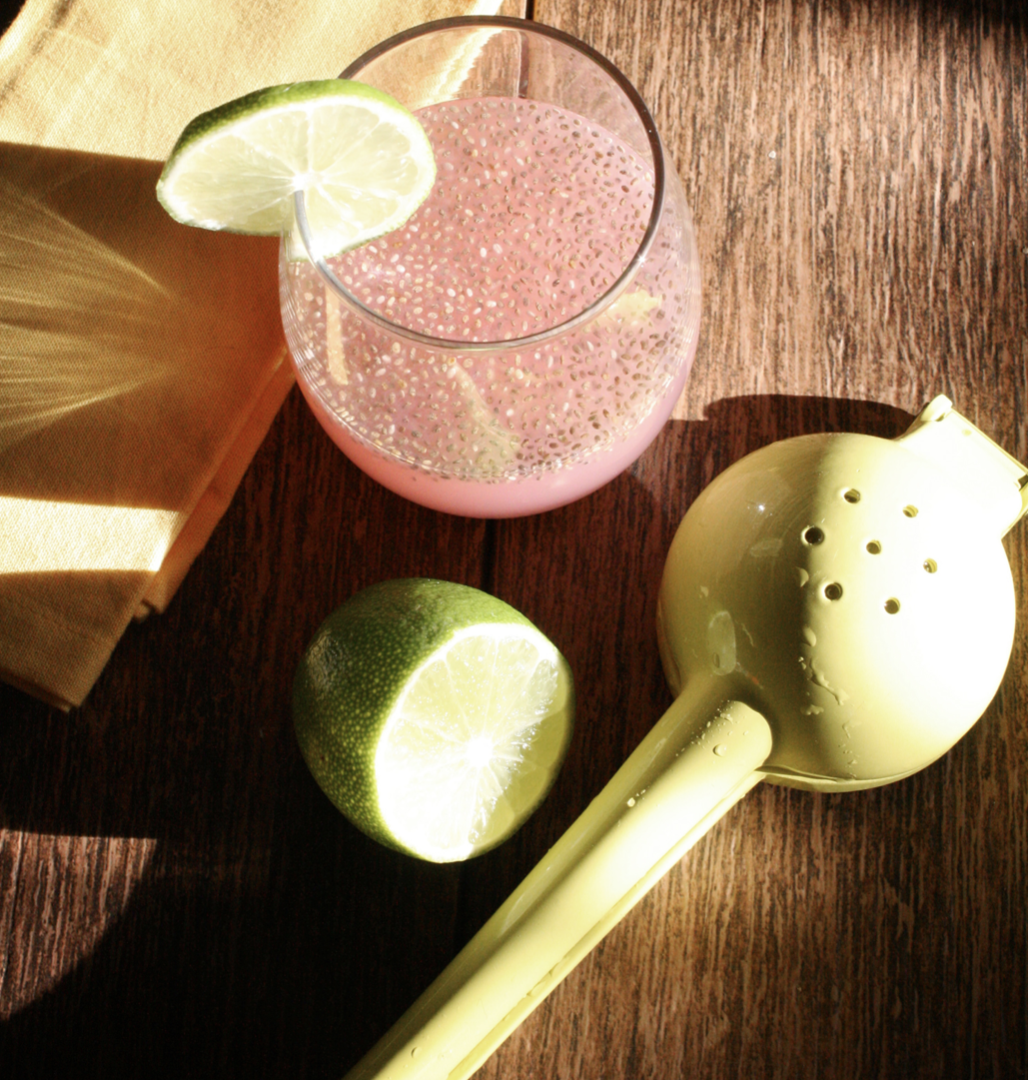 Chia seeds are not only for cheesy ceramic sheep planters. It is a very nutrient rich seed, which has the interesting ability to swell and plump up on its mucilaginous outer layer while keeping a nice crunchy seed inside. Chia contains fibre, protein, magnesium, calcium, iron, zinc, and so much more! Chia frescos are very common in certain parts of the world - a Mexican food cart with a large pitcher of lime chia fresco is a beautiful sight on a hot day. This is delicious, refreshing, and helps revitalize. And don’t worry, it is nutritious, but you won’t believe how good it tastes, even with the seeds in there! Chia Fresca 2 cups/475 mL coconut water or plain filtered water Juice of 1 lime 2 Tbsp chia seeds 2 tsp honey Mix your ingredients together, stir or shake well (a canning jar with a lid is a good container to use so you can just shake shake shake) and let sit 20 minutes or so for the chia to swell. Serve chilled with a wedge of lime.  Herbal ShrubSipping vinegars, also known as shrubs or in some variations as a switchel, have been around for a long time. A few hundred years ago vinegar was used to preserve fruit for the off season and the resulting beverage was called a shrub. Switchel was another drink from that era, made from ginger, honey, vinegar, molasses, and water - also called haymaker's punch - and was often taken to the fields by farmworkers. The ratio is basically 4:1. 4 parts honey/vinegar with 1 part herb. I measured by cup for this reason. With medicinals it is preferred to weigh not measure, but this is a beverage with some boost, so using cup measures will work just fine. {ingredients}
Bring to a boil on the stove top and reduce heat immediately, stirring. Simmer, covered, for 40-45 minutes or so. Let sit for 10 minutes off the heat. Strain this into a large bowl through a few layers of damp cheesecloth. Don't squeeze it or you will end up with a cloudy liquid. While the mix smells great, don't stick your nose in the pot because the vinegar will be a bit intense. And don't worry - the resulting drink doesn't taste like vinegar…you only get that strong aroma since you are simmering it on the stove! You should end up with around 1.5 - 2 cups of liquid (herbs will absorb some, some will reduce in cooking process - so it can vary). Add fresh vinegar to get you to two cups if necessary. Mix it with equal quantity of raw honey. It should be 2 cups herb infused vinegar, 2 cups raw honey. Add 1-2 Tablespoons of molasses. Shake or stir very well - it will be completely separate when you pour the honey in at first (see below) - but if you shake or stir really well for a minute or more, it will combine. You may need to stir before each use. You can store in your fridge for about 8 - 12 weeks or so. To drink, add 1/4 cup sipping vinegar to a glass, fill with sparkling water, club soda, or seltzer. Try mixing a bit into your pitcher of iced tea. Mix with sparkling wine or champagne. Or, take as a tonic by sipping a tablespoon or so in a small shot or cordial glass. For kids, the best is 1/4 cup of your shrub in a glass with ice and sparkling or soda water. Combining the concept of alcohol free tincture or oxymels with the day to day deliciousness of a shrub means you can have a tasty refreshing fizzy soda with the benefits of the herbs! Other Cold Summer Recipes I Have Posted Previously:
Iced Hibiscus Tea Juniper Sage Soda Banana Maca Frozen Smoothie This is the time of year where I want to use the herbs as I pick them as they smell so AMAZING, I want to make things that everyone loves and that don't take too much time, and that are cooling and delicious. If they can be poured into a popsicle mold and frozen as well, that is a bonus. While I do love a nice iced herbal sun tea, different drink mixes using the amazing variety of summer herbs keep it interesting!
0 Comments
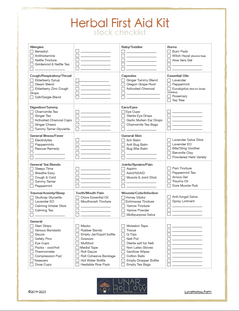
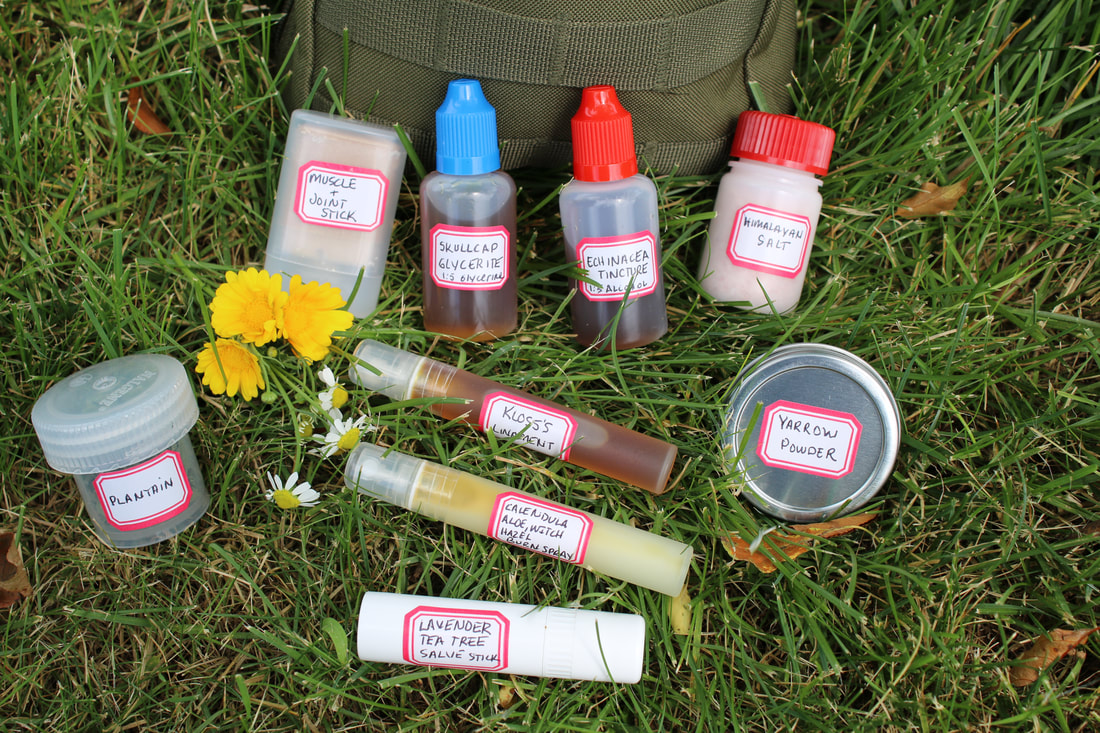 I love growing my own herbs for everything. Tea, tincture, salve, first aid, food, you name it. Growing my own herbs all summer long and then filling my shelves makes me feel prepared for anything. When things became very hard to come by during the early year of COVID, I felt secure knowing I had everything I needed, even if no stores could ship for months. As herbalists, we are lucky to have a head start. We can identify the herbs we want to use out on a walk. We know what to pick for scratches or cuts or stress or stomach aches. Having a well stocked home apothecary can also be used to build ready-to-go kits that are easy to use and targeted to the specific needs and situations in our regions. Some people have one kit for everything, but I like to have a few types of kits on hand for different situations. When a well thought out first aid kit combines with skills, we are better prepared. My kits have a lot of what I grow and make myself, along with some key items that I purchase. Some of that changes based on what I'm growing, the season, and the needs of my family. Today I want to share more about how to build a day/camping/weekend outing kit. This is a small kit organized by season and region that is great for taking with you in the car, when hiking, or when camping. I live in the midwest, so my needs definitely vary from summer to winter. In summer my kit tends to focus on injuries, sun, ticks and fatigue. If we were hiking in a more remote location I might add water filtration, food, batteries, and other items in case we get stranded/injured. If I put a kit in my car during blizzard season, I might include the first aid kit in a large lidded container along with bottled water, blankets, warm socks, extra hats, a box of instant hand warmers, and gloves. When my kids were younger I always carried extras - suckers, granola bars, sunscreen, backup shoes, and outfits along with a first aid kit. I also have a child that gets overheated easily, so I always carried instant cold packs and/or coolers with re-freezable ice packs, which were good for not only keeping food cool, but also cooling down and on injuries. There are a few main categories to consider when building a first aid kit. To start, let’s look at all of the supplies as a whole first, and then focus on the herbal first aid elements. 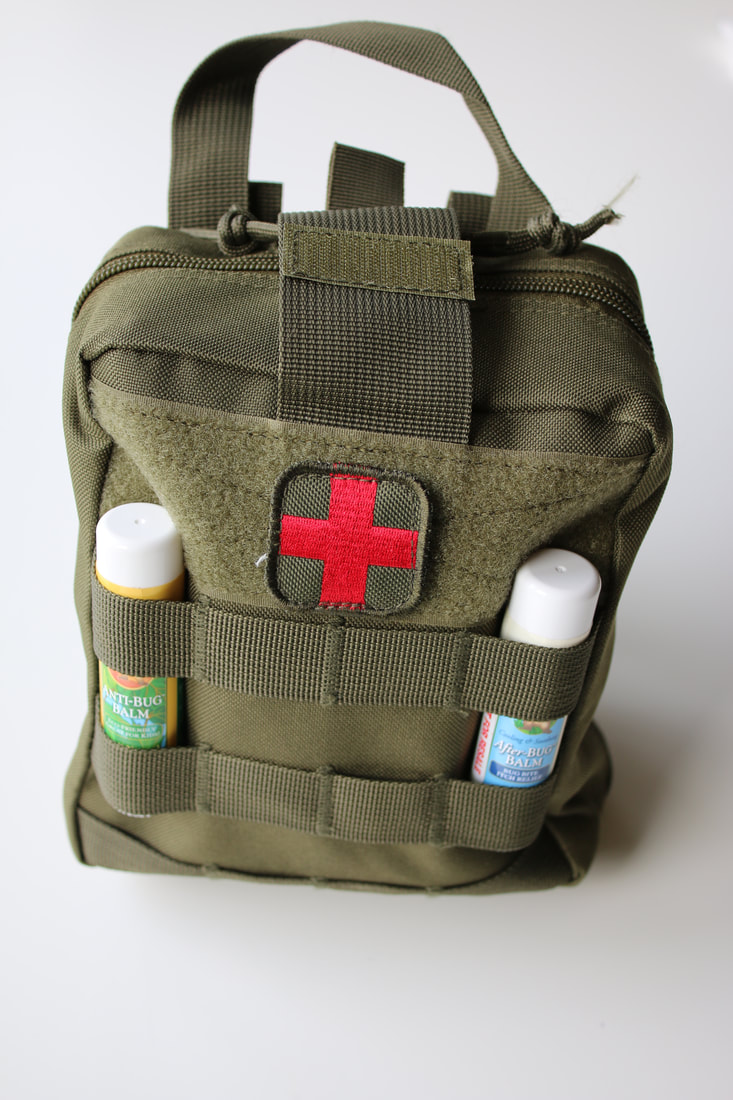 CategoriesAllergies: If anyone in your family has allergies, having a few antihistamine tablets can be a big help. For skin allergies, having salve or balm that help with the itch and inflammation is great. For more serious allergies, keeping benadryl in the kit is a great idea, and always having epipens in the kit for those that experience anaphylactic reactions. We also carry a cooler with an ice pack in summer to keep epipens cool if it is really hot. For seasonal allergies, making an iced tea blend for camp that includes peppermint, goldenrod, and nettles can be nice and support lowering histamine response as well. ENTE: Ears, nose, throat, eyes. Q-tips are great for mixing things as well as clearing out bugs or gunk in the ears or nose. With small children during the cold and flu season, mullein ear oil might be on your list. Eye drops or single use saline ampules are great for rinsing the eyes or inflammation. If you are on a longer hiking trip it might be a good idea to carry a dental kit or have clove essential oil and a mixing medium to apply to any broken teeth or on gum injuries until you get back to civilization. Teething gel can help as well, especially if you have little ones (though I have used it on a few adults as well). Chamomile tea bags are a great addition to a kit as the tea can be used for calming and stomach upset, as well as an eye rinse. I keep salt in my small kit because it can be used as a gargle for sore throat, to make a saline rinse for a wound, or mixed with honey and lemon juice to create an oral rehydration mix. Salt is lightweight and doesn’t go bad, so it is great for emergency kits. General/Seasonal: This is where you think of where you live and what is happening around you.. If you live in the desert southwest, something for snake bites may be important. . If you live near the ocean and are always at the beach, burn spray or eye rinse cups might be useful (or jellyfish stings). Just try to think of where you are going and what the climate and top needs/issues might be. In extreme heat you might want cool packs, in cold, hand warmers. On longer hikes in remote areas a whistle or a water filtration straw might be very important to have. This also includes some staples/basics such as tweezers, safety pins, tape, multitool, flashlight, scissors, a notebook and pen, electrolytes, and extra baggies. I also put things in baggies where I can - they can be used over a bandage on a hand, finger or foot. They keep the contents dry in case of torrential rain or falling into a creek or river. They can be used to mix something together, to place over gauze and taped on an injury. There are many uses for a few extra plastic bags, it is good to have a few in the kit. Gut/Digestion: Chamomile tea is mentioned above and can be good for an upset stomach. Ginger tea or ginger chews can also help with stomach upset and nausea. I love ginger chews. Bismuth tabs are great for diarrhea, heartburn, nausea, and indigestion, and are lightweight and obviously identifiable. For poisoning or other more severe issues, having activated charcoal tablets on hand is important. I also like carrying capsules of ginger/chamomile or oregon grape root, depending on the season and length of outing. Illness: Illness can be from food or water, viruses, bacteria, or other causes. During cold and flu season you might want to stock elderberry syrup and natural cough drops. In the summer, it might be nausea or diarrhea (see above). For a short hike or weekend camping trip, stocking just the basics can help get you home. For longer trips or hikes, having items that can help reduce a fever or soothe a cough might be what is needed. Yarrow is a good multi use herb that can be used to stop bleeding or for a fever. I like to have powdered yarrow on hand, but also often include a squeeze bottle of yarrow tincture for cleaning hands or for fever as well. Echinacea tincture is always in my bag for illness (and wounds) as well. Infections/Wounds: This category not only includes having bandages, compresses, suture tape, or wraps, but also antibacterial support for cuts, scratches, and punctures. Lavender essential oil is a good one to carry as it can be applied to a burn, used in an inhaler for anxiety, has antiseptic properties and is antimicrobial. You can make rollerballs with first aid blends and have them ready to apply. Lavender is also safe for kids and the elderly - and if you carry a small vial of carrier oil or have a pre-mixed rollerball ready to go, it can be easily blended for other topical applications. This category also includes salve - I like making salves in small sticks so that they are portable and solid enough to not melt in the summer heat. To keep from contaminating the stick, you can scrape some off with a clean Q-tip, popsicle stick, or finger and apply to any wound. I like having a stick of salve that can be used for blisters, cuts, sunburns, and is a good all around ointment. I also always pack a soothing sun spray in the summer, that helps relieve sunburn, but can also be used for other scraps and scratches. If we are already carrying a cooler with ice packs, I put the burn spray in with the cold things, as a chilly burn spray feels amazing on a sunburn. Echinacea tincture can be used internally for infection and illness as well as topically on wounds. Kids/Pets: This is a big variable category. With small children you might want to include suckers, herbal gummies for stomach issues, and even things like extra socks and cute bandages that make it easier to keep them on. If you hike with your dog, having a folding bowl, extra water, and some sort of liquid bandage can help with pet paw injuries and overheating. I like the paw wax for pads in winter, as if my dog gets a cut, it can be heavily applied and help us get back to the car. The dog flexible wrap tape that discourages them from chewing on bandages can help, too, and it can be used for humans or pets. I also like the dog bandanas that are of the cool cloth material, as you get it damp, squeeze it out, and it is cooling. Good for a hot dog as well as hot kids, in a pinch. Medications: If you have important medications, having some extra in case you get caught out is a good idea. Important medications become critical if you are stranded along a raging river for 2 days, or have an injured person and are waiting for assistance. This can also include glucose tablets, candies or honey sticks for blood sugar, an inhaler for asthma, or other critical needs. Pain: Pain can be from a wound, sprains, overexertion, or fall. Keeping some aspirin and other NSAIDs on hand can help, as can having topical pain relief for tooth problems, wounds, burns, or other injuries. One spray I always have in my kit is Kloss’s Liniment. This recipe has been around for over 100 years, and is well known in the herbal community. This can be used for pain, swelling, bruises or boils, toothaches, sores, and more. This is also a good skin cleanser on wounds to reduce chances of infection. I love the little sampler spray bottles for these things, as they take up little space, but have enough to use many times. Safety: This may not be a big need for a short hike or camping at a busy campground. But if you are hiking backwoods or are kayaking Lake Superior, you may have to add safety additions to your kit. Things such as a whistle, bear spray, flares, extra emergency blankets, a flint or waterproof matches, and food rations might be important depending on the location. If you have younger children, you may want them to carry an emergency whistle and your contact information at all times. When my kids were small and we hiked a lot, I got the fishing vest lots of little pockets. The pockets could carry the whistle, compass, snacks, ice packs (to keep cool), little bottle of cold water, contact info in a baggie for waterproofing, etc. That way they carried their own things too, which is less for me to carry, and critical items would be WITH them if we got separated. Sanitation: No matter how many herbal aids you have on hand, if a wound cannot be cleaned out it can get infected. Salt is a good option when mixed with water to rinse out a wound. Kloss’s Liniment is a good option, and so is lavender essential oil. The first step to working with any wound is having clean hands. I like carrying soap, but if you don’t have a clean water source that isn’t helpful. A mini hand sanitizer is good. If you are in an area without access to any water that is a problem too, and I try to always have a small water source in the kit in case we are out otherwise. Water and salt can also help clean hands. I also pack some natural antibacterial wipes for hands, surfaces, tools, tweezers, etc. Sanitary gloves are important too, and I always have a few pairs on hand. Skin: Skin crosses over with wounds and infection, but also includes bug spray, sunscreen, tape, gauze, burn pads, wound repair and more. Bug bites can use an anti-itch balm or salve, which also crosses over with skin reactions to water, sap, or plants. I always carry a few moist burn pads or ointments as well, for any bigger burns when we have campfires. With skin goes ticks as well, and a tick remover for those in tick areas is good, or really pointy tweezers. Those little honey sticks can be used on skin or for blood sugar. Yarrow powder can be used to slow bleeding. Plantain is for scratches and scrapes, and I like to have a little jar of dried plantain that can be mixed with some water to make a poultice or compress. I also keep moleskin tape as it is a great cover for blisters. Trauma: Trauma can involve injury or a scary event. I like to keep a skullcap glycerite on hand for calming after injury, pain, or frightening event. It can help calm when scared of the dark or when stressed due to an accident or storm. I also carry a blank inhaler container with a wick that can be used with lavender essential oil to calm, or, the wick can be used to help stop a nosebleed. Rescue Remedy is often in kits for this, as can be other glycerites or calming tools. Other: There are a few things in my kit that I have found are a must when we are also packing herbs. A container that holds q-tips can also be used as a mixing jar. Yarrow and Plantain can be crushed and sprinkled in, mixed with water, and applied to an injury. I keep a few muslin bags that can be filled with plant material and placed on a wound. They can also be used to steep herbs for an infusion or compress. I keep a small empty squirt bottle for blending salt and water and used for cleaning a wound or gargling. Q-tips can be used as applicators or stir sticks. I like an emergency blanket in the kit as it can be used not only as a blanket, but also a dry groundcover, a sling, a blanket, a tarp/rain cover, ties/straps for a splint, and even as a reflector. 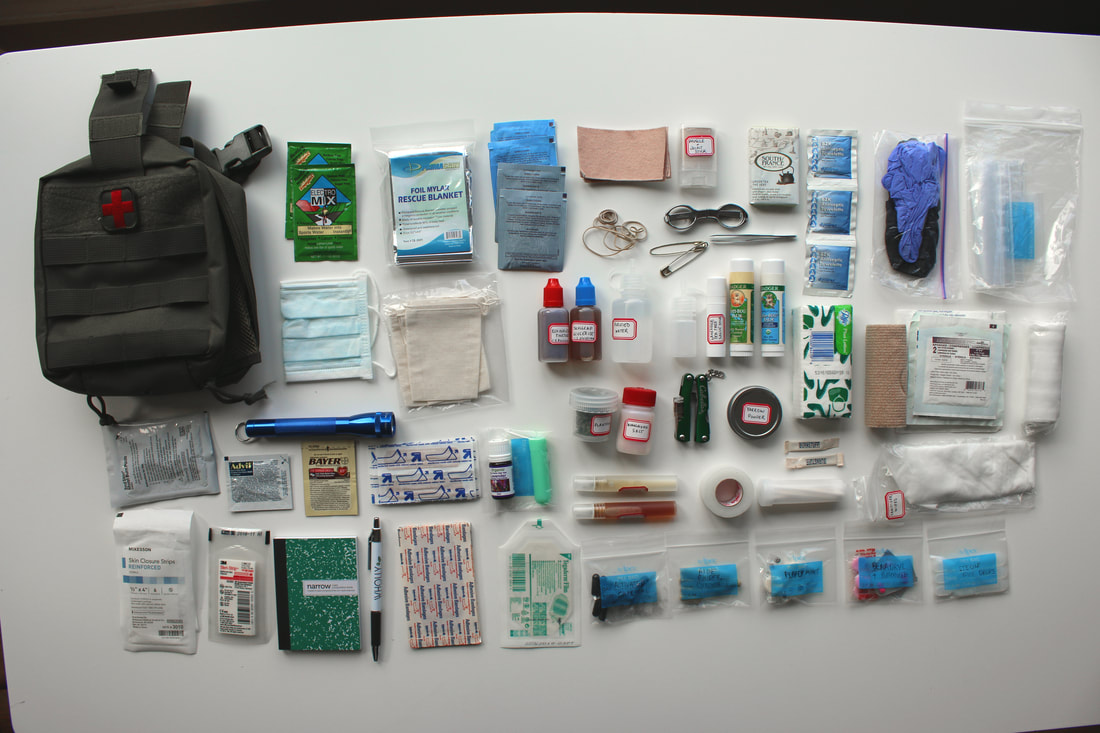 Herbal First Aid RECIPES So, now that you have all of this information, how do we put it all together? I created a sheet you can download to use as a checklist when you build your own portable camping/car/day trip herbal first aid kit. This can help you go over the categories, and cover your bases as you adjust for seasons, region, and family needs. You will see modified and expanded versions of this checklist in the future as we also talk about a home family first aid kit and a bug out bag kit. Of course the point of all of this is that we have an herbal first aid kit that utilizes herbs and plants we have grown ourselves and that we have in our home apothecary. If you don’t have all of these items you can purchase them all, or slowly add to your kit. To get you started, here are some recipes for a few key elements in your portable Herbal First Aid Kit. 1. Yarrow Powder Take 1 ounce of dried yarrow (flower and leaf). Put into a mortar and pestle or spice grinder, and grind until a fine powder. Put into an airtight container such as a small jar or tin. To use, infuse in water and use as compress for fever. Soak a splinter in yarrow infusion to draw it out before you pull it out with tweezers. Sprinkle ground powder on a wound to stop bleeding and reduce inflammation. Drink the infusion for fever and colds (not for infants). 2. Kloss’s Liniment This liniment recipe has been around for a long time. It was first published in 1939 in Back to Eden, by Dr. Jethro Kloss. There are variations online and in herbal books. Google search to find options that fit with your needs. The recipe is for sore muscles and can also be used as a disinfectant. I change it up based on what I have on hand. The base recipe is: 1 oz echinacea powder 1 oz myrrh powder ½ oz goldenseal powder ½ oz calendula powder ½ oz thyme powder ¼ oz dried cayenne pepper 1 pint rubbing alcohol Add dried herbs (powdered works best) to a pint or quart canning jar. Add about 1 pint of rubbing alcohol to the jar, and screw on the lid. Shake well every day or two for 4-6 weeks. Store in a warm location during this time. Strain well and bottle. Label EXTERNAL USE ONLY very clearly. Pour into a small spray bottle for your first aid kit and label properly. You can choose other herbs to add to the infusion including St. John’s Wort, yarrow, or plantain. You can also add essential oils to the final blend to enhance certain properties. Rubbing alcohol is used here as it evaporates well and is a great disinfectant, but you can also use witch hazel, vodka, or another menstruum of choice. 3. Sun Spray ½ ounce calendula infused witch hazel ½ ounce aloe vera (liquid type is good for a spray bottle) Mix together and put into a small spray bottle. Label and use for sunburns, inflamed skin, bug bites, etc. Optional: 8 drops lavender essential oil 32 drops of Solubol or dispersant 4. Joint & Muscle Rub Stick 3 oz Arnica, Willow Bark, & Comfrey infused jojoba oil ½ oz shea butter ½ oz cocoa butter 20 drops black spruce essential oil 10 drops peppermint essential oil Gently melt the butters with the infused oil until liquid. Add the essential oils and pour into travel deodorant stick or small balm stick molds. Quantity made varies by what size container you use. If it gets really hot where you are, you might want to add a little extra butter or beeswax to get a nice solid stick. I find my summer sticks need a little more butter/wax than the winter sticks so they apply smoothly. 5. Muscle Ache Oil20 drops Helichrysum Essential Oil 10 drops Roman Chamomile essential oil 2 oz Trauma Oil (blend of St. John’s Wort, Arnica, and Calendula, usually) Blend together into a flip top bottle. To use: Shake well, squirt a little onto hands, and massage into aching muscles. Safe for kids 10& up 6. Lavender Salve Stick (boo boo bar) 1 oz Lavender & Calendula infused babassu oil (or other oil of your choosing) ⅓ oz shea butter 6 drops lavender essential oil 3 drops tea tree essential oil Melt together the shea and infused oil until liquid. Add the essential oils. Add a few drops of vitamin E if desired. Pour into lip balm tubes. Let harden. If it is very hot where you are, you may need a little more shea butter or some beeswax to make this a solid enough stick. I like pouring this into large lip balm tubes. Quantity varies by what size tube you use. Other: Activated Charcoal Tablets: Activated charcoal comes in a large container of powder, which is really messy to handle. I like using a capsule maker with ‘00’ capsules. I fill a bunch with the activated charcoal and keep them in a baggie in my kit. They can be swallowed as a capsule, or broken open and used for other things such as emergency water filtration. (Requires basic knowledge to properly and safely utilize in this way). Bug Bite Sticks: You can make your own or get the little sticks that break and the cotton swab get saturated that you run on the itch. Other Tablets: Other capsules that come in handy include ginger, chamomile, slippery elm, or oregon grape root. See what your seasonal needs would most likely be and make what works! 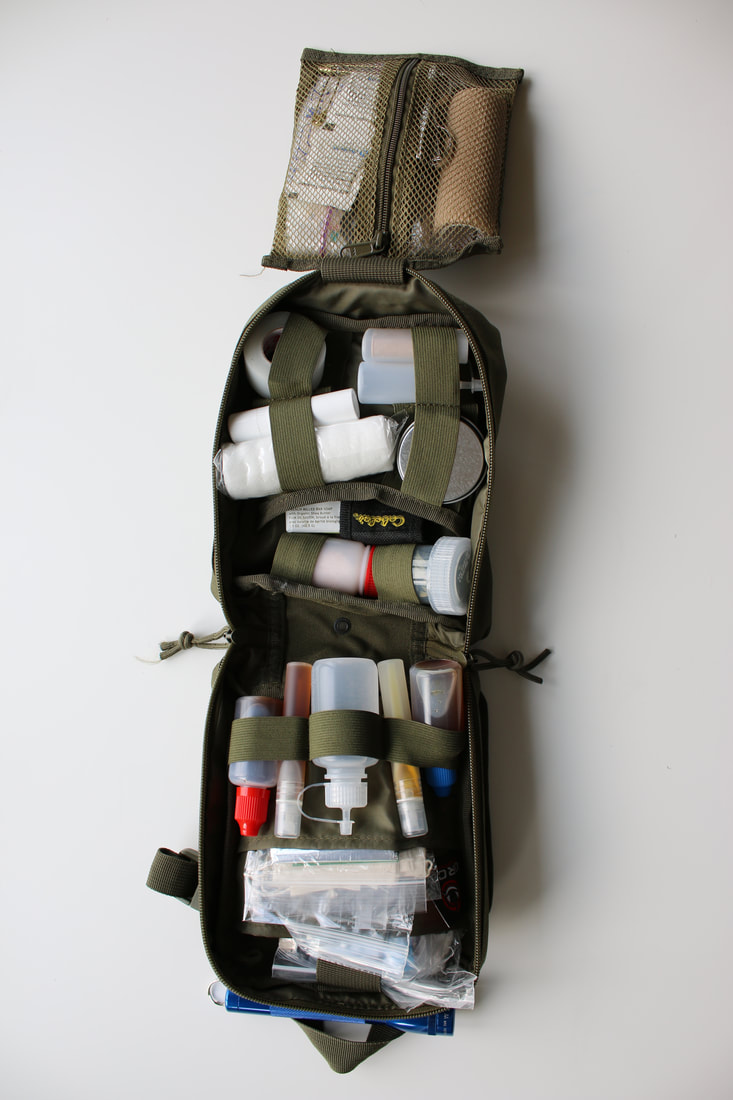 Building a first aid kit doesn’t have to be complicated. Tick the boxes of your needs, put together something in a case or container that you will remember to carry and that is easy to carry - if it is heavy or inconvenient, you will leave it behind. I have a great bag that velcros or straps onto any backpack, making it super easy to take along, and to find when in a panic. Start small, build as you go. Check through it seasonally and see what needs a seasonal change or a refill. By starting with this daytrip/weekender first aid kit, you are on your way to having a fully stocked set of first aid kits that keeps your family ready for anything! I plan to share more about making full family first aid kits and bug out first aid kits soon, so subscribe to be sure you get it in your inbox.
I first wrote this article back in 2019, when it was published in Home Herbalist Magazine. This article has been edited and updated over the years, and I wanted to share it here! This has been edited for the times and my own first aid kit! 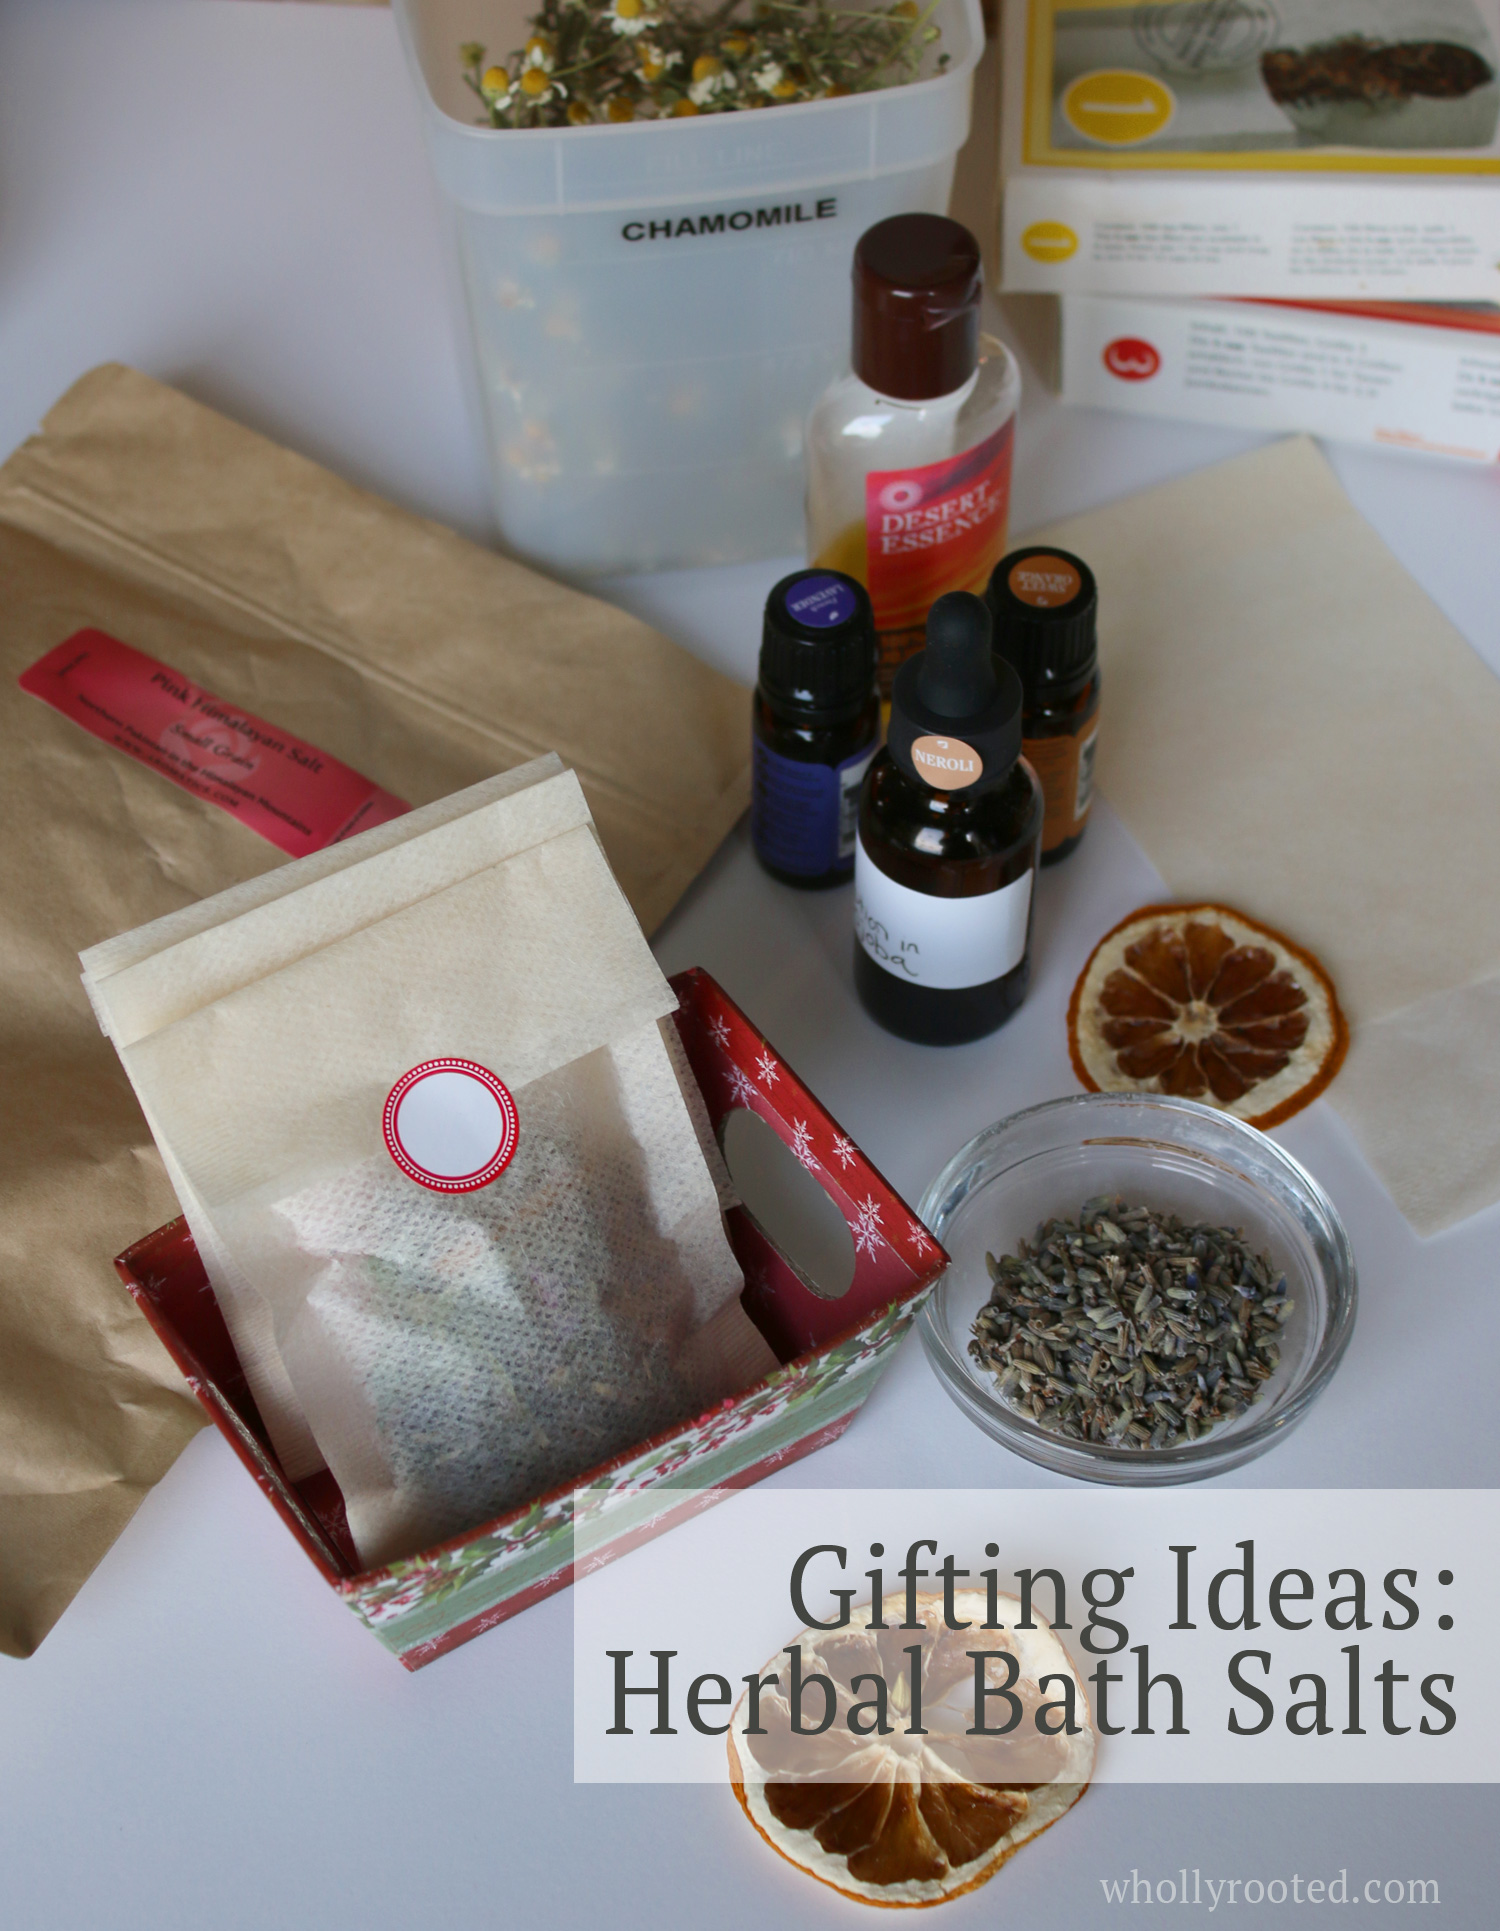
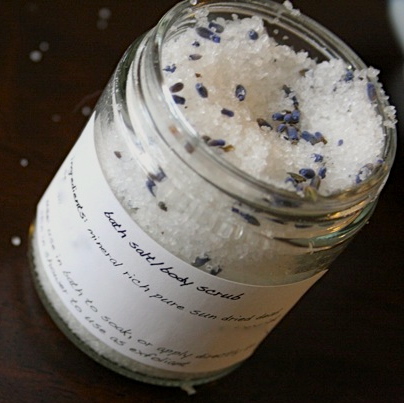
Herbal Bath Salts combine the ease of fragrant bath salts with the healing benefits of herbs. I like bath salts for many reasons. I have one son who has eczema flares in the winter - and salt/herb/eo baths have helped keep those to minimum for the past few years (along with a rich body butter). My other son has mast cell issues and severe food allergies and we have found that the mineral rich epsom salts help keep him from having as many skin reactions. As he is older he prefers to shower now, but still has a soak when he has been having a rough week health-wise.
Herbal Bath Salts are easy to make and very customizable. Many places sell dried herbs - or you can use what you grew/dried from your own garden (bonus!). Here is a base recipe using herbs known for their calming and healing properties - plus a few ideas of how you can customize your own. 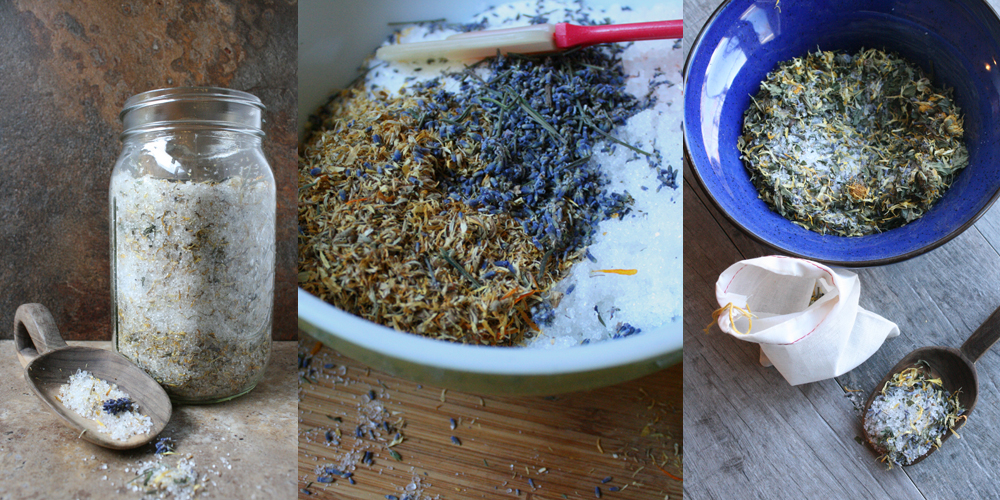
Sleepy Time Bath Blend
Approx. 4-6 baths
Mix the salts together in a large bowl with the dried herbs. In a small vial or cup mix your carrier oil with the essential oils. Drop a bit at a time into the salt/herb blend as you stir well. Store in an airtight container. To use, scoop ¼ to ½ cup per bath into a re-usable muslin pouch, and steep in the tub as you fill it. Soak and enjoy! Optional add-ins or substitutions: dried plantain, lemon balm, lemon verbena, coconut milk powder, dried orange peel, or rolled oats. If you collect your own garden herbs, just be sure to dry fully and remove from stems before weighing. Also, you can use just the salt & herbs and skip the essential oils. Other essential oil and herb combos that are nice (just blend into the carrier oil and add to the salt mix) as alternates::
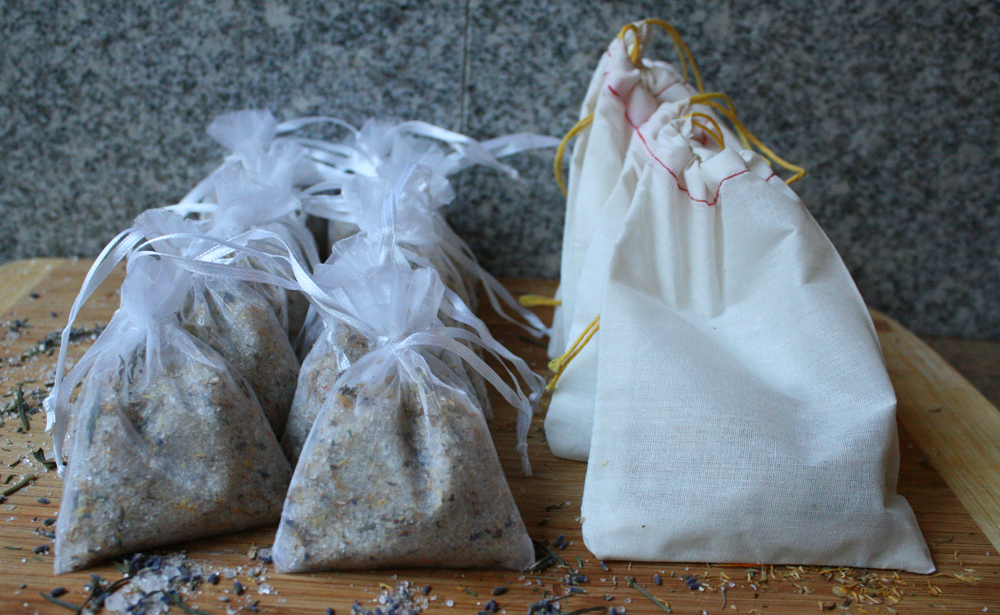
To make as a gift, put your blended batch into a nice glass jar and attach instructions and a muslin bag or scoop. Attach instructions - use 1/4 cup or more per bath - and gift away! You can also make individual tub bags - measure 1/4 cup portions into unbleached biodegradable large empty tea bags. I really like the x-large natural iced tea bags because they strain finely so no bits end up in your bath and they are compostable. You can simply sew or sticker them shut at the top and put into a pretty box with instructions. Craft stores also sell wedding favor bags which are a good size - and they can be cleaned and re-used. The key is to store the pre-filled bags in an airtight container so that they don’t start to dissolve from the moisture in the bathroom. The salts will sink to the bottom and settle if you use a single large jar, so be sure to stir or shake before scooping into the tub. Be sure to keep the lid on tight for a whole jar or store the pre-filled bags in an airtight container to keep from dissolving in the bathroom moisture. Herbal Bath Salts Instructions: Scoop 1/4 cup per bath. Tip: Don't use bath salt blends for tiny ones. For toddler baths you can use a small pouch of only dried calendula or lavender – using 2 Tbsp of dried organic herb is enough for a shallow bath – and skip the salt and essential oils. Those gentle herbs will help sooth any bottom or skin rash, while remaining safe for wee ones. The easiest way to do this is pour 1 cup of almost boiling water over your herb pouch in a heat safe bowl, and let steep until room temperature. Remove the pouch and pour this *cooled* infused water in with your toddlers bath water. This way you have the full infusion added to a bath at a safe temperature. 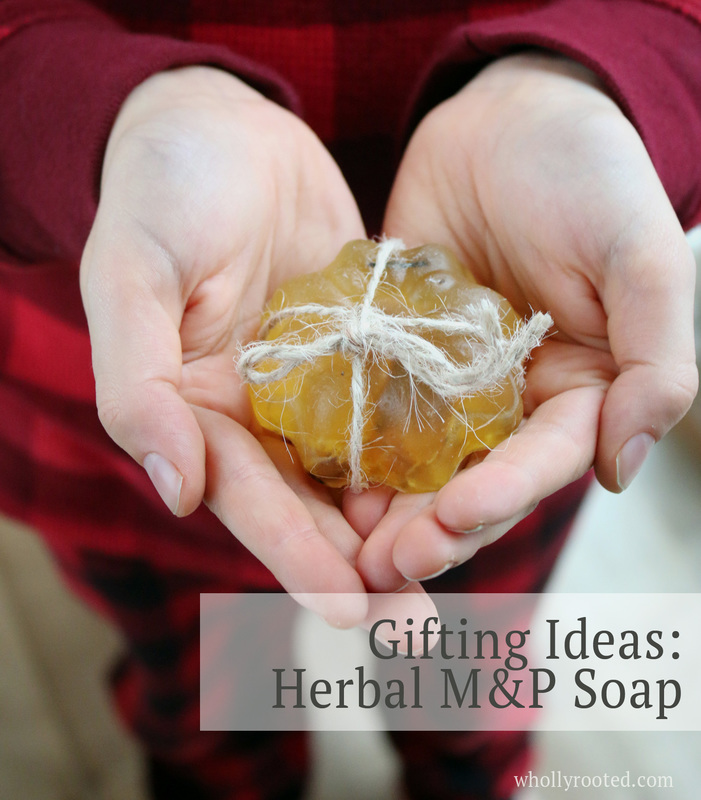
I cannot believe it is November. It has been so warm here in Wisconsin. Flowers are still blooming, I am still watering pots, and we have been outside with green grass, short sleeves, and iced drinks. It is unbelievable, but I keep hearing that little voice saying only a few weeks until G's birthday and Thanksgiving, and only a few more weeks until winter solstice and Christmas --- you are soooooo behind on gift making. Why yes, yes I am.
I am sure you are all much better than I, and have been cranking away at handmade gifts and goodies for months. I seem to transition from all of the garden work season to holiday making season and when garden work continues for so long the rest gets pushed off. I have so many great recipes for hand made goodies in my pile of things to blog that I never blogged, so I think I will share them over the next few weeks. Since some are old and some are new and some were for our home projects, I won't out our gifts to any family members (which is always the worry this time of year), and I will also motivate myself to get rolling on the making. After I water all of my pots with iced tea in hand, of course. The in-between of handmade things - from small kids (find something safe! and easy! and cute!) to teens (I know what I want to make and don't need your input, thanks!) - is the tween and early teen crafting making phase. The phase where the project needs to be interesting and cool enough for them to want to join you and actually do it all themselves thankyouverymuch, but short enough to not seem like some mad mom thing. They want to make gifts for people and they want to feel involved, but they want to be interested. This melt and pour herbal soap falls into that category. My tween (soon to be 12) son loves working with me on all of my aromatherapy projects and assignments. He wants to know about the chemistry and whip things up and use all of my special measuring devices that I reserve only for that stuff (so!many!cool!measuring!devices!and!stir!rods!). My 13 year old son is in the wellllllll maybeeeeeeeee but I'm pretty busssssssyyyyyy phase, but even he enjoys something that resembles a DIY:Sci science project. No, it isn't dangerous and doesn't blow up, but the big grated ball of m&p is microwaved until it is a liquid and you get to pour it into molds, so that is fun. And they have something to give that they made. Melt and pour has a bad rap for being meh, but there are some very good quality organic versions out there (and palm free options!) and it is great for the tweens as it doesn't involve the lye and caustic chemicals of processed soaps, but it is something that they can make and customize. Or, you can make it yourself. No tweens needed. I like the addition of dried herbs from our garden in m&p soaps. They add some skin nourishing properties, they give it more of an earthy homemade feel, and they look nice. herbs: This recipe combines lavender and calendula, both of which are soothing, relaxing, and healing. Combine ingredients to suit what you have in your herbal cabinet – try adding items such as dried rose petals, dried chamomile, or dried mint leaves. Tweak your fragrance to match your additions. molds: You can use soap molds of course, but don’t be afraid to get creative. Using muffin tins or silicone candy molds work great and give a great variety of patterns. I used a metal mini cake mold for this batch. 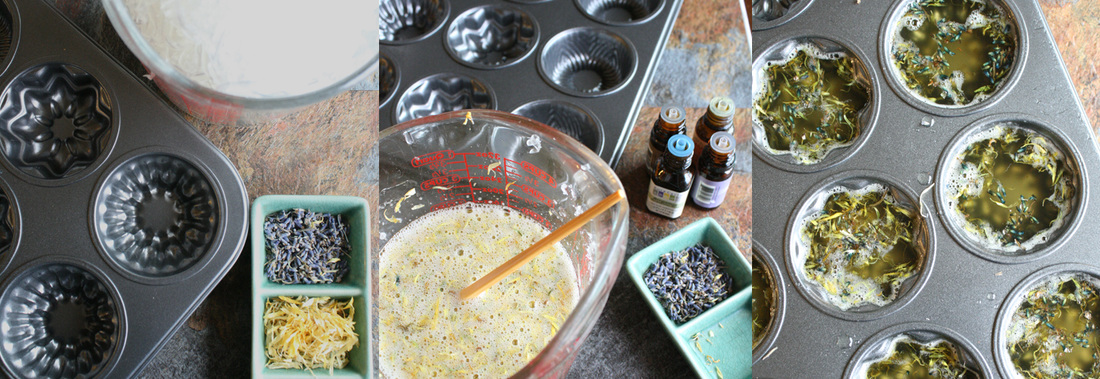
Ingredients: 16 ounces/475 mL of organic m&p soap*, grated (try a natural glycerin, aloe, or hemp type - choose your favorite) 3 Tbsp honey (optional) 4 Tbsp dried calendula petals 2 Tbsp dried lavender buds 1 Tbsp apricot kernel oil or avocado oil 1/8 tsp vitamin E (from bottle or pierce a vitamin E capsule) You can make the soap using only the base, oils, honey, and herbs. But to add some additional fragrance, you can add a blend of essential oils. This mild earthy citrus blend goes well with the calendula and lavender and has a nice uplifting aroma. 8 drops bergamot essential oil 30 drops mandarin 45 drops lavender 13 drops cedarwood or if you like a more floral blend, try 45 drops lavender 25 drops sweet orange 8 drops sandalwood 7 drops neroli 3 drops ylang ylang Don't panic. If you are thinking you want to make this but using only two essential oils - you can't go wrong with lavender + sweet orange. Directions: Oil your molds if using metal tins, or follow instructions if using soap mold or silicone. Melt your m&p soap base. There are two ways you can melt your grated soap base. You can melt gently in a double boiler on your stove, or you can microwave in a microwave safe bowl, stirring !very! !gently! (to help prevent foamy bubbles) every 30 seconds or so until melted. When melted, quickly and gently stir in your honey, vitamin E, and base skin oils. Pre-heat your honey a bit so it will stir in - if you pour it in fairly cold it will clump and sink. Add your essential oils, and finally add in the calendula petals, stirring carefully and gently to not add bubbles. Pour this mix into the molds gently to avoid too much bubbling. After cooling for only a minute, sprinkle the lavender buds over the top. They will sink in, but not all the way to the bottom this way. If you wait too long they will just sit on top, not sink and harden into the soap. You can gently remove any bubbles at the edges using a skewer or chopstick, so that the bar will dry smooth. Let the soap harden and cool fully before removing from the molds. If you are using metal tins, let the soap cure/dry in the tray so that they shrink enough to pop right out the next day. If you are using soap or silicone molds, remove from the mold to cure/dry on a tray for a day or two before wrapping. Package the soaps in a little box or wrap with ribbon or string. Gift away (and keep a few for yourself!). 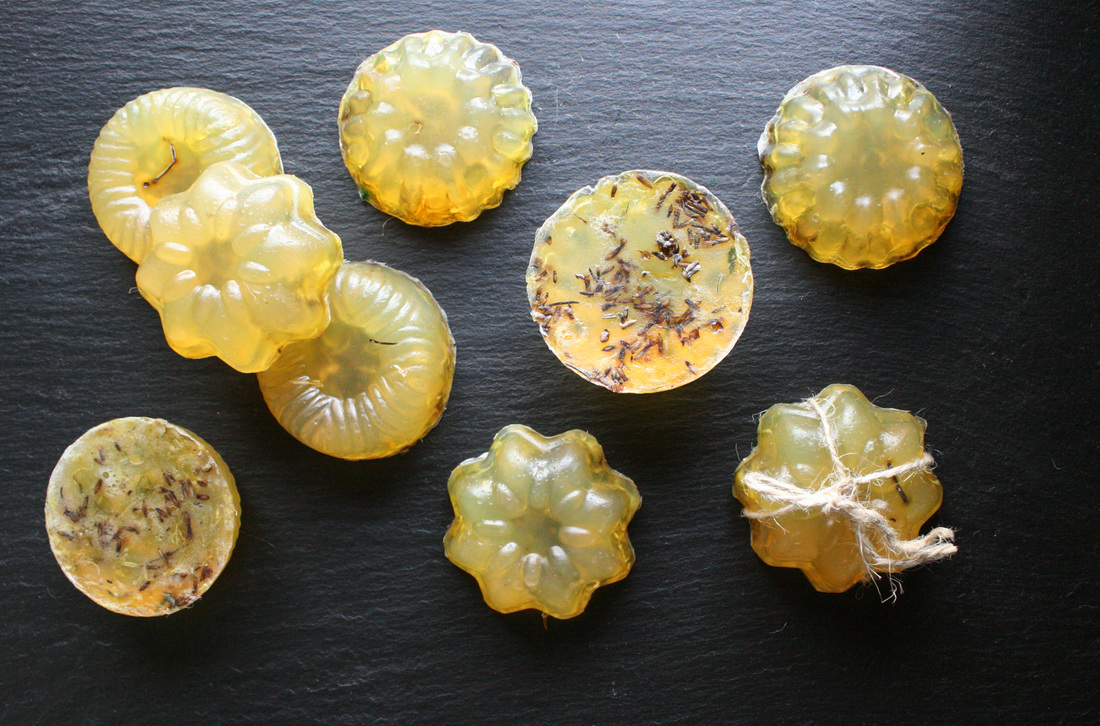
*Not all melt and pour soap is alike. Look for organic vegetable glycerin melt and pour. It doesn’t have any harsh petrochemicals and is a gentle and environmentally-friendly base. There are palm oil free versions, and even aloe, honey, or hemp! You can choose an organic goat milk type of m&p as well (although herbs won’t show as much). We stick with non-animal based soaps since my son has severe dairy allergies and cannot even bathe with them.
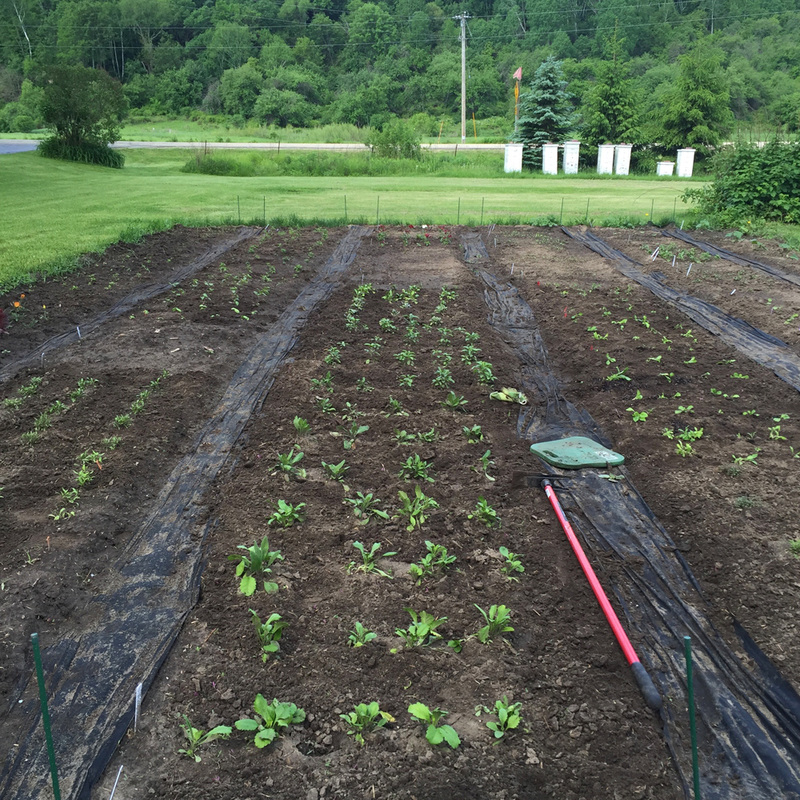
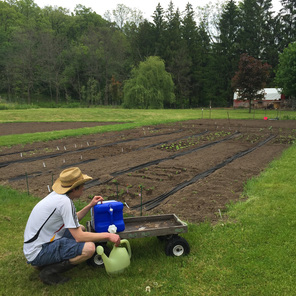
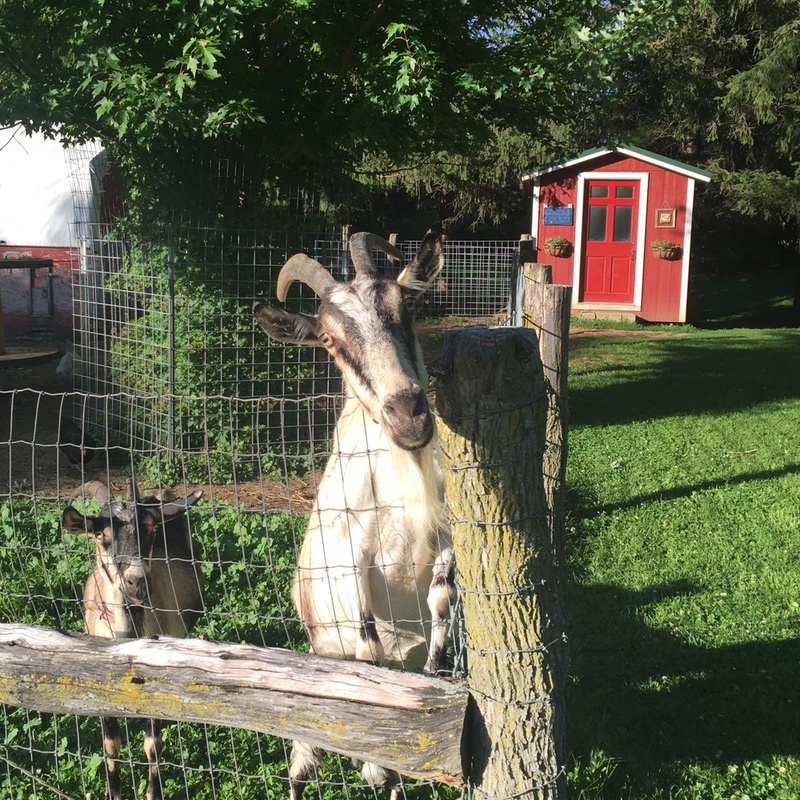
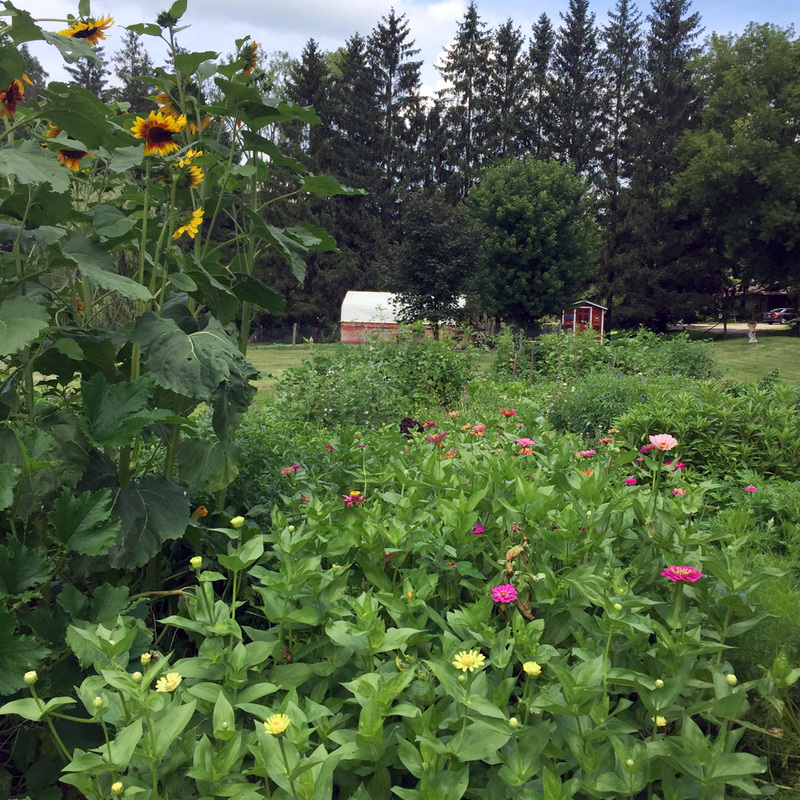
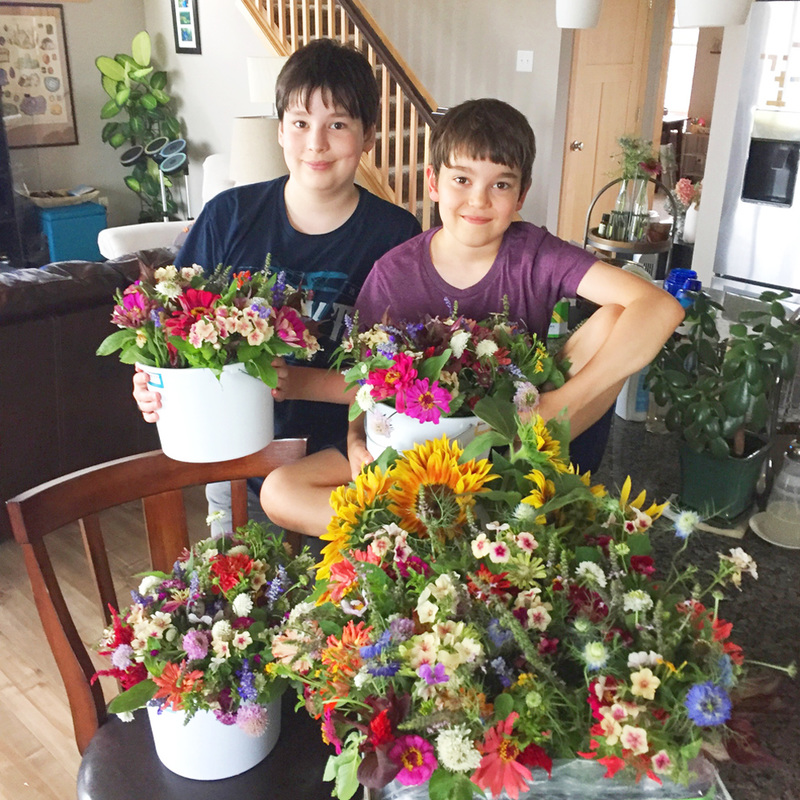
Resources: Dried herbs: Mountain Rose Herbs Bulk Herb Store Soap Bases: US Bulk Apothecary Brambleberry UK http://www.justasoap.co.uk/soap-making/melt-pour-soap-bases/ 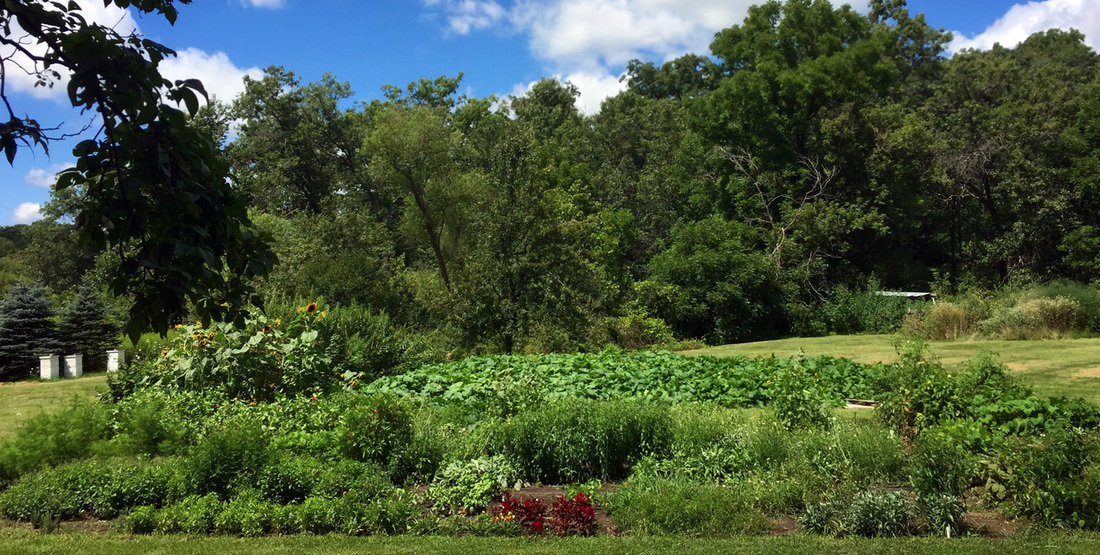 I realized that I haven't written about our garden in many months. Once planting season begins it seems that summer rushes by, noted only by how many days has it been since it last rained, and what is ready to pick, always hot and sunny but urgent in the need for constant weeding and tending. Interestingly, our garden(s) took on a whole new level this summer. I don't usually like to tell people of any of our charitable projects. Doing nice things or donating to help someone get on their feet or working and volunteering to help people is something we should all do without any expectation of attention or praise. Because it is the right thing to do. But when my children are involved on this level, I like to recognize them for their kindness, generosity, and loving hearts. They are amazing humans. Back in March while we were starting seedlings, my boys had the idea to grow flowers for the food pantry. Our community garden keeps a bin up front for the local food pantry so that any extras in the garden can go right to them. The local food pantry also has an extra large plot there managed by volunteers to grow as much fresh produce as they can as well, so they pick up the extras in the bin when they are there. We have always put our extras in the bin, but growing flowers and making bouquets so that families could have something fresh and colorful on their tables in addition to the food sounded like a fantastic idea. I wrote a letter to our local Badger Prairie Needs Network and asked if they would take flowers if we grew/bunched/delivered them. They said yes! The boys wanted to call it the Happy Flower Project (#happyflowerproject). After getting the YES from the food pantry, we went into overdrive choosing flower seeds and starting a few hundred extra seedlings. I quickly realized that our very small community garden plot wouldn't hold that much and that our home garden wasn't developed enough yet for that many more plantings. But we really wanted to make our flower project for the food pantry work! Gulp. I kept growing those seedlings, thinking we would find a way. In May, just as I was hardening off hundreds of flowers, a local unschooler mom wrote to ask if I knew Janelle, who had garden space to spare and was looking for some people to fill it. I wrote to her and we went out to see her lovely valley where she organically raises goats and has a large organic garden plot. We were SO LUCKY to get space there, and we planted so.many.flowers. in late May and early June. My husband, as always, jumped into our family project and helped with everything. In addition to all of the flowers, we planted many medicinal herbs and two vines of cucumbers and heirloom pumpkins in that patch. This space is twice the size of the other community garden plot, and the soil is wonderful (and the goats eat our weeds by the bucketful).
We chose to plant only family food like tomatoes, peppers, peas, watermelon, and some herbs at the community garden plot as it has picky soil and isn't very big. We did plant zinnias around the perimeter for extra cutting flowers if we needed them. At home, we expanded our fruit plantings and I added additional many perennial plants in a few new small beds around the house. As we rotated weeding/harvesting/caretaking from garden to garden each week, the goat farm was quickly the favorite place for the boys as there are goats (baby goats!), chickens, and a large trampoline there. Woot! Even with how hot our summer has been, things were growing well. Of course that led to the inevitable garden crash - a few weeks ago we had a few days of torrential rain and our community garden plot was completely submerged. We ended up losing almost 100% of the plants in the community garden plot from the floodwaters and then not long after, to rot. Can you imagine how relieved I am that we had the other plot out at the goat farm? And that most of our flowers and medicinal herbs are there? We are again SO lucky.
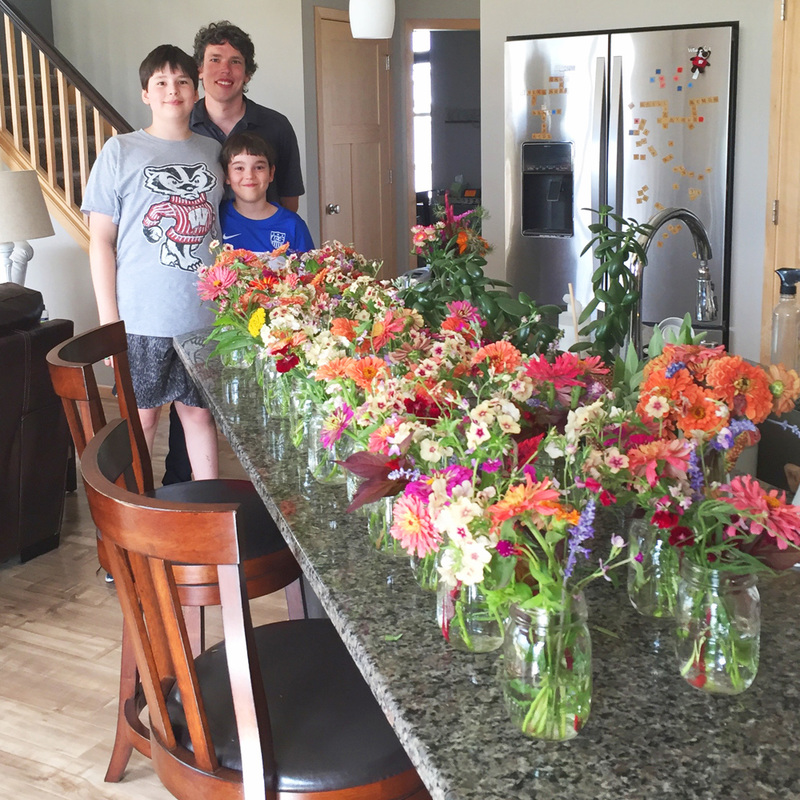
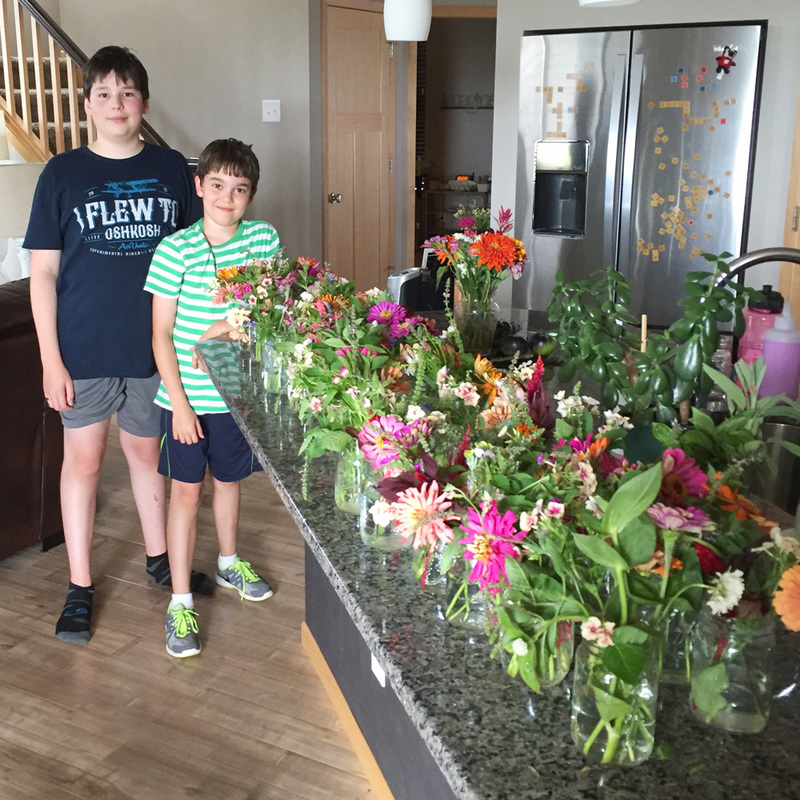
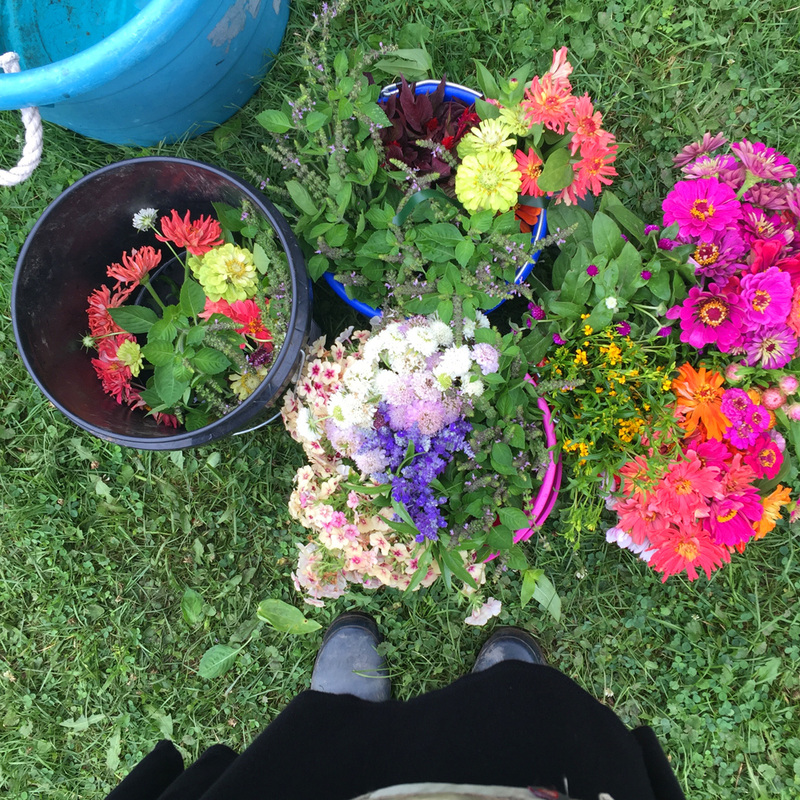
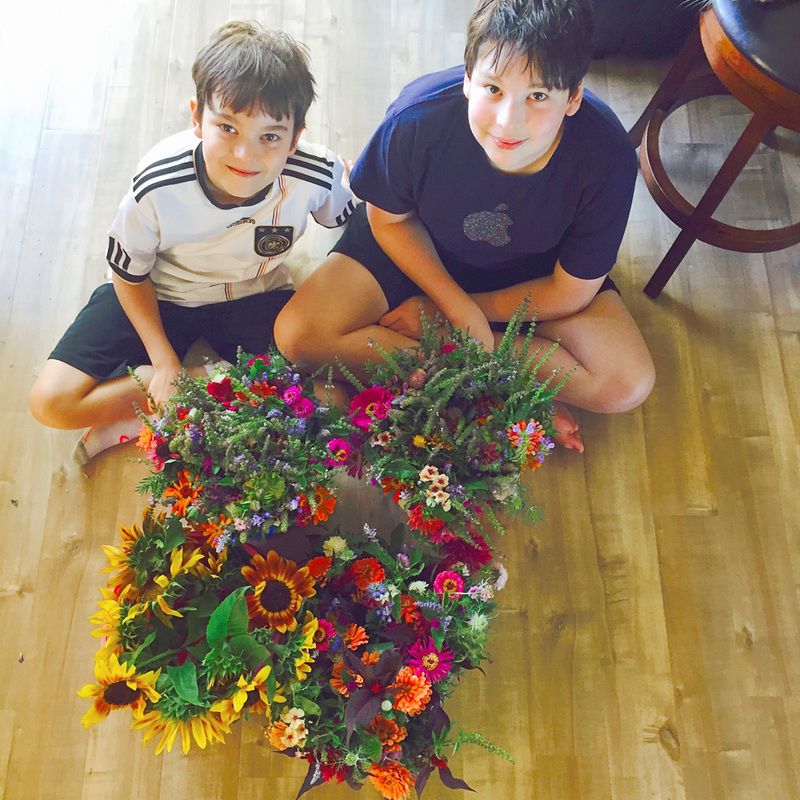
Every Friday we go out to the farm garden to pick flowers for a few hours and transport them in buckets of water back to our house (the garden is about 15-20 minutes from home). From there we divide them by type and then create mixed bouquets. We rubberband the ends and put the bunches into fresh buckets of water. After that all that is left is that we load up our car and deliver all of the flowers to the Badger Prairie Needs Network so that they have fresh flowers for busy Saturdays! We have been filling a dozen mason jar vases each week so that the community meal tables have fresh flowers (as well as the registration desk and waiting areas). The garden has been producing more and more each week and we have been able to make dozens of bouquets - filling several buckets - for visitors to choose from each week. We are hoping to increase our bouquet count each week for a few more weeks before they start to slow down for the season. My kids know all the hard work required in doing these bouquets, but also get to carry buckets of those flowers and a crate of filled vases into the food pantry every Friday, knowing that people have been so happy to see fresh flowers that they can take home for their table. It has been eye-opening for them to see how our local community of individuals, businesses, restaurants and chefs work together to help over 300 families in our school district alone. How chefs donate their time, how local businesses and restaurants donate all of their extra produce and meals, how local stores donate their dents and bakery items. How gardeners bring in giant bags of produce. How many volunteers donate their time to clean, prep, cook, stock, make, and feed so many people in our community. They see how even in our small town we are all a part of something together, and that it is important.  The #happyflowerproject has been a nice experience for all of us this summer, and I am so glad we jumped in head first and that so many things came together for us to make this happen. I hope the weather allows us to keep this going for as long as possible! So I am tooting a horn for my amazing kids with their kind hearts and commitment to our community. And their recognition that flowers can make people smile.
I'll share more about what we ended up growing in our 3 gardens and what we plan to pot to overwinter and which varieties we are growing again next year - but for now, just my boys. <3 #happyflowerproject Edited to add: I have had several people write to ask how we "do it all" with mast cell disease, rheumatoid arthritis, lupus, and asthma (etc.) on our plate. And the key is, we pick our own projects, we create our own parameters and expectations, and we deliver based on our own timeline. We accommodate ourselves. We create our own opportunities together as a family, and we do what works for us! (And, my kids are amazing.) ❤️ 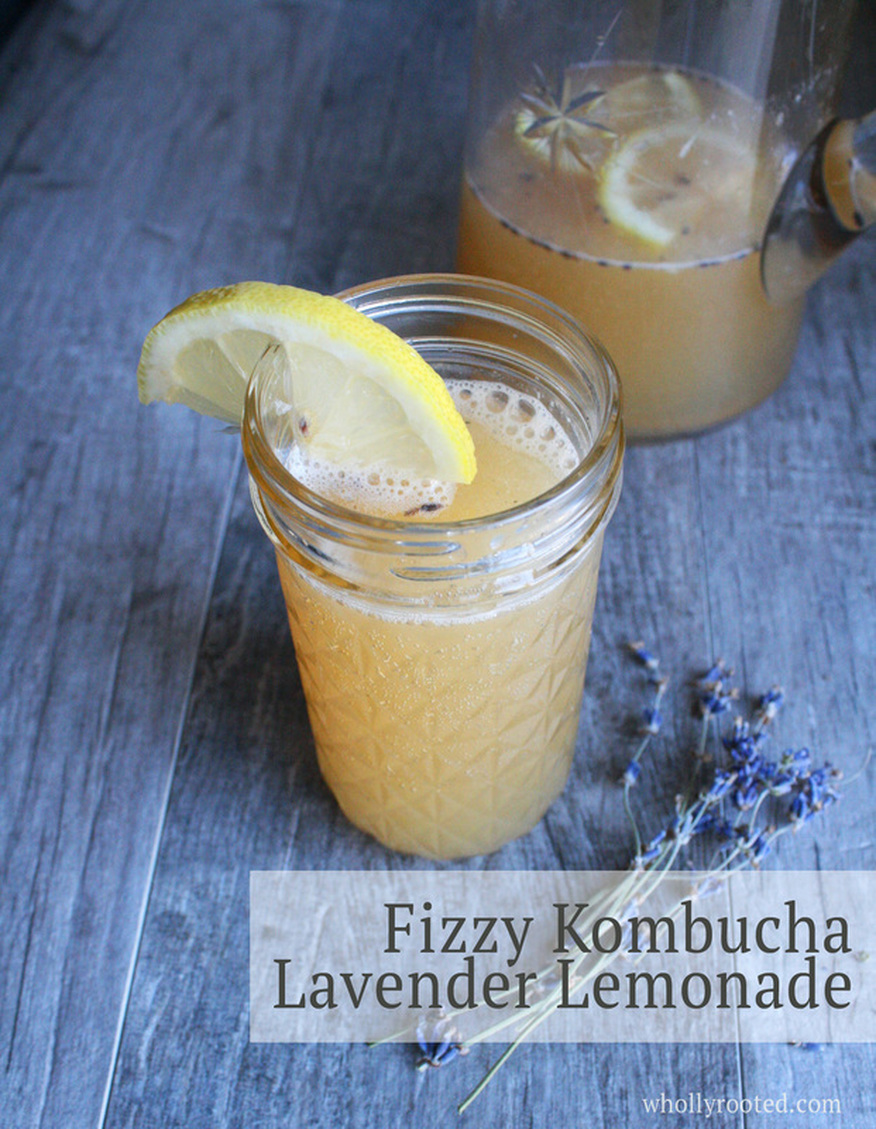
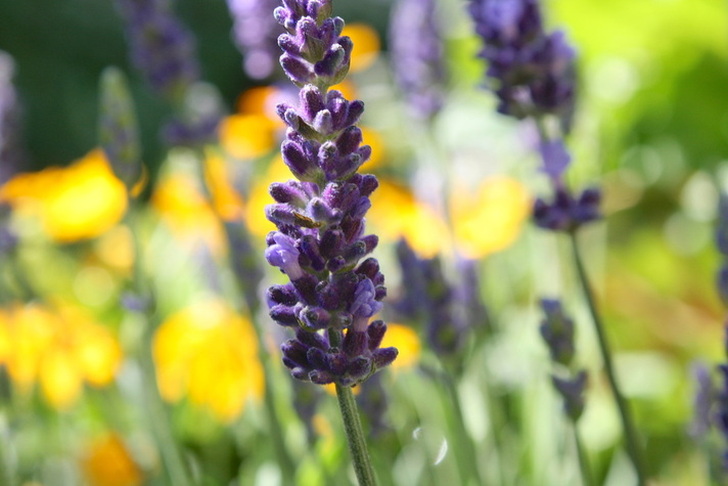
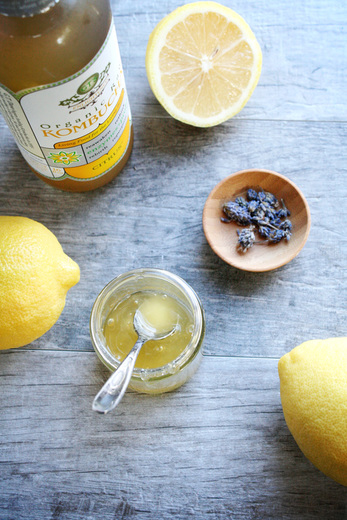
I love lavender. I used to be so sensitive to it that I definitely couldn't handle any artificial lavender anything, and even the flowers would be too intense for me. As I have cleared out all artificial fragrances in all of my home/body/bath products for years now and have gone exclusively natural and organic, I have found that I can now tolerate real lavender and even love it. I grow a lot of lavender every summer and dry it in my dehydrator for use in recipes - both for culinary and bath/body herbal use. A favorite way to use lavender is by infusing honey with it. There is some magic alchemy that lavender gives to the already aromatic honey. It is a great flavor combination. Lavender also works well with citrus. Since I love making all of my own beverages of course I have a favorite lavender lemonade recipe.
Fizzy Kombucha Lavender LemonadePrint |
{wholly rooted}The classic lemonade is refreshing and delicious. This recipe adds kombucha for a fizzy probiotic healthy punch, making it taste like a fizzy soda treat. If you make your own kombucha, you are set. If you are using store bought kombucha, look for a brand that has a nice carbonation and with a flavor that goes well with citrus and lavender! I like ginger or citrus kombucha with mine. {ingredients}
Mix your fresh lemon juice and lavender honey in a small pitcher. 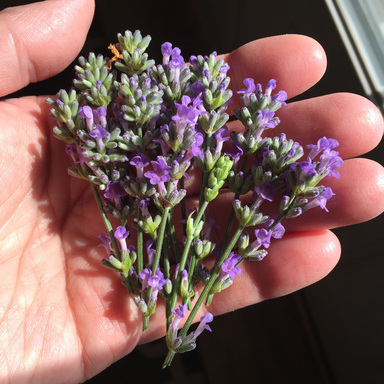
Tip: Add the honey to the lemon mix when slightly warm so that it will stir in and not sink the bottom. Whisking while slowly pouring it in helps too.
Lavender Infused Honey: To make lavender honey, gently warm your 1/2 cup of honey (LOW - no boiling!) with 2 Tbsp of dried lavender buds added. Let sit for 20-30 minutes on *very low* heat and then strain. The honey will be infused with the lavender aroma and flavor. More about: Kombucha Lavender Lemons 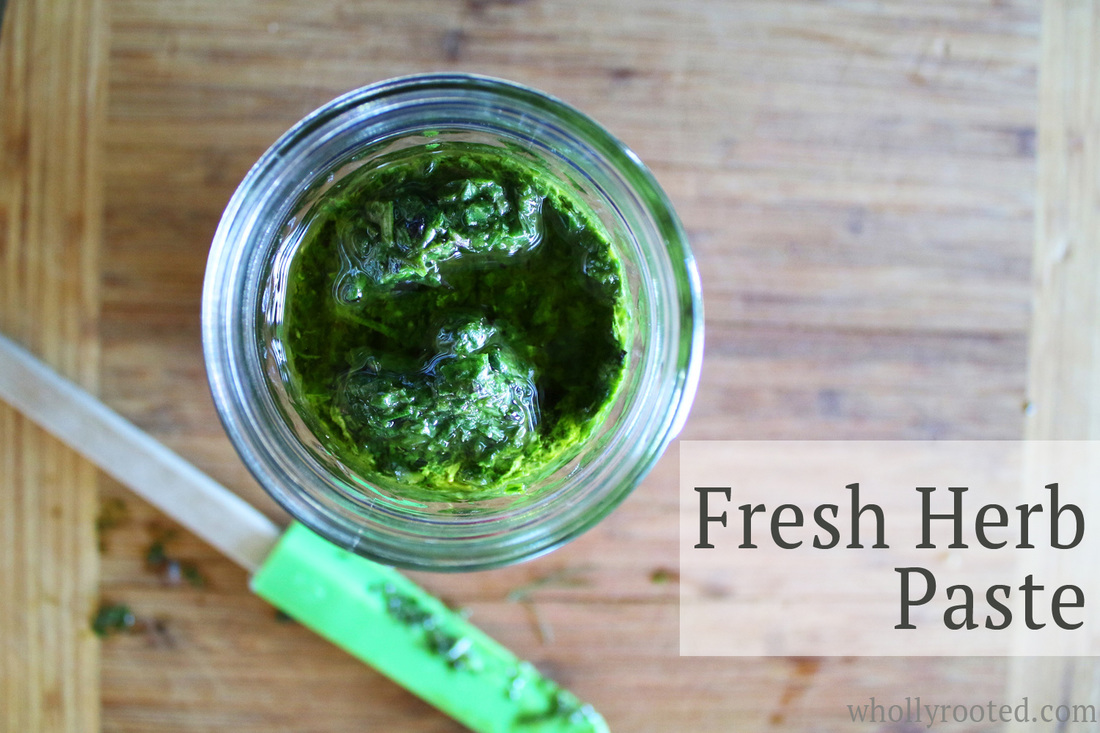
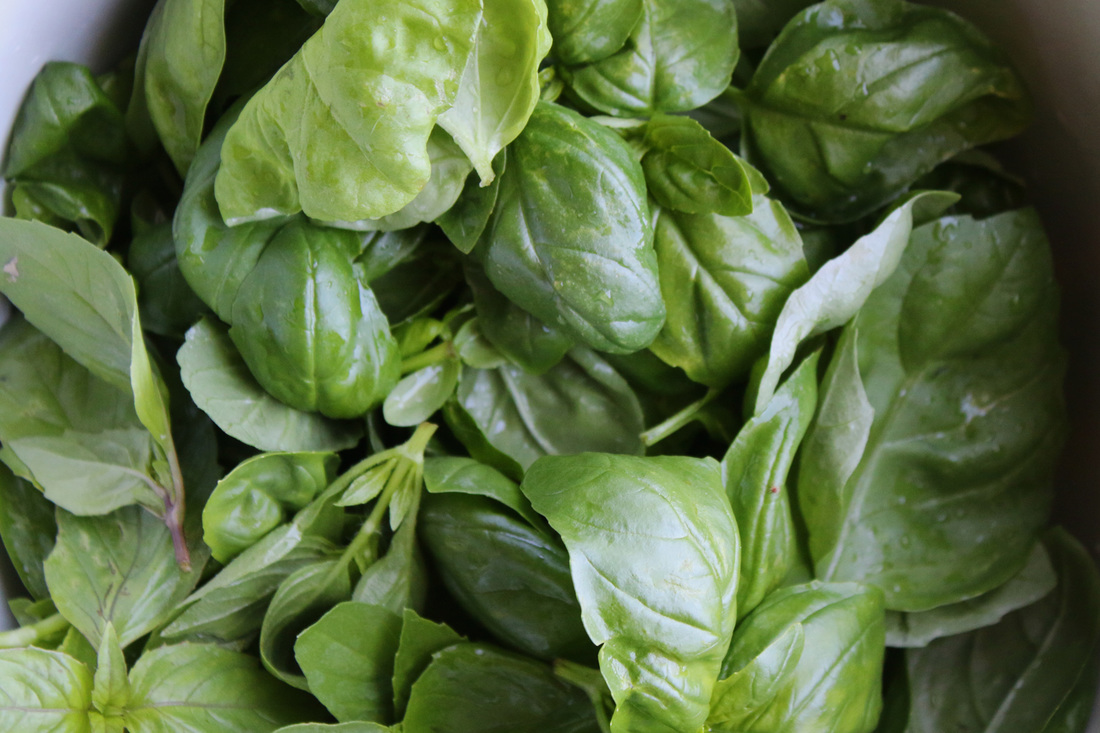
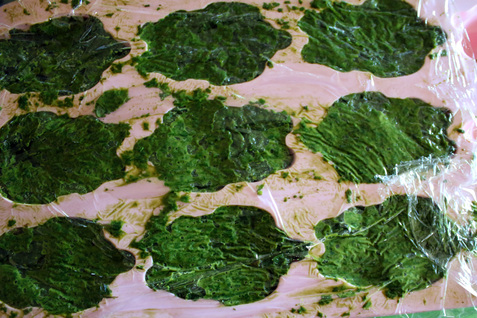
Once the gardens start producing, it can be a challenge to keep up. My dehydrator is going pretty much full-time, drying herbs, flowers, and veggies for use all winter long. Some herbs, such as basil, don't dry very well, so I make plenty of pesto to freeze. While I love pesto, I don't want my basil options to be so fixed all winter, so freezing more simple combinations means that I not only have plenty of pesto, but also have plenty of options for soup, stew, stir fry, rice and more, all fall/winter/spring. Freezing basil to preserve for winter is easy. I like to make herb pastes, which keep their fresh vibrant flavors and aromas and are super quick and easy to prepare. My husband thinks I missed an opportunity to name this recipe "Frozen Basil Bunnies" - but it isn't just basil that this works for, it is great for any fresh herbs. Although I agree that Fresh Herb Paste isn't *quite* as memorable as Frozen Basil Bunnies. Say that fast 10 times.
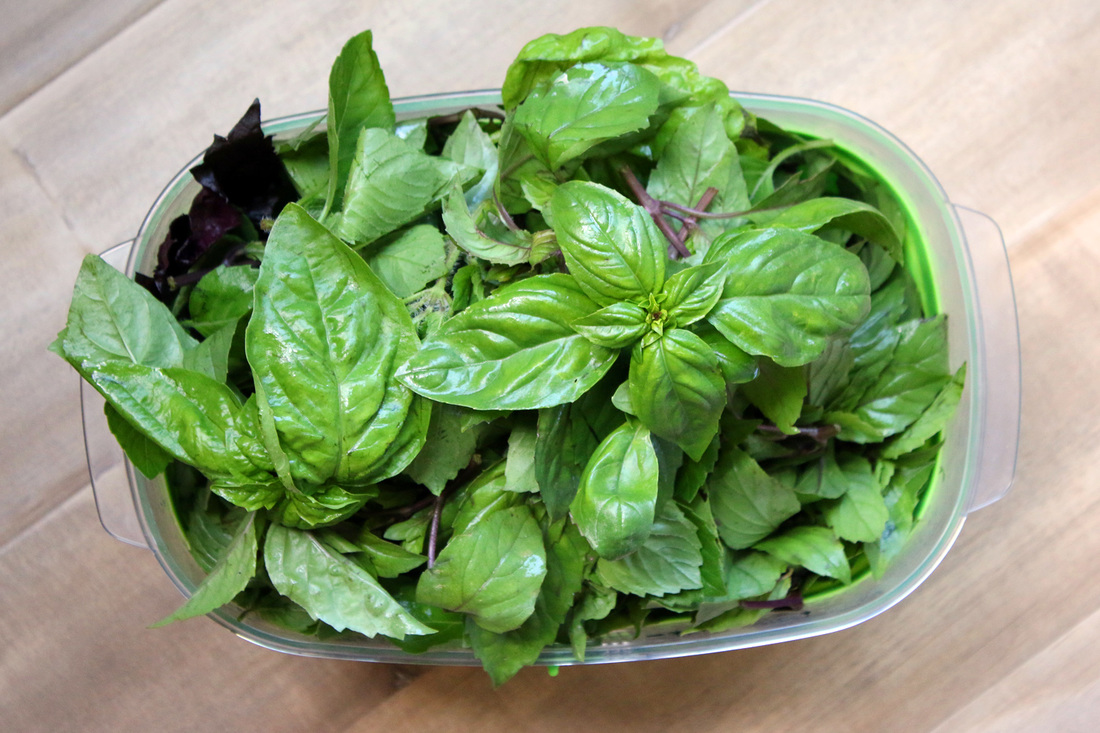
Basil is my first frozen paste because it is the herb that needs freezing the most, and I grow a LOT of it. It is so simple. Take 4 cups of freshly picked, packed basil leaves. Put them in the food processor with about 1/4 - 1/2 cup of extra virgin olive oil and about 1/2 tsp of fresh sea salt. I don't want to add too much salt so I have room for seasoning in recipes, but a little helps keep the vivid color and flavor. Whiz the basil/olive oil/salt in the food processor until fully blended. You may need to scrape the bowl down with a spatula in the middle of it to get all of the leaves. Depending on your type of basil and how packed it is when measuring, it will need as little as 1/4 cup of olive oil. The measurement is flexible just like the recipe. Add just enough oil to get it to fully whiz in the food processor! If you want fresh paste, voila, you are done. Put it into a canning jar in your fridge and use over the next week or so. You can also freeze it for longer storage. The recipe is per 4 cups of herbs because that fits into a food processor, but it whizzes down into a smaller amount, so you can keep going in batches to make as much as you like. I did 5 batches of basil paste and still have more left. Lots. O. Basil.
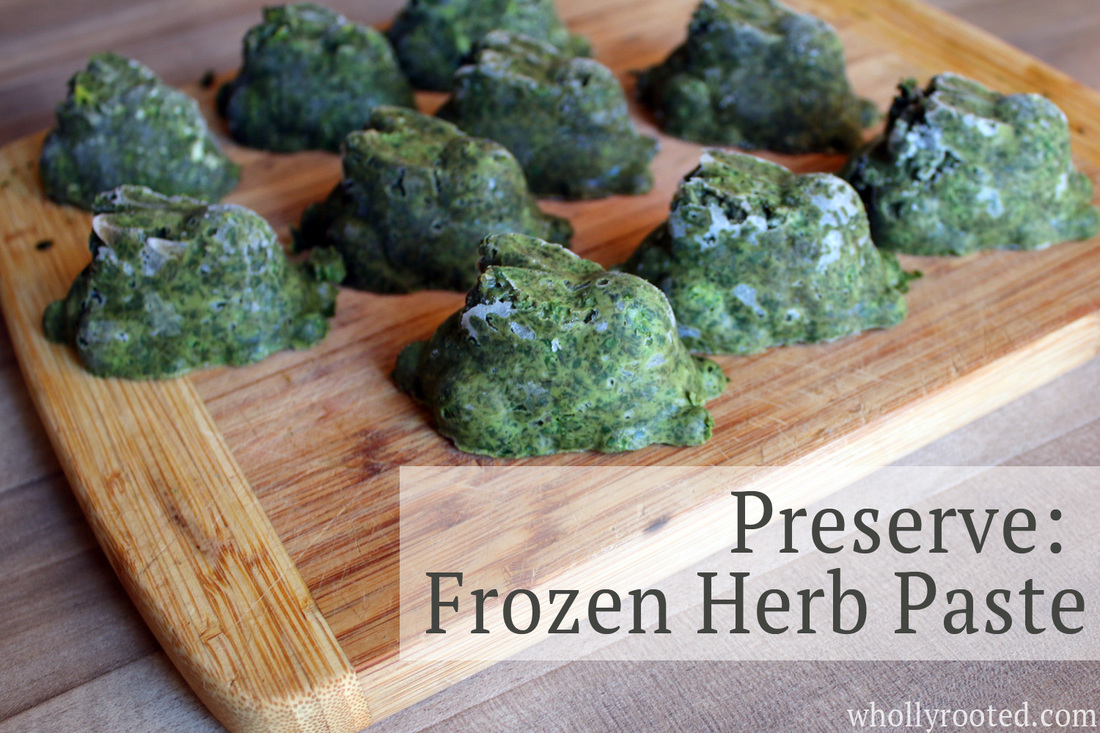
To freeze, take your paste and spoon it into ice cube trays or silicon molds and put into the freezer until frozen solid, and then pop the cubes into a freezer baggie until you need them. I like freezing in about 1/4 cup quantities as that makes it easier to only defrost what you need, rather than thawing out an entire jar. I like silicon molds because I can do bigger than an ice cube amounts. Mine are all in bunny shapes because while I have personally selected all of my herbs-only molds for my lotion bars and body bars, all of our food use silicon molds have been selected by my 11 year old, who only buys cute animal shapes. ;) So we have a whole bunch of basil bunnies in the freezer.
Fresh Herb PastePrint |
{wholly rooted}Freezing is a quick and easy way to preserve herbs for winter! {ingredients}
Measure 4 cups of packed fresh herbs (remove stems). 
You can do this with mixed herbs as well, of course. I made several batches that included parsley, sage, basil, rosemary, thyme, and cilantro. It is the same recipe, just vary your herbs based on your supply! Try different combos - just be sure to label!
I love growing a lot of herbs, and I love preserving them too. Since our growing season in Wisconsin is fairly short, finding many different ways to preserve things so we feel like we have a wonderful variety the rest of the year is key. Looking for other ways to preserve your herbs? Try my veggie bouillon recipe - I love making a lot of this in the summer to use all winter long. SUCH an amazing flavor! 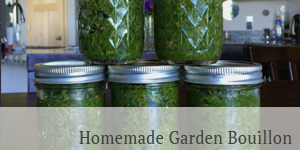
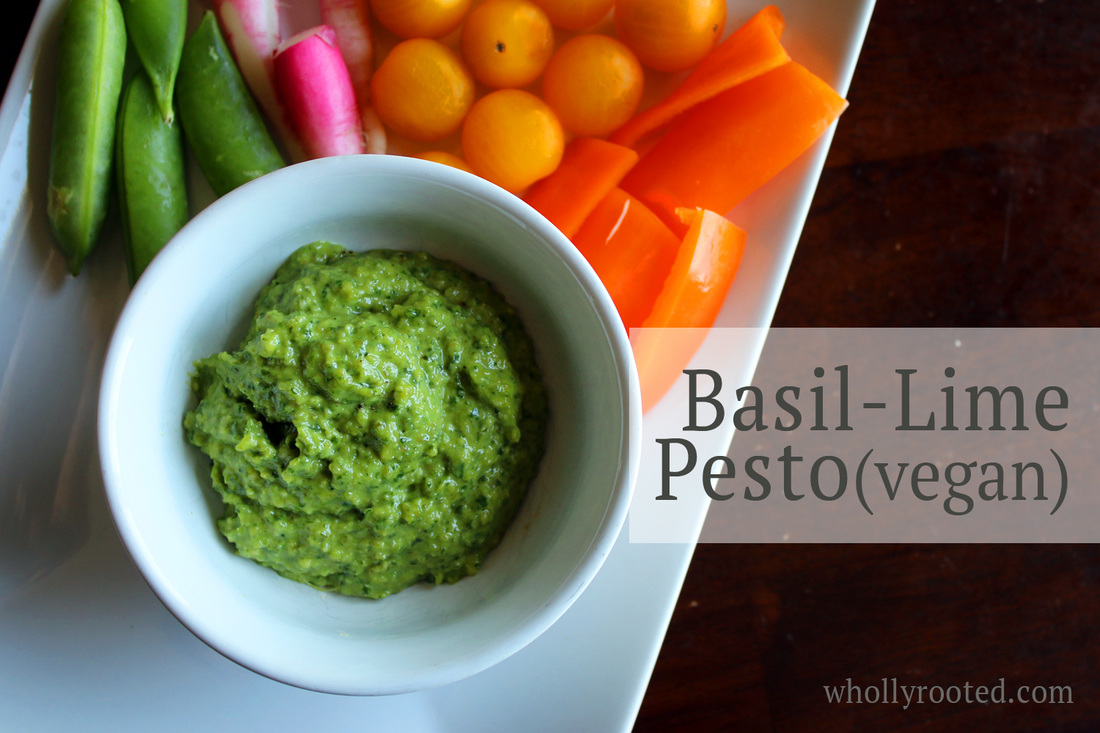
I love the beginning of CSA season. Spring arrives late in Wisconsin and it takes until June for the vegetables to really start rolling in, and it coincides with my burst of rapidly growing herbs which I planted a few weeks ago. Pesto is a favorite way to combine different flavors and use the herbs in abundance with all of the fresh vegetables. The key for me of course is the combining of different flavors. I like pesto, but we have a dairy allergy in the house AND I don't like drowning myself in mono-flavors. I love making different types of pesto so that there is fantastic variety not only for immediate consumption, but also enough to freeze/preserve for winter. This pesto is a favorite. I grow many types of basil, and no matter what type I have on hand, it works. This recipe is dairy free and combines fresh zesty flavors such as lime, ginger and garlic. I am also using cashews instead of pine nuts. Not only are they easier to find, but they are nutritious and I always have some on hand (I'm addicted to date/cashew truffles and cashew cream). You will be amazed at the flavor and want to make extra to freeze for winter! 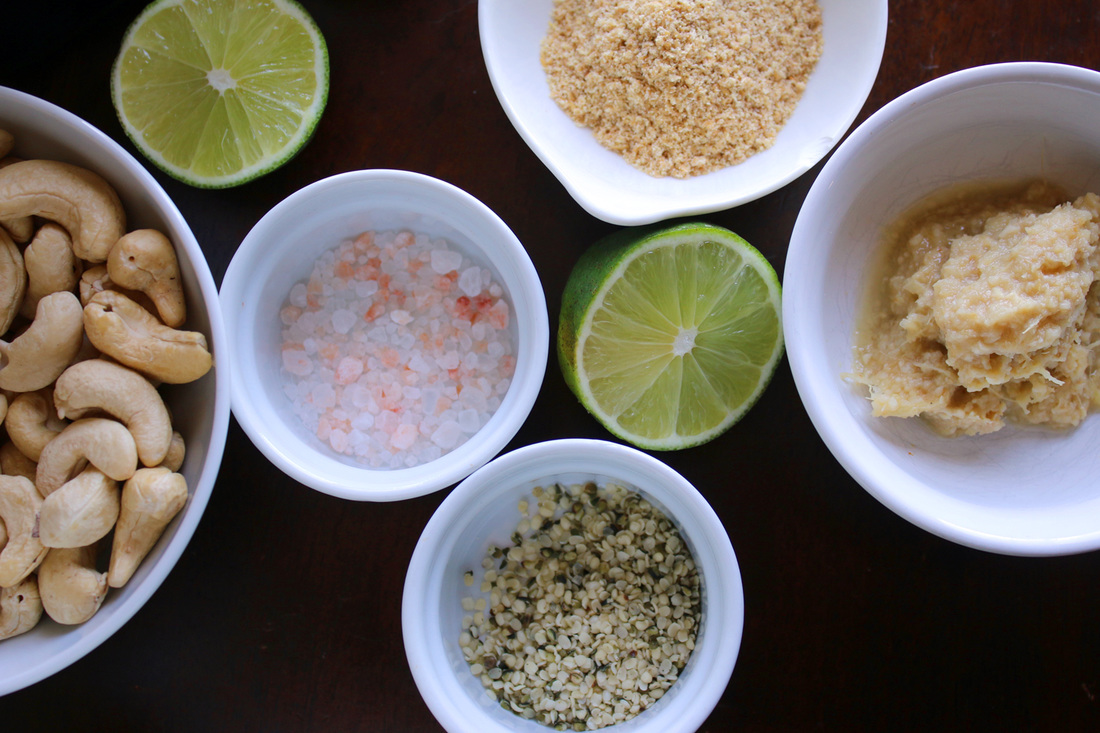
Basil-Lime PestoPrint |
{wholly rooted}There is nothing better than the taste of freshly homemade pesto with crudités, on grilled veggies, or over pasta. This version is vegan, and combines the amazing flavors of basil, lime, garlic, and ginger. The ground flax and hemp seeds make a great texture subsitute for the cheese -it is so good! GF/DF {ingredients}
First, using a food processor, pulse your raw cashews with the flax meal and hemp seeds until finely ground. 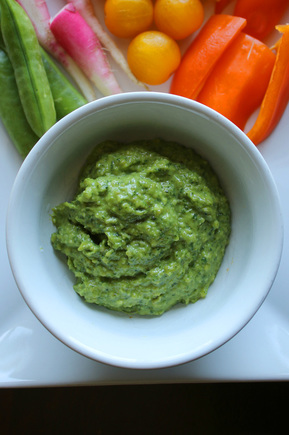
I made a single batch of this today, which will likely only last me a few days. So I am sure I will make some more as my genovese, persian, blue spice, thai, lemon, lime, lettuce leaf, and emily basils grow, grow, grow! bonus: This recipe is delicious and easy to prepare, but also packed full of good vitamins, minerals, healthy fats, fiber, and protein. Yum+. Cashews Garlic & Ginger Basil Lime 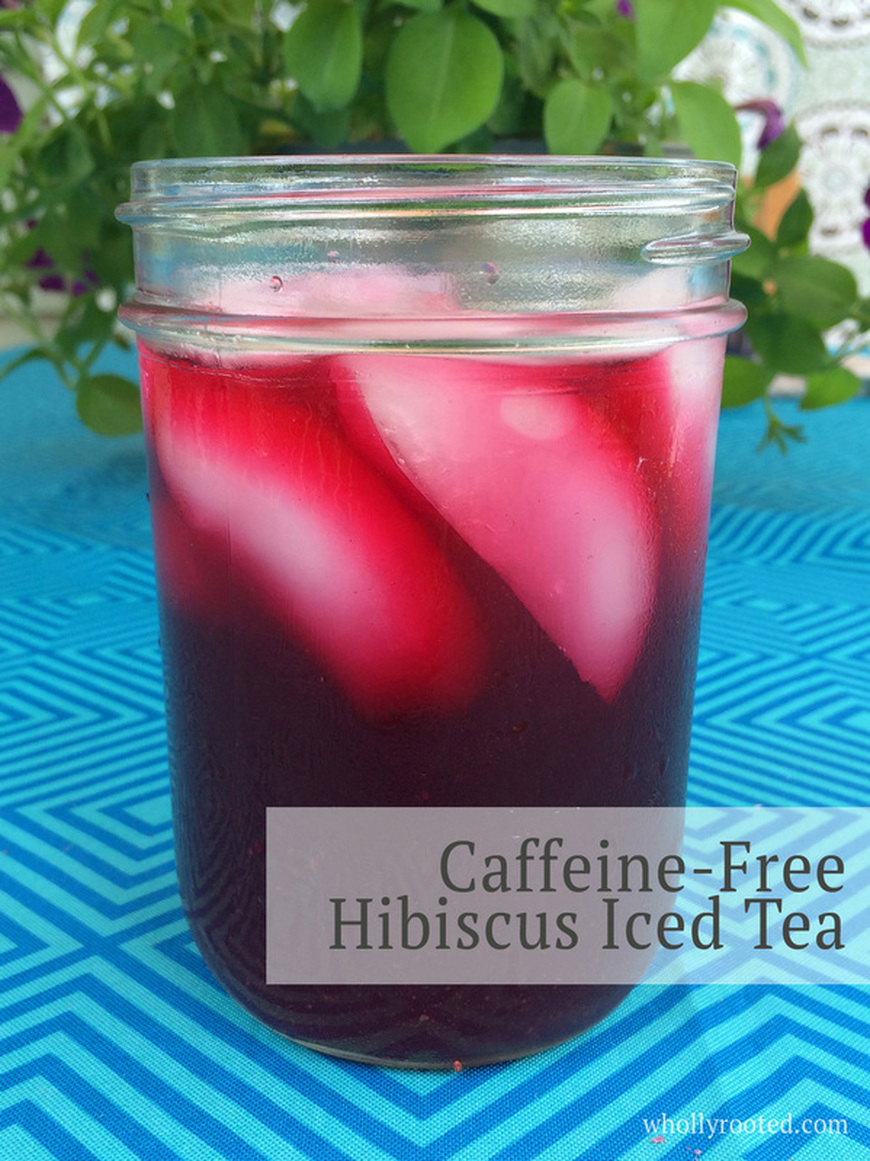
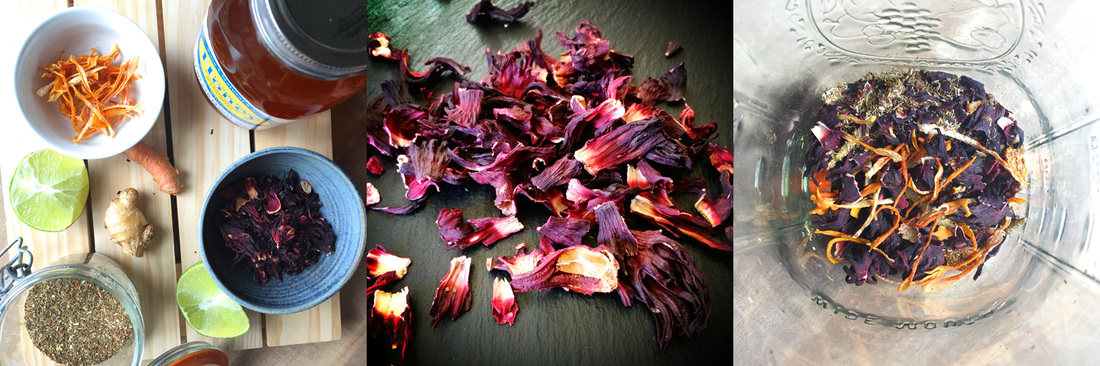
I have always been happy drinking water all day. My husband, however, likes having iced beverages with many flavors, and isn't much of a water drinker. So these days I make shrubs, switchels, fruit syrups to use with carbonated water, and of course iced teas. I prefer mixing some herbal goodness with my drinks, so this recipe combines the great properties of turmeric, ginger, hibiscus, citrus and rooibos with some fresh local honey to make an extremely delicious tea. This has so much flavor and is so refreshing - and with no caffeine we can drink it in the evening as we sit on the deck admiring the sunset.
Caffeine-Free Hibiscus Iced TeaPrint |
{wholly rooted}Iced tea is a summer staple and this recipe combines a wonderful rich colour of hibiscus with a healthy boost of turmeric and ginger. This is has a rich twangy flavor, perfect for hot summer days or steamy evenings. Green rooibos is a caffeine-free herb that has a mild green-tea like flavour and contains antioxidants as well as minerals and flavonoids. I like using green rooibos because caffeine-free means we can drink iced tea into the evening! {ingredients}
Using a half gallon canning jar or heat safe pitcher add your hibiscus, ginger, turmeric, citrus peel, and rooibos. 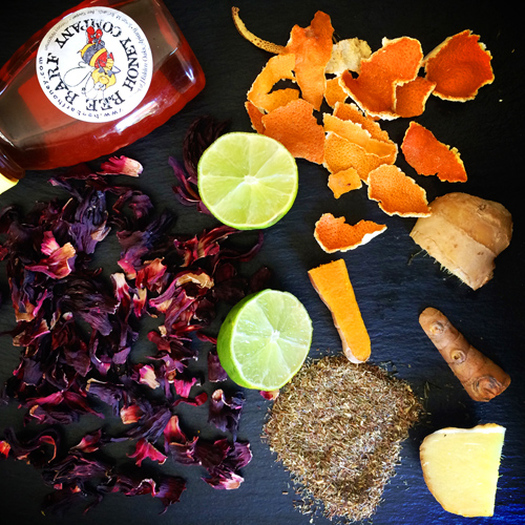
I love drinks that are not too sweet and that are very refreshing. Today is going to get into the 80's and I have already been outside watering the garden, opening up the greenhouses and watering all of the seedlings. The first thing I wanted when I came inside was a cold glass of iced tea. Yum. This is one of my favorite cold drink recipes and the smell and taste of it just feel like summer to me! More about these ingredients: Green Rooibos Tea Benefits and Use Health Benefits of Hibiscus The Amazing and Mighty Ginger 6 Health Benefits of Turmeric 8 Healthy Lime Facts 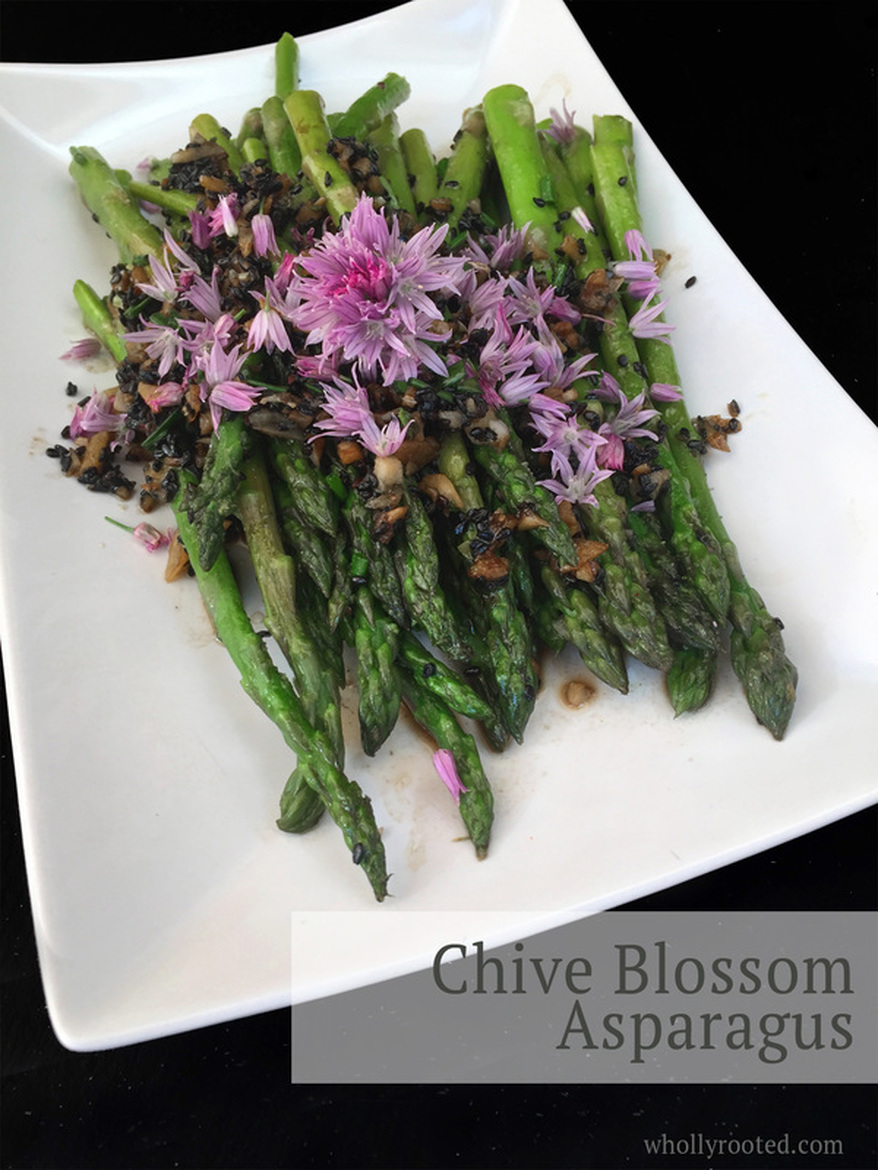
We have long winters here in Wisconsin, so when things start to grow, it is exciting. We also don't have long seasons of items once they do appear. Asparagus, rhubarb, strawberries - all are in and out quickly, so we tend to do as much as we can while they are here. I love asparagus. My husband didn't used to like it so much, but it has grown on him as I experiment and find more flavors it blends with. Asparagus and chives are amazing together. And the smoky richness of sesame oil, the salty flavor of soy, and the crunchy bite of black sesame all meld together to make an awesome asparagus dish. I usually make this as a side dish, but it is also fantastic over a bed of lettuce (or arugula!) with a little soy/sesame oil dressing drizzled over the top.
Chive Blossom AsparagusPrint |
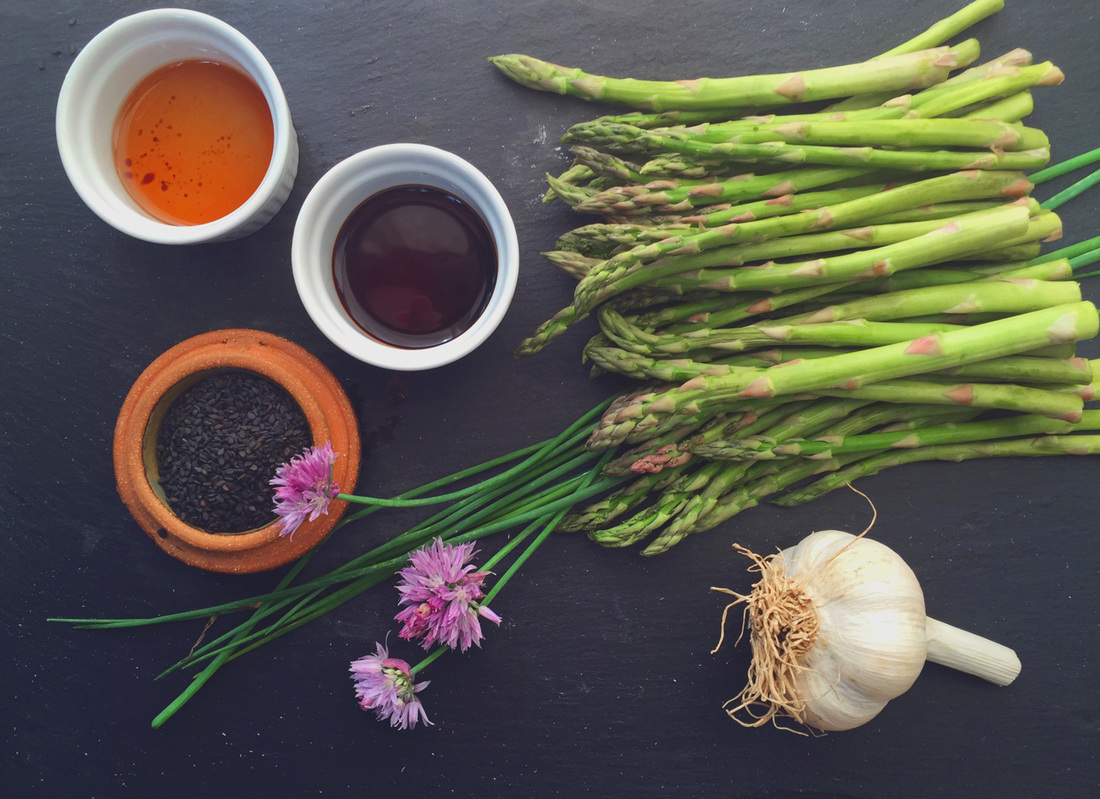
{wholly rooted}Bright green spears of asparagus are among the earliest of garden harvests. The thin, delicate spears work well with many different flavours, and are delicious steamed, grilled, as soup, pickled, and as a side dish. This recipe combines early season asparagus alongside another spring visitor – chive blossoms. {ingredients}
Blanch your asparagus for about 2 minutes in boiling water.
This recipe is quick and easy, but has a lot of flavor. A great way to combine the ingredients of spring into one fantastic dish. Chive Blossom Infused Vinegar Chives are a mid to late spring herb that are often overlooked. Chives are delicious in salads, egg dishes, sprinkled over soups, and more. Don’t forget the blossoms either. The delicate pinkish purple flower heads have a lovely onion/garlic flavor. Chive vinegar is a quick, simple way to capture some of that. 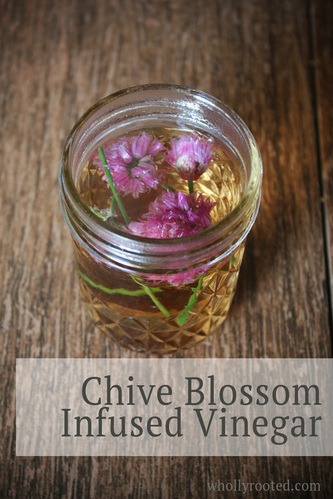
Directions:
Pack a ½ pint jar with (clean) chive blossoms, along with a few chive stems. Pour over any type of mild white vinegar you like – you can pour over room temperature vinegar, but warm the vinegar first for best results. Make sure all blossoms are fully covered. Let sit for a few days in your fridge until the blossoms have turned the vinegar a lovely shade of pink. Strain out the old chive flowers (add a few fresh ones for decoration if you wish), store in the fridge, and use in salad dressings!
Spring may seem slow to start some years, but when the first greens, herbs and veggies appear we can't get enough. Here is to spring, and fresh food from the garden!
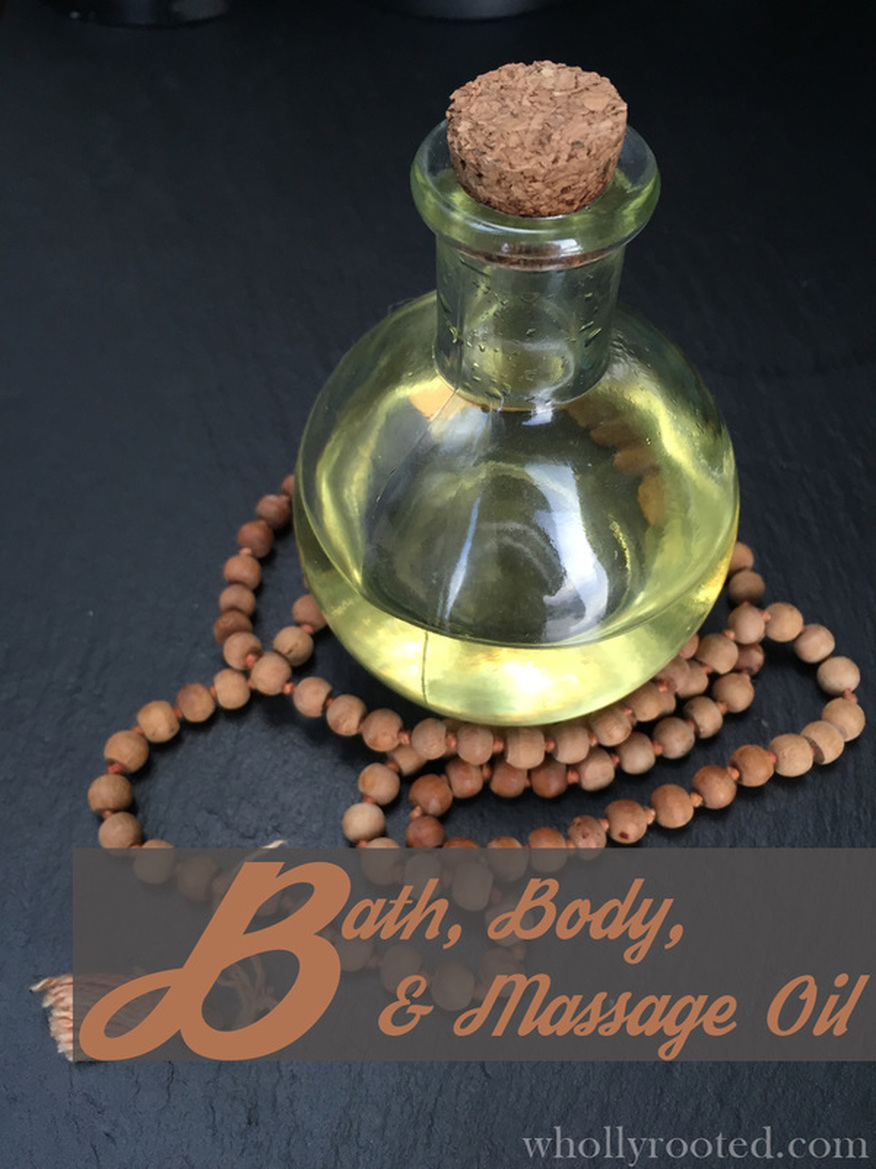 This is the time of year that no matter how much water I drink or how much humidity I add to the house, my skin still feels dry. I know that -25 windchills and days with a high of -2 means the humidity drops, but wow. One way to keep my skin from cracking is to moisturize. I have a favorite fragrance free/allergy safe version for us, but I do love the warm heady aroma and skin feel of a moisturizing body oil. This works best when just out of the shower. Or, it is a great massage oil. The fragrance isn't too strong, but is warm and exotic, reminding me of warm humid places. And my skin loves it. It absorbs quickly without a greasy feeling, and it leaves skin feeling soft. Body oils are nice to make, as they give instant gratification for not too much work. A body or massage oil is simply an infused blend of oils, or a blend of base oils with essential oils. These luxurious concoctions are great for a romantic massage, as a body moisturizer after getting out of a warm shower, or to add to a warm bath. This oil would also make a great Valentine's Day gift. This basic blend combines essential oils, which give a warm and earthy fragrance, while also softening and supporting our skin. Apricot kernel oil is good for sensitive or dry skin, and is light and emollient. Avocado oil is a healing oil good for dry and sensitive skin. While it is thicker and creamier than some other oils, it absorbs quickly, so there is no greasy skin feel. Both are great for dry winter skin. The essential oils in this blend are not only warm and fragrant, but are nice on the skin. 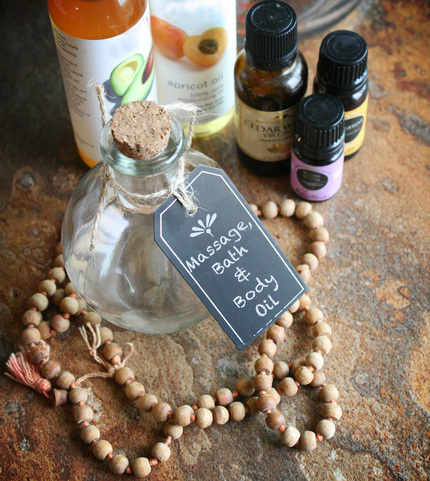 Bath-Body-Massage Oil 2 ounces/60 mL apricot kernel oil 2 ounces/60 mL avocado oil 13 drops of sweet orange essential oil* 7 drops of cedarwood essential oil 4 drops of ylang ylang 4+ ounce bottle to store the oil {24 drops in 4 ounces is about a 1% dilution, perfect for a leave-on body oil or massage} Blend your ingredients and pour into a nice bottle. Be sure to label! Shake before each use. Pour a little into your hand and rub over your arms, legs, and body as you would a lotion, or use as a massage oil. If you can warm it a little in a bowl of hot water before use, it will feel extra wonderful. I like recipes that take only a few minutes to make and are not too finicky. It means that I can make small batches often and change things around or use the base oils I already have in my herb cabinet. Quick and easy! *Some citrus essential oils can cause photosensitivity. If you swap out sweet orange essential oil for another type of citrus oil, be careful to ensure you are substituting a safe/non-phototoxic type, or avoid sun exposure for 12 hours after use.
Reference: http://www.aromaweb.com/articles/phototoxicity-essential-oils.asp 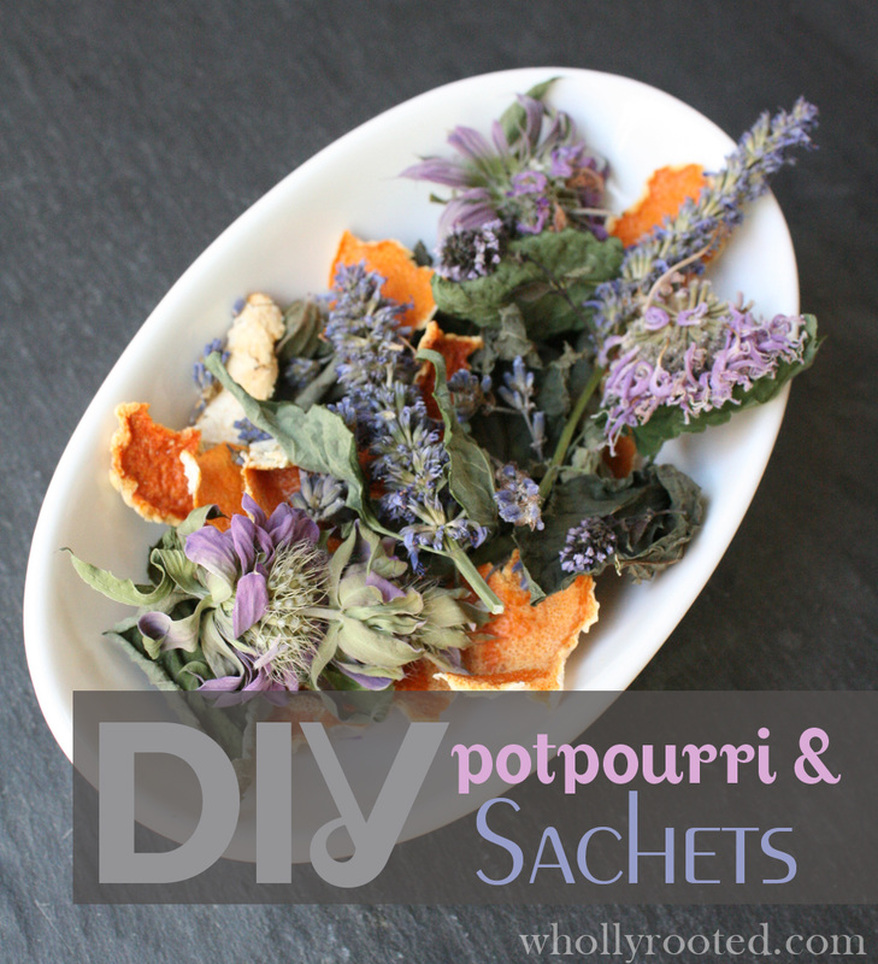 Potpourri Stop right there, don't think homemade potpourri is anything like the chemical laden store bought over fragranced stuff. Making your own is not kitschy; it is a good way to have on-going odor absorption and a light fragrance in areas such as bathrooms and kitchens. Making it is simple. Choose your container, add your base items, and then enhance with a few drops of essential oils. You can stick with base dried herbs, flowers, and spices, but things like pinecones and pine branches also hold oils nicely and add bulk. Be sure not to buy the pre-scented chemically treated pinecones from the craft store. You can find untreated pinecones from online suppliers, or if you collect your own, be sure to clean thoroughly and place in your oven on the lowest setting for an hour or so to dry and de-pest before using. I dry herbs from my gardens all summer long, so I always have plenty of dried fragrant herbs and flowers to use in sachets, teas, and potpourri. I grow things like bee balm, anise hyssop, lemon verbena, lemon balm, different kinds of mint, rosemary, lavender, and more. I dry them in my dehydrator all summer long and store in airtight containers in my herb cabinet. I also like to dry citrus peels and rounds for use in tea, and those items also work well in sachets. 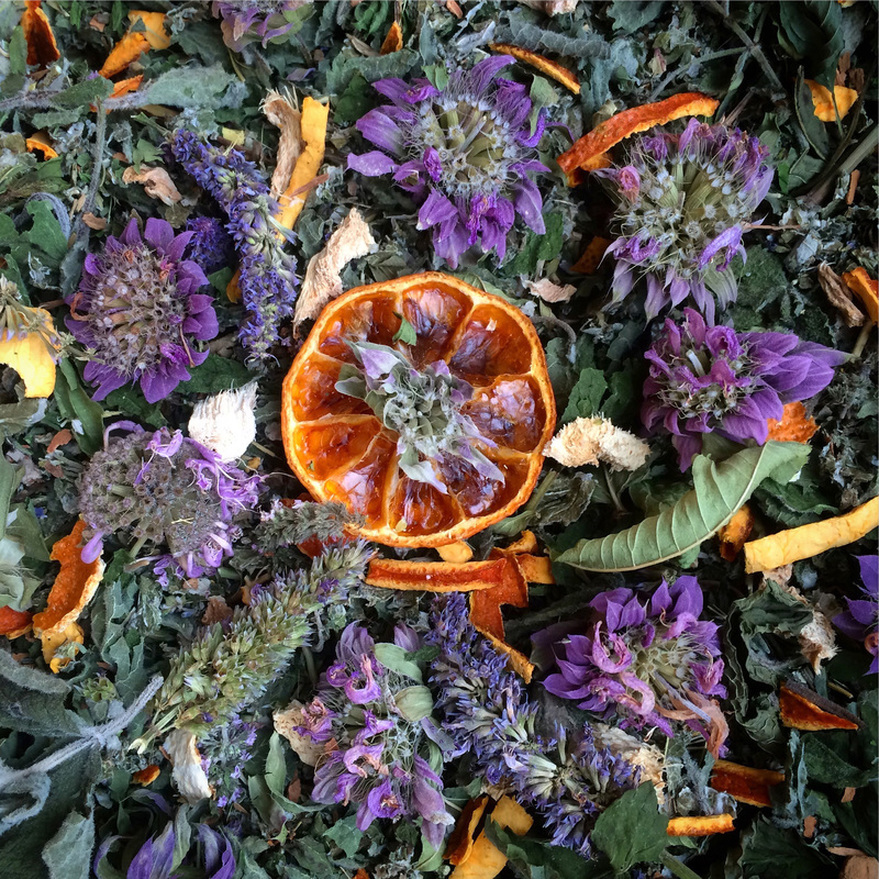 To make potpourri, fill a container with your dried herbs and flowers of choice. Good herbs to dry for this include lemon verbena, mint, lemon balm, anise hyssop, lavender, rose petals, bergamot heads, rosemary, and any type of dried citrus. This blend looks lovely when you combine the peels and flowers and leaves. For some additional fragrance, add a few drops of essential oils to the mix. Lemon, lemongrass, lavender, sweet orange, and spearmint all are wonderful. Experiment to find your own favorite blend. I tend to make different blends for the guys in the family which have more of the pine, fir, rosemary, juniper, and citrus, while I enjoy lavender, citrus, patchouli, cedarwood, etc. myself. 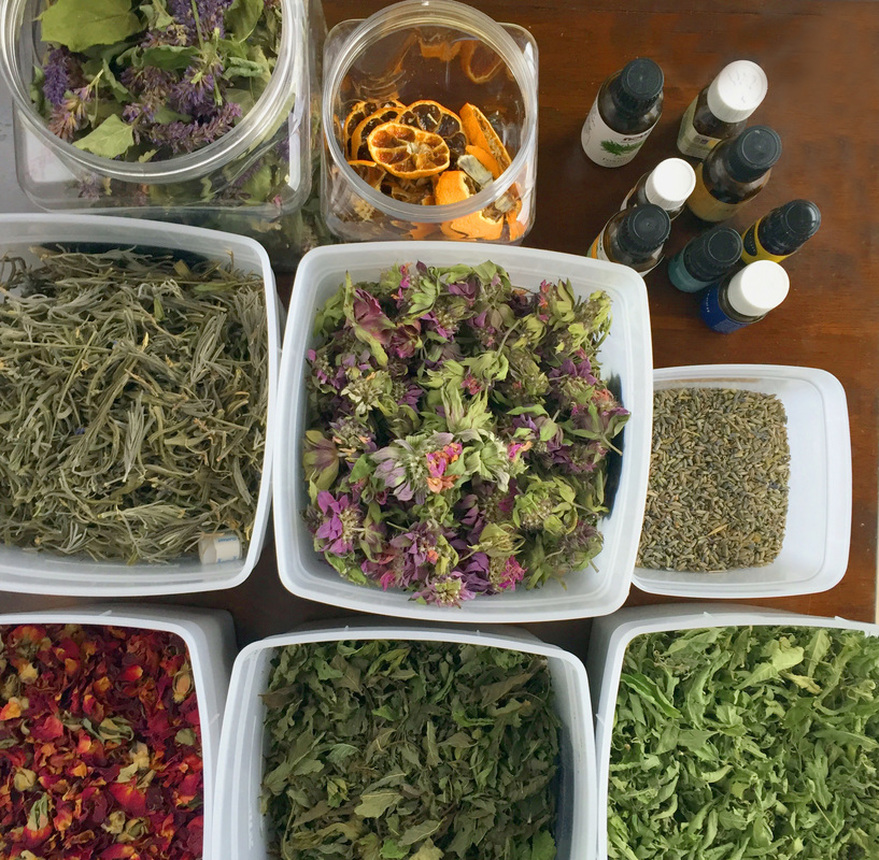 Another use for your essential oil enhanced dried herbs is sachets. Gently crush your herbs of choice in a clean bowl, mix in your essential oils (a binder can help retain fragrance longer, so if you have it, try adding a small spoonful of ground orris root into the mix, although I have even used frankincense powder), and spoon into pre-sewn rectangles of fabric (leave one end open to fit the herbs). Stitch closed and use in your drawers, shoes, or closet. Refresh with a few drops of essential oils as needed. 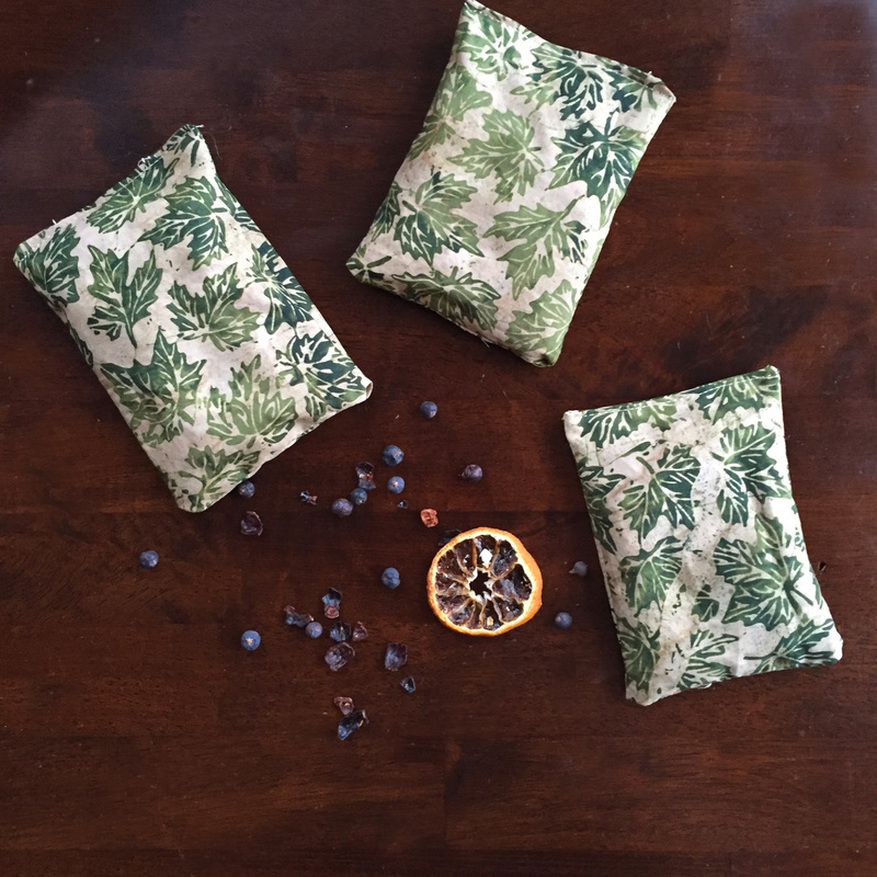 I made sachets with herbs from my garden for holiday gifts, but made sure to make a few for our own house. They are tucked into the master closet, the mud room by all the shoes and boots, and in the front coat closet. They help keep things smelling fresh. I may insert them into my pre-teen sons boots once or twice too. Ahem.
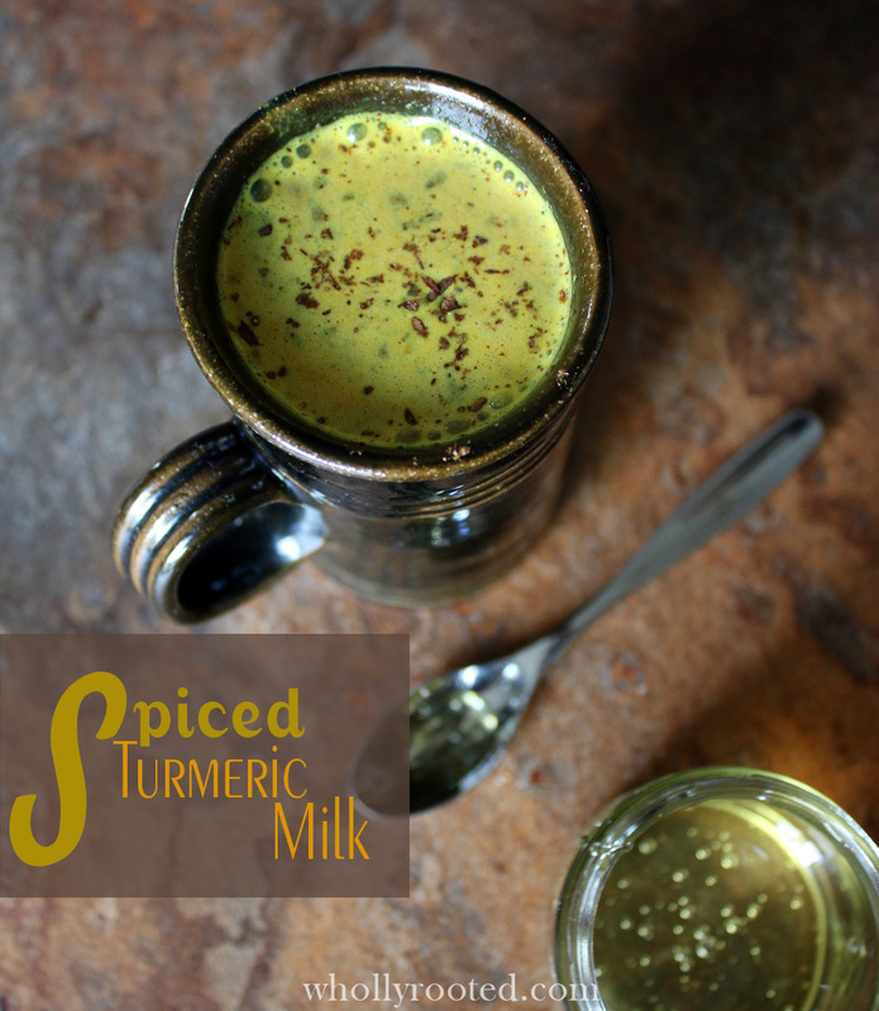
Turmeric has been used traditionally not only as a flavorful spice/seasoning, but also for its health benefits. Turmeric contains curcumin, which has antioxidant and anti-inflammatory properties. The addition of ginger gives this drink a warm spicy flavor, and is good for digestion and also an anti-inflammatory. I consciously add anti-inflammatory foods to my diet as much as I can to help support anti-inflammatory processes in my body, and having a drink with both ginger and turmeric is an added bonus. The taste is rich and creamy with a hint of a musky chai-like undertone. It is delicious. This rich golden milk is great during seasonal transitions when it can go from warm to cold in one day or when you get inside after a cold day in the snow, and a steaming mug of spicy milk tastes and feels wonderful. 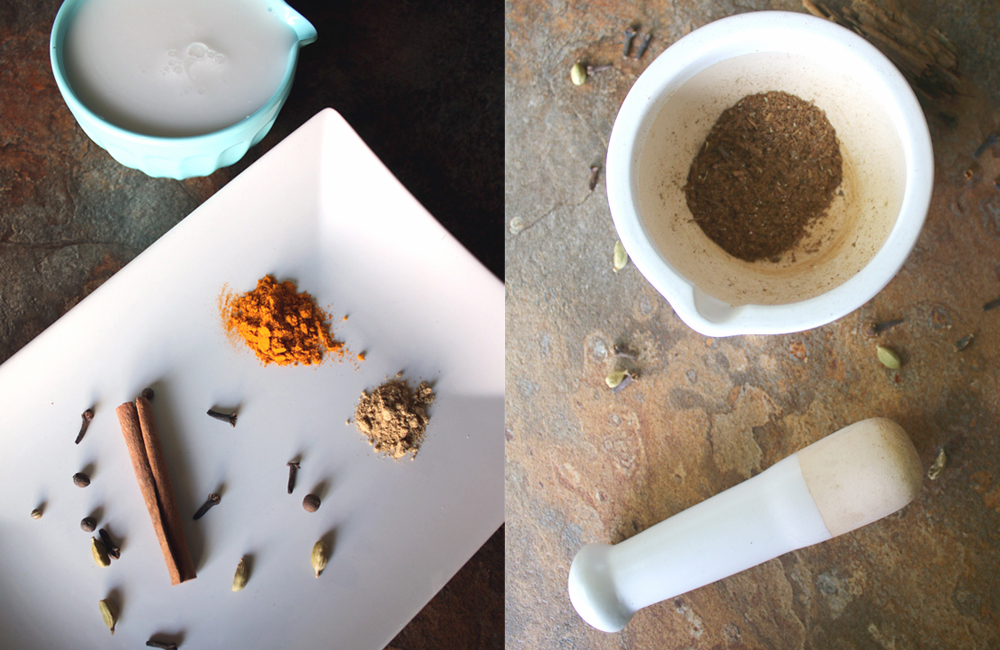
Spiced Turmeric MilkPrint |
{wholly rooted}While using fresh turmeric is best, it can be hard to find at the market during certain times of year, so this recipe uses powdered. This is delicious on a cold winter day. {ingredients}
Warm the coconut milk in a saucepan on the stove. 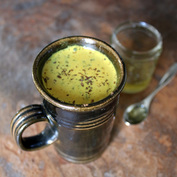
I love using turmeric and ginger as much as I can, and this drink is so delicious and rich and spicy. I do like coffee (we roast our own beans) and I love herbal tea (I grow and dry my own herbs all summer long to make herbal tea blends), but I also like having a hot drink that has a different flavor in my winter mug rotation! 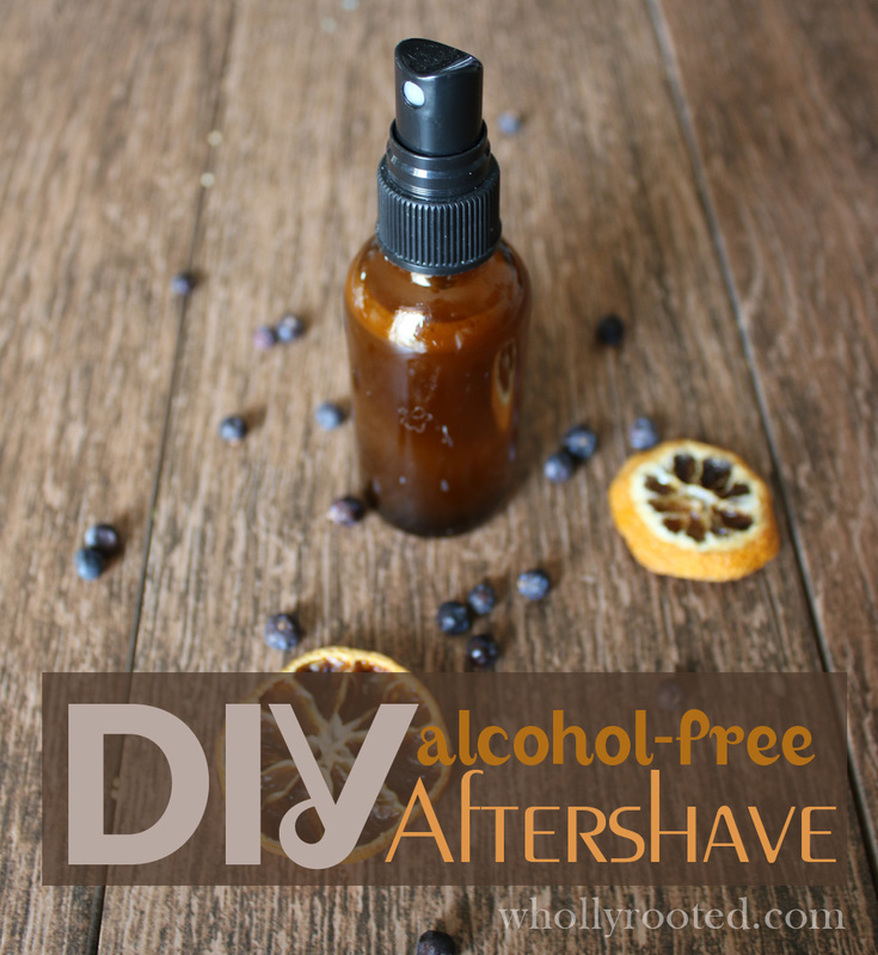
Most DIY bath/body/personal care recipes out there are she focused. While scent has no gender, generally products made for men have more of an earthy, musky fragrance. This aftershave can be used by anyone, but it is particularly great as a facial toner and aftershave. This contains none of the alcohol, preservatives, or artificial fragrance of store bought brands. Instead, this is a refreshing mix that can help soothe and tone freshly shaved skin, soften and moisturize, and also leave a wonderful fragrance behind that is natural, earthy, and not overpowering. My husband loves how this makes his skin feel soft and yet supple (with no overdrying) and that the aroma is warm and musky without being overpowering. I even sneak a spray of it on my scarf sometimes because I love the smell. 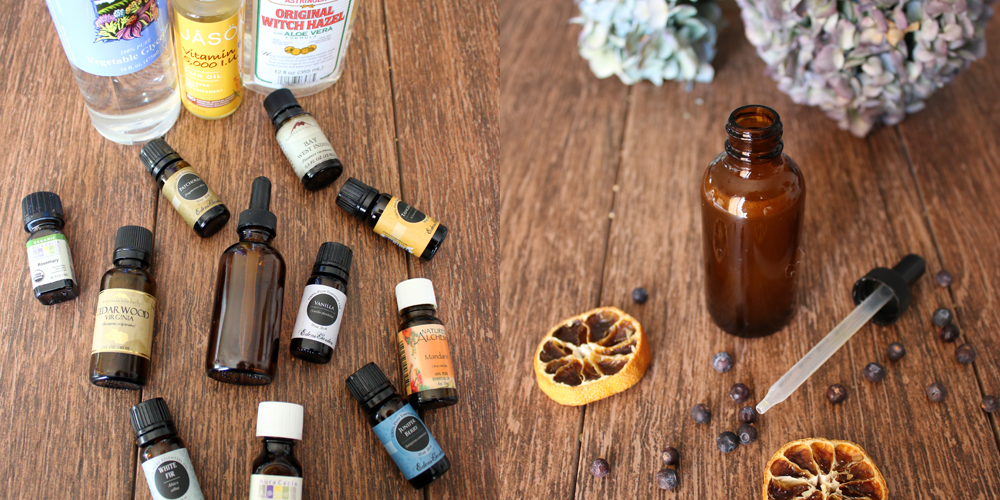
DIY: Alcohol-Free AftershavePrint |
{wholly rooted}This recipe uses witch hazel instead of alcohol, which has been used for ages as an astringent, and to smooth skin without drying. Be sure to find a witch hazel brand that is fragrance and alcohol-free, so that you get the full benefit of the plant without the sting. Vegetable glycerin assists in retaining moistures, and acts as an emollient to soften skin. Vitamin E acts as an antioxidant and anti-inflammatory. These ingredients combined with the essential oils make a wonderful gentle aftershave for even sensitive skin. {ingredients}
Instructions: 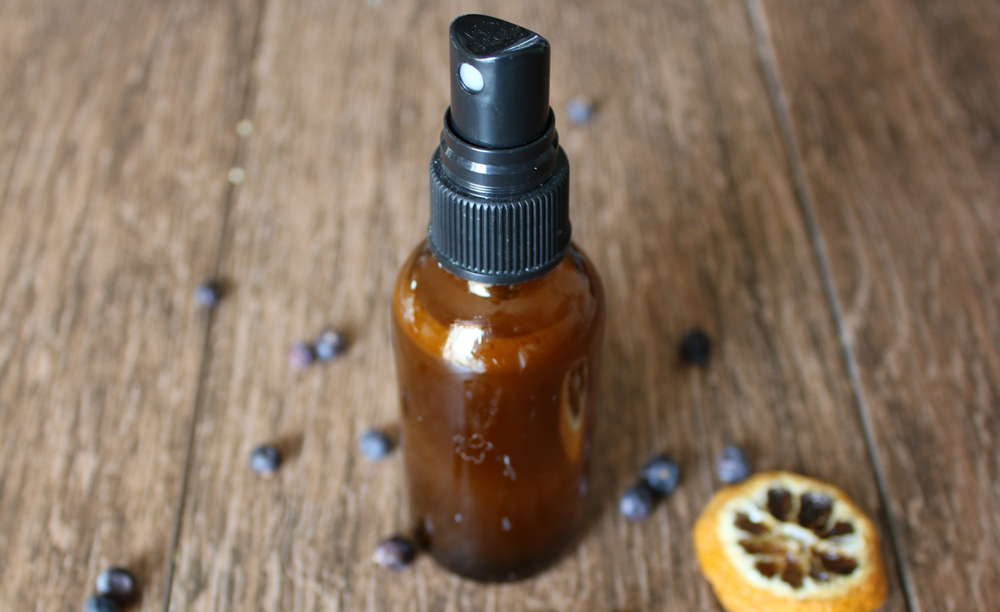
It isn't always easy to find handmade and homemade gift ideas for the men in your life - and this recipe makes a great gift!  Summer means a lot of sunshine and even when careful, sometimes we get a bit too much sun. I am super careful about the sun - I spend a lot of time outside with the kids, in the garden, at the community garden, and at the CSA picking during the summer. I am also taking medication for my RA which makes me photosensitive, so I can burn easily. Aaaand there is the whole hot flashes business. So needless to say I find myself sometimes feeling like my skin is just on fire, even when we are careful about when and where and how much sun we get. This offers a cool refreshing immediate feeling of relief. I carry it in the cooler sometimes when I know we will be out for awhile, and I always have a bottle in the door of my fridge. This spray combines several gentle ingredients that have properties which can help reduce inflammation, soothe the skin, and promote healing. Supplies: One 4 oz. glass spray bottle or two 2 oz. bottles 3 oz. distilled water 2 tsp. organic apple cider vinegar 3 Tbsp. fresh aloe vera gel (use a plant or a good quality gel, not the neon green fragrance added goo from the pharmacy) 20-25 drops of lavender essential oil First, remove the gel from your aloe. Aloe is such a great plant everyone should have one at home! Simply remove one or two stems (depending on how large they are). On a cutting board make a slice down the entire length of one side and peel the stem open into one flat piece. Using a butter knife, gently scrape down along the stem from end to end, removing the liquid material, leaving the green outer shell. Once you have 3 Tbsp. of fresh gel, break up any thicker bits using the back of a fork, and then put all of your aloe in the spray bottle. Next, add the distilled water and apple cider vinegar, close the lid, and shake well for a minute. Finally, add your essential oils, screw on the top again, and shake well one last time. Clearly label your bottle and store in a refrigerator. This should keep in the refrigerator for at least a month. Shake well before using. Don’t spray directly on your face, spray onto your hands first and then apply to your cheeks/forehead/nose. When I feel like I'm burning up I often spray the mist into the air and walk into it, or spray my chest/neck. 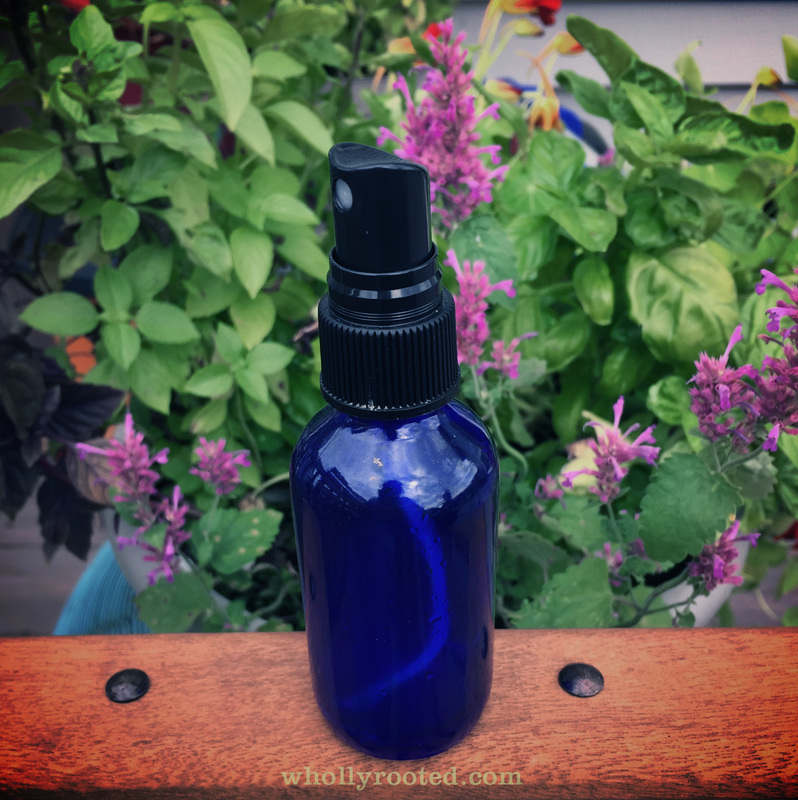 A chilly refreshing healing spray feels SO good on hot skin. While it is best to not get burned, sometimes in the summer we get a little too much sun or just feel overheated (not to mention hormonal overheated) and this refreshing herbal spray can help provide quick relief. Optional :: Try reducing the distilled water to 2.5 ounces, and adding .5 ounces of a good quality organic witch hazel in the recipe. I prefer alcohol-free spray, but the really good quality witch hazel can give additional relief for those times you have too much sun. 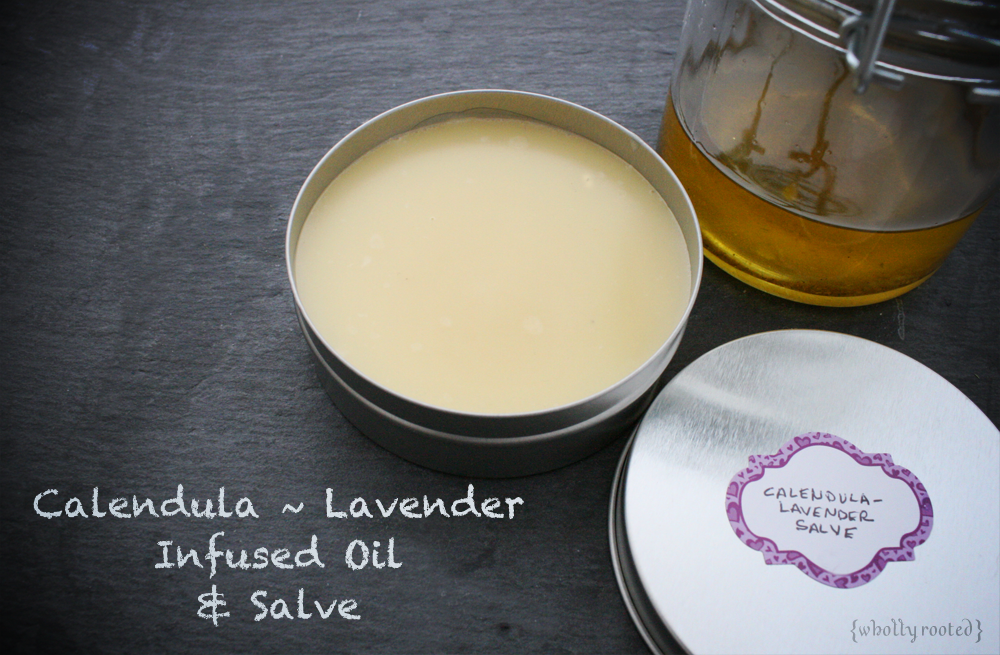
I have a 9 year old with eczema. Over the years we have tweaked his diet and have gotten him to a point where he doesn't often have the huge flare-ups he used to have (dairy and cane sugar are his triggers). His asthma has been under control too, which often goes hand in hand with the skin for him. That said, our success seems to be in part to his diet, and also our skin care and bathing regime. We have worked with his allergist and a dermatologist for a few pesky painful bits, but generally, we try to keep his skin pampered so we don't have to resort to the steroidal ointments. We have a cream and body oil we use after bath every night, but we also make a salve for spot treatment. This salve can be used by all of us for various skin applications, but I most often use it for rough patches. This base oil is made from an herbal infusion. I like using the oven method because it is gentle and easy. The process is just simply pre-heating the oven to a low 250ºF temp, and then placing your oven safe bowl of herb/oil in the oven, turning it OFF, and leaving the herbs to infuse in the oil for several hours. I find it convenient this time of year to just do it at night and leave the bowl in the oven overnight. If I am already using my oven for dinner, I just cool it down to temp and make sure it is OFF before putting the herbs in there. This method gently heats the oil, and allows me to do other things besides monitoring the temperature constantly as I do more with the stovetop or crockpot methods. Once summer arrives I usually prefer the solar method since I don't want my oven on, but the oven is so simple and perfect for most of the year. 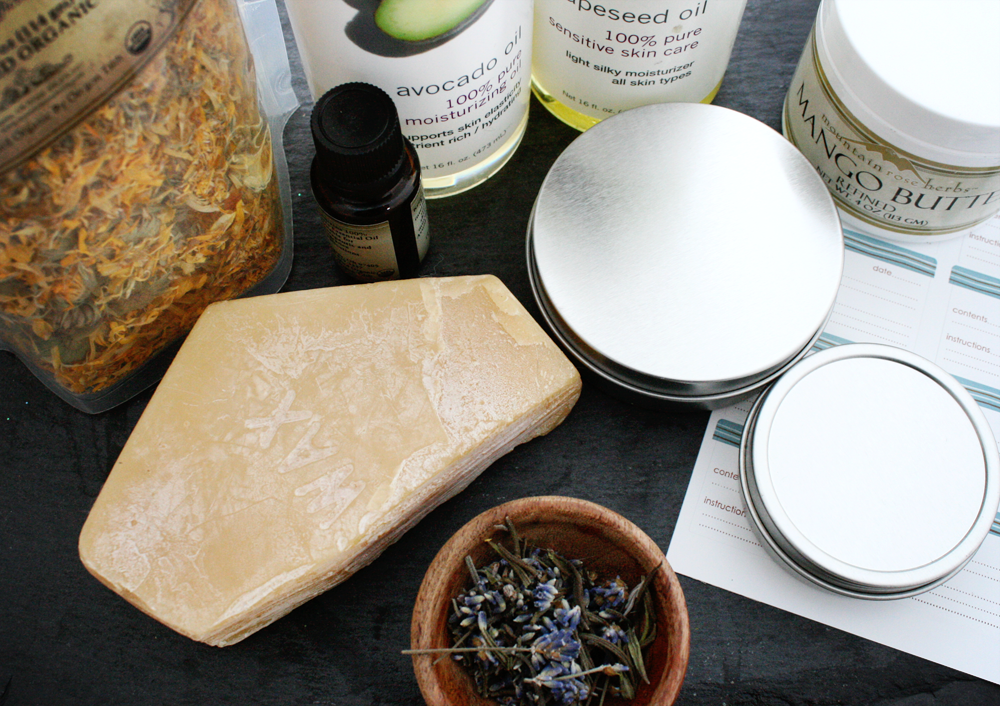
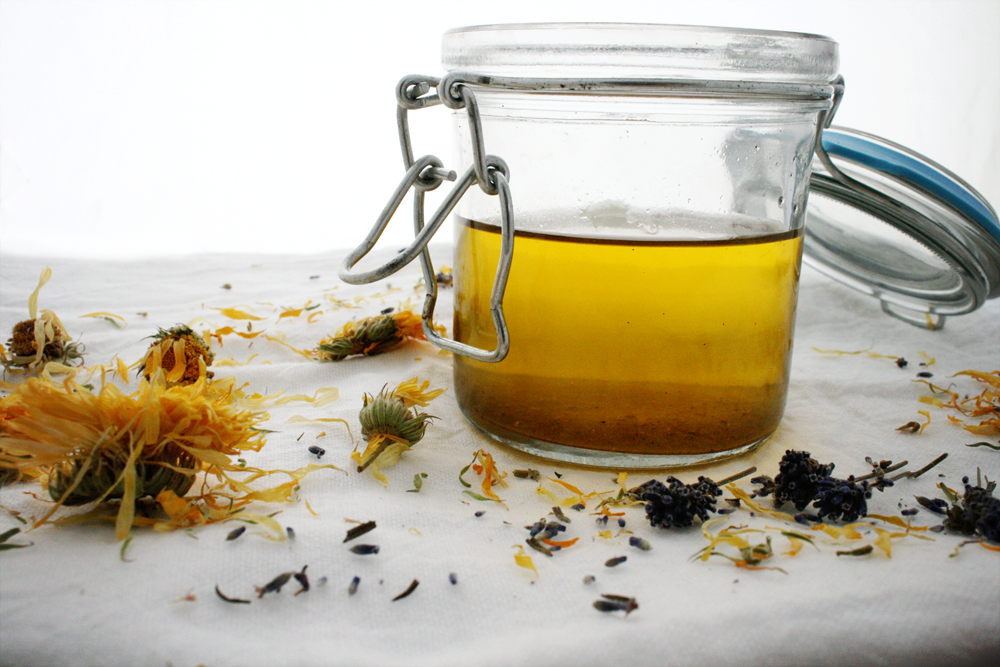
This salve I like to make uses calendula and lavender. I often vary the type of base oil I infuse depending on the time of year (each oil has different properties, absorption, etc.). Use whatever oil is safe for you and your household. This batch I used avocado oil, but I often use (organic) olive oil, grapeseed oil, or even coconut oil. {Calendula~Lavender Infused Oil} For this oil, I use 1 cup of oil to 1 cup of packed dry herbs (calendula flowers). Most often by weight is best, but I know with calendula it is a light petal based herb, and this ratio works for this infusion. I filled the cup first tightly with calendula, and added a few tablespoons of dried lavender buds. The lavender is optional, but I love it, and I dry my own each summer to use in my herbal concoctions. Place your dry herbs in an oven safe bowl. Pour over your oil. It is going to look like you don't have much oil and it at first won't even cover all the herbs. That is OK. Stir it up to get it all coated. Place in your preheated 250ºF oven, turn off the oven, close the door, and leave it for a few hours. I usually just leave it overnight. To strain just run it through a few layers of cheesecloth. Squeeze it. I like taking the ball of cheesecloth and herbs and squeezing it with my lemon squeezer. It gets out more oil than my carpal tunnel hands ever could. This is your base oil. 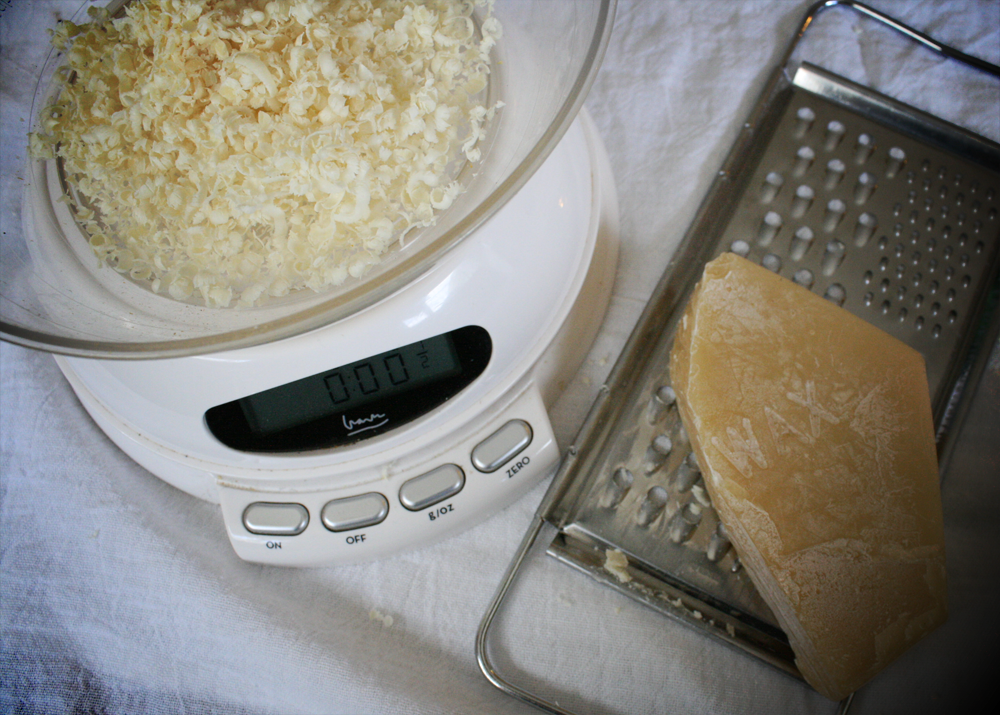
To make the salve, you can use the low temp oven method again to melt things, or do a low temp/gentle double boiler by heating water on the stove in a saucepan, and placing your oven safe bowl over the top. {Calendula~Lavender Salve} Into your oven safe bowl or double boiler :: 3 ounces of your freshly made aromatic calendula-lavender oil (you will have some left over for other good stuff) 1/2 ounce of mango butter 1/2 ounce (up to 1 ounce) of grated beeswax You may ask if the mango butter is optional - sure. You can use coconut oil for that portion (it is a room temperature solid oil, which is a nice substitute) or skip it and use just the infused oil and beeswax. Cocoa butter would work too, although the arguably wonderful scent will overpower any oils you add. Shea butter should work too, although I haven't used it since we have an allergy in the house. I have found my son likes the texture when it is a little thicker and not as oily, and the mango butter works great for us. This has a good skin feel for him. I say use a half to a full ounce of beeswax because ~ it will vary depending on how you like it. Or your climate. I use less this time of year because it is still cool and I don't want it hard as a rock and impossible to use. In the summer I use the higher quantity of beeswax because I want it to set even in moderate heat - such as in my travel bag or hiking tote. To test if you like the consistency, the trick is to melt it all together, take it off the heat/out of the oven, and let it cool right there in the bowl. After it fully cools stick your finger in there and rub some on. See how you like it. From there re-melt and tweak it if you need to. Remove it from the heat, and now add your essential oils. I used 12 drops of organic lavender essential oil. Work quickly so it doesn't all harden in your bowl. Now, just pour it into your tins. For this batch I used a single 4 ounce tin. Sometimes I use smaller tins so I can have one at home and one in my purse. I like using a lip balm tube for a small portable version that is great in a travel bag, first aid kit, or backpack. If you use a tube, be sure to label clearly it as a salve so you don't apply it to your lips! For all of my tins, I put a detailed label with ingredients, use, and date on it somewhere so I don't forget, as well as a name label on the lid. 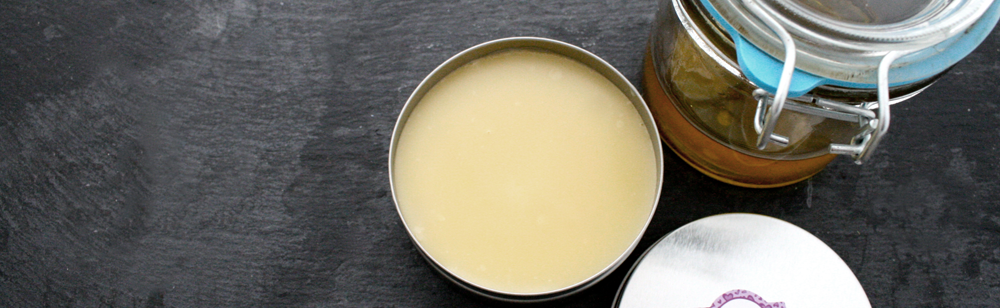
Now, let it cool. It is ready to use! My son loves it on his dry annoying patches. I love it on my garden knuckles. You know, the red dry cracking knuckles you get after digging, raking, and planting in the garden like a madwoman after a six month break where your previously gloriously hard-earned garden callouses turned into soft supple winter hands without hard use. Ahem. After you make this 4 ounce batch you will have some of that base oil left over to use in bath melts, balm, or another batch of salve! Making your own infused oils and salves is not hard, and both are a great addition to your home kit. *** Note: I use only 12 drops of lavender EO because we have tweaked it to where my son is comfortable with the scent level (and my oil infusion has some scent since I added dried lavender buds to that process). You can add up to 20 - 24 drops total comfortably for 4 ounces of oil! Calendula:
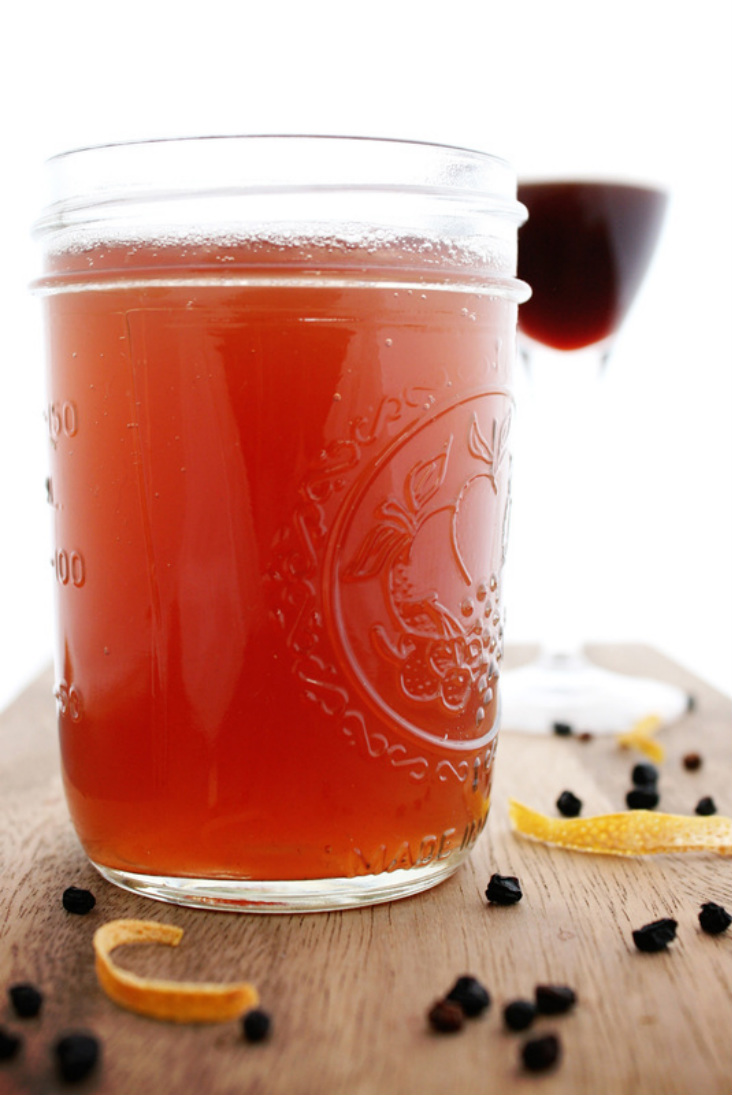 Sipping vinegars have been making a comeback within local artisan food communities. Sipping vinegars, also known as shrubs or in some variations as a switchel, have been around for a long time. During Colonial times, vinegar was used to preserve fruit for the off season and the resulting beverage was called a shrub. Switchel was another drink from that era, made from ginger, honey, vinegar, molasses, and water - also called haymaker's punch - and was often taken to the fields by farmworkers. A switchel was used like gatorade or sports drinks today - to refresh, cool, and replenish. I like them because the flavor options are endless, and they are a nice way to combine the medicinal or immune system boosting power of herbs with fizzy delicious better-than-a-can-of-soda-could-ever-be flavors. In this house we have some intolerance to corn syrup and manufactured citric acid so we don't do canned sodas. BUT we sometimes still love fizzy drinks. Water kefir, honey sweetened fruit syrups, and shrubs are our favorite homemade concoctions. This blend contains a rich combination of flavors. Elderberry, holy basil, astragalus, rose hips, ginger, citrus peel, and hibiscus. I like this in spring when we need a little immune system boost and support after a long winter and with the start of spring cold & allergy season. 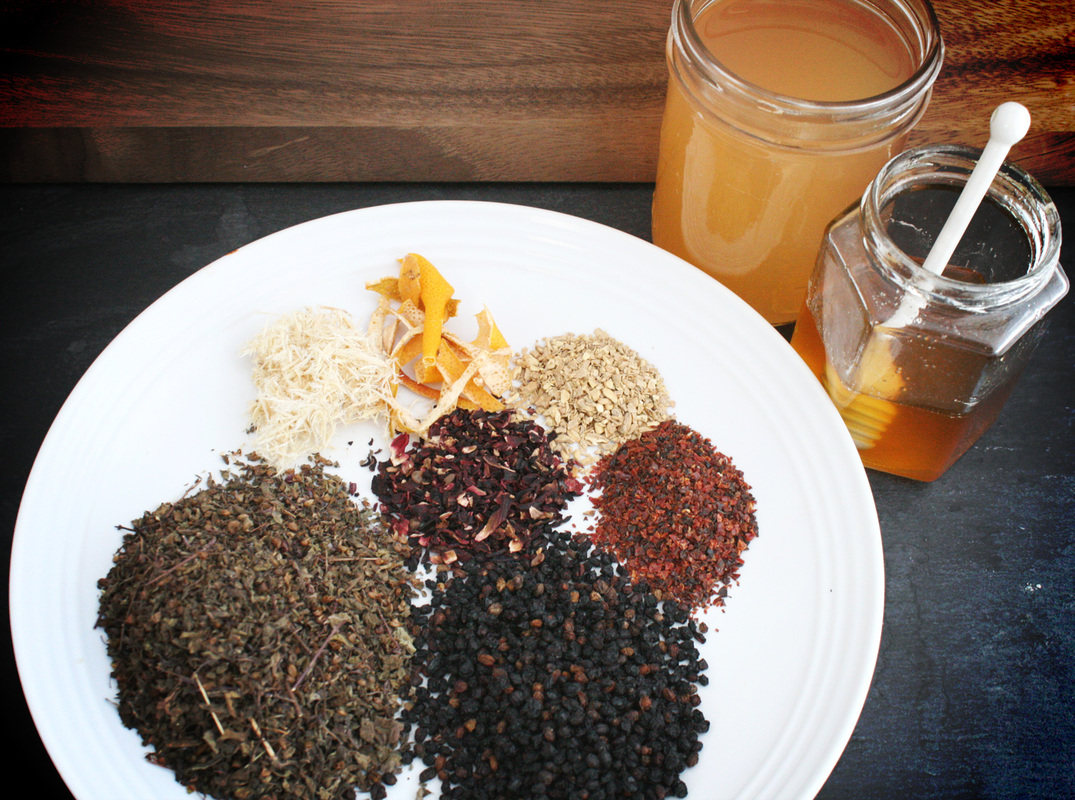 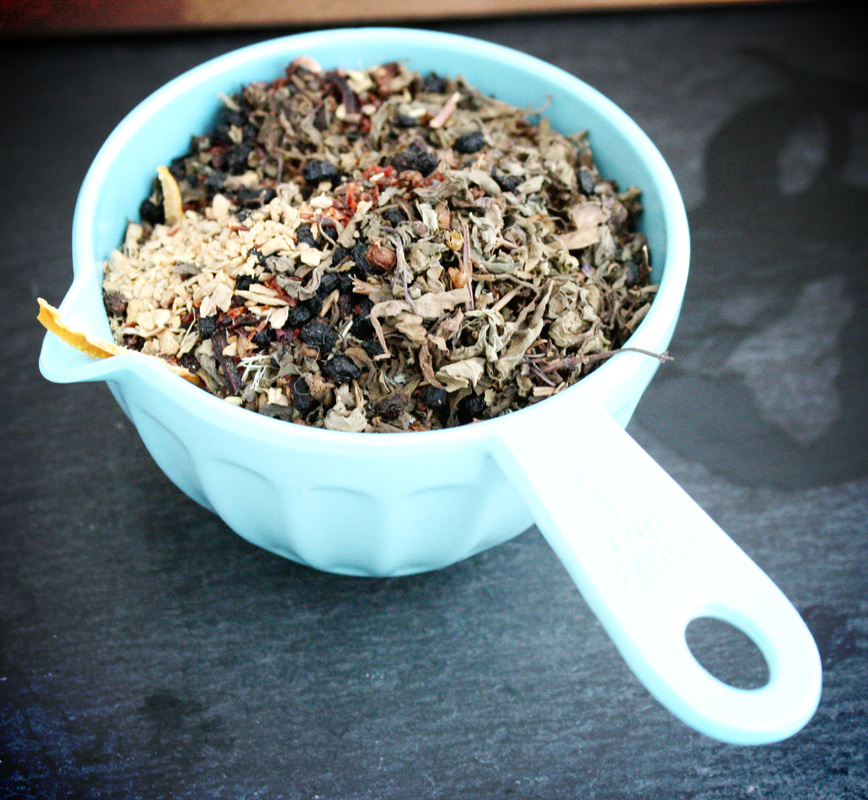 holy basil-elderberry shrubPrint | from whollyrooted.comThe ratio is basically 4:1. 4 parts honey/vinegar with 1 part herb. I measured by cup for this reason. With medicinals it is preferred to weigh not measure, but this is a beverage with some boost, so using cup measures will work just fine. {ingredients}
Add your dried herbs to a pot with 2.5 cups of vinegar. I used 2.25 cups of raw ACV (apple cider vinegar) plus .25 cups of coconut vinegar (it has a mellow sweet flavor with a lot of minerals), but you can use all ACV if you prefer. Do not use the plain white distilled vinegar you use for your cleaning or pickles. It will be gross. Champagne vinegar is an OK substitute, but ACV is your best bet.  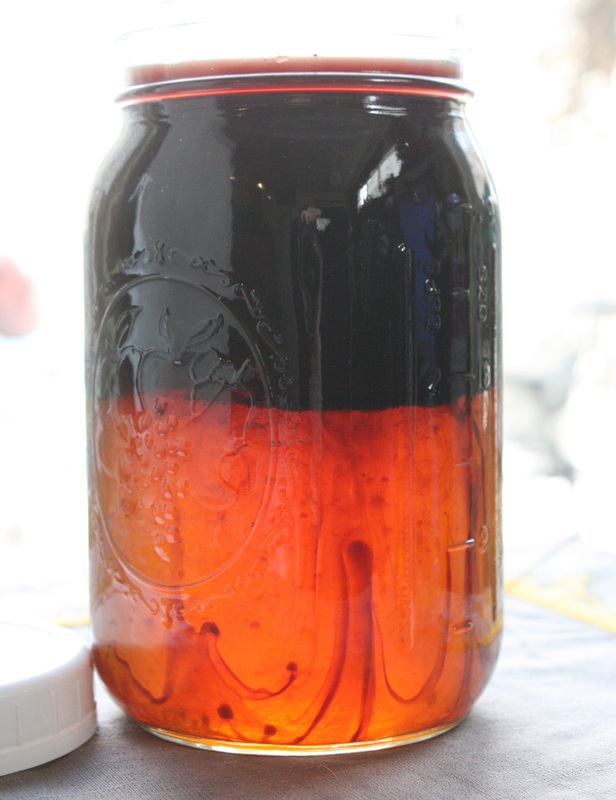 To drink, add 1/4 cup sipping vinegar to a glass, fill with sparkling water, club soda, or seltzer. Try mixing a bit into your pitcher of iced tea. Mix with sparkling wine or champagne. Or, take as a tonic by sipping a tablespoon or so in a small shot or cordial glass. For kids, the best is 1/4 cup of your shrub in a glass with ice and sparkling or soda water. 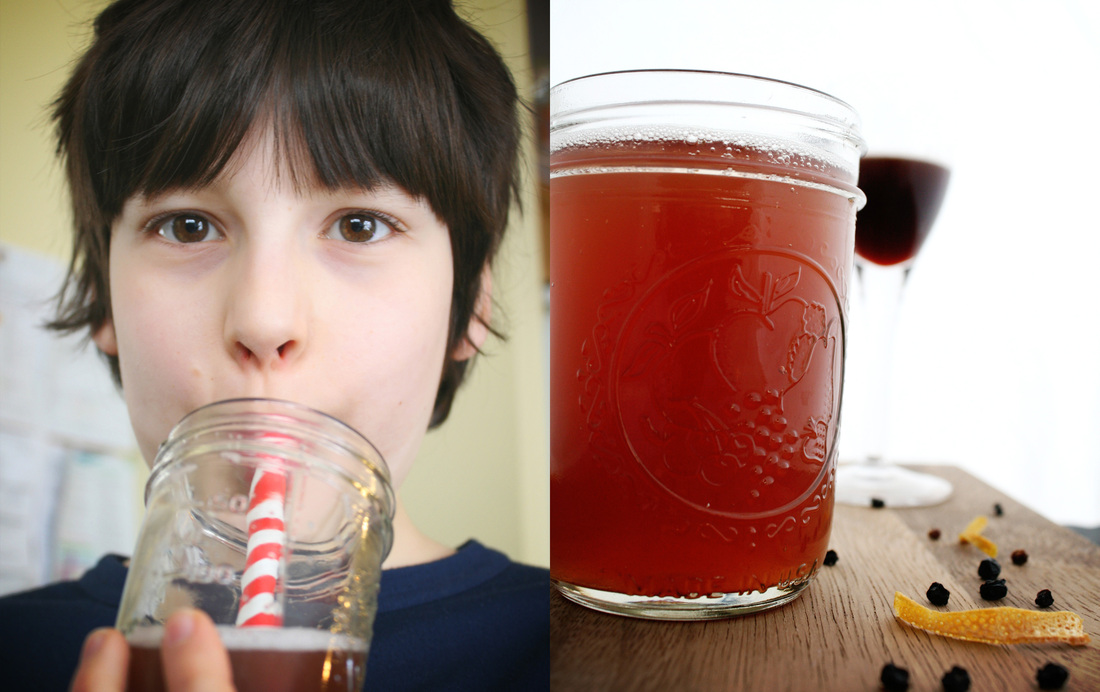 Combining the concept of alcohol free tincture or oxymels with the day to day deliciousness of a shrub means you can have a tasty refreshing fizzy soda with the benefits of the herbs! Holy Basil (ocimum sanctum) is a great adaptogenic herb that I think is underused. It has a peppery floral aroma when dried, and I think has a great flavor, especially when combined with citrus or berries. I often use it in tea blends, syrups, and vinegars. It is a nice all around herb for support.
 I love using dead sea salts as a detox body scrub for me, and it is a great additive every week (or whenever he has a flare-up) for the bath for my son with eczema. Dead sea salt contains many minerals and has many therapeutic qualities good for the skin, the body, and healing - and that combined with the soothing/anti-inflammatory properties of the lavender and the oil relieves itching and flare-ups.
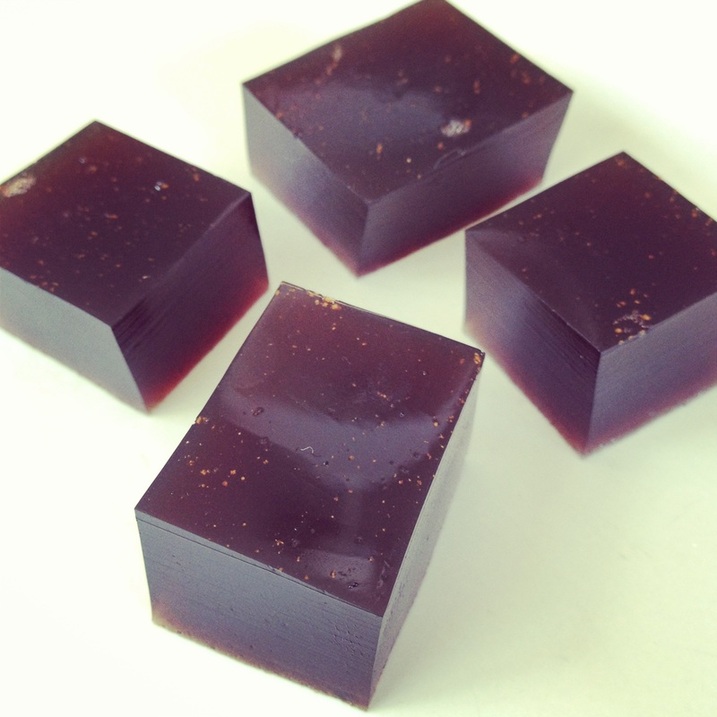 This is a kid friendly way to make a mineral rich gelatin cube with the immune system boosting power of elderberry. But don't use regular gelatin packets. Look at your local coop or natural foods store for a high quality gelatin which avoids factory farmed animals and follows healthy pastured practices to produce an excellent quality powdered gelatin. You can usually choose porcine or kosher. Kosher meaning pork free, pastured cow source only. Be sure to look to see that the kosher gelatin is from 100% grass fed cows. Porcine may include a more varied diet, although it is cheaper. My older son is allergic to gelatin as well as pork and beef, so we make this only for 3 of us. He is very allergic to pork, so no pork products come into our home just to ensure safety. He is less reactive to bovine, so I am comfortable carefully preparing that for three of us without worrying about causing him a reaction. So, my preferred gelatin is the Great Lakes Unflavored Kosher Beef Gelatin. {{how to}} Make a strong tea of your choice. You can use purchased tea such as elderberry echinacea, or any elderberry herbal tea bag blend. I made my own:: 1/4 cup dried elderberries 1" knob of ginger sliced finely zest of one organic lemon Tbsp of dried rose hips Honey to taste Add all ingredients to a pot with 2 cups of water, bring to a simmer with lid on, turn down to low, and let steep 45 minutes. Strain. While still warm add 1 Tbsp of good quality gelatin (I use Great Lakes Kosher Beef collagen joint care) per 1/2 to 3/4 cup of tea. Stir to dissolve gelatin, pour into shallow container and chill. Once set cut into 1-2 Tbsp size cubes and eat daily. Tasty! |

denise cusackI am a certified aromatherapist, clinical herbalist, permaculture designer, organic gardener, plant conservationist, photographer, writer, designer, artist, nature lover, health justice activist, whole foods maker, and mother of two young adults in south central Wisconsin. 

Categories
All
©2007-23 Denise Cusack, all photos and text. Feel free to share my posts on FB or Twitter or online media or pin on Pinterest (thank you!), but please keep the links back to my website intact (meaning please do not take or copy my images off of this website and share them unattributed or without linking back here or use them without permission). Thank you! :)
|
 RSS Feed
