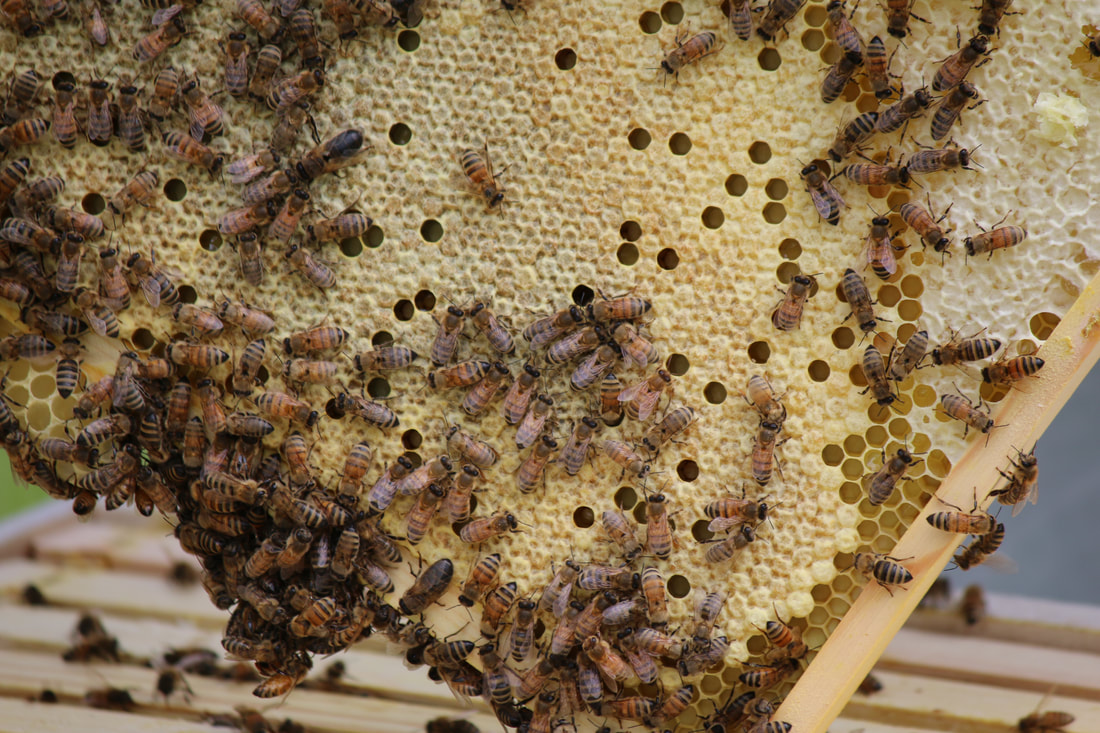
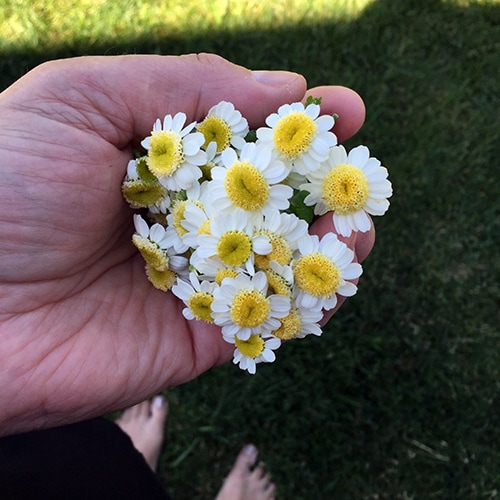
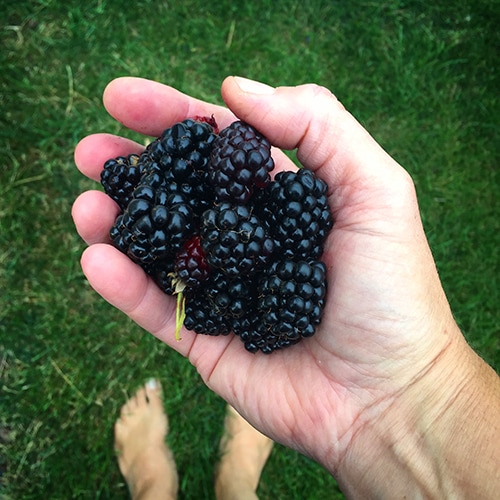
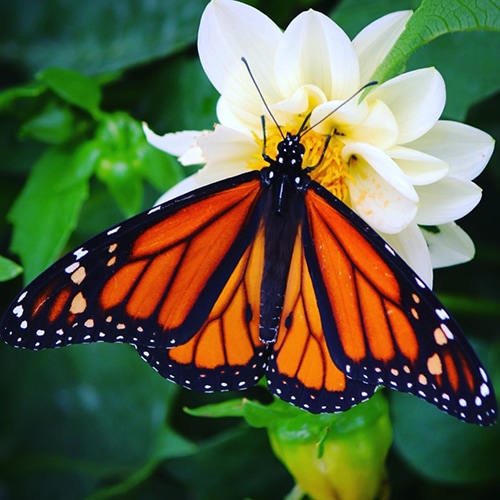
 I have always wanted to keep bees. I love their magical dances, quiet dedication to the greater good, their dedication to the queen and enigmatic communication that we humans don't understand. We have always worked on having habitat for native pollinators, who do need our help. And while some think bringing a box of bees into an environment is not natural, what the bees do when we "keep" them, it really pretty independent from us as much as we pretend to have control over the situation. When we moved here I knew I wanted to keep bees. I was happy to see that the neighbors who have their permaculture forest guild wilderness across the road had a few hives down the road. I know most of the native plants and medicinals we plant are loved by both natives and honeybees, and we also planted two areas of orchard. We have bush fruit in the back orchard area - cherries, elderberries, nannyberries - and in the front orchard we have aronia, goji, raspberry, blackberry, blueberry, apple, peach, plum, and serviceberry. We also have wild raspberries, mulberries, and blackberries. And, we have many other plants and flowering trees. Truly enough support and food for our pollinators.
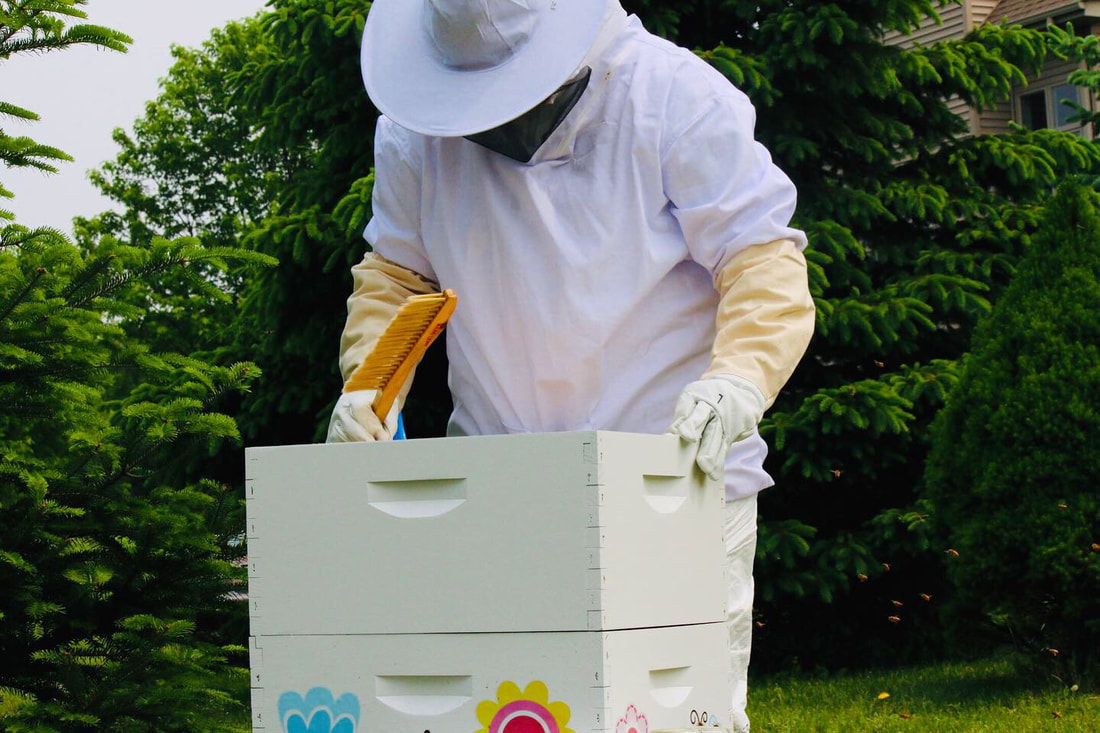
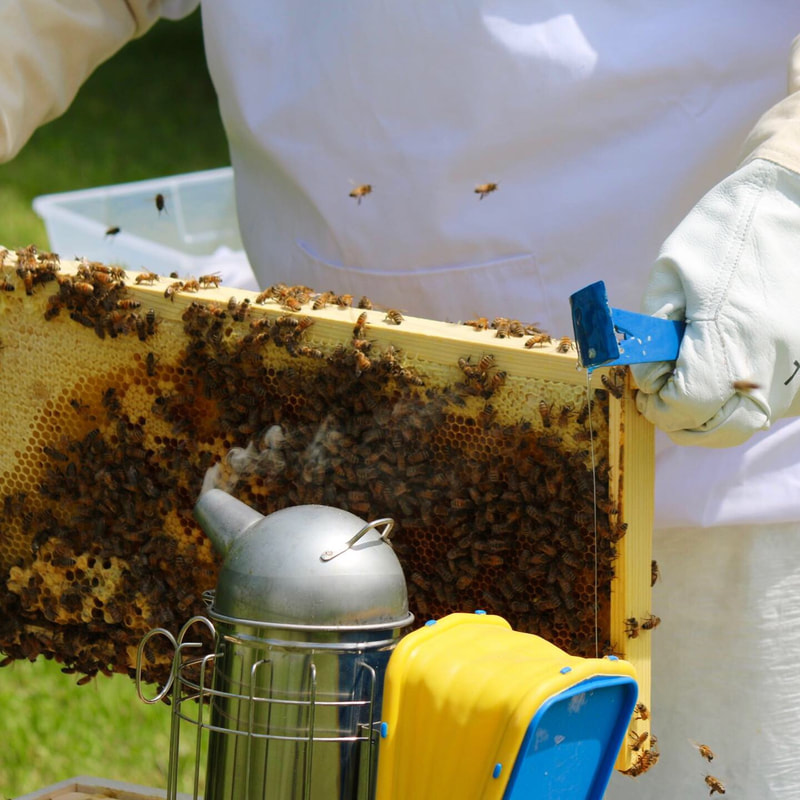
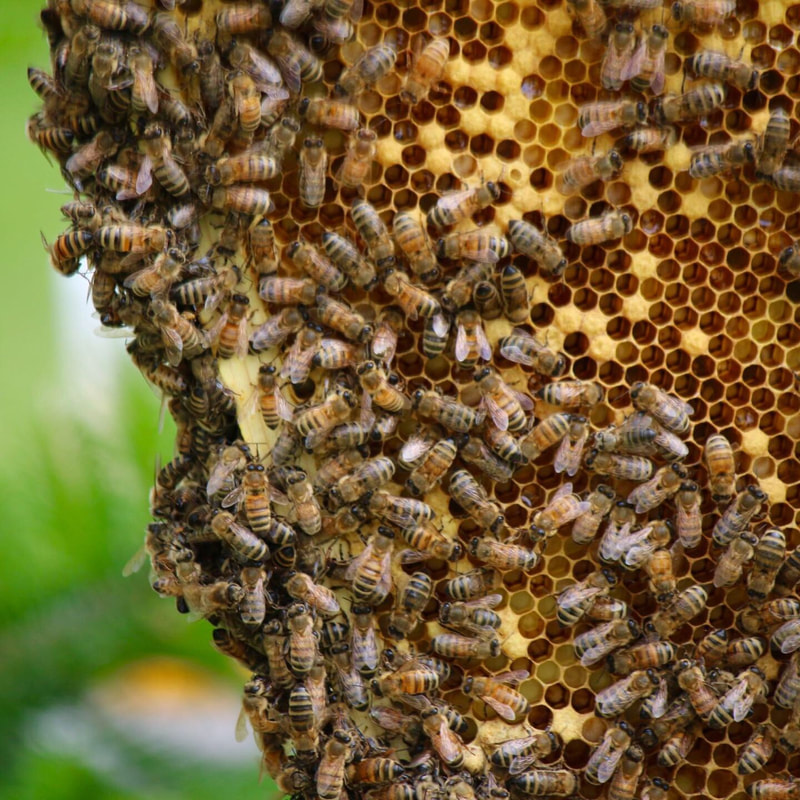
So, of course as it goes, we installed bees when they arrived at the post office. We had everything ready to go, and we transferred them into the hive. As a new beekeeper, while I spent years reading about beekeeping, I have been reading ongoing now as well, so that I follow the season and know what to look for as I have been inspecting and checking throughout the summer. I was a little nervous on my first inspection, but know that they can smell our fear, and so I focus on telling them how amazing they are, thank them for pollinating my plants, and radiate love. It might sound cheesy, but I do think that helps keep them calm. I do inspect suited up - I know some don't wear gloves or a suit - but I move with intention, carefully, and thankfully. The inspections have gone well all summer. I find what I should, I proceed through the hives, and I find the queen or evidence of the queen.
I know as I get more experience working with them, I will expand with more hives and probably experiment with different processes or setups. I love the idea of natural beekeeping, but know that with mites and other issues that can arise being so common, I should be a responsible beekeeper and do my best to keep them healthy before I experiment or try new things. So many long-time experienced beekeepers are losing their hives - or a lot of their hives - every winter, so I hope to make it through a winter.
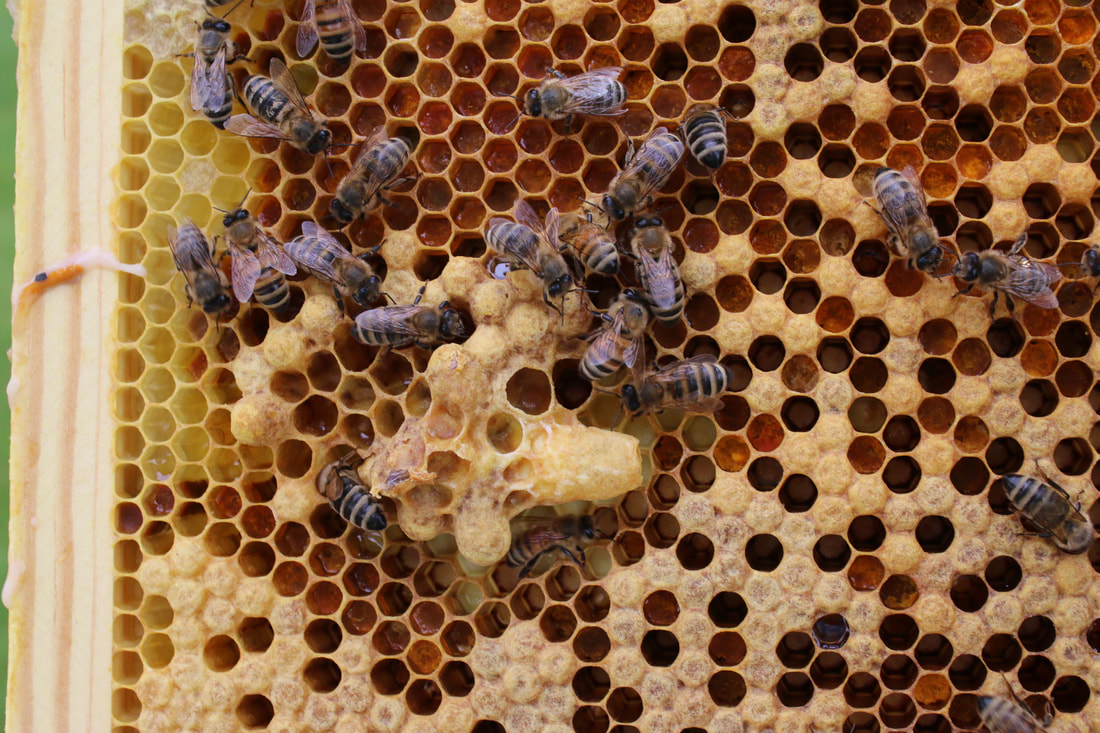
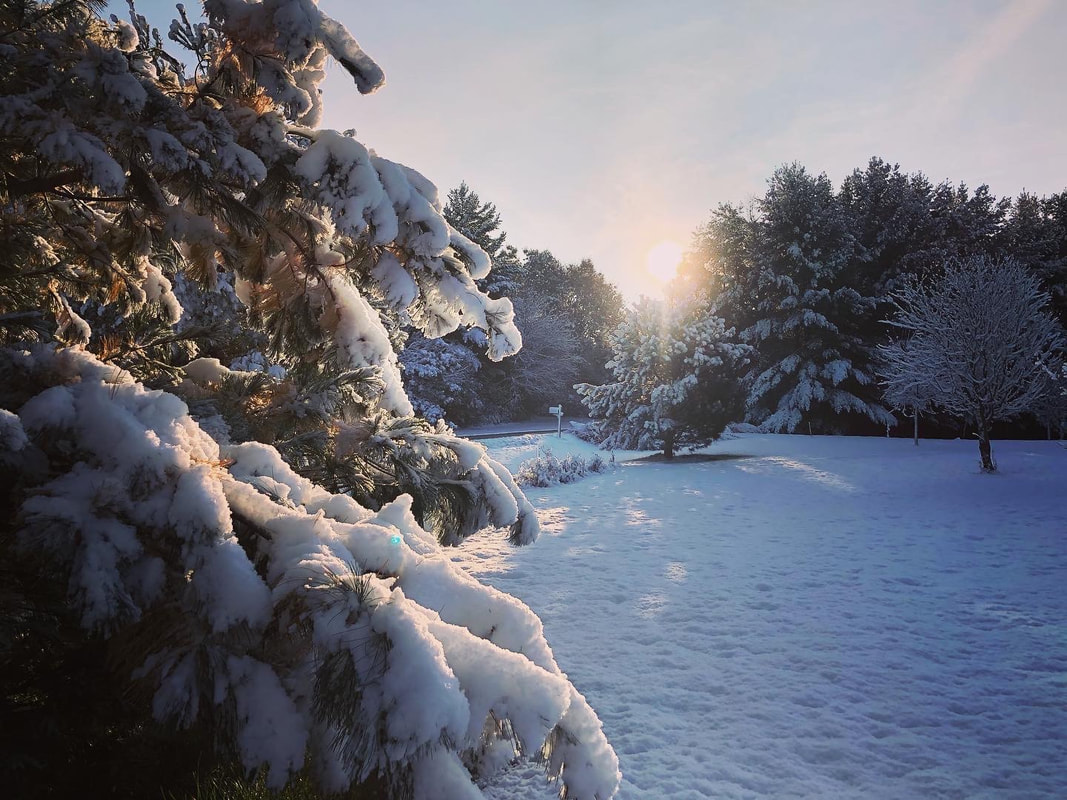
Now that we are in September, I have checked the hive again and we will start looking towards preparing them for winter and protecting them from invaders looking for warmth and food. I am happy to finally be keeping bees, after dreaming of them for many years. Every time I walk the dog on the back acre I see our hive setup and am grateful for all of the changes we have made in the past year to get here. My whole family jumped in headfirst to get us to this new place, and our life is so different than it was one year ago. We overwintered successfully in this new place, now we need to get the bees through their first winter here as well.
1 Comment
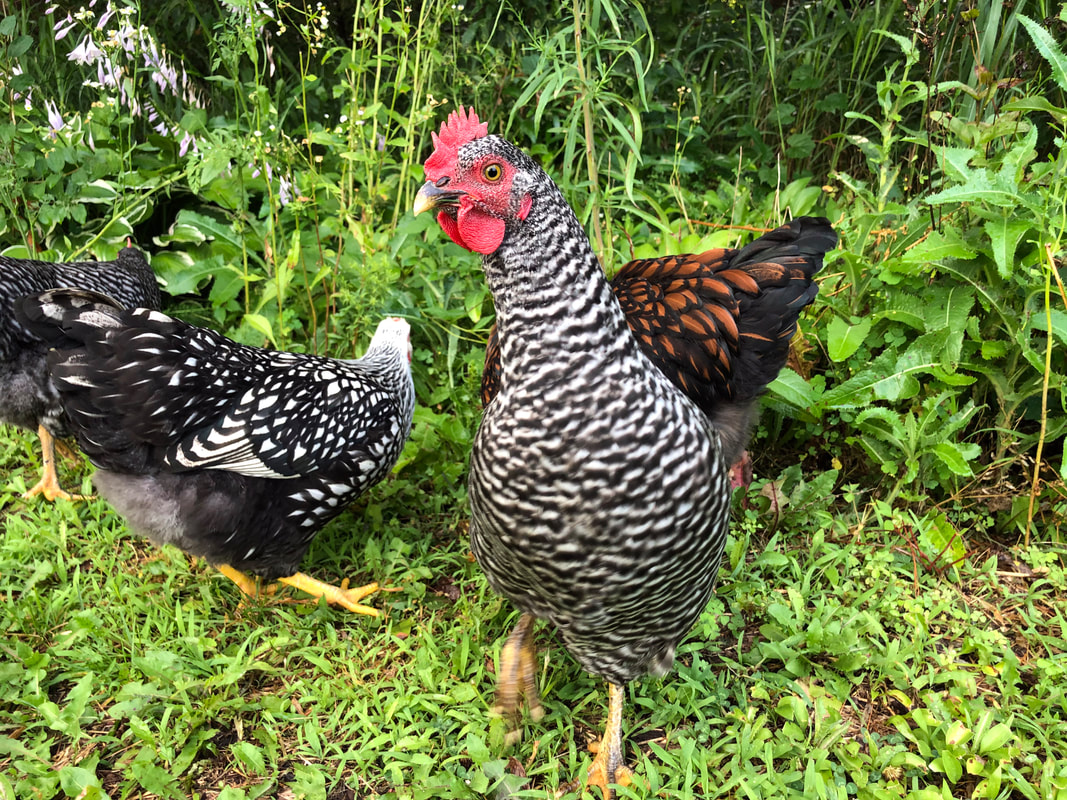
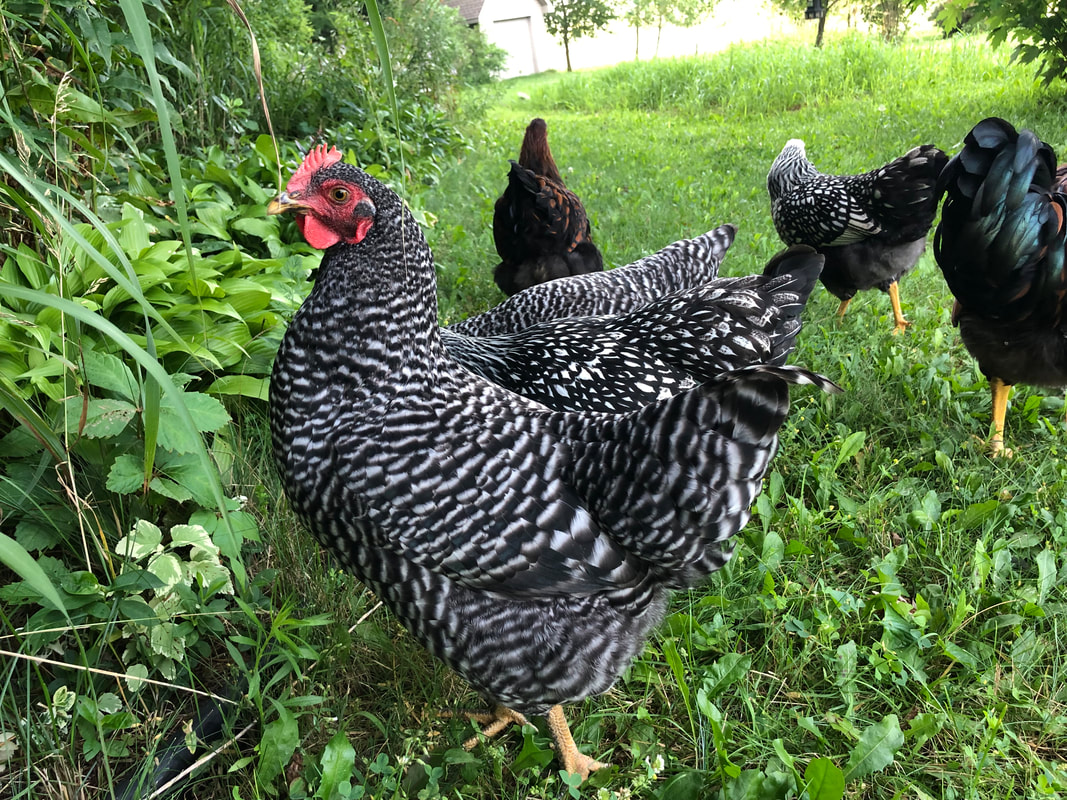
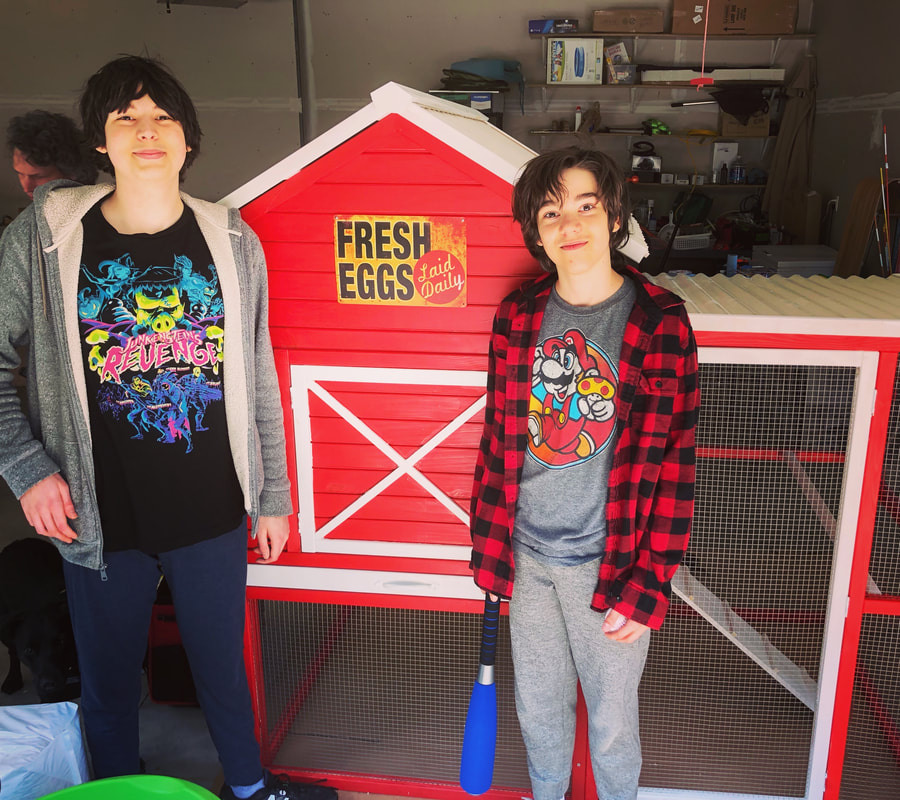 One of the things we have wanted to include on our little farmette is chickens. Not only do chickens lay eggs, and my teenager is, and has always been, a chicken whisperer (and while he is allergic to all mammals/meat/milk, he is not allergic to feathered animals or eggs!), and they are also wonderful in a permaculture system. They eat bugs, weeds, and bits and pieces of garden plants, and they leave rich fertilizer for our compost, orchards, and gardens. We are raising them only for their eggs and fertilizer, not for meat. They will hopefully live a long and happy life here at Lunar Hollow! We got 6 sexed chicks in early March, and inevitably one was a rooster - so we have 1 big guy and 5 hens. We have 2 golden laced wyandotte, 2 silver laced wyandotte, and 2 barred rock. They should all be pretty cold hardy in our Wisconsin winters. The boys initially wanted to name them after epic video game characters (Ahri, Aurelion Sol, Cassiopeia, Fiora, Jinx, Kai'sa, Shyvana, etc.), but I have just naturally fallen into calling them by names that end with the -ie sound, since it is easy on the mouth and easier to remember for me, so the names are starting to stick. The boy is Budgie, then we have Siouxie, Terri, Cyndi, Annie, and Toni. (Can you tell how old I am from the names?)
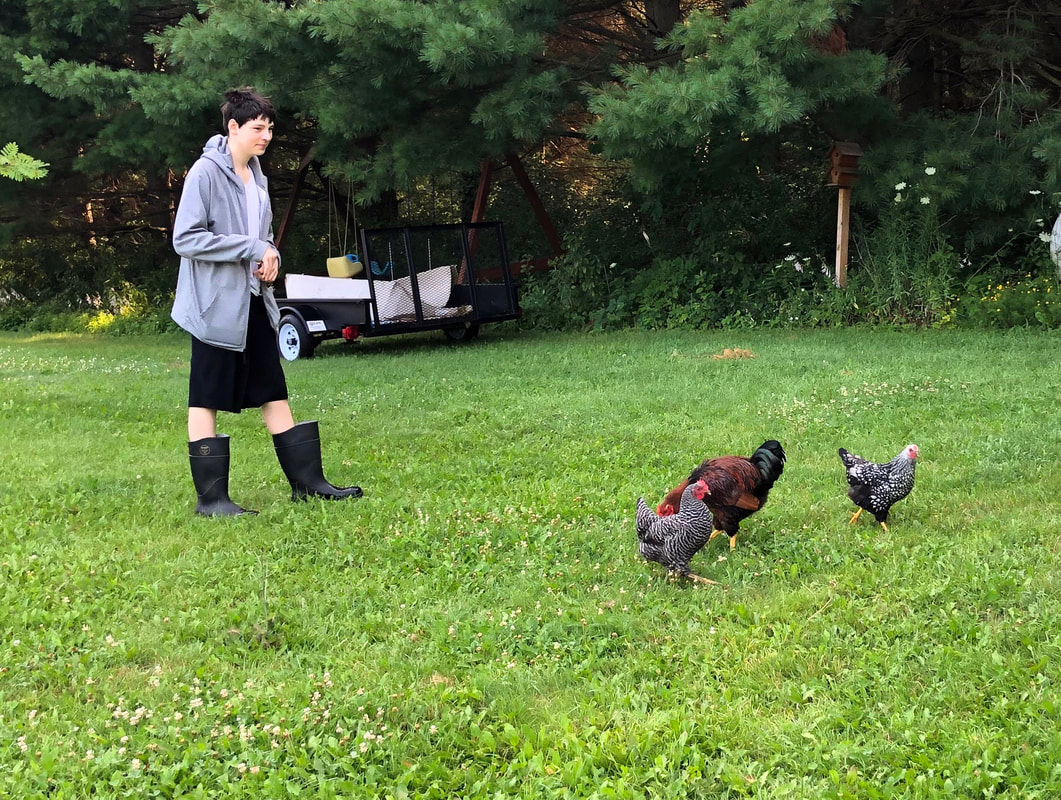
We live with a natural woods barrier on one side, but 3 other sides are pretty open for wandering (& one side is along our road), so we have not let them roam without supervision yet. Every day they get out to roam in a different area and we are taking them farther from the coop and run each time, and training them to come back when called (treats!). It took a few of us to herd them back each time, but now I can do it myself with only minimal clucking sounds, as they know what awaits them when they return. As the summer winds down, they will get to wander in our food gardens, medicinal beds, and orchard, and we will know they will come back with us when it is time.
We started with just 6 chickens, but plan to add possibly geese or ducks next year, if we make it through the first winter with the chickens. We shall see. It worked out well for us to start with only 6 and get used to the routine and care of the chickens before expanding.
It is interesting to see the intelligence of the chickens, see their personalities, and see them learn and figure things out. They are fun little dinosaurs! Our next phase for the chickens is figuring out the best way to add some shelter/tarp area for rainy season and as we go into winter and snow. Also, winterizing the coop...any tips? 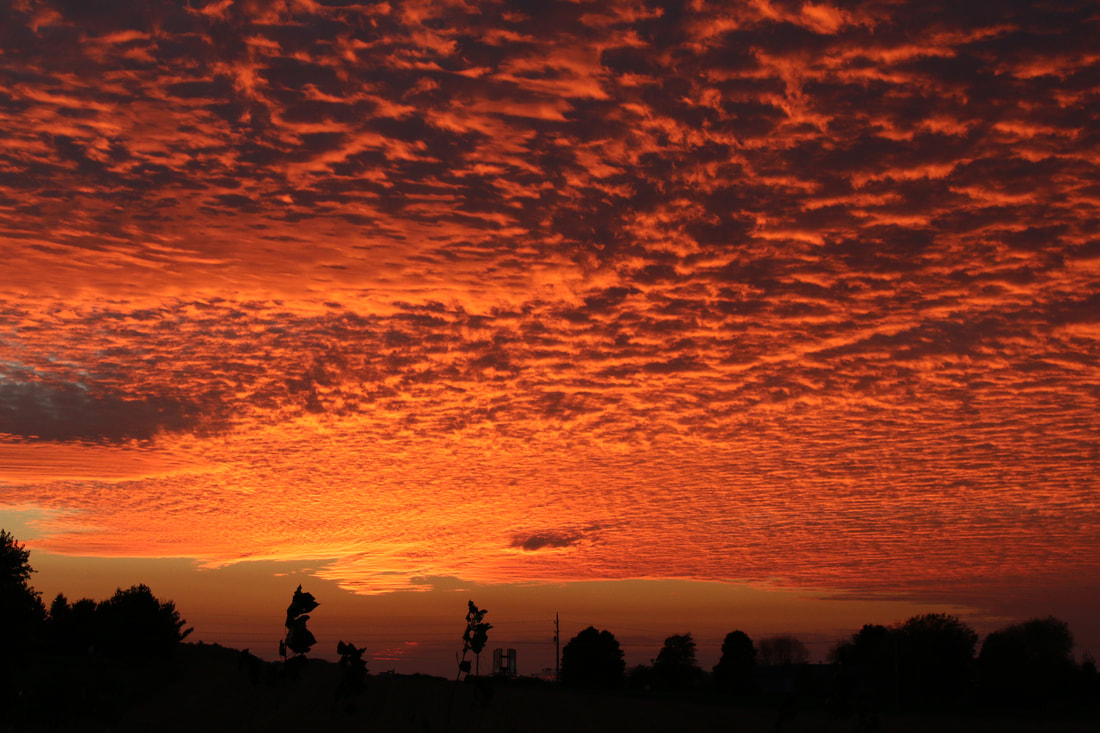 Summer has been in full force here. Record breaking heat, storms, winds, sunsets. All spring it was a lot of work, but also a lot of discovery. We first looked at this home last July and moved in September, with only a few hours on the property in between. So, it was a guess about the land, the plants, the soil. We have been really happy to find so many natives and medicinal plants growing here. For awhile it was a daily discover, and now in peak summer, I have identified a lot of what is growing here. We have been very lucky to find (I'm sure I am forgetting a few):
sThere were also many garden plants in ground besides the trees including asparagus, raspberry, and strawberry. We also have been working to plant a lot of food and medicinals. We started by creating a few beds in one primary area and widening a few existing beds. We got a lot into the ground. We started a beautiful triangle medicinal bed and a strip along the food bed for plants that can be moved out into more of a permaculture guild design ongoing - including wormwood, anise hyssop, tulsi, skullcap, brahmi, calendula, white horehound, dagga, echinacea, milkweed, lemon balm, spearmint, peppermint, St. John's Wort, mugwort, hyssop, clary sage, elecampane, Moldavian dragonhead balm, lavender, agrimony, thyme, sage, evening primrose, and a bunch more. We also got plants such as rose, valerian, solomon's seal, black cohosh, american ginseng and a few others into the ground, but it will take a few years to see anything. We also have about 50 pots with herbs on our deck and stairs in back that includes rosemary, fig, lemon, lime, passionflower, and more culinary goodies that like heat. We installed a few flower cutting beds as well, to have fresh flowers all summer - which is nice. We have also been preserving and pickling away from our food beds.
I feel like there are not enough hours in the day, but that is the nature of working a few acres, homeschooling, volunteering almost full time, having a mentor, volunteering in clinic, taking several classes, and trying to have a life! I am enjoying summer as much as I can, while also starting to look forward to autumn and winter for downtime (ha!).
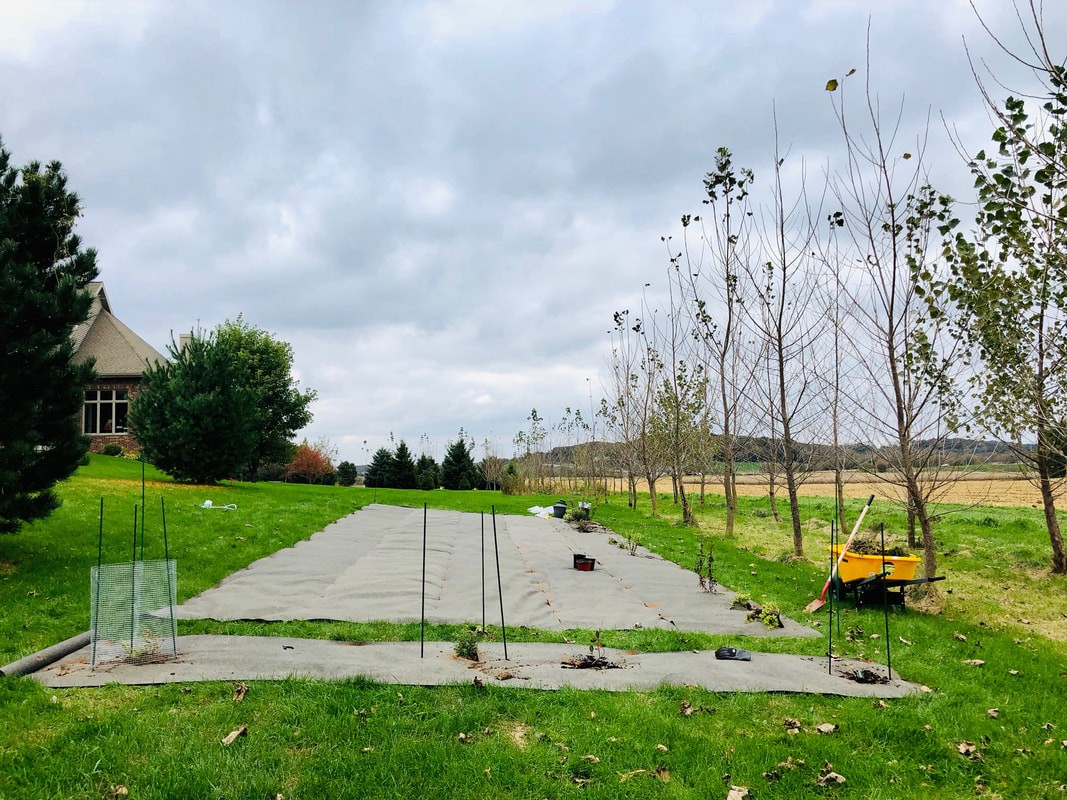
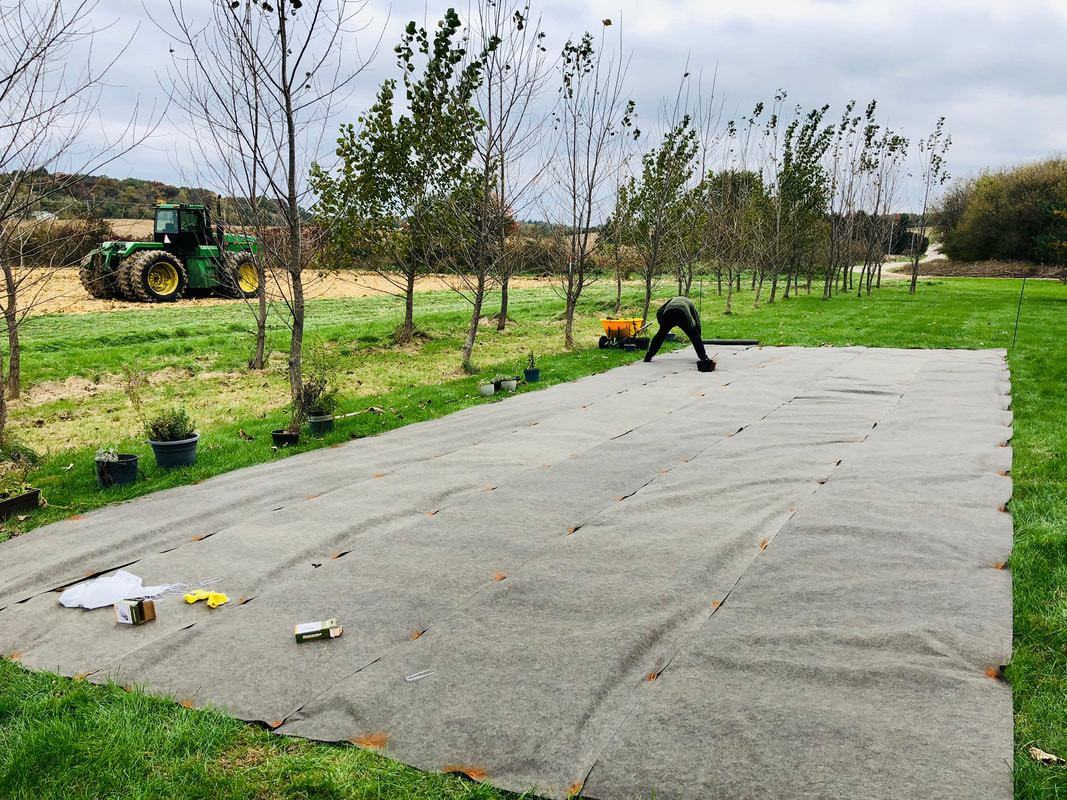
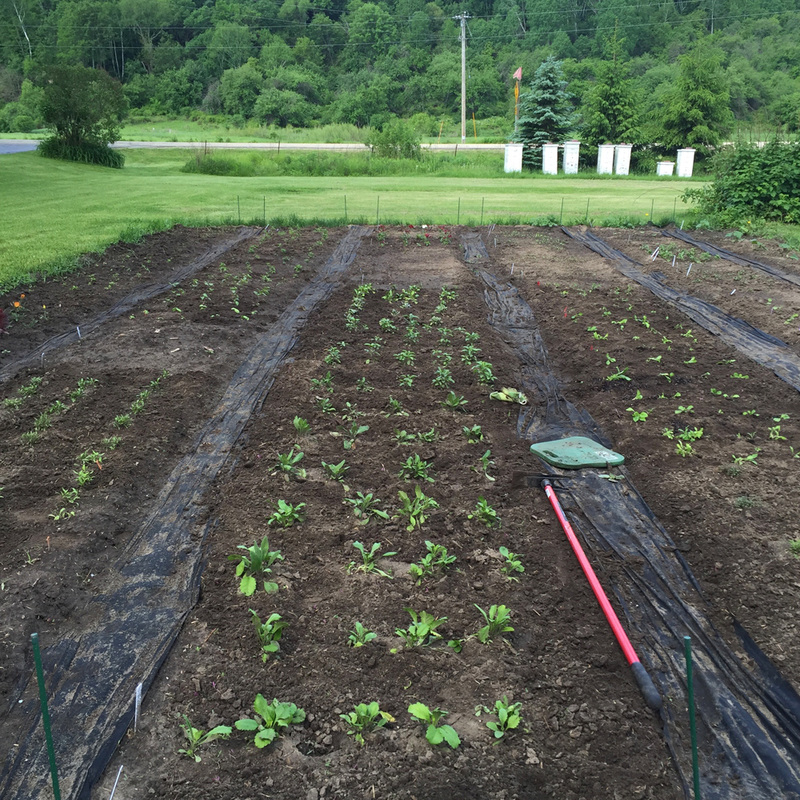
All of that and I have not even mentioned our dog, chickens, or bees. We not only got a new house, we got a whole new life. More later. Because one thing I have noticed is that I mess the blogs of the 00's. When we would write, share, read, comment, and have actual conversations. I feel overwhelmed by instagram and facebook a bit. More of a throw everything at the wall and see what sticks endeavor, not conscious thoughts assembled to share connect. I mean, I suppose there are people trying to do that, but the more "popular" one is on social media, the more it is just posting to get everyone to tell you how amazing you are. Not anything that benefits the relationship between the two or the reader/viewer. Mostly a poster ego stroke, and I am just not into that. I feel like I want to get some of the old engagement and conversation back. SO, I will be writing likely to myself, for myself, with only myself to read it, but ... it is time to take back this space. until then. 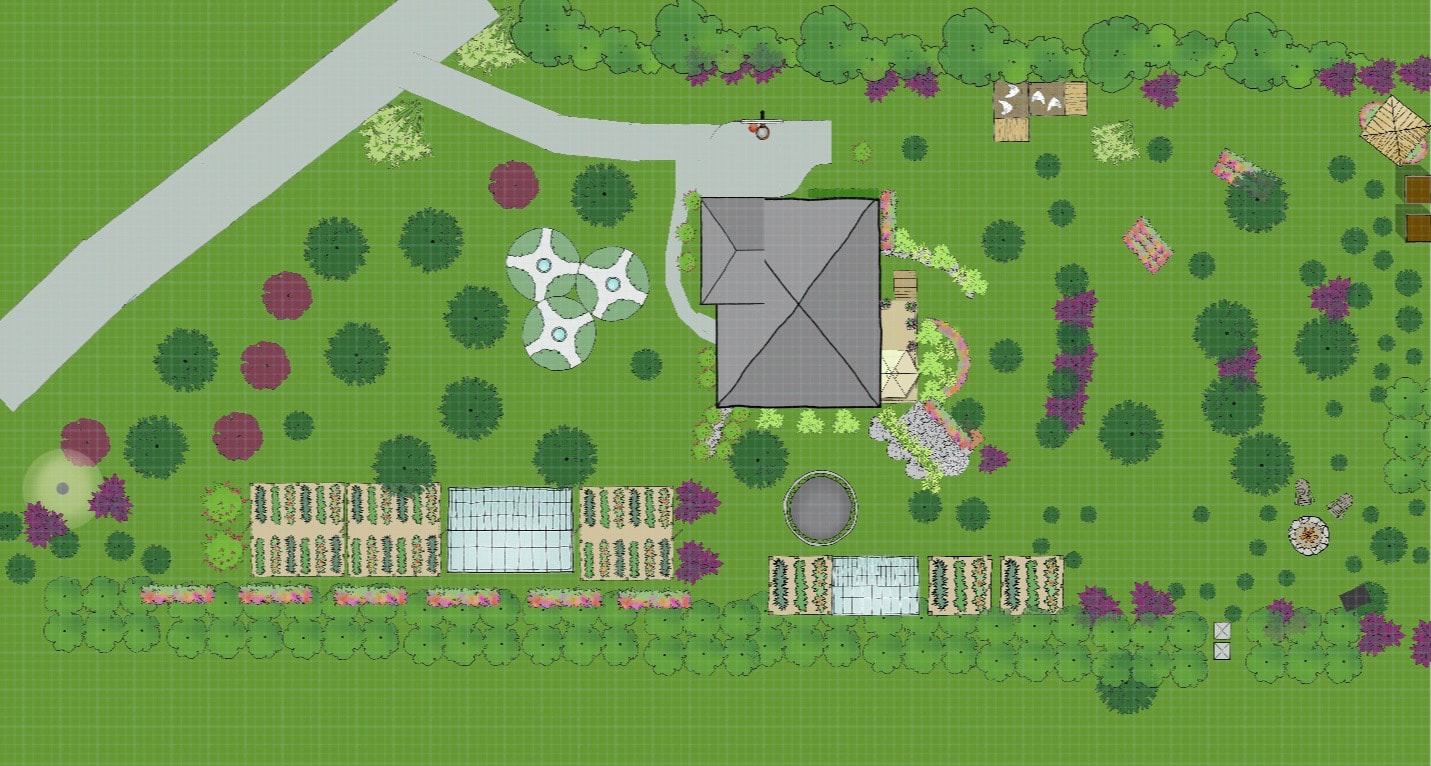 We have had a few months settling in, getting used to wind, water, slope, drainage. Bugs, animals (lots of animals). We have been working to develop a big plan for planting, but really wanted to get to know things a bit first. We have been working on the big plan - where the beehives will go, the compost pile, the coop, the cutting garden, the food garden, the fruit trees/orchard, the cane fruit, the nut trees, the medicinal gardens, the greenhouse. I have been working on and tweaking a digital plan (see above). We adopted a dog recently, and so I have been walking the perimeter in sun, rain, and snow, so some of that will change as I have walked the land so much I have a better idea of space and light and drainage. 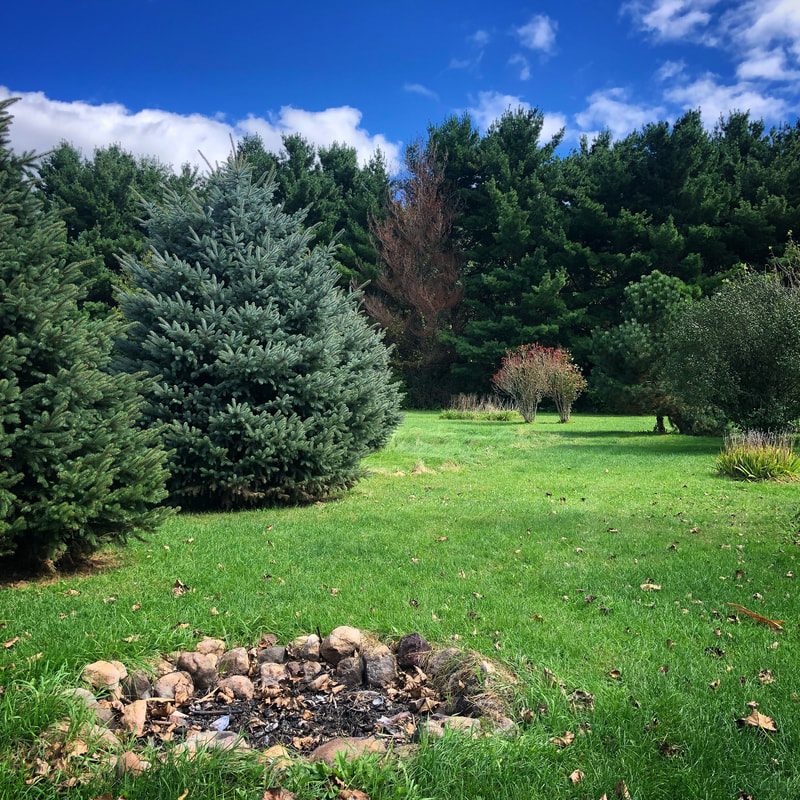 I am trying to make gradual process in some areas, but I also want to get a lot done (without burning out my family helpers). We laid out some black tarps in the fall, planted some canes and fruit, deer-proofed the small plants - we see a dozen deer a day on our property - and then plotted out where the other beds will go and where we hope to install the high tunnel. We have many bare root and 2nd year plants coming in the spring, so we will plant as we get them! We have our starter beehives and bees will be coming this spring. We have a plan for chickens and geese, but we may ease into that as we recently got a dog and there is much work to be done to get this all started, and more coop and animal care might be too much for everyone. We shall see how we feel once the snow starts to melt! Our goal is to create not only a permaculture farmette here with food and medicinal plants, but also educational gardens and a space for classes. By working to preserve endangered plants as we can, this space will become a botanical sanctuary, caring for pollinators, plants, and people. We setup a large seed starting system and I have started seeds. I will share more on that later - but here is our big plan for this year. 
2019 Planting Plan
 Moving is one of those things that seems to take forever and then boom you are set down in a new home full of boxes. The UNpacking seems to be the hardest - finding the new right, logical, spots for the things that used to have a certain place. Getting the feel for where things will make the most sense and most natural. We are still unpacking. I think it will be awhile longer. Last weekend we tackled the apothecary and apothecary storage areas. We installed new shelving to get more space for items and we setup several large tables in the classroom/family room/apothecary space so there can be many people there being productive. We have slowly unpacked the boys rooms, getting everything just right. A few neighbors have already dropped by to introduce themselves, including a homeschooling family on the next deadend over. Everyone has been friendly and helpful and I am not worried about Brice traveling on business during the winter knowing that if needed someone is close by.
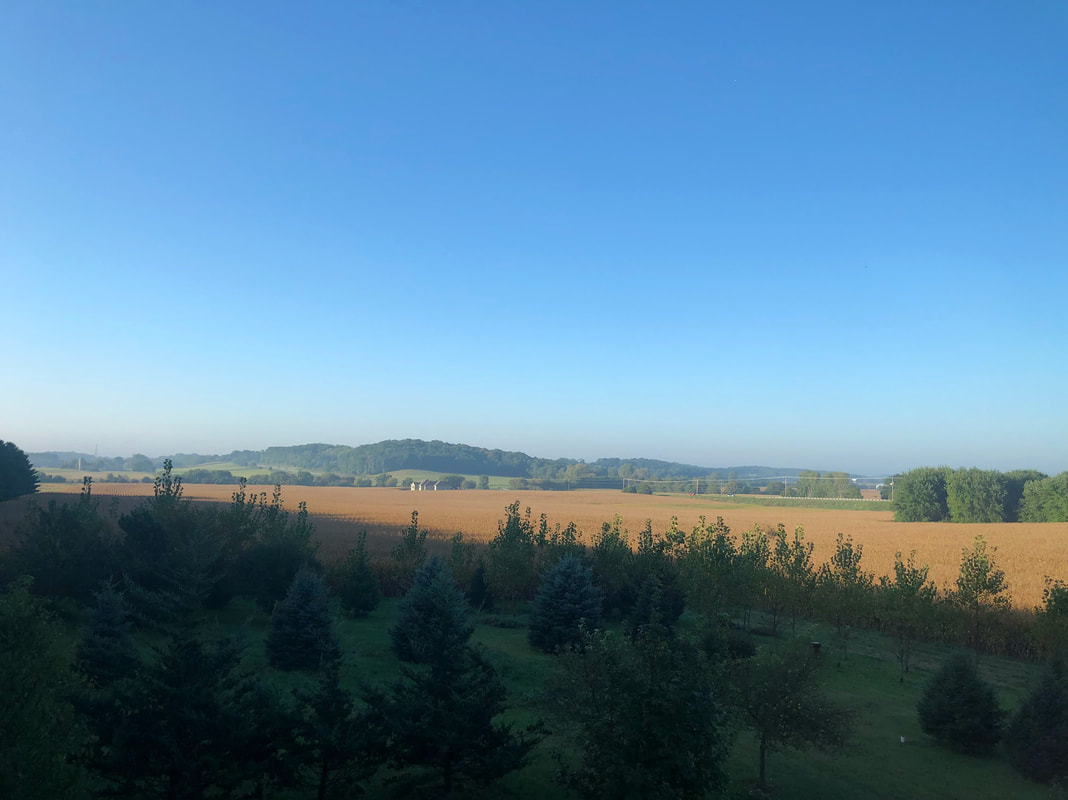
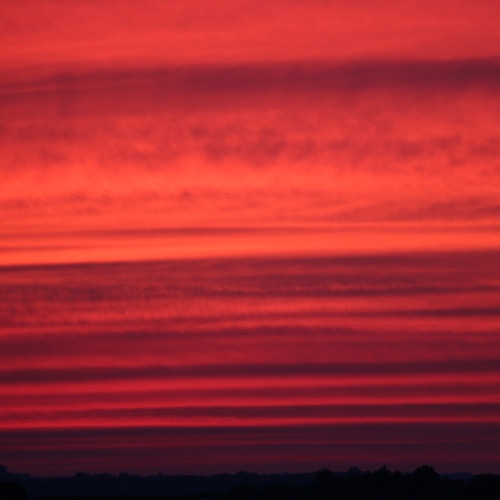
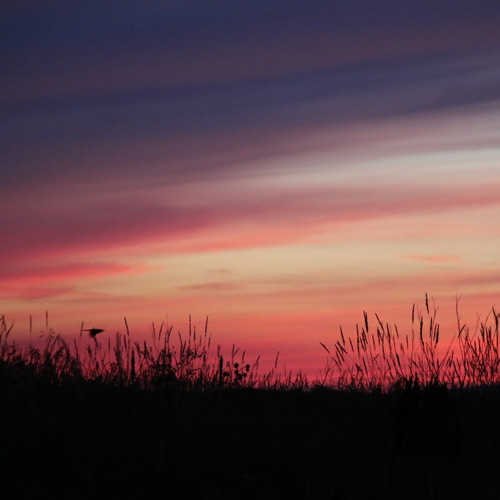
The main draw of this house was the land, but we haven't been able to explore it since we moved. The Madison area has historic flooding and days where more than a foot of rain fell - so the mosquitoes are fierce and stepping outside, even for a moment, is a battle. Not a few mosquitoes, but literally thousands in a dark cloud. So we are awaiting the first frost, and enjoying seeing outside through our amazing and huge windows. We also have a lovely and large second story deck that seems to be above the mosquito line for the most part, so sitting outside watching the sunrise is beautiful and blood-free. The deck is where we plan to distill any autumn hydrosols before the first frost - we are planning spruce, pine, tulsi, juniper, and geranium before they are done for the season. 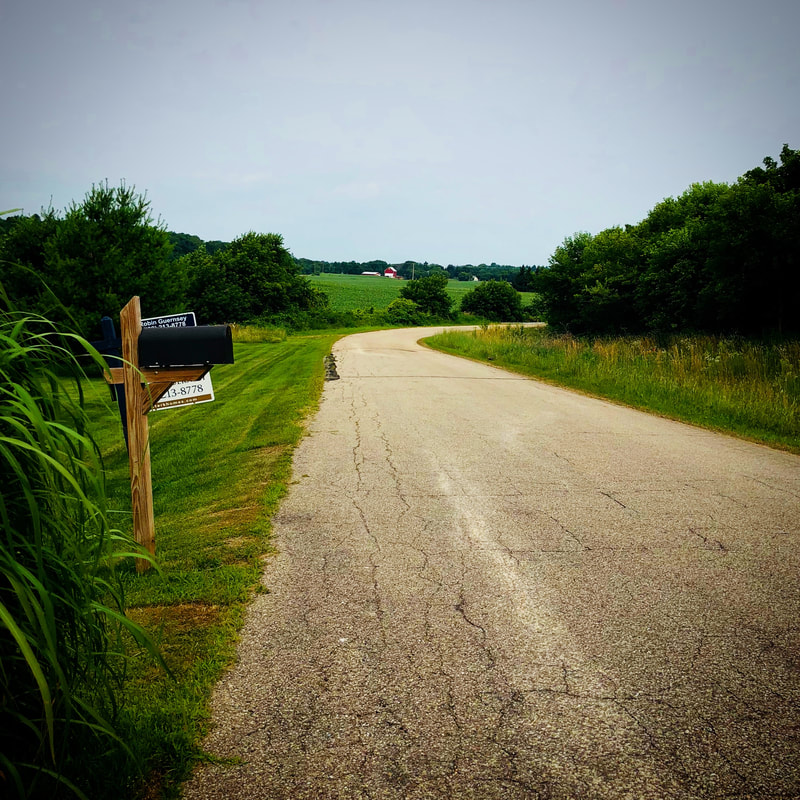 I had wondered about the thought vs reality of moving to a rural place. I know I have lived in tiny towns, and in small rural neighborhoods, with no streetlights and only a few distant neighbors. Everyone has been so happy and so in love with the views, the stars, the darkness, the quiet. We all stand together watching the Cooper's Hawks aerial stunts only feet away from the windows. We see the turkeys visit many times per day - dozens of them - and have found a few feathers left from some male posturing over turf. Hummingbirds visit every plant on our deck and a fox ran by along the roadside today before dodging back into the forest. The boys are both happy and content - and have been helping enthusiastically in the kitchen as we try to "catch up" (haha) on canning and preserving as we skipped most of August trying to move with less. Apples, peaches, cucumbers, tomatoes, herbs, peppers and more are a breeze in our giant kitchen. I am actually enjoying leaving the open floor plan concept into a room that is a kitchen. It is near the living area and dining room but it is a distinct room. We have found ourselves spending more time together in the kitchen - and my baker G is very motivated by having the extra space.  We have big plans and so we have been sketching and thinking and planning. We hope to have a high polytunnel as well as a greenhouse or some sort of permaculture forest greenhouse for plants needing more heat. We are also laying out a food garden with deer fencing, and then are creating many medicinal microgarden areas wrapped around all of the tree areas, to create a walking natural path of medicinals and plantings. Our fall will include planting fruit - elderberry, blackberry, raspberry, blueberry, aronia. goji, and lingonberry. Fruit trees will be going in this fall as well - apple, cherry, and pawpaw. We also have plans to plant endangered woodland medicinals along the woods on the east side of the property. I brought many plants with me, but we are also planting a lot more. This will include mushroom log spawning as well as black cohosh, solomon's seal, valerian, goldenseal, and several more - all on their way as bare roots. I have seeds for fall planting going in for nettles, lady's mantle, woodruff, hawthorn, evening primrose, skullcap uva ursi, lobelia, motherwort, osha, mugwort, and more. We are staking out our composting area and getting a trailer addition for our ride on mower to haul garden waste as we get things in ground, cleared, and beds made so they can rest over winter. My goal is to have this land as a United Plant Savers Botanical Sanctuary as well as an educational garden and medicinal herb minifarm. This was a perfect time of year to move here as it gives us some time to prep for next spring now, but also time to get to know the land, the slopes, the weather, the wildlife, the drainage, and then winds. It isn't overwhelming feeling like we have to do everything NOW, but can work to prep for next spring. I am excited to be able to grow a significant amount of medicinal herbs here - for my use, class use, and to donate to HWB. I feel lucky to be here. 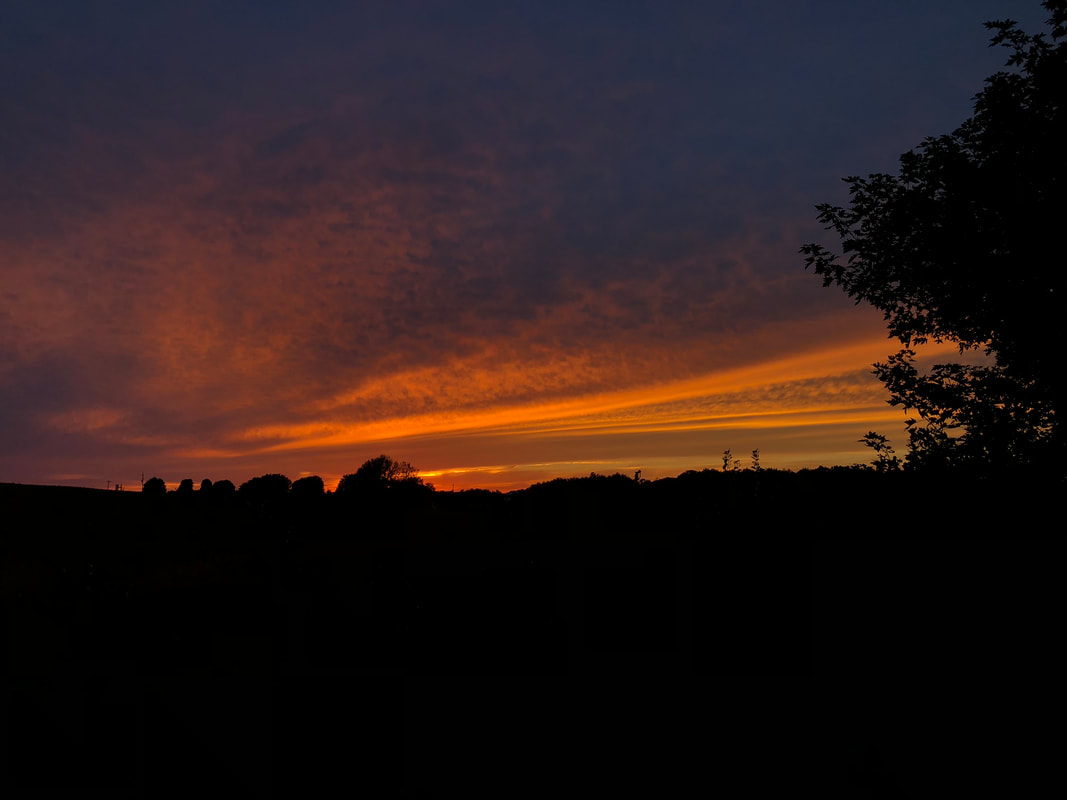 One reason we were motivated to move was the loss of the views at our last home. We started at the edge of a field with views for miles and ended up surrounded by homes and people with no view but lawns and fences. Our new living room has floor to ceiling windows facing west and I am happy to say we have spent almost every night at the windows or on the deck looking out as the sun sets over the fields and hills. We have our piece of the sky back.
 If you follow me on facebook or instagram you likely already know the news. We are moving! We have been in this home for 3 years, but we have always had in the back of our mind that we would move again for the right property. Acres. With high speed internet. Rural, but accessible to the airport for my husband who travels on business. We have always felt uncomfortable with people right there when we are in the garden. We are lucky that we actually have great neighbors that we love to chat with, but it still feels like a fishbowl.
From February to June this year we had constant issues with my older son's health. The mast cells are wreaking havoc and his body is reacting and responding to everything. Over a few months he had a biopsy, 2 MRIs, a few scopes, a dozen blood draws, and an urgent care visit. We have some answers and we have been making changes via foods and herbs to support him ongoing - but all of that pretty much reinforced the idea that we need a place where we can settle in for the long haul and where we can just work together as a family. A home that works for us now, and will work for us with adult child or children still living at home. We found one home that was amazing and after a hectic week we discovered the owner used an open house to push an existing accepted offer - and we just wasted time even trying. About a week after that we were in a small town 40 minutes east and I half heartedly mentioned a house I saw that was nearby - should we drive by? We drove past and immediately called the realtor for a showing the next day. We have been wary of homes that have been lived in since mu son and I react to everything people have used in the home - cleaners, detergents, plug-ins, air fresheners, you name it. But we were in the house for an hour without any reaction. It was spotless, well maintained (anal retentively, almost, which is good). The only house you can *see* when standing anywhere on the property is almost a mile away (there are closer neighbors, but there is a large wooded area of pines, so we cannot see them). Glorious. We put in an offer before we had even listed our house and it was accepted. We had a frantic week of packing half of everything we own to stage the house for the realty photographer and an open house. The house was listed on that Thursday and on Sunday the open house happened. On Wednesday we had an offer and our house was sold (we have amazing realtor team too). I am not much of a woo person, but I have always felt if something is too hard it wasn't meant to happen. This came together perfectly because it is what we need at this time.  We had high speed internet tested - and it is indeed high speed. The well was tested and it is deep and clean. We had the house inspected and it is not only beautiful, but in great condition. While I can't wait to update the kitchen cabinets and light fixtures throughout the house (a little country for me), it has real wood floors, floor to ceiling windows in the living room with views for miles (literally). It also has a full lower level that can be used as classroom (!!) and business space now and will be a perfect an A apartment if he needs it in the future. We only have a month to now pack and move. A month or so is plenty of time to make big plans. We want chickens. Greenhouses. Extensive medicinal herb gardens and integrated layered permaculture systems throughout. There is a forest side - perfect for medicinal woodland plants, and plenty of flat space for serious expansion of growing. The property also already has fruit trees, restored grasses and prairie areas, and it is on a road with only 3 other homes, next door to horses. It is also zoned rural so no HOA. Plenty of room to grow food and herbs and have fresh air and sunshine.  Being in this home for a few years has been a good step for us, but we are ready to make the move to better match our lifestyle and to make a better day to day for all of us. We have been waiting and working for many years wanting big open skies, huge views, green rolling hills, and land of our own. It is time.
What a whirlwind the past many months have been. For those friends who know me on facebook as well, thank you for all the good wishes for my son over the past few months. It is so appreciated.
I am still volunteering full-time with Herbalists Without Borders, and I am now also volunteering as Clinical Herbalist with the Veterans Resiliency Holistic Clinic through HWB. My consulting hours at VRHC are contributing to my clinical hours as I am working with an AHG mentor to fulfill the clinical hour side to achieve RH designation. If child health, volunteering full-time as Executive Director, volunteering as a Clinical Herbalist, and working with an AHG mentor on case studies sounds like an insane amount of work all at once, you would be correct. But still, here I am. And my business is still eeking along, although I have not had time to work on my summer product launch as I have been focusing on consultations for my AHG hours. I made some big changes this year to allow me to have more time for my business as well as my design support work. I help small herbal businesses with their branding, labeling and marketing materials, and I design and integrate ebooks from writers into Amazon kindle, iBooks, and print on demand (primarily herb/food/aromatherapy topics). My two most recent book designs are now live on Amazon: Foodies, Foragers and Friends: A Wildrafter's Cookbook by Gigi Stafne The Magic and Medicine of Mineral and Metal Essences, by Gigi Stafne I am also working on some of my own books for publishing, and I have updated many eGuides for HWB. I am enjoying the publishing and book design process. I had to pull back on the gardening, and am not gardening at the friends farmette this year nor at the community garden. Everything is in my yard, close at hand. I am fully stocking a large apothecary in my studio space -- which is to support my clinical consultations. Woot! I am also still writing for magazines - I have had articles in a few issues of AromaCulture Magazine, and have several articles still coming in future issues. I really enjoy writing for print magazines, but I am a huge fan of AromaCulture as they are oriented towards practitioners as well as everyone else! It gives more science based information for us to further develop and expand our understanding of plants - which is wonderful.
I have jumped headfirst into a new project - podcasts and webinars for Herbalists Without Borders. I have a schedule that I am working on and hopefully a helper/producer to help get some amazing topics out to the world. There are so many people doing amazing things in their communities - and they can be a great example for others. I feel like I need to share their amazing work and show people that they too can make a huge impact.
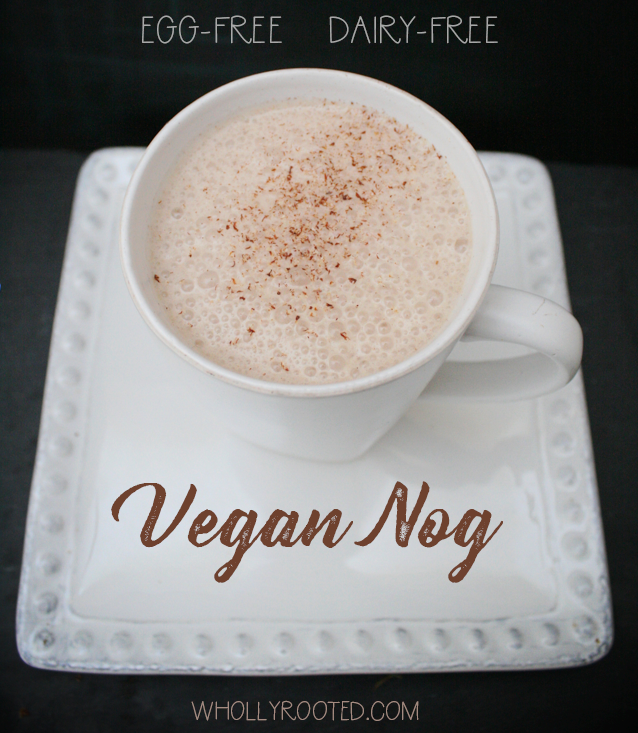
Everywhere you look in winter there is another recipe for an eggnog or boozy drink. This version is not only alcohol free, but dairy and egg free as well. Not that you couldn't add a swig of something, but it is absolutely delicious and warming all on its own.
Vegan NogPrint |
{wholly rooted}Egg & dairy free nog recipe - using medjool dates, it is even low glycemic. {ingredients}
Pour your coconut milk into a pot along with the pitted dates. We don't do dairy in the house, as my older son has a severe allergy. And quite honestly I don't want any of us in this house to follow down the road of our genetic lottery of diabetes, so I love recipes that are not only dairy free, but also use low glycemic sweeteners. The dates also are what gives the drink that thicker creaminess. If you use rice milk, it will be a little thinner, obviously, but hemp, cashew, coconut and other thicker milks have the perfect thickness! This year has flown by and I cannot believe it is October. The business has been booming, I have been working on writing articles and books, volunteering, doing more formal "high school" modules with my always unschooled teenager who wants to go to college at 16 to become an immunologist (PhD track). Supporting my husband who has been traveling a lot for work. Visiting with a family who is moving closeby because our kids are good friends (well, we all are). Volunteering with Herbalists Without Borders. Taking Aidan to many appointments and hospital procedures due to additional health issues stemming from mast cell disease. Spending a lot of time in all the gardens. Summer was a blur.
Which brings us to September and October. I have been enjoying volunteering with Herbalists Without Borders - as you know herbalism and holistic health (and nutrition) are passions of mine - and I have been feeling as my own kids get older that we all want to get more involved in social and racial justice, access to real whole food in food deserts, global herbalism, holistic health access, and more. And just as I was thinking of starting a few programs of my own, the long time Executive Director of Herbalists Without Borders, Gigi Stafne, announced she was retiring from that position. I spent a bit of time talking to my family about it, discussing how we would all manage this and if my kids were supportive (they are). So I applied for the position, interviewed, and was selected as (volunteer) Executive Director of the nonprofit Herbalists Without Borders. The minute I accepted the position and started training and taking over, we had multiple back to back natural disasters which has tossed me right into the fire. Hurricanes, forest fires, training, transitioning, and then garden and kids and homeschooling and business, and Aidan in recovery mode after a summer of tests and health issues. So here we are! I love engaging with herbalists and businesses and members to mobilize for good, to help people, and to support programs that make a difference. And it ties in well with my business and client work. One big enchilada of herbal health and holistic family life. It sounds like a lot, but we seem to be in a great groove here. The positive aspect of all of us working from home, homeschooling and doing everything together as a family. It is perfect for fall into winter as we tuck into home, the garden winds down, and we have more time inside. And we can do work together to make a positive impact. All good. More about my HWB position and transition: http://herbalistswithoutborders.weebly.com/blog/hwb-news How was your summer? Can you believe it is autumn? Can you help Puerto Rico? http://herbalistswithoutborders.weebly.com/disaster-relief.html 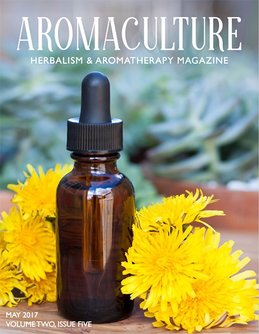
The May issue of Aromaculture Magazine is out, and I am happy to say that I have an article in this issue! If you haven't seen Aromaculture Magazine yet, you should check it out. It is a beautiful digital magazine with articles on aromatherapy and herbalism from some of the most respected aromatherapists and herbalists in our country. This spring issue is lovely! From the editor, Erin Stewart: "This issue is centered around easy-to-grow garden herbs and useful weeds (and the essential oils produced by them), growing your own herbs, and ways to use them in herbalism and aromatherapy. Each article delves into therapeutic uses for the herb or essential oil being discussed and many of the pieces include recipes so you can learn to work with the botanical yourself." The May issue has featured articles from Rosemary Gladstar, Erin Stewart, Carole Hodges, Donna Eaton, Cathy Breiner, Lori Wilkins, Anne-Marie Bilella, Shannon Becker, and Paula Begel as well as an interview and excerpt with Rosalee de la Forêt on her new book Alchemy of Herbs. What I love about the magazine is that it has something for everyone from beginner to practitioner in aromatherapy and herbalism. The articles are in-depth and there are always wonderful recipes and projects to make at home! 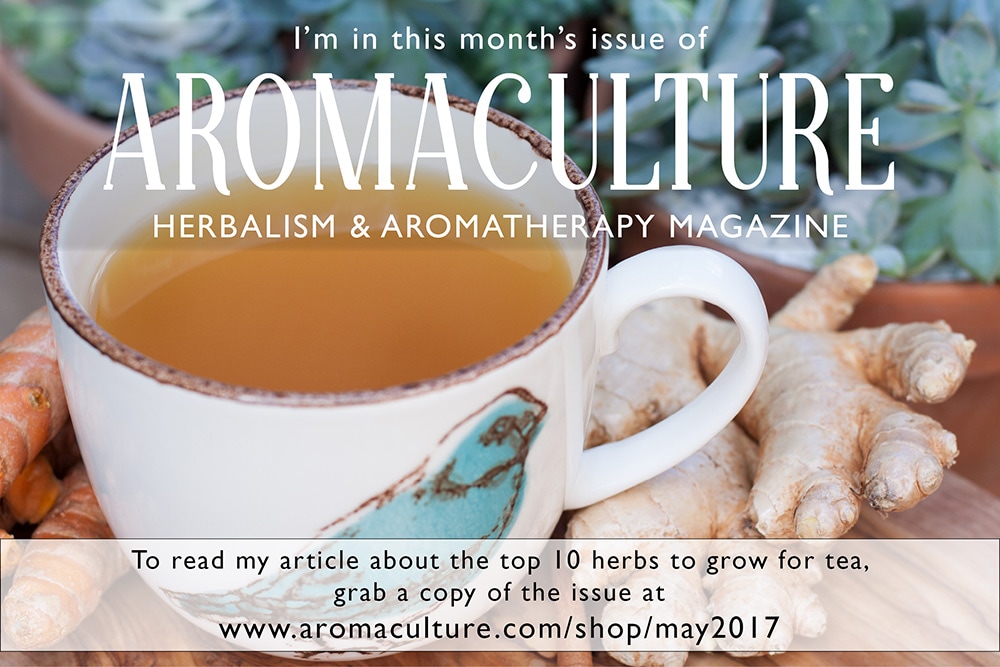
I am proud to be a contributor this month with my article The Top 10 Herbs to Grow for Tea. Be sure to visit Aromaculture to find out more about the magazine and click here to see the TOC and to order your digital copy! 
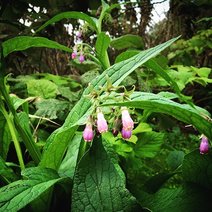
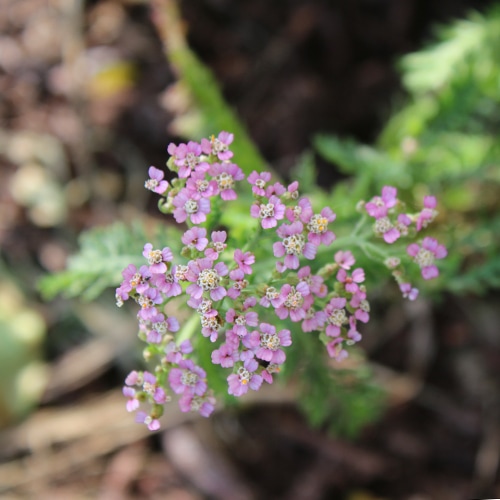
Moldavian Dragonhead Balm (Dracocephalum moldavica)
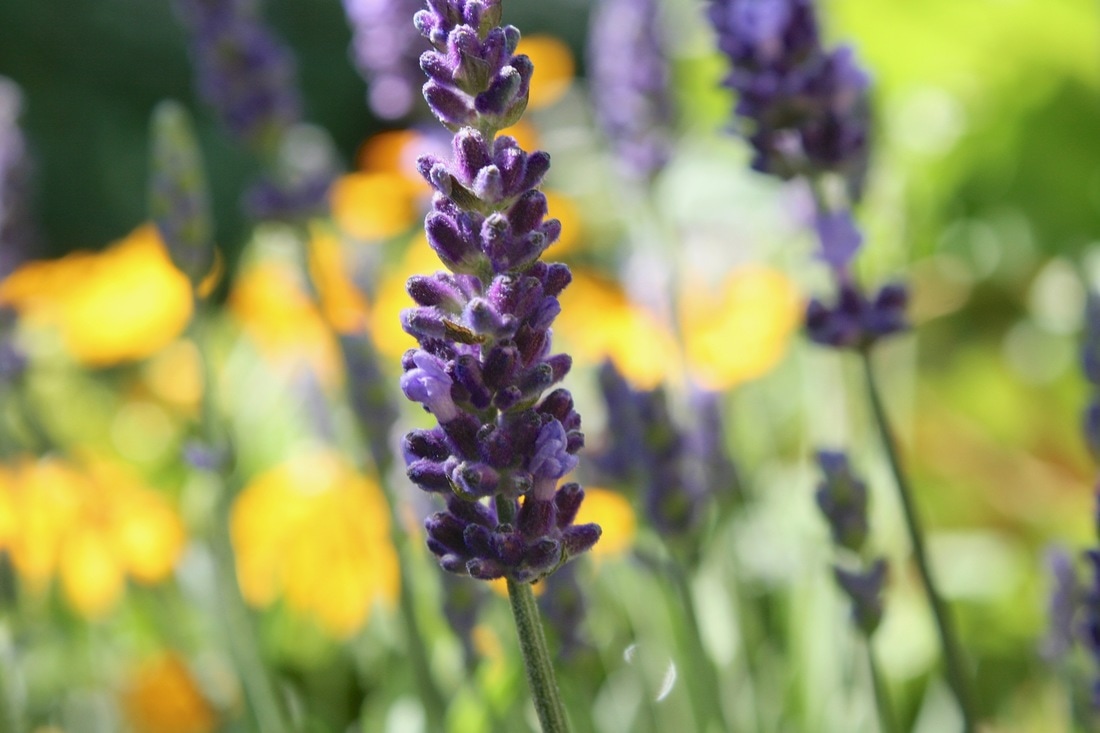
One of my favorite things to do is to grow herbs for tea. I grow hundreds of plants every summer at my garden plots and spend the summer drying them. I dry enough to make tea for all of my own family and friends for the whole winter. And more. Much more. While there are so many varieties of seeds to grow out there available to all of us gardeners, there are certain (wonderful) herbs that I rarely see included in gardening articles. So I think over the next few weeks I am going to feature a few of my favorite underappreciated herbs/plants/veggies/fruit to grow. One of my favorite tea herbs is Moldavian Dragonhead Balm. Dracocephalum moldavica has been cultivated as an herb for centuries. It is an introduced plant in the US and can be found wild in many states. It is the Lamiaceae family and shares the mint characteristics - it is easy to grow, flowers all summer, prolific to self seed, and makes a great tea. It is also loved by pollinators. 
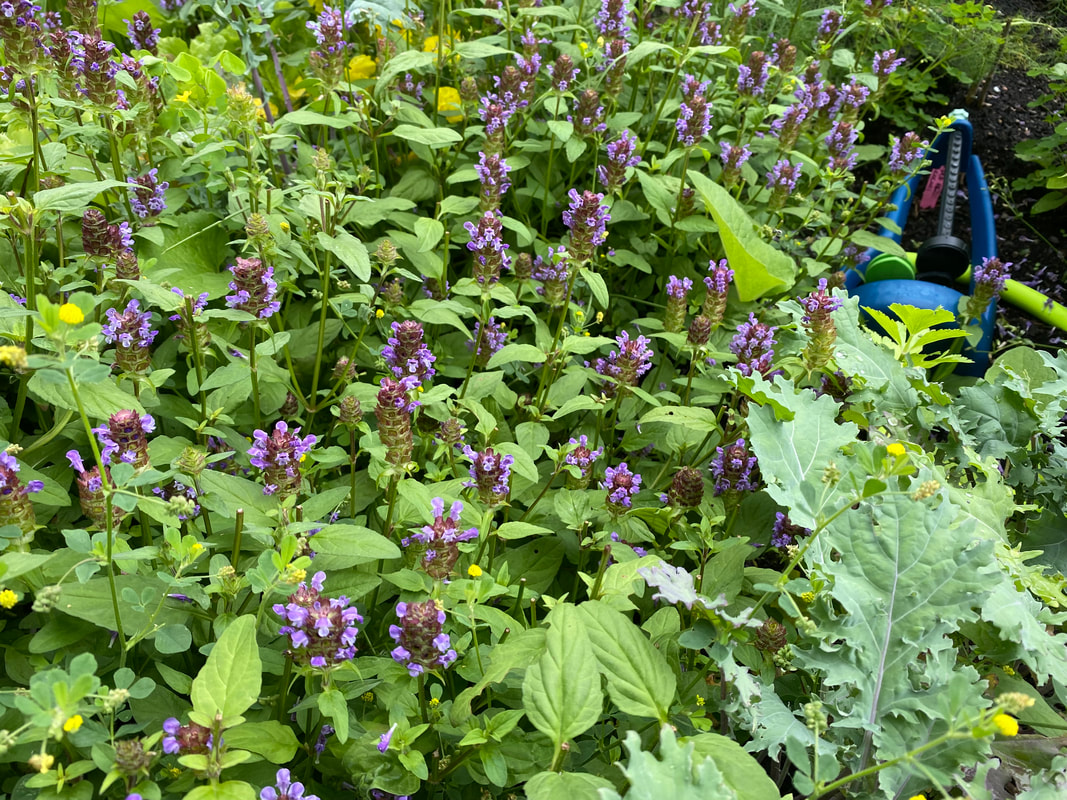
Moldavian Dragonhead is a self seeding annual, and is hardy in zones 3a-7b. It gets about 1 foot high or so and about the same width, and has blue and purple blooms that look like little dragonheads - with fangs. It grows quickly so it is often one of the first flowering herbs of the summer.
I love how the bees are drawn to it, it flowers on and on all summer, and how the blooms are vivid and beautiful. It is a nice addition to landscaping and is easy to harvest frequently throughout the summer. It doesn’t need a lot of special care and grows happily in most soils and in full sun to part shade. It does better when kept moist, but it is OK drying out in between waterings if it must. 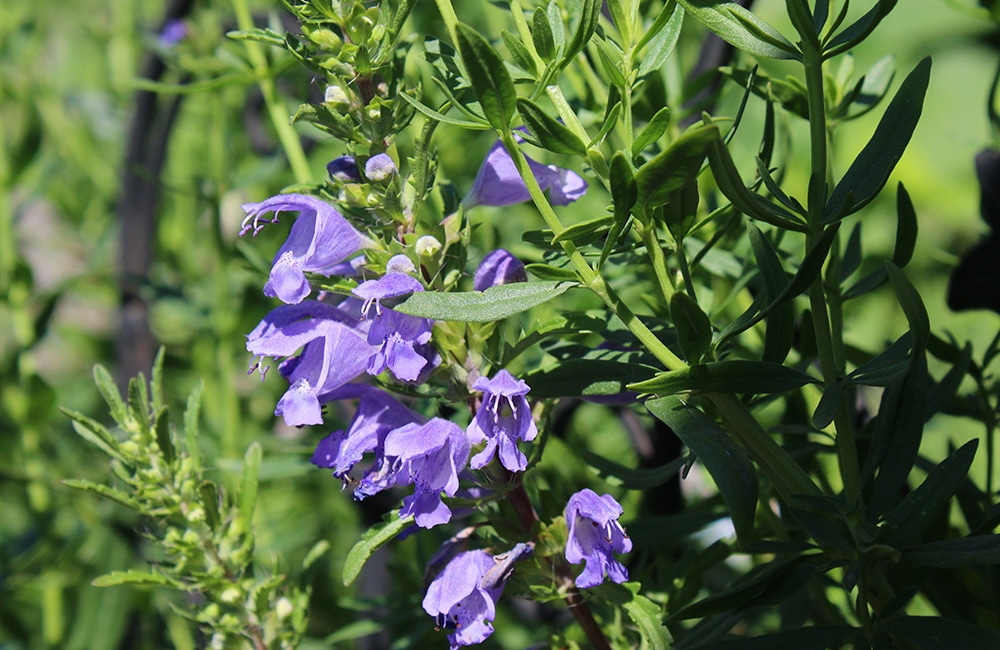
Historically it was used as an astringent, tonic and vulnerary. This plants smells and tastes similar to lemon balm but keeps its aromatic fragrance even when dried (which lemon balm does not do as well). It adds a fresh aromatic bright lemony flavor to blended herbal teas. And it makes a wonderful iced tea.
To harvest, I wait until the flowers have bloomed up most of the stem and start harvesting by cutting the top 5-6” or so off of each flowering stem. I leave the flowers and leaves on the stem to dry in my dehydrator, and once dried I carefully remove from the stems and store in an airtight container until I blend into tea. This can be used in culinary recipes - as a substitute for lemon balm. But I really love it for tea - I have used it in my tea blends for almost 10 years now and I have never had a summer without it! 
Resources:
Henriette's Herbal - Moldavian Dragonhead Balm & Lemony Tea Herbs US National Plant Germplasm System Strictly Medicinal - Moldavian Balm Baker Creek Heirloom Seeds 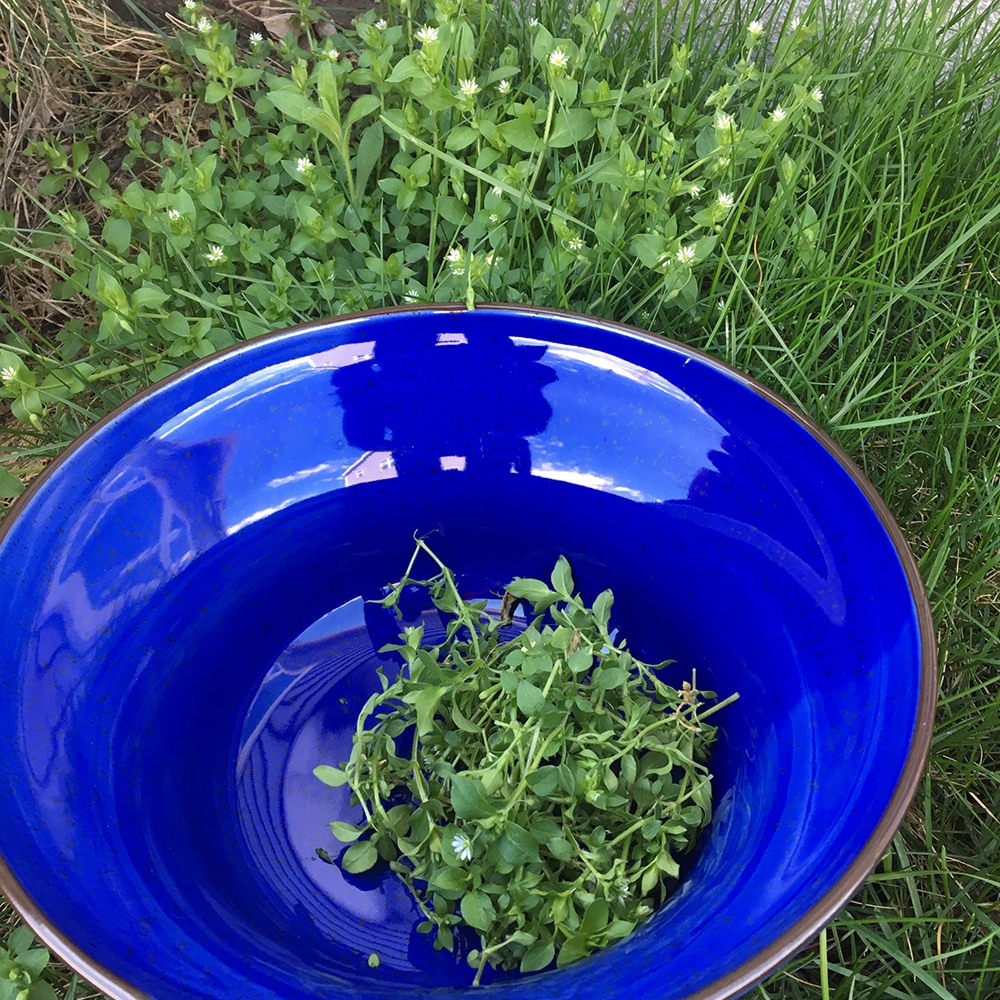
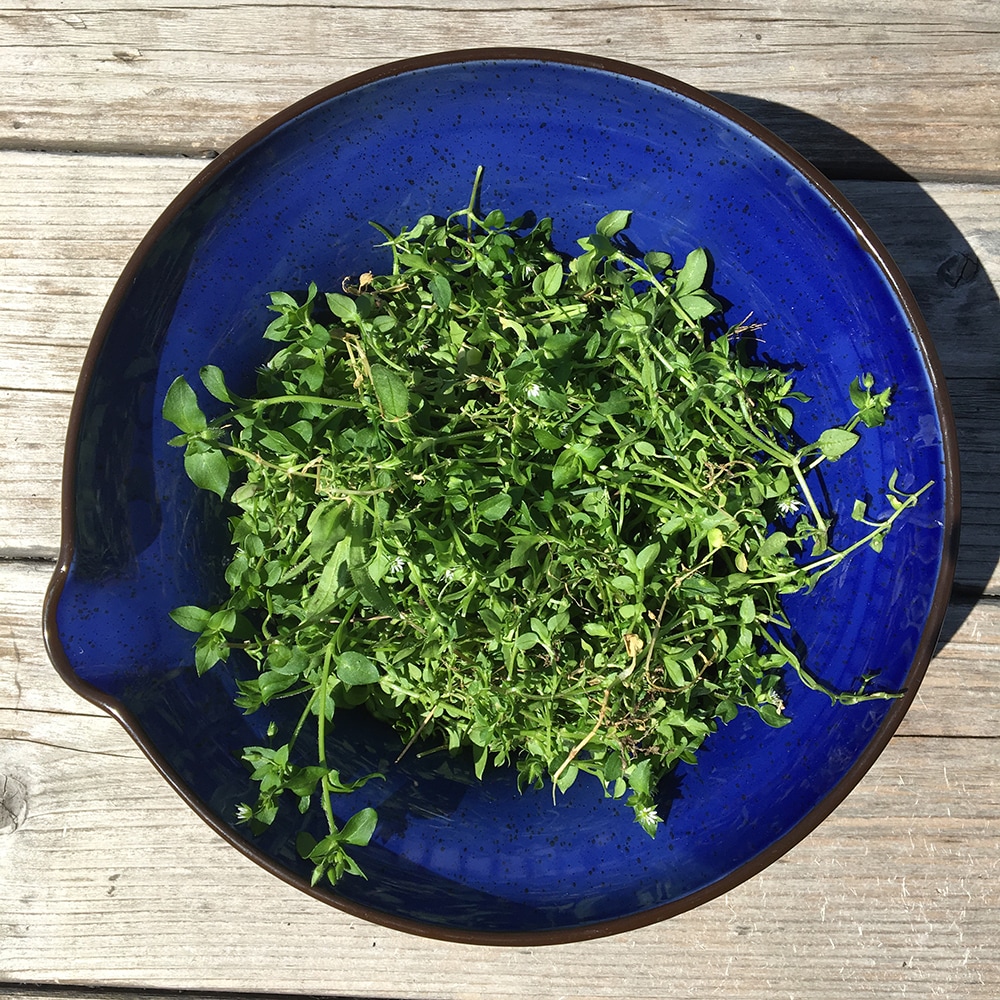
I love the time of year when everything suddenly turns green and there is a burst of grass and weeds and buds and a riot of neon yellows and chartreuse as things slowly gain darker color. I think living in the north we like winter as much for the stark beauty of snow and ice and indoor time as much as we love how spring comes with such intensity and a complete change of palette. Chickweed (Stellaria media) is one of the early weeds that is a multifaceted and useful medicinal and culinary treat. It has a long history of use and it grows in pretty much all climates. It is a very nutrient rich plant and is enjoyed in pestos and salads for its nutritive and diuretic properties, it is cooling, soothing and demulcent. It can easily be added to smoothies and salads and it is rich in iron, calcium, magnesium and potassium. It is also often used externally for skin inflammation, acne, irritated eyes, and diaper rash - any hot irritations and inflammation.
Ahem.
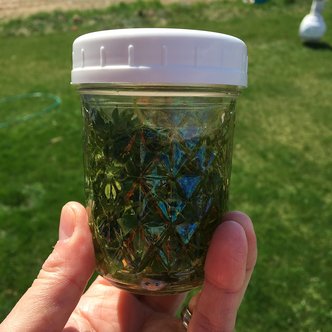
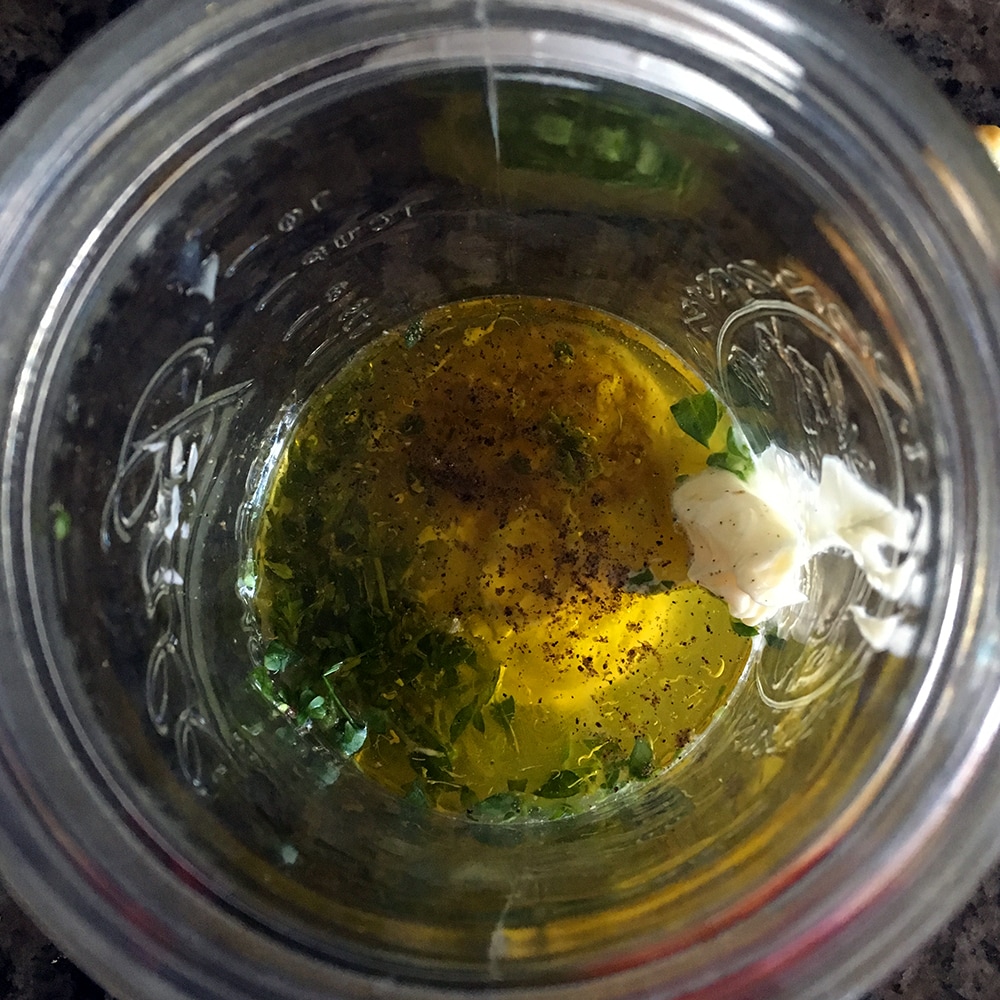
Chickweed is a plant that likely is growing somewhere in your yard or along your borders. The best time to pick it is just when it starts to flower, before it is stringy and seeding. Harvesting is simple - pick from a spot you know is safe (no pet traffic, pesticides, or runoff). You can cut it a few inches from the central base, leaving a few inches behind so it will grow enough for a few more harvests. Once you have snipped a bowl full, be sure to clean and dry it and sort out any bits of grass or other plant material that may have hitched a ride. Chickweed is pretty easy to identify. It has 5 petals that are so deep that it looks like 10 petals. And along the stem there is a fine line of hairs growing vertically up ONE side of the stem. Look closely - the little line of hairs is only on one side to each node, and then past the junction the hairs grow on another side. Leaves are oval and grow in alternate patterns up the stem. After harvest, you have many options of how to use it. You can simply chop and add to a salad or put into your morning smoothie. I happen to have a family who is not as enthusiastic as I am about picking weeds in the yard and eating them so I have a few ways to use them that my family is OK with. Chickweed Salad Dressing Chickweed Salad DressingPrint |
{wholly rooted}Chickweed is a nutrient rich and delicious plant that you can find in most yards. This salad dressing is a great way to use chickweed - especially if it is a new foraged "weed" for you! {ingredients}
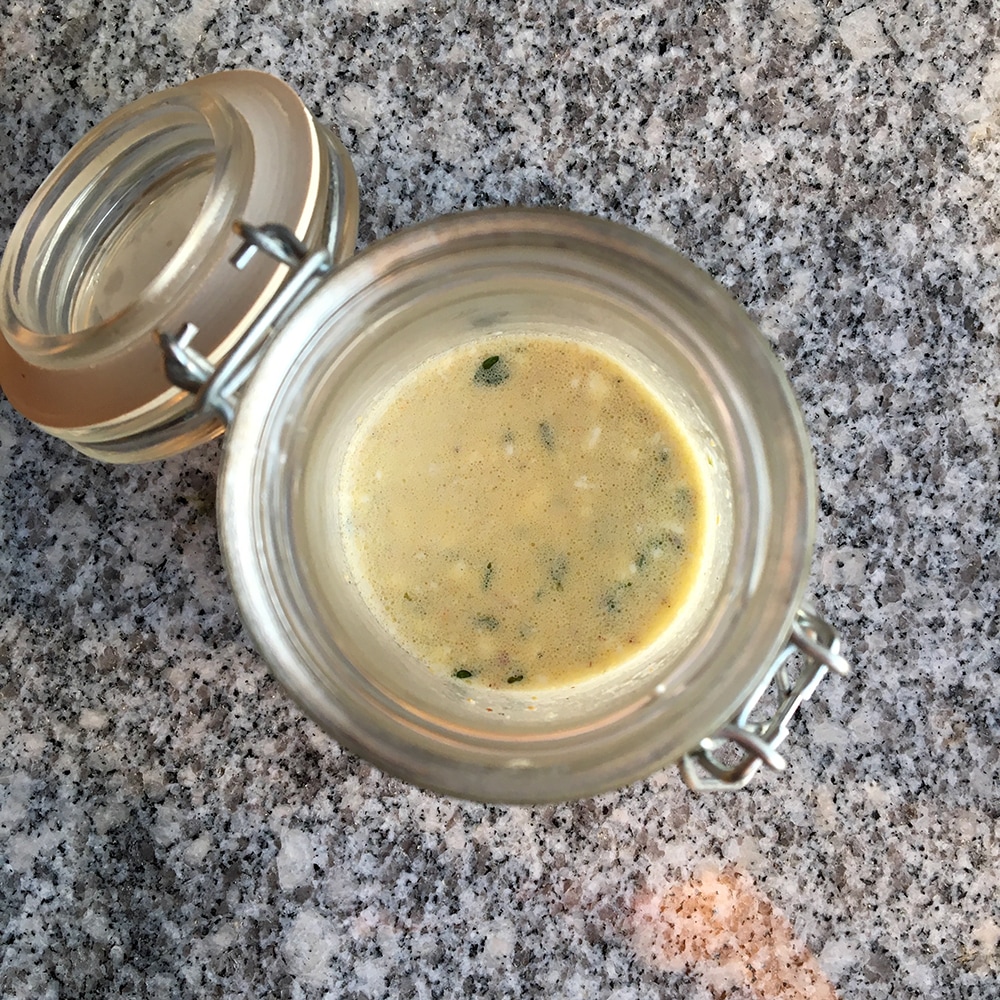
This is an easy dressing to blend into a jar.
Infused Chickweed Oil
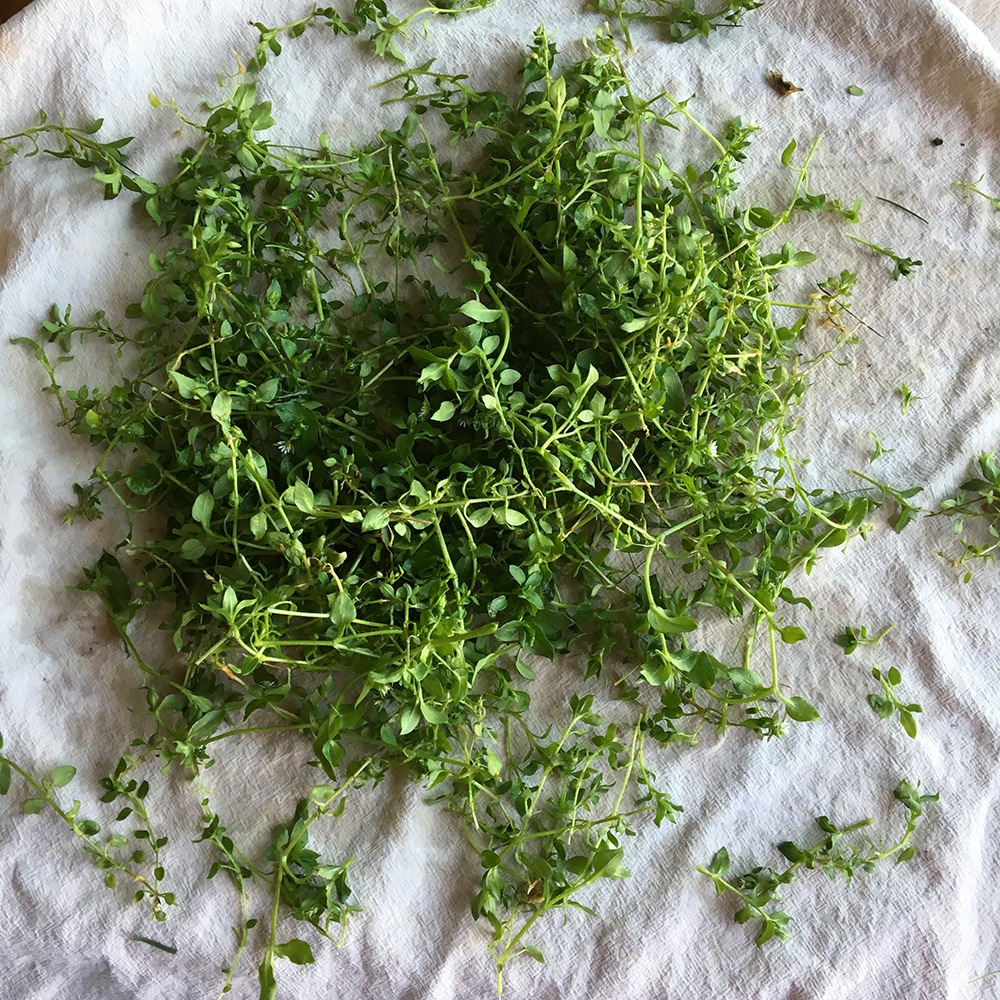
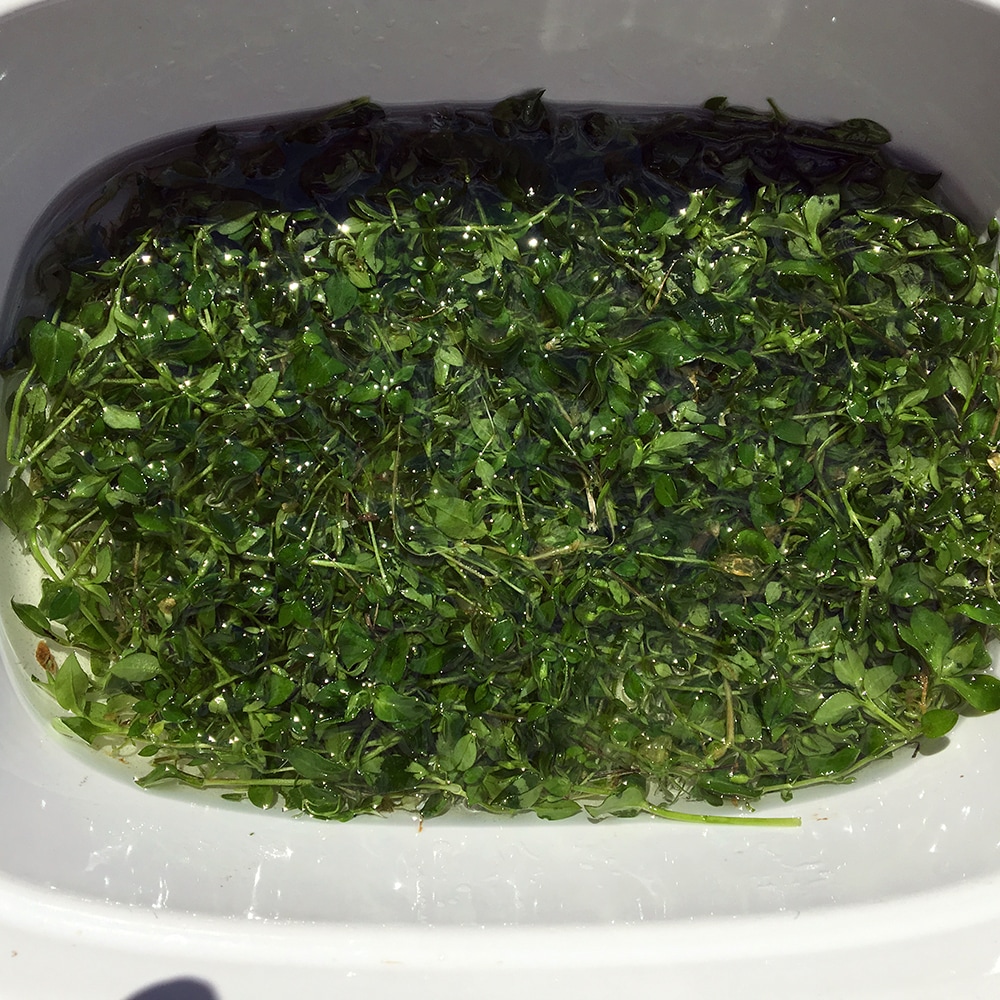
I love using chickweed to make salve. It is easy to infuse an oil with fresh chickweed. Most herbal infusions recommend using dry herbs to minimize the potential for spoilage due to water content. Chickweed is one of the few herbs that doesn't dry very well and so I use it fresh. There are a few tips to ensure the best outcome.
First, after rinsing the chickweed let it dry out. Chop it up a little spread it out on a screen or tray and let it dry out a bit for a few hours or overnight. Second, use a low and slow heat infusion method. Pre-heat your oven to 250F. Put your wilted/slightly dry chickweed into an oven safe pan and pour over a carrier oil to cover. I use olive oil sometimes, but it carries a smell, so I often use safflower, grapeseed, or some other neutral oil. Once your oven is preheated put the pan in the oven, turn the oven OFF and let it infuse in the warm environment for several hours or overnight. Third, strain well. I like to strain through a very fine mesh strainer first, and then through a nut bag second (a few layers of cheesecloth or a coffee filter would work too). This strains out as much plant material as possible. Store this oil in the fridge to prolong shelf life. You can use this as a culinary oil as well, but I use it to make a salve. A simple chickweed salve only needs your infused oil and beeswax. You can add lavender essential oil to it too. Or you can blend a few infused oils together such as calendula, comfrey, and lavender along with beeswax to make a blended healing salve. Chickweed will keep growing all summer long, especially in the shady spots along garden beds and rock walls. I will keep harvesting, but it is always the most exciting finding and cutting the first bowlful every spring! Here are a few recipes if you are interested in using chickweed in more ways:
River Cottage Chickweed Pakoras
Chickweed Pesto from Rosalee de la Forêt at Learning Herbs Chickweed Salad from Mark Bittman More general chickweed info from the Practical Herbalist. 
Win a Wholly Rooted Box
The grand prize for today is a Wholly Rooted box. This includes several goodies from Wholly Rooted! Comments will close and the drawing for this will be held at 5PM CST today, March 31, 2017.
Contents: Rooted Rollerball, 5mL Essential Oil Blend (I will surprise you), 1 4-ounce bag of Calming Bath Tea, 1 set of 5 Postcards, and 1 Diffuser Necklace. The winner from all of the entries is Ronnie! Thanks everyone. This giveaway will close at 5PM Central Standard Time. I will draw a name from all entries from a random generator. I will announce the winner on the FB page and on this page. There is only 1 winner drawn from comments. The box will be shipped USPS First Class or Ground, depending on location. No substitutions unless it is by me to meet shipping requirements if an international winner is selected. Any substitutions will be of equal or greater value. International shipments may be charged customs fees or taxes. You are responsible for any customs or taxes - Wholly Rooted is not responsible for import taxes, tariffs or duty charges outside of the US. Be sure to visit the home page at WhollyRooted.com to see what is in the new shop! 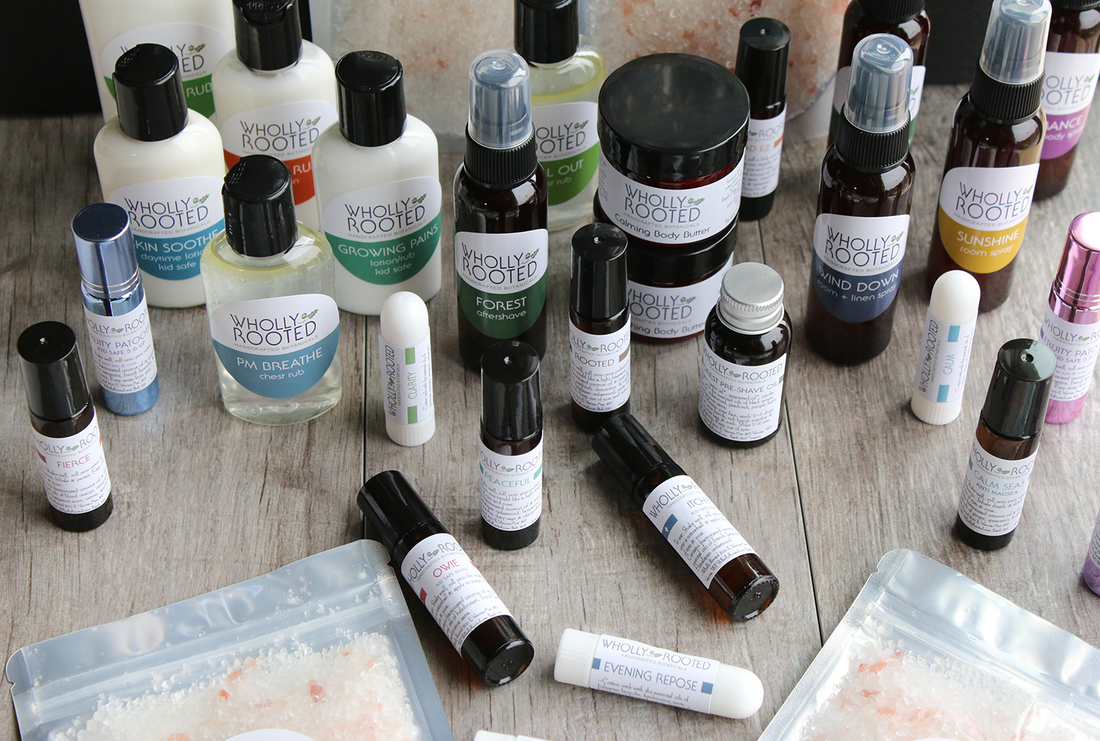
OHMYGOSH. Today is the day we have been working towards for months. Today is the grand opening of Wholly Rooted handcrafted botanicals. The shop is officially open, and I have so many wonderful products listed. They smell amazing. Visit the Shop! GRAND OPENING GIVEAWAYS!
Soooo, I am going to be holding several giveaways all day. I will be posting each giveaway on a blog post and sharing to my facebook page.

Giveaway #1 is FREE SHIPPING. This is for US territories only, any International winner will get the equal credit towards their total shipping fee. This drawing is closed. I drew a name from a random generator of all comments from here and on the FB page, and the winner of free shipping is Jana W. Don't forget to visit the Wholly Rooted Home Page orstorefront to check out our new products!
I have been quiet this winter. The winter that didn't feel like a winter. Winter is for home, tucking in, re-grouping and rest. While I have done a lot of home and tucking in, there has not been so much rest. Last fall I completed my master herbalist and then after that I completed my Aromatherapy Certification. I spent most of the fall and early winter working on case studies and writing research papers. Meeting with people and making products. I was lucky to have the best case study mentor - she is an author and scientist I really respect and I felt it really allowed me to take off in my interest which is the in-depth organic chemistry and chemical profiles of essential oils. I love plants and botany and soil and growing things. But I also love facts and data and science. I love looking at a problem and scanning my brain for all matching components and the chemicals present in plants that make them work so well with our bodies. They are quite amazing, actually. So I went down the rabbit hole of organic chemistry, physiology and GC-MS reports and I am now out the other side. Which brings me to the non-rest portion of the winter. I really love making custom products for people and working directly one-on-one to create unique products for specific issues. And I love creating and making. I am lucky to have a wonderful space to have my own herbal studio and I've been planning planning planning. I am launching my aromatherapy and herbal health consultations practice with custom blending for each individual, as well as launching a general aromatherapy product line this spring. I've been designing, planning, calculating, testing testing testing, working. And it is getting close. So close! When I combine that prep work, garden seed starting, and some design projects I have taken on, there has been no time for the winter blues. Which is exactly what I had planned. 
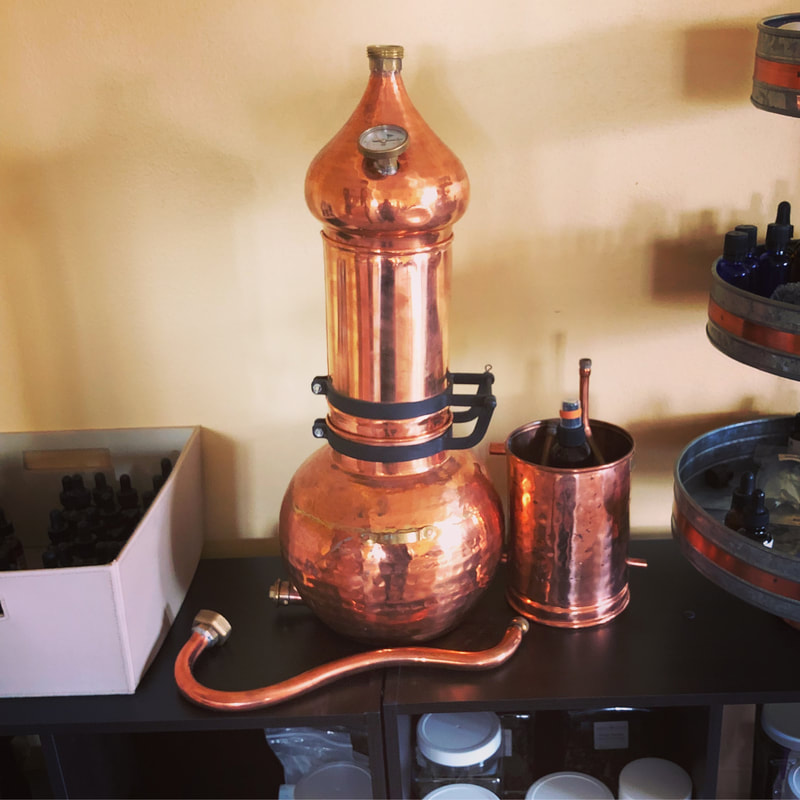
And speaking of garden planning!!!! I am very interested in hydrosols and I am hoping to distill my own hydrosols this summer. Small-scale, of course, but still! A still! Something small and portable and that is in my backyard percolating away. I can't wait. I have so many plantings planned for this summer (both for my own herbal cabinet as well as food plants for the food pantry) that I know I will have enough to experiment and learn about the process of distillation of hydrosols. One thing I love is learning new things. And design! I volunteered with Herbalists Without Borders International and I just finished re-designing the website and will continue to do website and print work for them as we go along. HWB is a great group of people and I have really enjoyed working with them - it inspires me to do more with my own knowledge to commit to find more ways to support my own community. I have been a designer for so long and I have always continued volunteering with my skills and have enjoyed working with small businesses who are environmentally conscious, community focused, and justice oriented - it is a good fit for me and works well with our life and family vision. I cannot believe it is almost spring. Spring is the time for new beginnings, coming out after a long winter and new life. It is the perfect time to launch Wholly Rooted handcrafted botanicals. So keep an ear and an eye out. I have a lot of good stuff coming soon and I am excited to share!
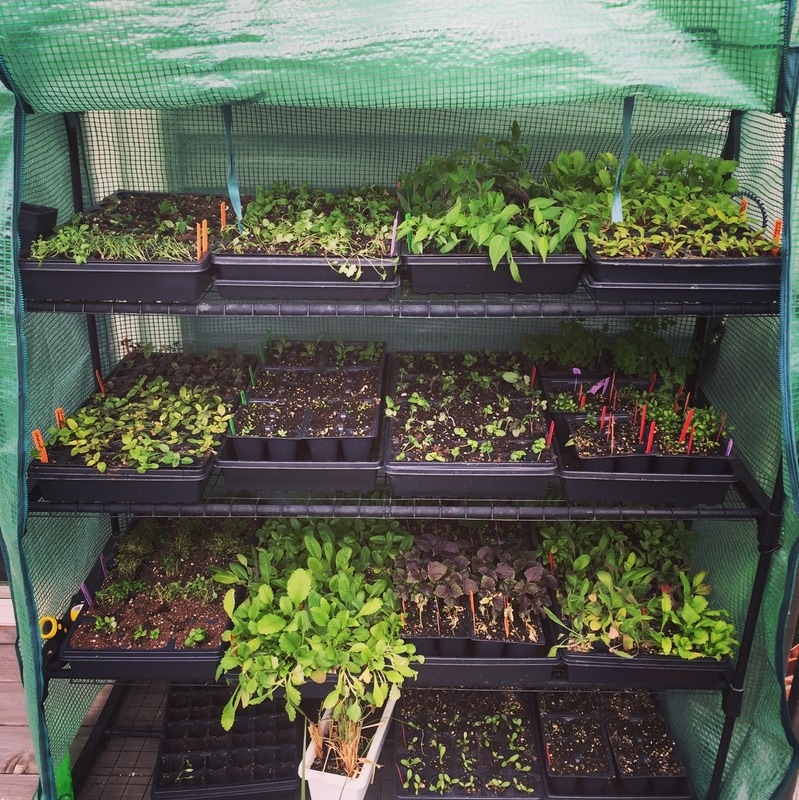
Can you believe it is finally seed season again? Ah, the trays of soil, the hundreds of little packets and grow lights. I have done less hard core planning this year and more seed organizing (my time has been spent working on a new biz). We hope to have about the same amount of growing space total as we had last summer (crossing fingers), so I have hundreds of seeds in my little seed box, organized by seed starting date ready to go. My first big check is always what did I put in ground here at the house last summer and the summer before. Our first summer in this house was all waiting for grading and driveway and all of that, so it was a wash, but last summer I did a lot of planting. There were also many things I grew out at the goat farm garden all summer that I brought home and put in ground in the fall as well. I also have some things in buckets in corners along the house (eep) waiting for spring to get planted in. I hope/plan that for the summer we will again have space at the goat farm, we will garden into our landscaping more at our house, and ... we bought a wooded lake lot last summer (see below) where I am planning to plant endangered/rare woodland medicinals. It is too far away and too shaded/wooded for any more organized plantings, but it is good for plants that can just be left alone and not watered by hand.  Last summer was the big #happyflowerproject where we grew flowers for the food pantry all summer. We plan to grow things for the food pantry again, but expand to food and other plants and not just flowers. And I am planning on growing even more medicinal plants and have bigger harvests! So first. In ground at the house - most planted last summer:
I also have lemon, lime, lavender, rosemary, pomegranate, ashwagandha, and cuban oregano that have been inside all winter and will go out to the deck for the summer.
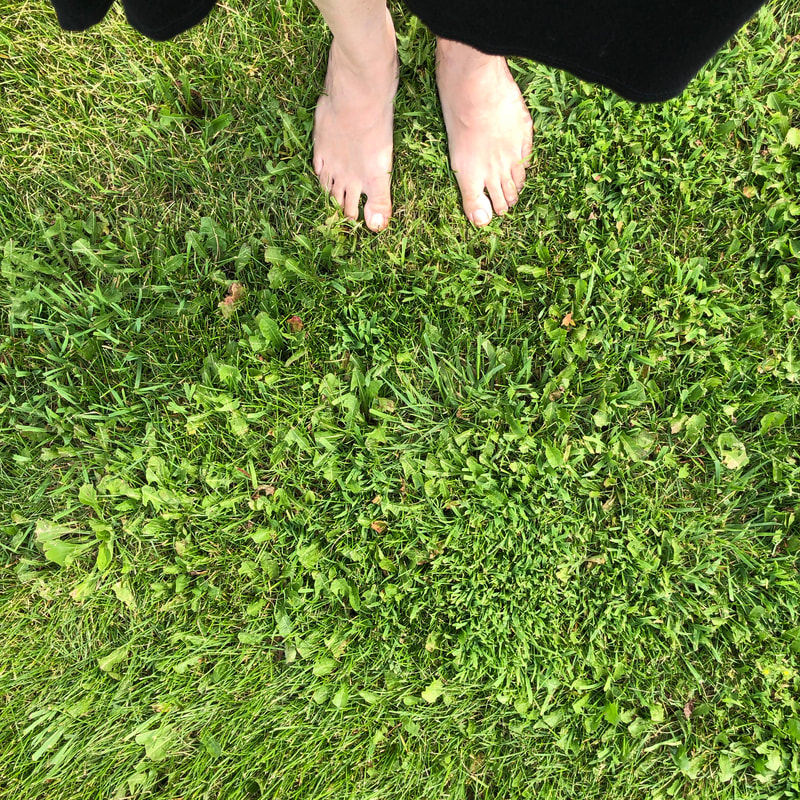
I plan to grow most of the flowers from last summer in smaller quantities plus more at the house. One thing we plan to do this spring is fence our yard. We have neighbors who let their cat roam - and it uses my garden beds as a litter box and dumps half eaten carcasses daily throughout the yard all summer where I always go barefooted. So, fence. And that will help keep any future neighbors from drifting anything into our organic garden. I enjoyed the flowers more than I expected last summer - I am a practical midwestern gal after all. But they were all so beautiful and loaded with pollinators that I am keeping them this summer.
And of course medicinal and tea herbs. I grow most of these every year, but I am increasing the plantings at the home garden as I expand all of the beds.
Of course the culinary herbs are important too. These I mostly grow at home so I can snip daily at all mealtimes.
Veggies & annual fruit. We are increasing veggies this summer. We will still have our CSA for our own family, but will donate more food from our gardens to the food pantry!
And of course some greens - I'm starting out with only a few and I add them all summer.
Last year I grew dahlias from seed, so we dug up over 125 tubers last fall and have them in the cold waiting for spring planting. We also managed to plant over 200 tulip/narcissus/hyacinth bulbs and I am very excited that we will have an early burst of color! With the fence will also come some fruit and shade trees which are much needed atop our windy sunny hill - and I will start planting those in early spring.
All of this makes me sounds like I have it all together. ;) My box system of dated folders counting back from last frost date really helps keep it simple. I can just load all the seeds into their starting week folder and pull them out every week as I start another round of trays. So that is the basic list of what I'm growing this summer! I love that I can increase the varieties every year without really adding that much extra work. One step at a time. This still doesn't include any woodland plants I want to put in at the lake, but I am thinking things like goldenseal, black cohosh, oregon grape, woodruff, eyebright, elderberry, slippery elm, hawthorn, possibly some plants in desperate need of habitat and care. The lake lot is much bigger than our home yard here, and it is in an obscure and low traffic area. It seems perfect for that! So really all I wanted to do was post a lot of photos of the garden to remind myself that YES the never-ending winter has an end in sight and spring and summer are coming. And of course I tucked in some seed lists and all that in between. See how I did that? Did I forget anything? What are you growing this year that you are excited about? 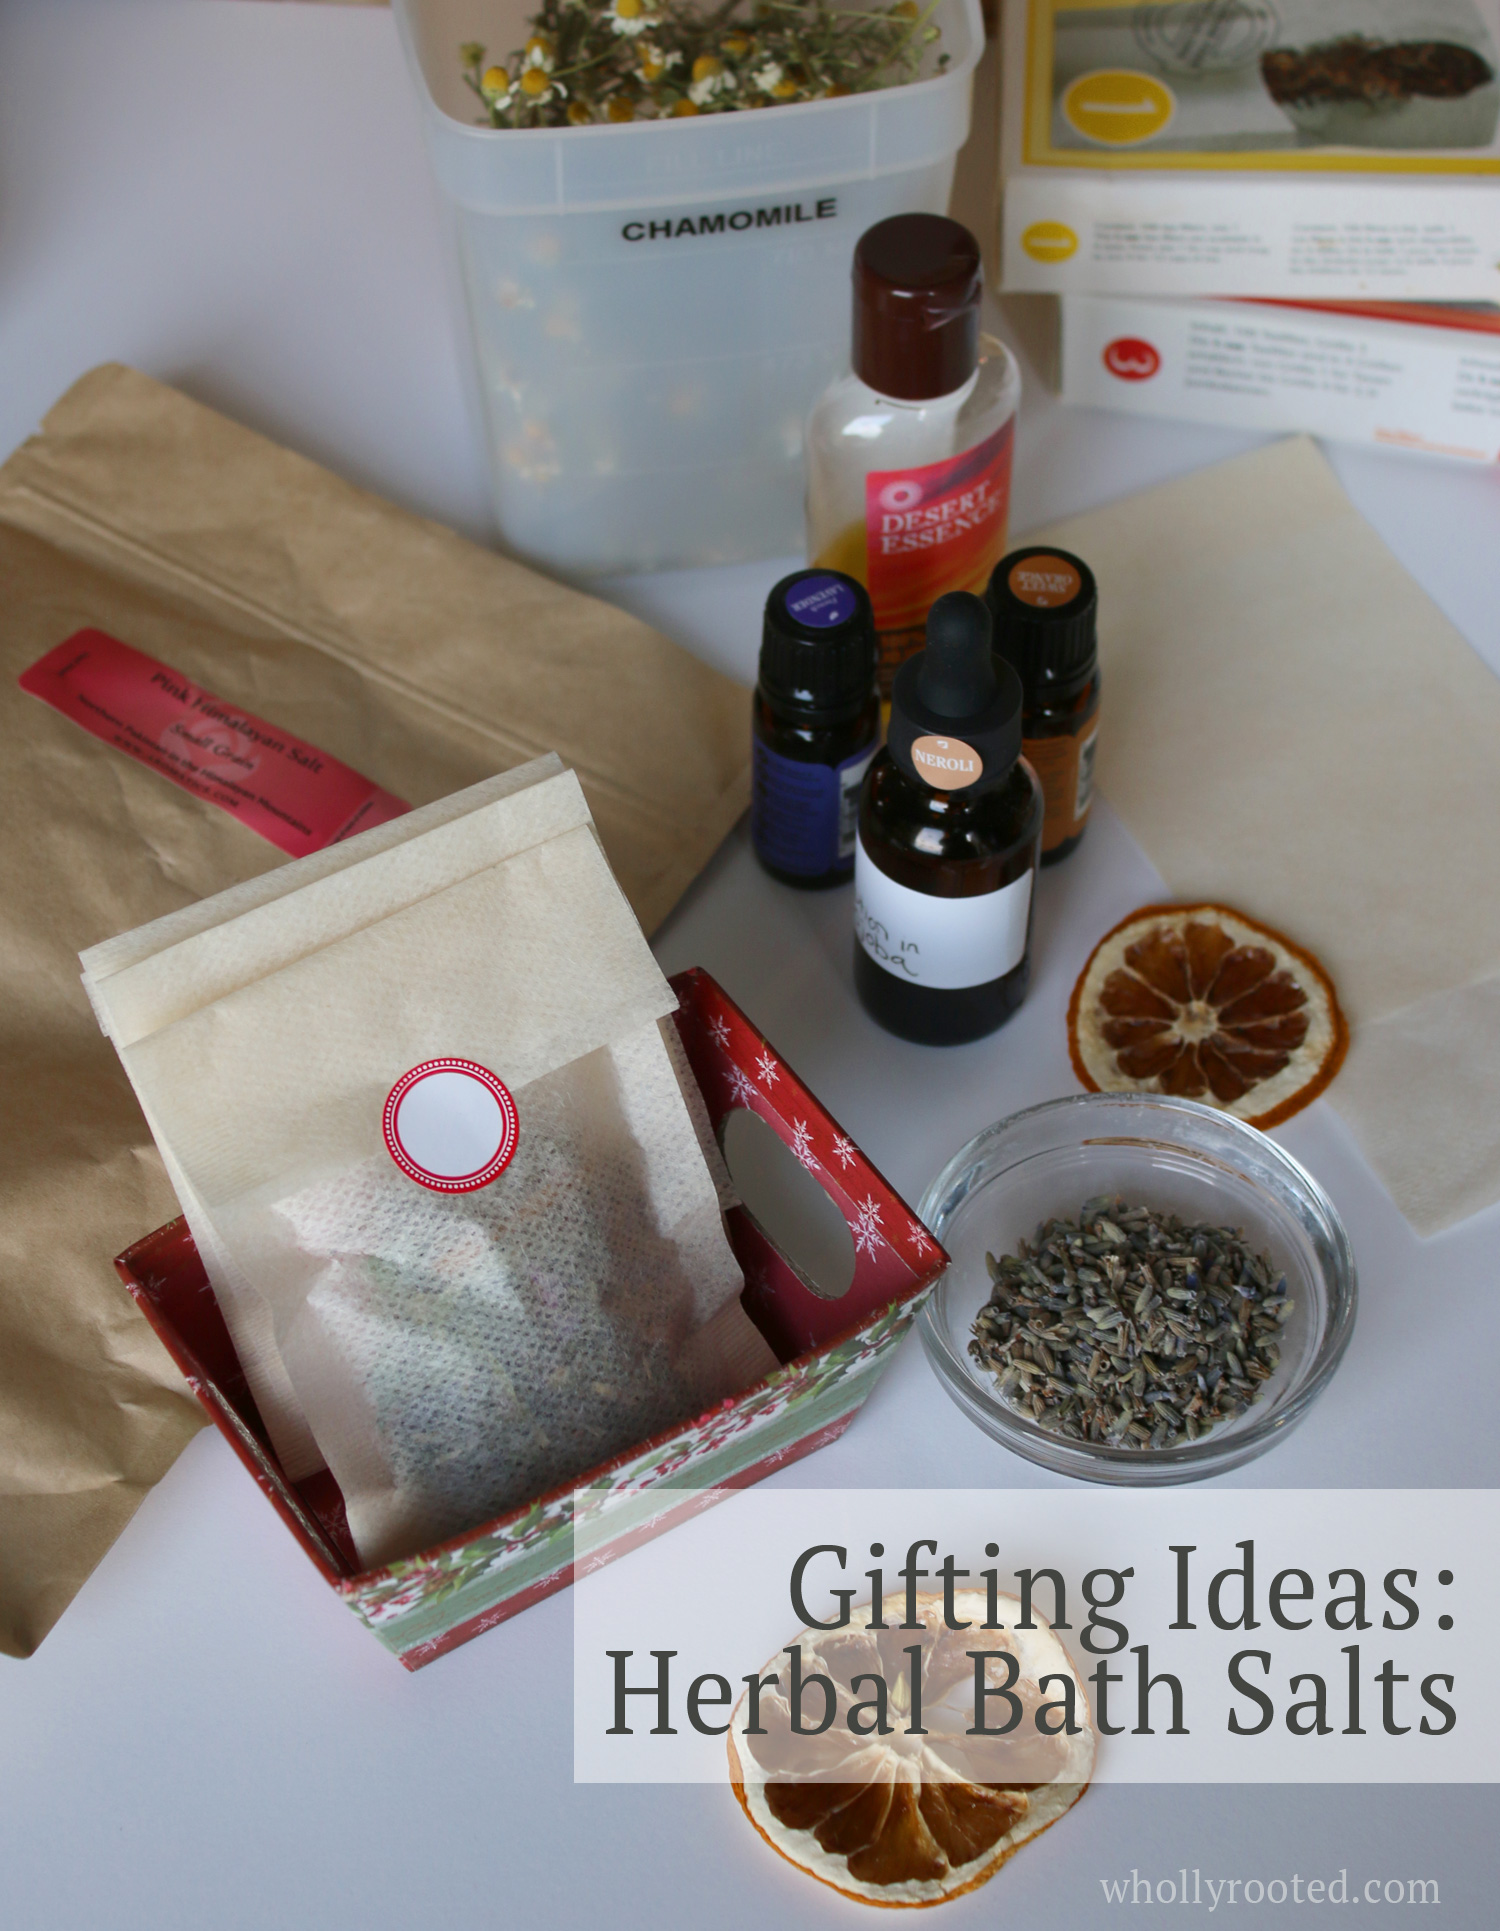
Herbal Bath Salts combine the ease of fragrant bath salts with the healing benefits of herbs. I like bath salts for many reasons. I have one son who has eczema flares in the winter - and salt/herb/eo baths have helped keep those to minimum for the past few years (along with a rich body butter). My other son has mast cell issues and severe food allergies and we have found that the mineral rich epsom salts help keep him from having as many skin reactions. As he is older he prefers to shower now, but still has a soak when he has been having a rough week health-wise.
Herbal Bath Salts are easy to make and very customizable. Many places sell dried herbs - or you can use what you grew/dried from your own garden (bonus!). Here is a base recipe using herbs known for their calming and healing properties - plus a few ideas of how you can customize your own. 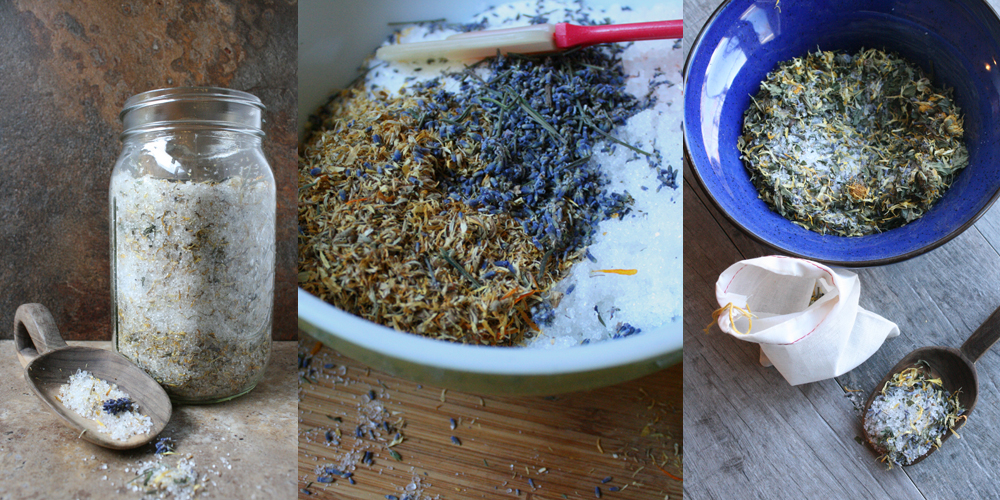
Sleepy Time Bath Blend
Approx. 4-6 baths
Mix the salts together in a large bowl with the dried herbs. In a small vial or cup mix your carrier oil with the essential oils. Drop a bit at a time into the salt/herb blend as you stir well. Store in an airtight container. To use, scoop ¼ to ½ cup per bath into a re-usable muslin pouch, and steep in the tub as you fill it. Soak and enjoy! Optional add-ins or substitutions: dried plantain, lemon balm, lemon verbena, coconut milk powder, dried orange peel, or rolled oats. If you collect your own garden herbs, just be sure to dry fully and remove from stems before weighing. Also, you can use just the salt & herbs and skip the essential oils. Other essential oil and herb combos that are nice (just blend into the carrier oil and add to the salt mix) as alternates::
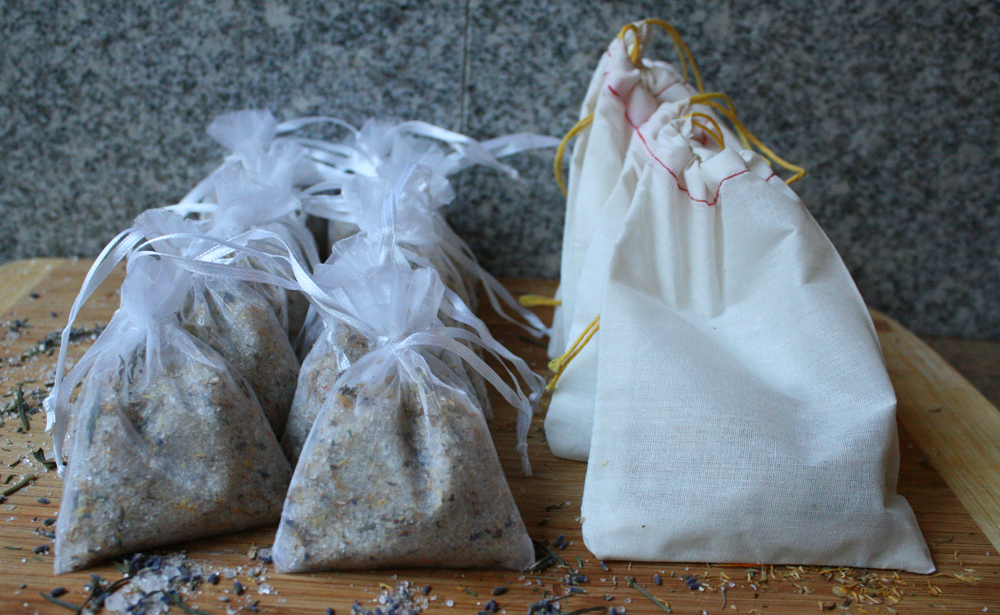
To make as a gift, put your blended batch into a nice glass jar and attach instructions and a muslin bag or scoop. Attach instructions - use 1/4 cup or more per bath - and gift away! You can also make individual tub bags - measure 1/4 cup portions into unbleached biodegradable large empty tea bags. I really like the x-large natural iced tea bags because they strain finely so no bits end up in your bath and they are compostable. You can simply sew or sticker them shut at the top and put into a pretty box with instructions. Craft stores also sell wedding favor bags which are a good size - and they can be cleaned and re-used. The key is to store the pre-filled bags in an airtight container so that they don’t start to dissolve from the moisture in the bathroom. The salts will sink to the bottom and settle if you use a single large jar, so be sure to stir or shake before scooping into the tub. Be sure to keep the lid on tight for a whole jar or store the pre-filled bags in an airtight container to keep from dissolving in the bathroom moisture. Herbal Bath Salts Instructions: Scoop 1/4 cup per bath. Tip: Don't use bath salt blends for tiny ones. For toddler baths you can use a small pouch of only dried calendula or lavender – using 2 Tbsp of dried organic herb is enough for a shallow bath – and skip the salt and essential oils. Those gentle herbs will help sooth any bottom or skin rash, while remaining safe for wee ones. The easiest way to do this is pour 1 cup of almost boiling water over your herb pouch in a heat safe bowl, and let steep until room temperature. Remove the pouch and pour this *cooled* infused water in with your toddlers bath water. This way you have the full infusion added to a bath at a safe temperature. 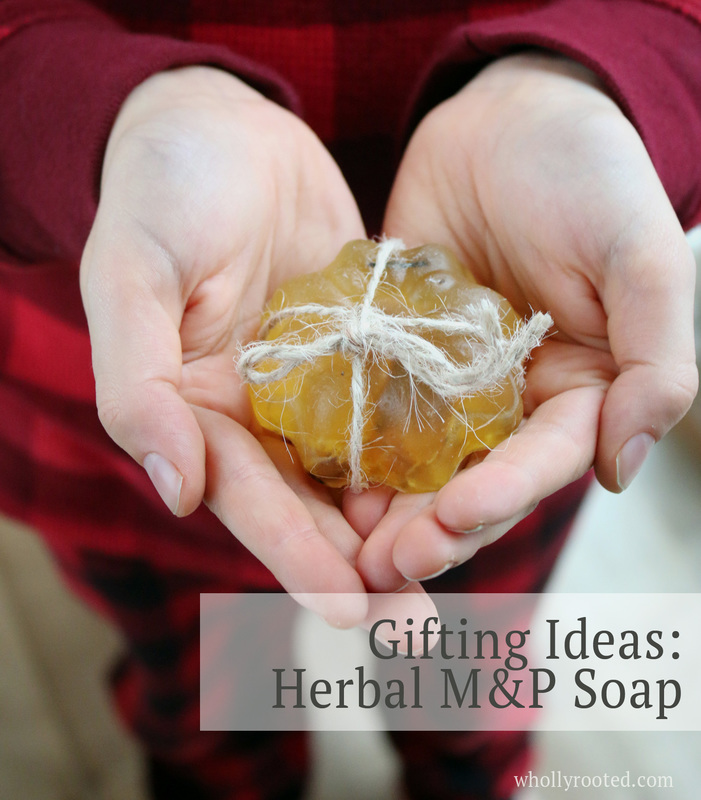
I cannot believe it is November. It has been so warm here in Wisconsin. Flowers are still blooming, I am still watering pots, and we have been outside with green grass, short sleeves, and iced drinks. It is unbelievable, but I keep hearing that little voice saying only a few weeks until G's birthday and Thanksgiving, and only a few more weeks until winter solstice and Christmas --- you are soooooo behind on gift making. Why yes, yes I am.
I am sure you are all much better than I, and have been cranking away at handmade gifts and goodies for months. I seem to transition from all of the garden work season to holiday making season and when garden work continues for so long the rest gets pushed off. I have so many great recipes for hand made goodies in my pile of things to blog that I never blogged, so I think I will share them over the next few weeks. Since some are old and some are new and some were for our home projects, I won't out our gifts to any family members (which is always the worry this time of year), and I will also motivate myself to get rolling on the making. After I water all of my pots with iced tea in hand, of course. The in-between of handmade things - from small kids (find something safe! and easy! and cute!) to teens (I know what I want to make and don't need your input, thanks!) - is the tween and early teen crafting making phase. The phase where the project needs to be interesting and cool enough for them to want to join you and actually do it all themselves thankyouverymuch, but short enough to not seem like some mad mom thing. They want to make gifts for people and they want to feel involved, but they want to be interested. This melt and pour herbal soap falls into that category. My tween (soon to be 12) son loves working with me on all of my aromatherapy projects and assignments. He wants to know about the chemistry and whip things up and use all of my special measuring devices that I reserve only for that stuff (so!many!cool!measuring!devices!and!stir!rods!). My 13 year old son is in the wellllllll maybeeeeeeeee but I'm pretty busssssssyyyyyy phase, but even he enjoys something that resembles a DIY:Sci science project. No, it isn't dangerous and doesn't blow up, but the big grated ball of m&p is microwaved until it is a liquid and you get to pour it into molds, so that is fun. And they have something to give that they made. Melt and pour has a bad rap for being meh, but there are some very good quality organic versions out there (and palm free options!) and it is great for the tweens as it doesn't involve the lye and caustic chemicals of processed soaps, but it is something that they can make and customize. Or, you can make it yourself. No tweens needed. I like the addition of dried herbs from our garden in m&p soaps. They add some skin nourishing properties, they give it more of an earthy homemade feel, and they look nice. herbs: This recipe combines lavender and calendula, both of which are soothing, relaxing, and healing. Combine ingredients to suit what you have in your herbal cabinet – try adding items such as dried rose petals, dried chamomile, or dried mint leaves. Tweak your fragrance to match your additions. molds: You can use soap molds of course, but don’t be afraid to get creative. Using muffin tins or silicone candy molds work great and give a great variety of patterns. I used a metal mini cake mold for this batch. 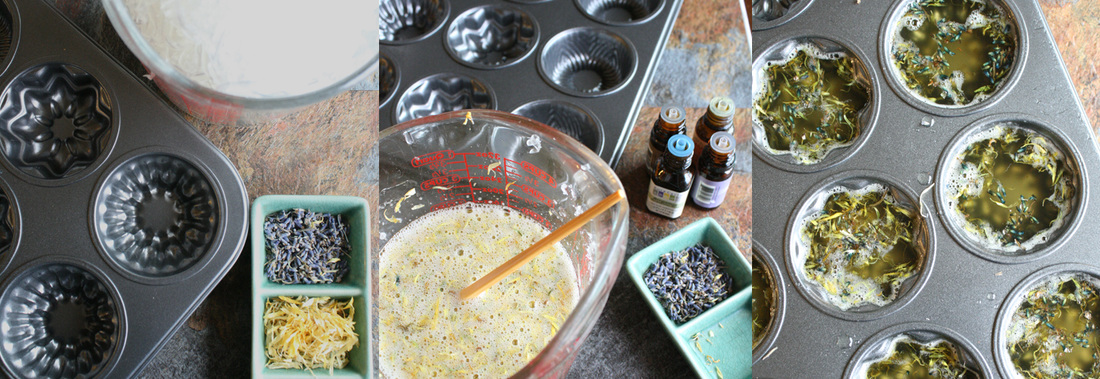
Ingredients: 16 ounces/475 mL of organic m&p soap*, grated (try a natural glycerin, aloe, or hemp type - choose your favorite) 3 Tbsp honey (optional) 4 Tbsp dried calendula petals 2 Tbsp dried lavender buds 1 Tbsp apricot kernel oil or avocado oil 1/8 tsp vitamin E (from bottle or pierce a vitamin E capsule) You can make the soap using only the base, oils, honey, and herbs. But to add some additional fragrance, you can add a blend of essential oils. This mild earthy citrus blend goes well with the calendula and lavender and has a nice uplifting aroma. 8 drops bergamot essential oil 30 drops mandarin 45 drops lavender 13 drops cedarwood or if you like a more floral blend, try 45 drops lavender 25 drops sweet orange 8 drops sandalwood 7 drops neroli 3 drops ylang ylang Don't panic. If you are thinking you want to make this but using only two essential oils - you can't go wrong with lavender + sweet orange. Directions: Oil your molds if using metal tins, or follow instructions if using soap mold or silicone. Melt your m&p soap base. There are two ways you can melt your grated soap base. You can melt gently in a double boiler on your stove, or you can microwave in a microwave safe bowl, stirring !very! !gently! (to help prevent foamy bubbles) every 30 seconds or so until melted. When melted, quickly and gently stir in your honey, vitamin E, and base skin oils. Pre-heat your honey a bit so it will stir in - if you pour it in fairly cold it will clump and sink. Add your essential oils, and finally add in the calendula petals, stirring carefully and gently to not add bubbles. Pour this mix into the molds gently to avoid too much bubbling. After cooling for only a minute, sprinkle the lavender buds over the top. They will sink in, but not all the way to the bottom this way. If you wait too long they will just sit on top, not sink and harden into the soap. You can gently remove any bubbles at the edges using a skewer or chopstick, so that the bar will dry smooth. Let the soap harden and cool fully before removing from the molds. If you are using metal tins, let the soap cure/dry in the tray so that they shrink enough to pop right out the next day. If you are using soap or silicone molds, remove from the mold to cure/dry on a tray for a day or two before wrapping. Package the soaps in a little box or wrap with ribbon or string. Gift away (and keep a few for yourself!). 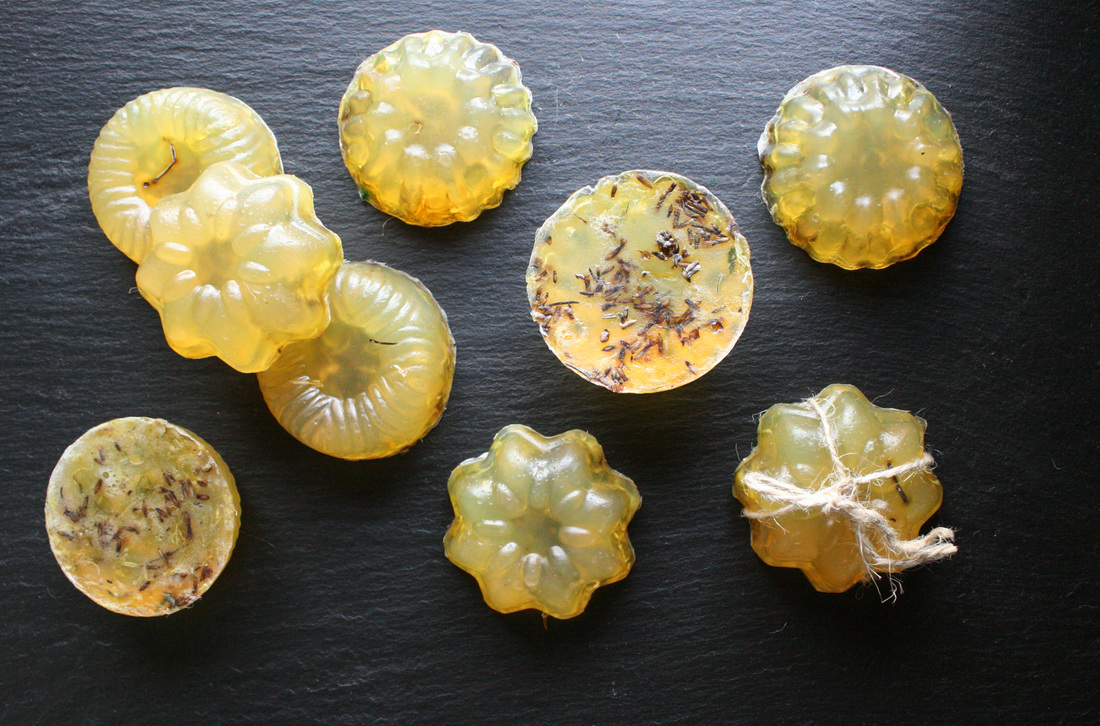
*Not all melt and pour soap is alike. Look for organic vegetable glycerin melt and pour. It doesn’t have any harsh petrochemicals and is a gentle and environmentally-friendly base. There are palm oil free versions, and even aloe, honey, or hemp! You can choose an organic goat milk type of m&p as well (although herbs won’t show as much). We stick with non-animal based soaps since my son has severe dairy allergies and cannot even bathe with them.
Resources: Dried herbs: Mountain Rose Herbs Bulk Herb Store Soap Bases: US Bulk Apothecary Brambleberry UK http://www.justasoap.co.uk/soap-making/melt-pour-soap-bases/
So ---- today is the day for our launch of Kitchen: DIY! This is a FREE 30-page book with some of our favorite kitchen DIY projects. Brice (my husband) and I have written many articles on home projects and this is a compilation of some of our favorites we wrote together. We are always asked about our hydroponics system and we go through how to choose and setup a system that is right for you. Another favorite is how to roast your own coffee - in a roaster or even on your grill or over a campfire (plus...recipes). How to sprout and which seeds are the best to start with. How to get started growing mushrooms - what are the different types of starter setups from tabletop to logs - and what types of mushrooms can you grow (plus...recipes). Brice also has a great article about grilling with hardwood charcoal and not the little chemical bomb briquettes. Of course this is filled with photos and recipes and detailed information with resources! Happy DIY'ing.
>>If you are on a non-Apple device, you can download a PDF version here! 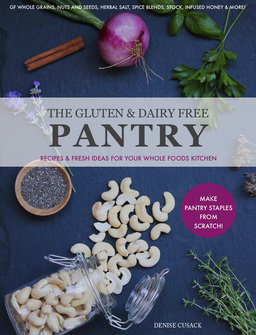
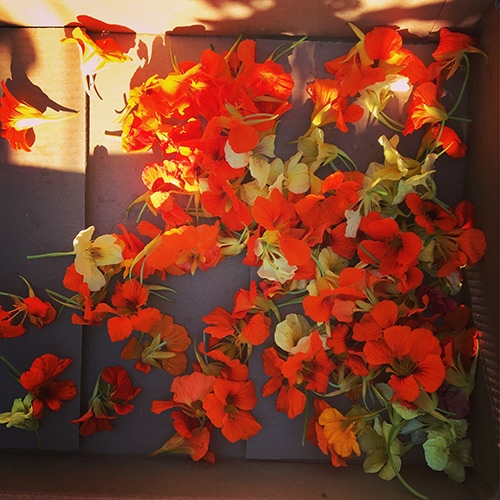
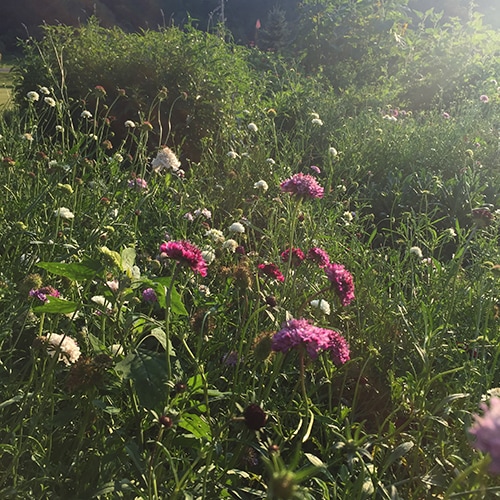
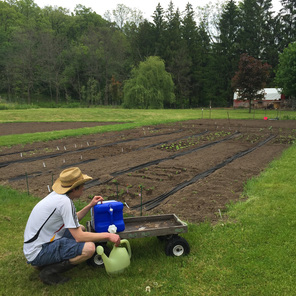
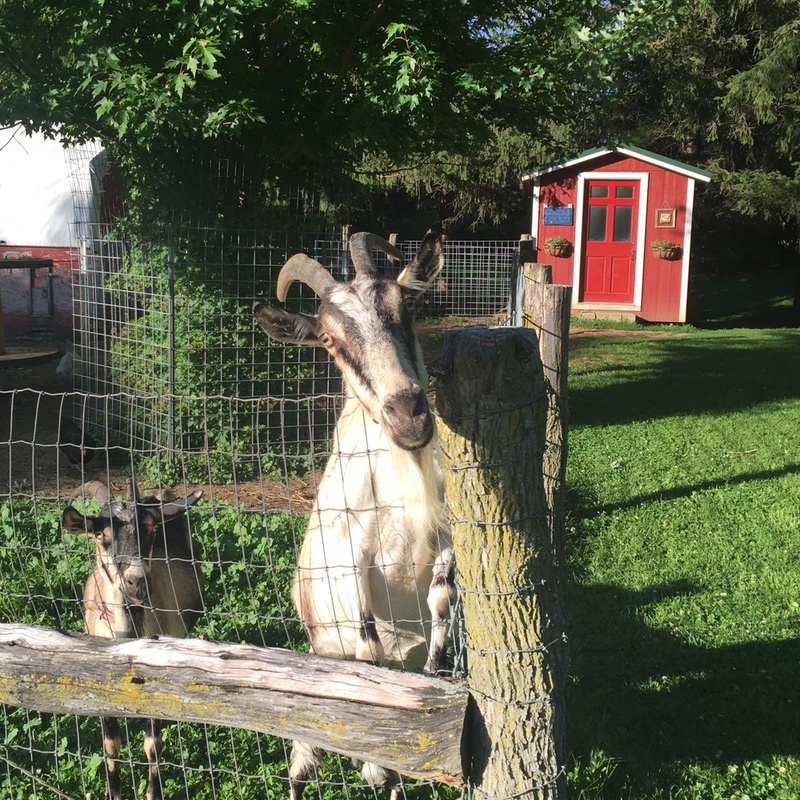
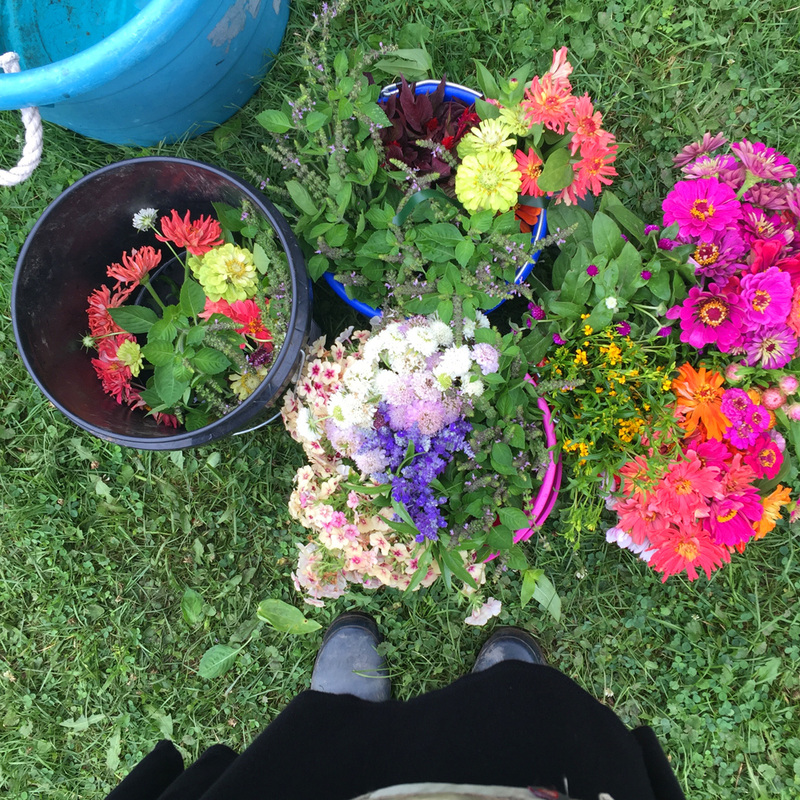
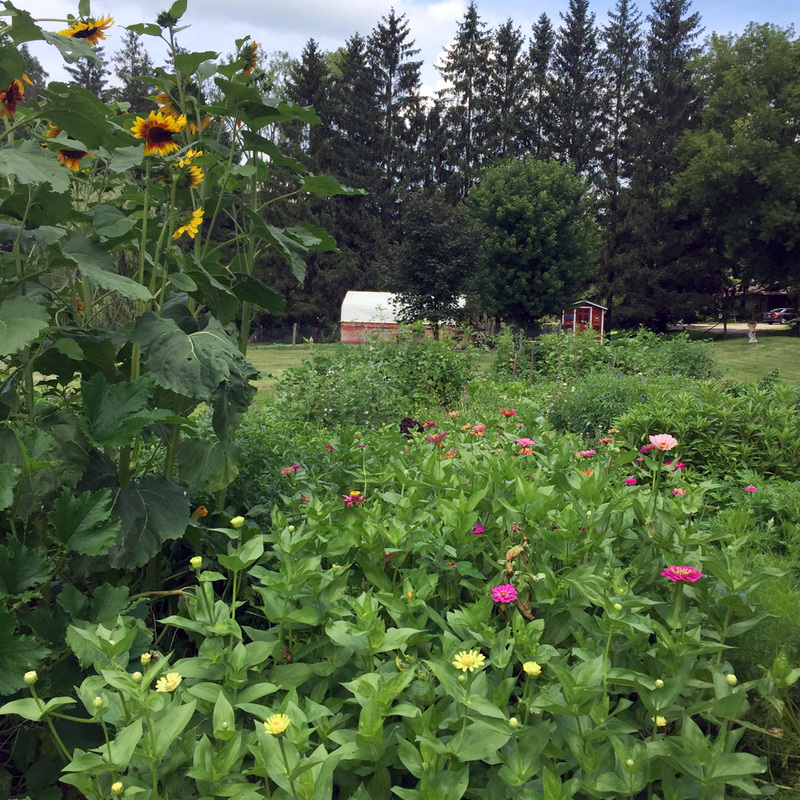
Be sure to keep an eye out here - I will be launching another ebook The Gluten and Dairy Free Pantry: Recipes and Fresh Ideas for Your Whole Foods Kitchen in the next few weeks! 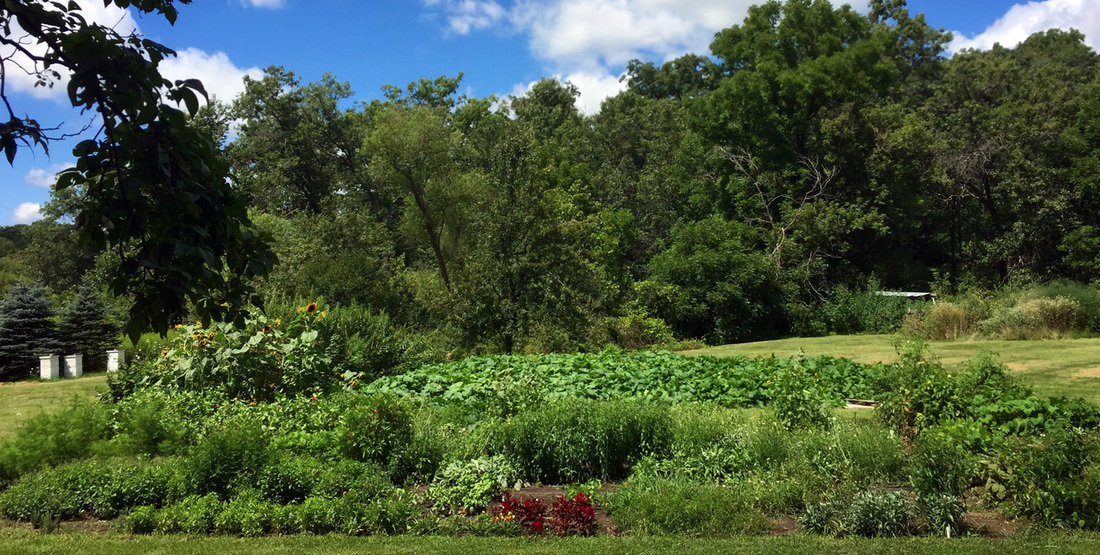 I realized that I haven't written about our garden in many months. Once planting season begins it seems that summer rushes by, noted only by how many days has it been since it last rained, and what is ready to pick, always hot and sunny but urgent in the need for constant weeding and tending. Interestingly, our garden(s) took on a whole new level this summer. I don't usually like to tell people of any of our charitable projects. Doing nice things or donating to help someone get on their feet or working and volunteering to help people is something we should all do without any expectation of attention or praise. Because it is the right thing to do. But when my children are involved on this level, I like to recognize them for their kindness, generosity, and loving hearts. They are amazing humans. Back in March while we were starting seedlings, my boys had the idea to grow flowers for the food pantry. Our community garden keeps a bin up front for the local food pantry so that any extras in the garden can go right to them. The local food pantry also has an extra large plot there managed by volunteers to grow as much fresh produce as they can as well, so they pick up the extras in the bin when they are there. We have always put our extras in the bin, but growing flowers and making bouquets so that families could have something fresh and colorful on their tables in addition to the food sounded like a fantastic idea. I wrote a letter to our local Badger Prairie Needs Network and asked if they would take flowers if we grew/bunched/delivered them. They said yes! The boys wanted to call it the Happy Flower Project (#happyflowerproject). After getting the YES from the food pantry, we went into overdrive choosing flower seeds and starting a few hundred extra seedlings. I quickly realized that our very small community garden plot wouldn't hold that much and that our home garden wasn't developed enough yet for that many more plantings. But we really wanted to make our flower project for the food pantry work! Gulp. I kept growing those seedlings, thinking we would find a way. In May, just as I was hardening off hundreds of flowers, a local unschooler mom wrote to ask if I knew Janelle, who had garden space to spare and was looking for some people to fill it. I wrote to her and we went out to see her lovely valley where she organically raises goats and has a large organic garden plot. We were SO LUCKY to get space there, and we planted so.many.flowers. in late May and early June. My husband, as always, jumped into our family project and helped with everything. In addition to all of the flowers, we planted many medicinal herbs and two vines of cucumbers and heirloom pumpkins in that patch. This space is twice the size of the other community garden plot, and the soil is wonderful (and the goats eat our weeds by the bucketful).
We chose to plant only family food like tomatoes, peppers, peas, watermelon, and some herbs at the community garden plot as it has picky soil and isn't very big. We did plant zinnias around the perimeter for extra cutting flowers if we needed them. At home, we expanded our fruit plantings and I added additional many perennial plants in a few new small beds around the house. As we rotated weeding/harvesting/caretaking from garden to garden each week, the goat farm was quickly the favorite place for the boys as there are goats (baby goats!), chickens, and a large trampoline there. Woot! Even with how hot our summer has been, things were growing well. Of course that led to the inevitable garden crash - a few weeks ago we had a few days of torrential rain and our community garden plot was completely submerged. We ended up losing almost 100% of the plants in the community garden plot from the floodwaters and then not long after, to rot. Can you imagine how relieved I am that we had the other plot out at the goat farm? And that most of our flowers and medicinal herbs are there? We are again SO lucky.
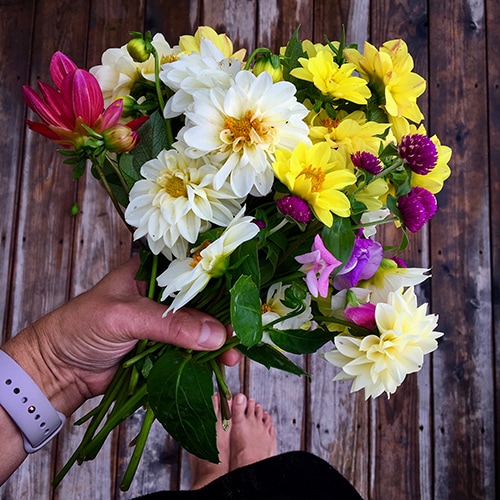
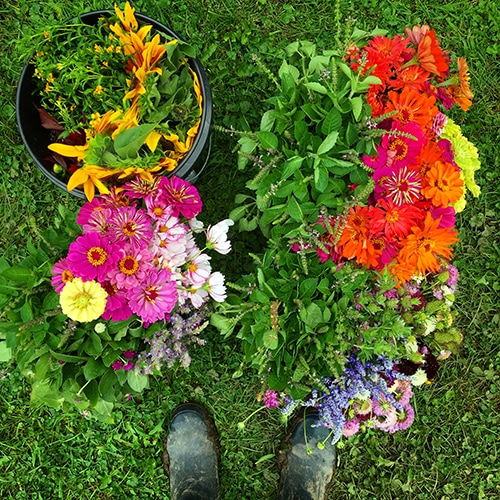
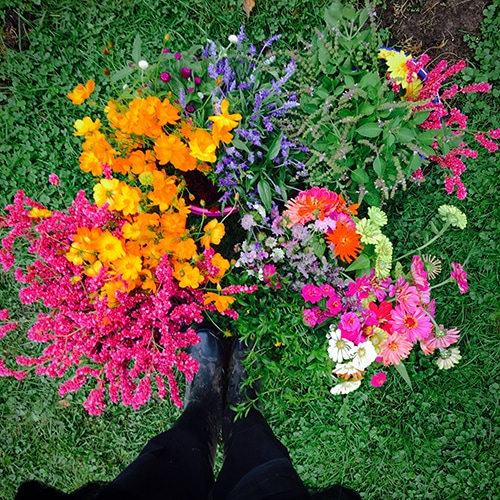
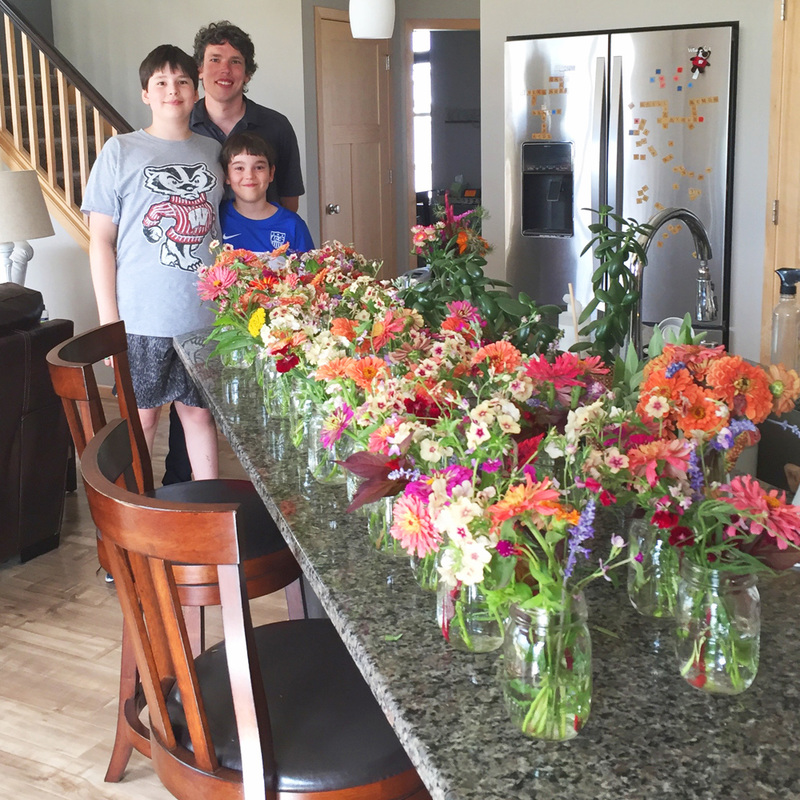
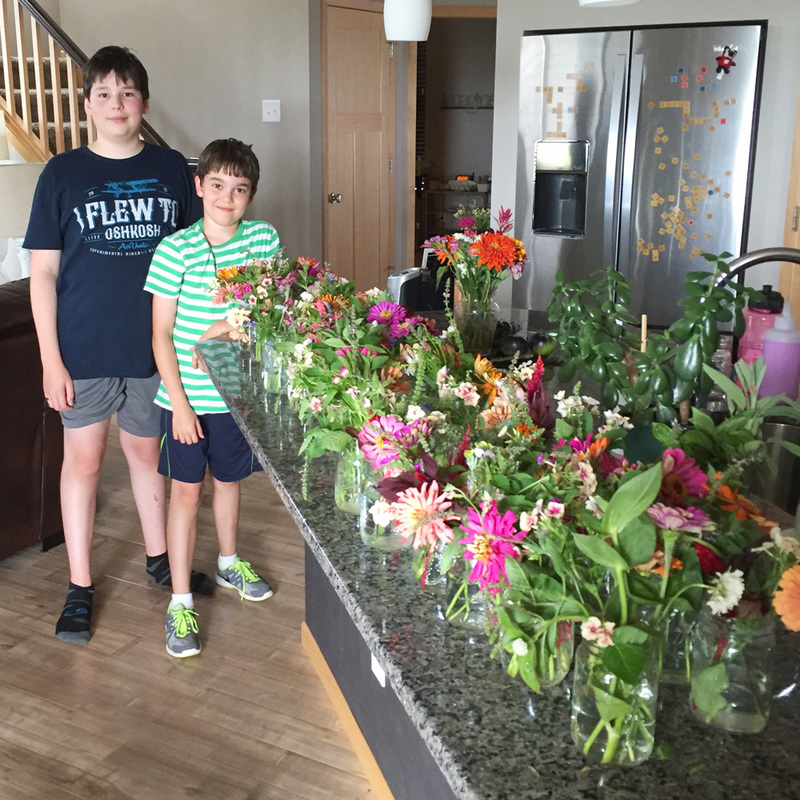
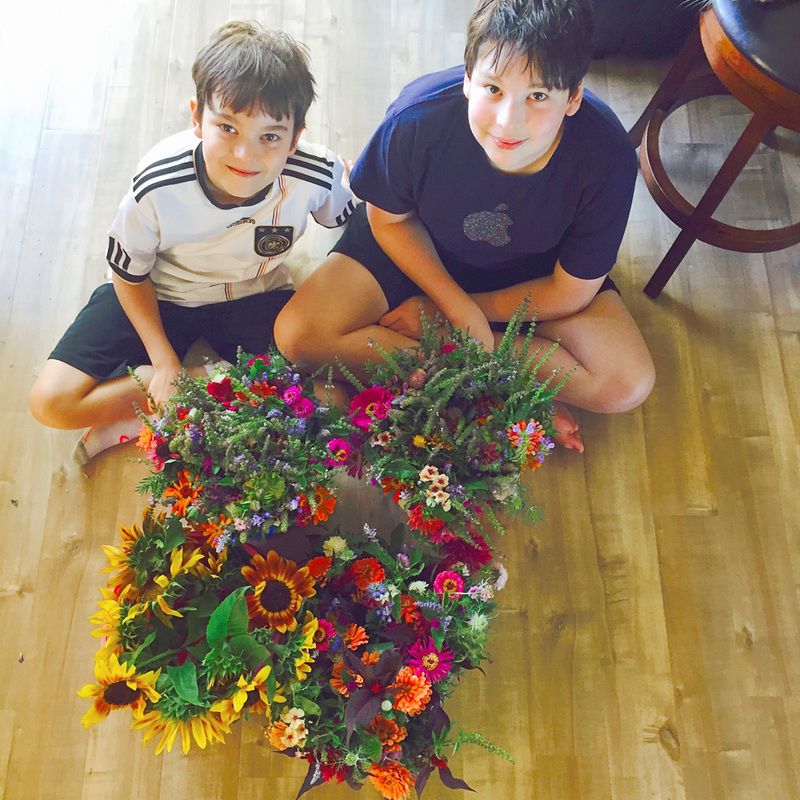
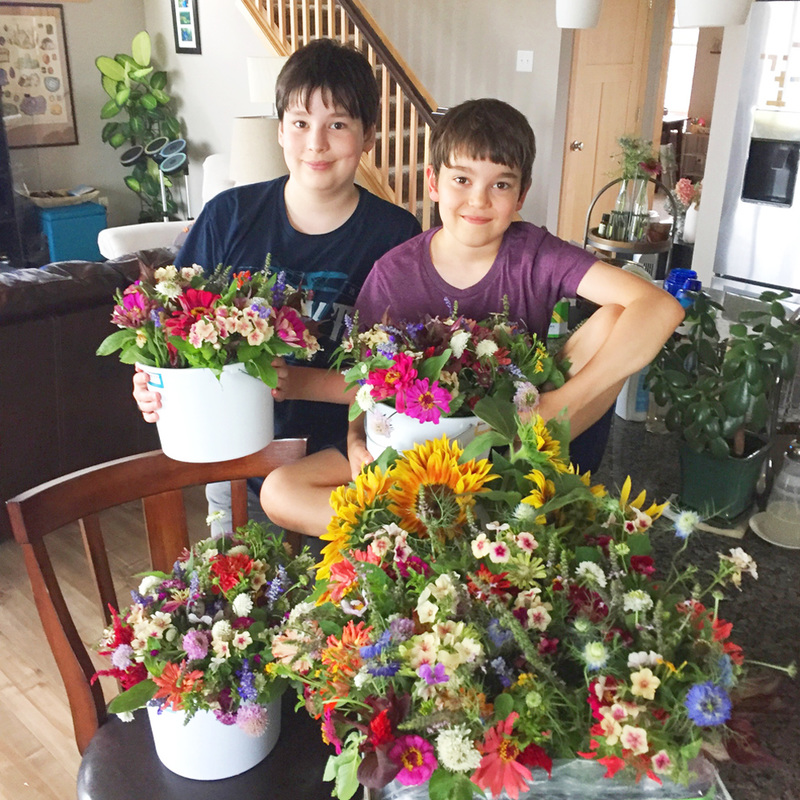
Every Friday we go out to the farm garden to pick flowers for a few hours and transport them in buckets of water back to our house (the garden is about 15-20 minutes from home). From there we divide them by type and then create mixed bouquets. We rubberband the ends and put the bunches into fresh buckets of water. After that all that is left is that we load up our car and deliver all of the flowers to the Badger Prairie Needs Network so that they have fresh flowers for busy Saturdays! We have been filling a dozen mason jar vases each week so that the community meal tables have fresh flowers (as well as the registration desk and waiting areas). The garden has been producing more and more each week and we have been able to make dozens of bouquets - filling several buckets - for visitors to choose from each week. We are hoping to increase our bouquet count each week for a few more weeks before they start to slow down for the season. My kids know all the hard work required in doing these bouquets, but also get to carry buckets of those flowers and a crate of filled vases into the food pantry every Friday, knowing that people have been so happy to see fresh flowers that they can take home for their table. It has been eye-opening for them to see how our local community of individuals, businesses, restaurants and chefs work together to help over 300 families in our school district alone. How chefs donate their time, how local businesses and restaurants donate all of their extra produce and meals, how local stores donate their dents and bakery items. How gardeners bring in giant bags of produce. How many volunteers donate their time to clean, prep, cook, stock, make, and feed so many people in our community. They see how even in our small town we are all a part of something together, and that it is important. 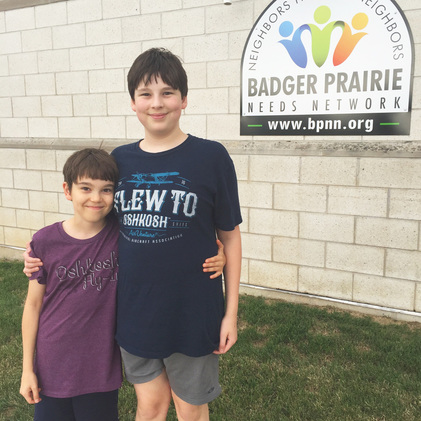 The #happyflowerproject has been a nice experience for all of us this summer, and I am so glad we jumped in head first and that so many things came together for us to make this happen. I hope the weather allows us to keep this going for as long as possible! So I am tooting a horn for my amazing kids with their kind hearts and commitment to our community. And their recognition that flowers can make people smile.
I'll share more about what we ended up growing in our 3 gardens and what we plan to pot to overwinter and which varieties we are growing again next year - but for now, just my boys. <3 #happyflowerproject Edited to add: I have had several people write to ask how we "do it all" with mast cell disease, rheumatoid arthritis, lupus, and asthma (etc.) on our plate. And the key is, we pick our own projects, we create our own parameters and expectations, and we deliver based on our own timeline. We accommodate ourselves. We create our own opportunities together as a family, and we do what works for us! (And, my kids are amazing.) ❤️ 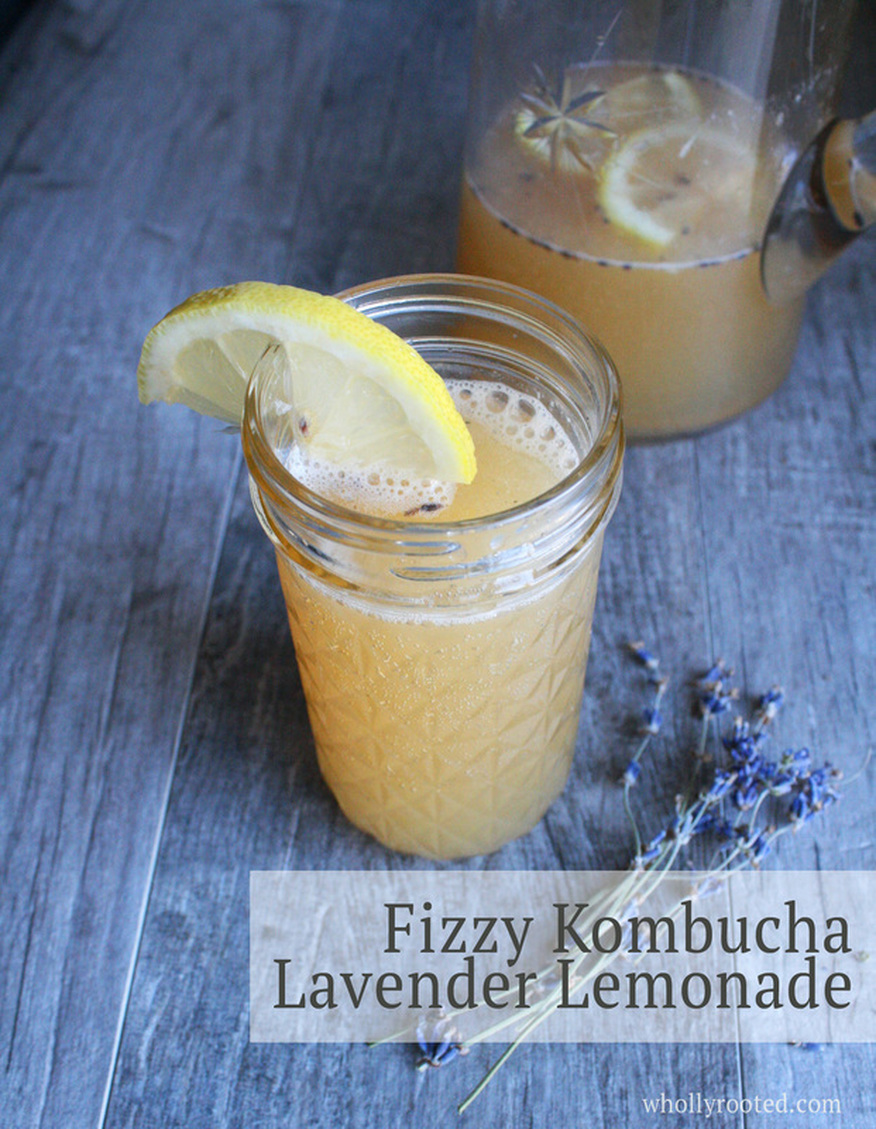
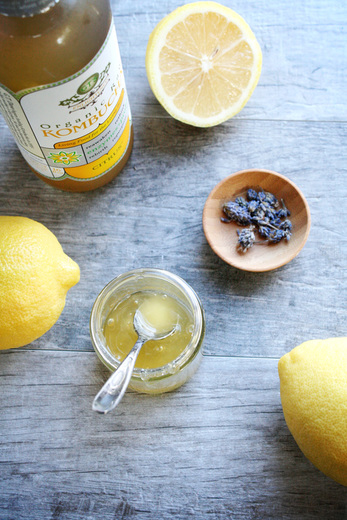
I love lavender. I used to be so sensitive to it that I definitely couldn't handle any artificial lavender anything, and even the flowers would be too intense for me. As I have cleared out all artificial fragrances in all of my home/body/bath products for years now and have gone exclusively natural and organic, I have found that I can now tolerate real lavender and even love it. I grow a lot of lavender every summer and dry it in my dehydrator for use in recipes - both for culinary and bath/body herbal use. A favorite way to use lavender is by infusing honey with it. There is some magic alchemy that lavender gives to the already aromatic honey. It is a great flavor combination. Lavender also works well with citrus. Since I love making all of my own beverages of course I have a favorite lavender lemonade recipe.
Fizzy Kombucha Lavender LemonadePrint |
{wholly rooted}The classic lemonade is refreshing and delicious. This recipe adds kombucha for a fizzy probiotic healthy punch, making it taste like a fizzy soda treat. If you make your own kombucha, you are set. If you are using store bought kombucha, look for a brand that has a nice carbonation and with a flavor that goes well with citrus and lavender! I like ginger or citrus kombucha with mine. {ingredients}
Mix your fresh lemon juice and lavender honey in a small pitcher. 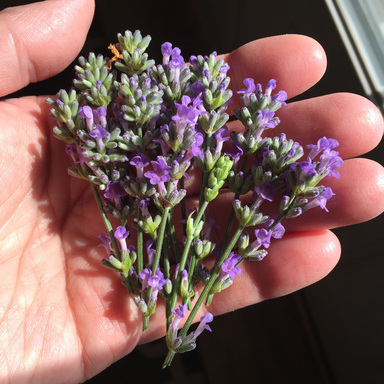
Tip: Add the honey to the lemon mix when slightly warm so that it will stir in and not sink the bottom. Whisking while slowly pouring it in helps too.
Lavender Infused Honey: To make lavender honey, gently warm your 1/2 cup of honey (LOW - no boiling!) with 2 Tbsp of dried lavender buds added. Let sit for 20-30 minutes on *very low* heat and then strain. The honey will be infused with the lavender aroma and flavor. More about: Kombucha Lavender Lemons 
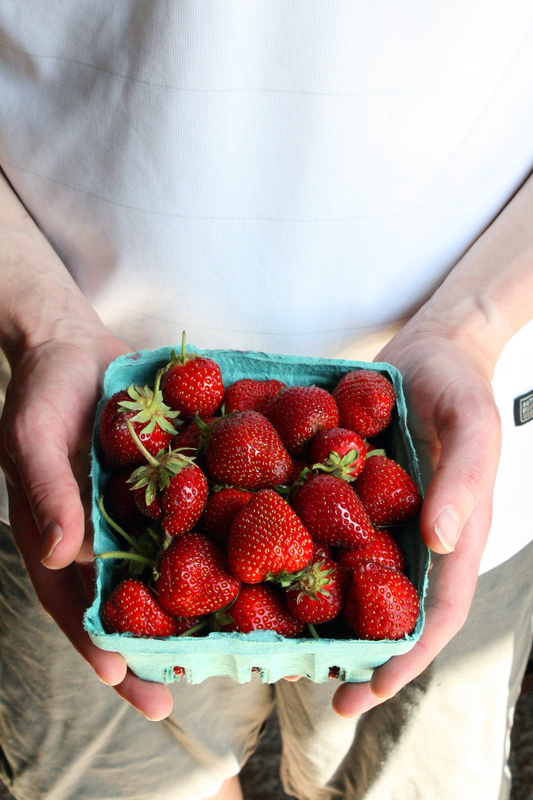
I love strawberry season. It lasts only a few short weeks, but it sure is good while it lasts. We are not growing strawberries this year - well, we are, but they are not big enough to fruit this year - but they can be found all around here. Strawberries are at local farmer's markets, roadside stands, u-picks, and in CSA's. We have picked up strawberries every time we see them, knowing that in a week or two they will be gone. I love making some jam and drying some for granola, but really, sorbet is a must. It is the perfect thing on a hot day.
Making an unheated dairy-free sorbet is really the best way to get the full amazing strawberry flavor. I know many recipes call for syrups with water, but really, who wants watered down strawberries. I want it to taste like an explosion of strawberries in my mouth. I don't like using white sugar and my body doesn't like me using white sugar, so I have experimented to get a scoopable sorbet using a natural sugar. This recipe uses raw honey and a wee bit of limoncello to keep it from freezing too solid (I love our homemade limoncello!!!!). This remains scoopable and a vivid red with the full pow of fresh strawberries. This *only* uses 3 Tbsp of limoncello per full quart of sorbet, but if you wish to have no liqueur in this, you can use 2 tsp of vanilla instead of one (vanilla extract also uses alcohol, which is what helps keep the sorbet from freezing into solid ice chunks) - but it WILL still be hard to scoop since you won't have the same recipe ratio and nobody wants several tablespoons of vanilla extract in their sorbet to compensate. Don't add *extra* limoncello though, as too much alcohol will make it more of a slushie. This recipe really is a great balance of flavor and freeze consistency and sweetness.
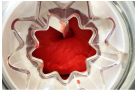
Strawberry SorbetPrint |
{wholly rooted}This is an unheated strawberry sorbet that packs so much intense strawberry flavor you will want more! {ingredients}
Blend the strawberries & lime juice on high in a blender until smooth.
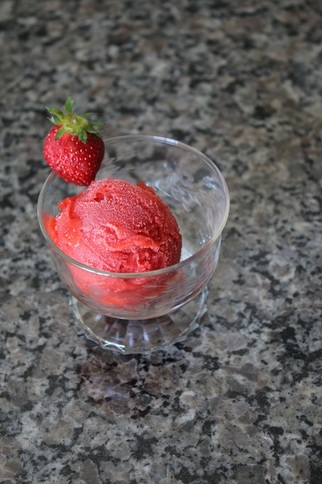
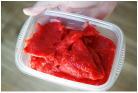
Strawberry season doesn't last very long, and while we *could* buy strawberries from the grocery store all year 'round, we all know nothing tastes as good as locally grown strawberries in season. This recipe really takes advantage of the natural sweetness and amazing flavor or summertime fruit. I think I have a sorbet recipe for just about every single berry all summer long, but strawberries are the first berries after a long winter and spring, and the taste is just...summer. I sometimes try to tuck a quart of it down at the bottom of the chest freezer so we can find in the fall and get all excited that we still have strawberry sorbet in October - but it never lasts that long. That is partly because I just have horrible secret agent stealth skills, and partly because it is so good and who wants to save some for later when you can have it now, when it is hothothot outside. We had strawberries in our CSA yesterday, and picked up a few extra quarts, so I am going to go make some more sorbet! 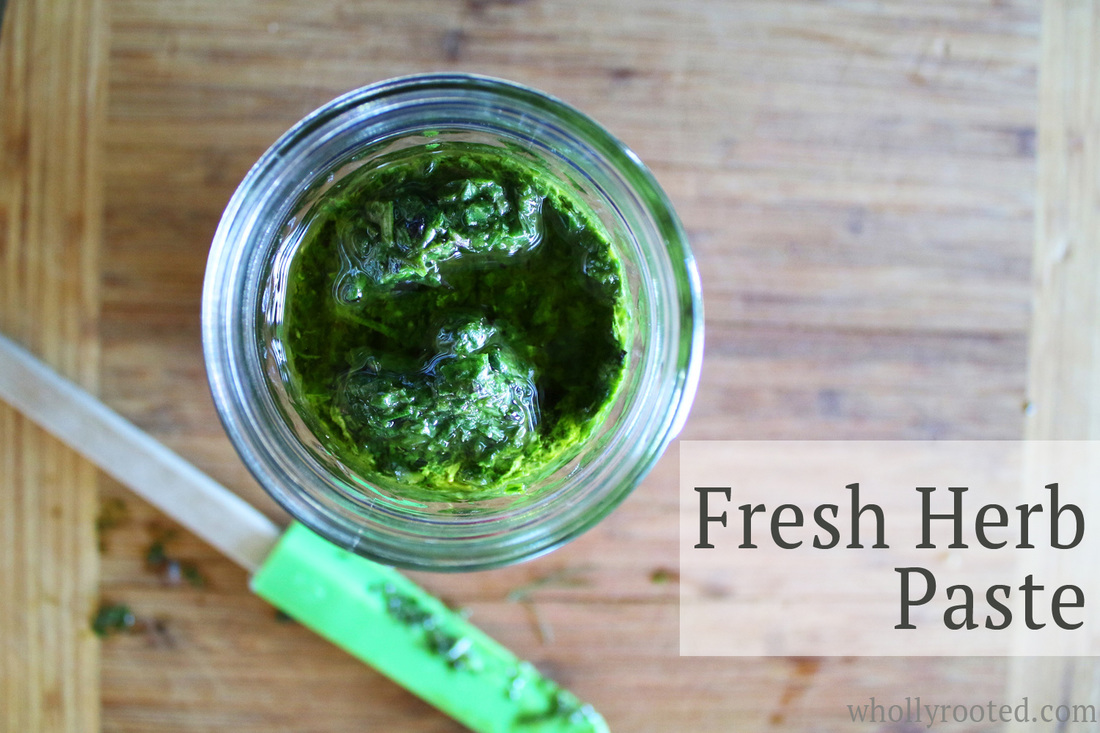
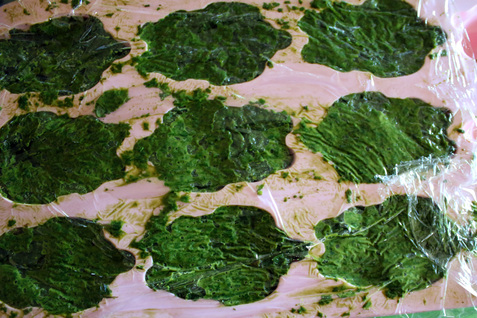
Once the gardens start producing, it can be a challenge to keep up. My dehydrator is going pretty much full-time, drying herbs, flowers, and veggies for use all winter long. Some herbs, such as basil, don't dry very well, so I make plenty of pesto to freeze. While I love pesto, I don't want my basil options to be so fixed all winter, so freezing more simple combinations means that I not only have plenty of pesto, but also have plenty of options for soup, stew, stir fry, rice and more, all fall/winter/spring. Freezing basil to preserve for winter is easy. I like to make herb pastes, which keep their fresh vibrant flavors and aromas and are super quick and easy to prepare. My husband thinks I missed an opportunity to name this recipe "Frozen Basil Bunnies" - but it isn't just basil that this works for, it is great for any fresh herbs. Although I agree that Fresh Herb Paste isn't *quite* as memorable as Frozen Basil Bunnies. Say that fast 10 times.
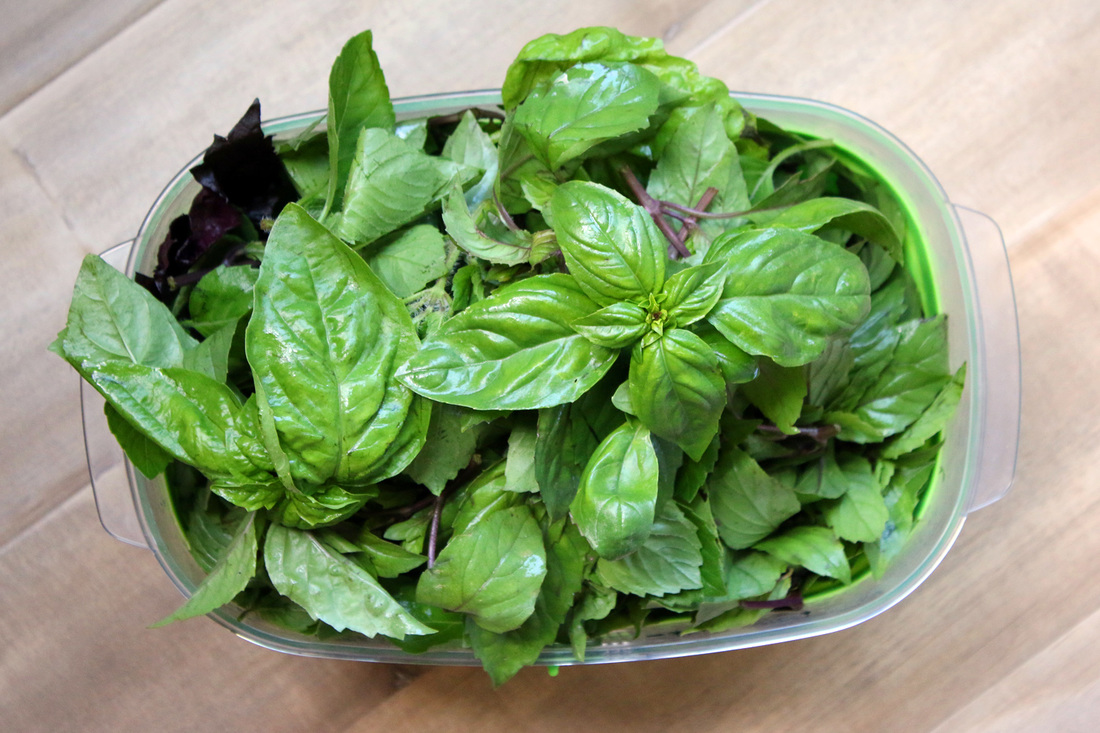
Basil is my first frozen paste because it is the herb that needs freezing the most, and I grow a LOT of it. It is so simple. Take 4 cups of freshly picked, packed basil leaves. Put them in the food processor with about 1/4 - 1/2 cup of extra virgin olive oil and about 1/2 tsp of fresh sea salt. I don't want to add too much salt so I have room for seasoning in recipes, but a little helps keep the vivid color and flavor. Whiz the basil/olive oil/salt in the food processor until fully blended. You may need to scrape the bowl down with a spatula in the middle of it to get all of the leaves. Depending on your type of basil and how packed it is when measuring, it will need as little as 1/4 cup of olive oil. The measurement is flexible just like the recipe. Add just enough oil to get it to fully whiz in the food processor! If you want fresh paste, voila, you are done. Put it into a canning jar in your fridge and use over the next week or so. You can also freeze it for longer storage. The recipe is per 4 cups of herbs because that fits into a food processor, but it whizzes down into a smaller amount, so you can keep going in batches to make as much as you like. I did 5 batches of basil paste and still have more left. Lots. O. Basil.
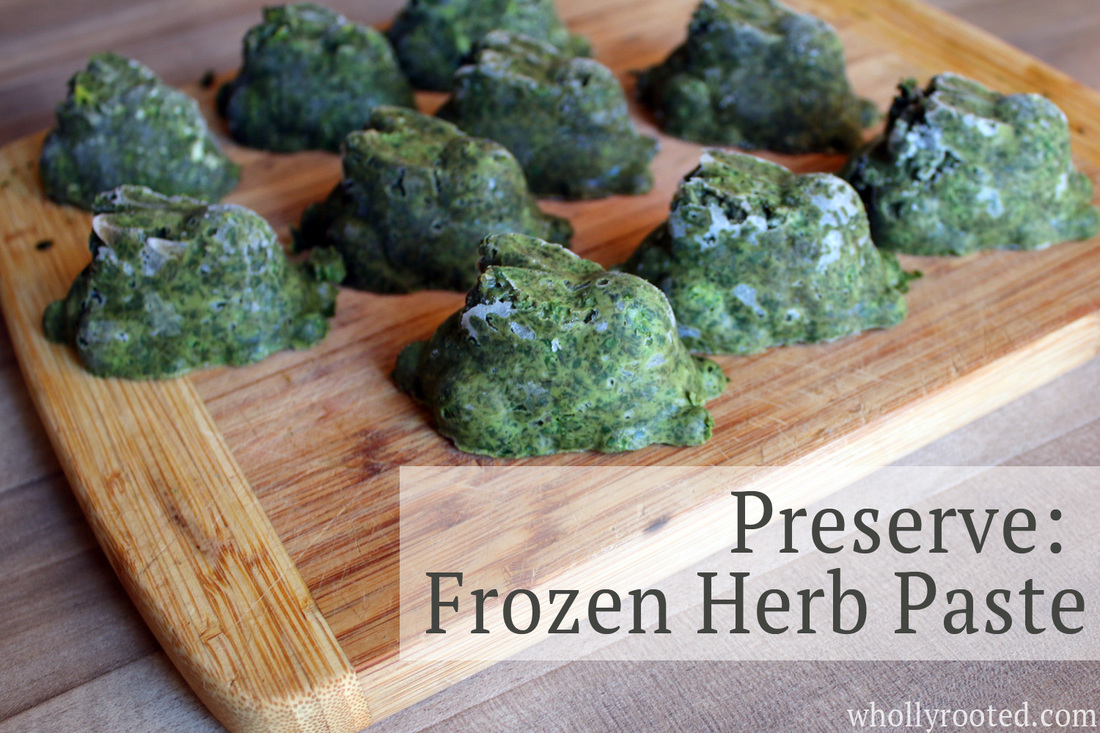
To freeze, take your paste and spoon it into ice cube trays or silicon molds and put into the freezer until frozen solid, and then pop the cubes into a freezer baggie until you need them. I like freezing in about 1/4 cup quantities as that makes it easier to only defrost what you need, rather than thawing out an entire jar. I like silicon molds because I can do bigger than an ice cube amounts. Mine are all in bunny shapes because while I have personally selected all of my herbs-only molds for my lotion bars and body bars, all of our food use silicon molds have been selected by my 11 year old, who only buys cute animal shapes. ;) So we have a whole bunch of basil bunnies in the freezer.
Fresh Herb PastePrint |
{wholly rooted}Freezing is a quick and easy way to preserve herbs for winter! {ingredients}
Measure 4 cups of packed fresh herbs (remove stems). 
You can do this with mixed herbs as well, of course. I made several batches that included parsley, sage, basil, rosemary, thyme, and cilantro. It is the same recipe, just vary your herbs based on your supply! Try different combos - just be sure to label!
I love growing a lot of herbs, and I love preserving them too. Since our growing season in Wisconsin is fairly short, finding many different ways to preserve things so we feel like we have a wonderful variety the rest of the year is key. Looking for other ways to preserve your herbs? Try my veggie bouillon recipe - I love making a lot of this in the summer to use all winter long. SUCH an amazing flavor! 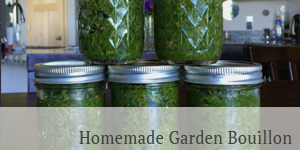
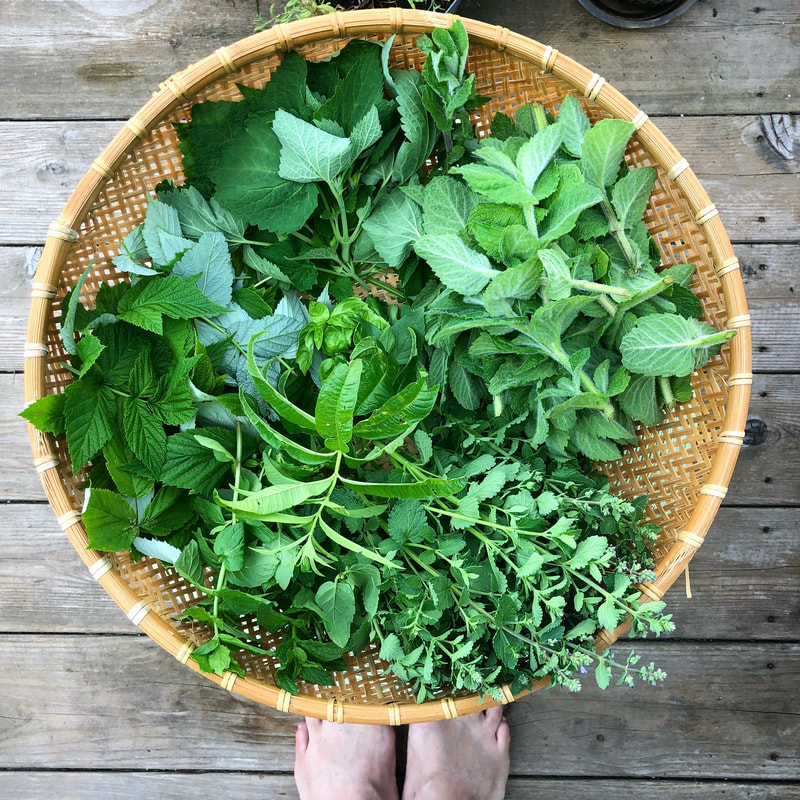
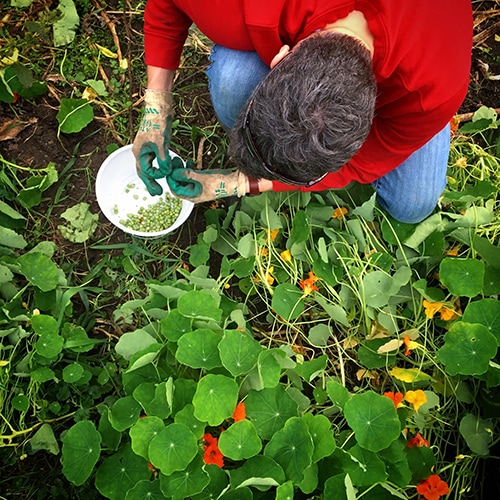
Pea season has arrived! I love the fresh green flavor of peas and pea shoots. I love to eat snap peas raw, pickled, sautéed, and steamed. I love to eat pea shoots in salads, wraps, stir fry, and tacos. We get peas and pea shoots from our CSA, but this is one of the things I also grow because...well...we just can't get enough. Pea season is short and sweet, and I like to make the most of it.
This year I am growing a new (to me) variety of pea called Magnolia Blossom Tendril Pea. It makes a lot of tendrils and fewer leaves, allowing more air flow in the peas. The flowers are so beautiful, and the plants are huge producers! My husband has been traveling for business most of the past few weeks, so he is missing out on the peastravaganza. This recipe is quick and easy and super delicious. It takes advantage of those freshly picked peas that are so tender they don't need to be boiled or overcooked at all, and are crispy and perfect with a few minutes in the skillet. I am also growing Blue Spice Basil this summer and it has quickly become a favorite. It has a rich, exotic, spicy sweet fragrance that is AMAZing (and the bugs don't touch it). It worked so well with the toasted sesame oil and ginger that I am dehydrating a batch to see how it holds up when dried. Most basil doesn't dry well and so we freeze it or make pesto to preserve it. This basil has such a different thick hairy leaf and sublime fragrance that I am curious - I would love to have a lot dried to use all winter. We shall see! 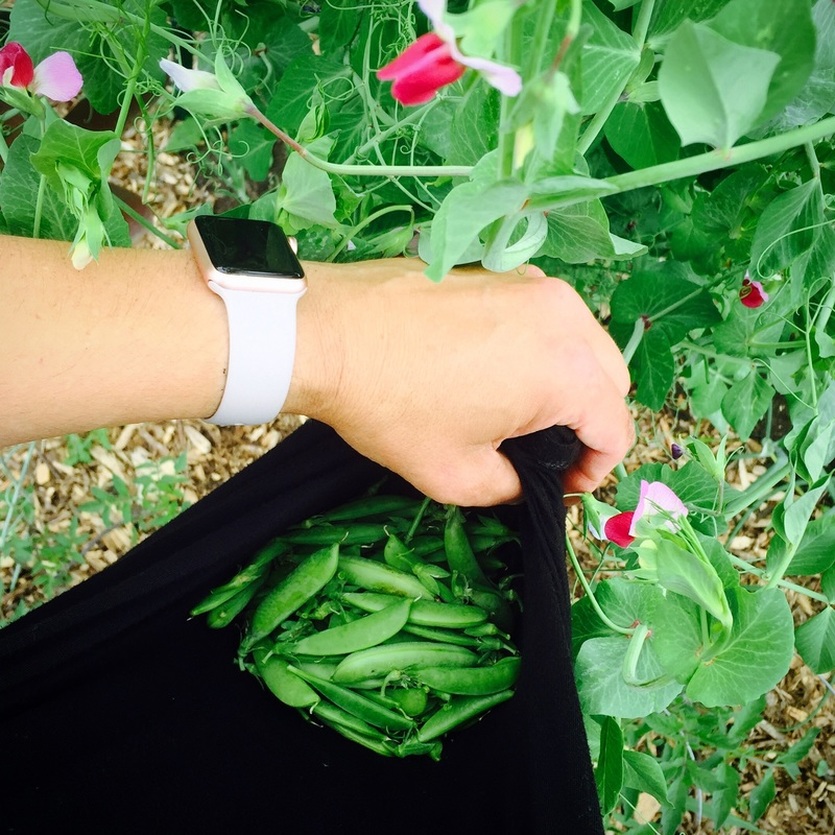
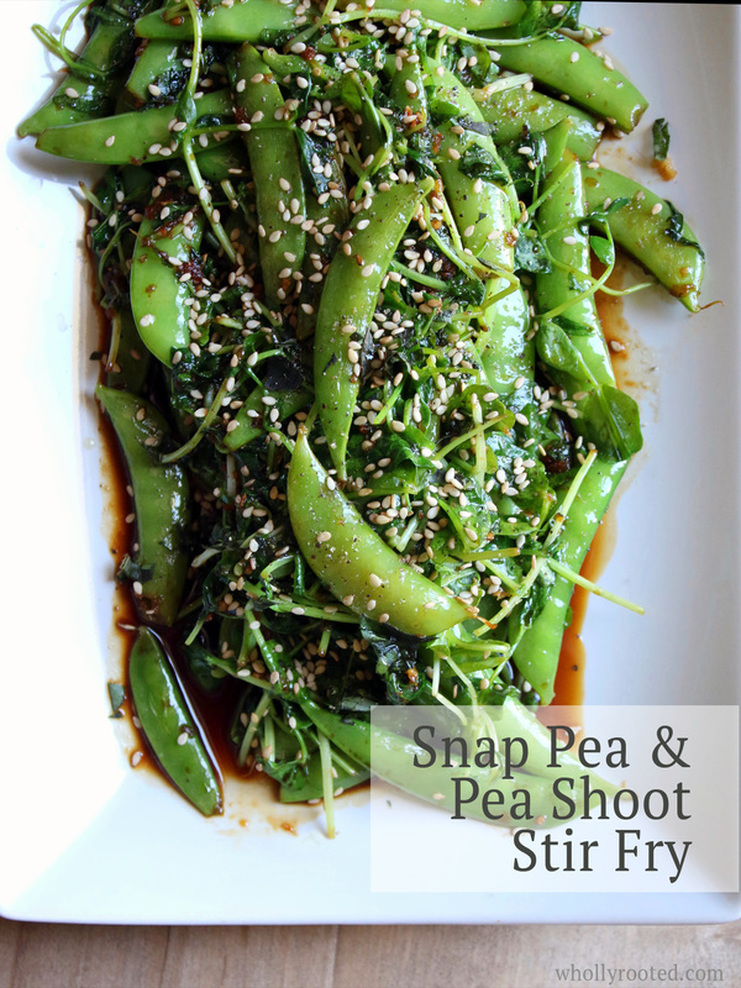
snap pea + pea shoot stir fryPrint |
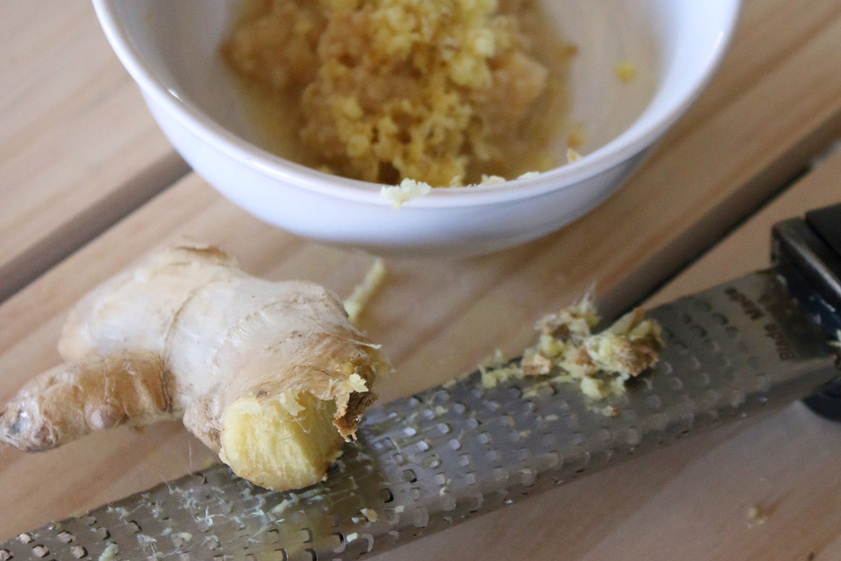
{wholly rooted}This recipe is perfect for pea season - it combines fresh snap peas and pea shoots with ginger, garlic, soy, and sesame oil to make a quick and easy (and delicious) dish. Serve as a side dish, or over rice for a main vegetarian course. {ingredients}
Directions:: 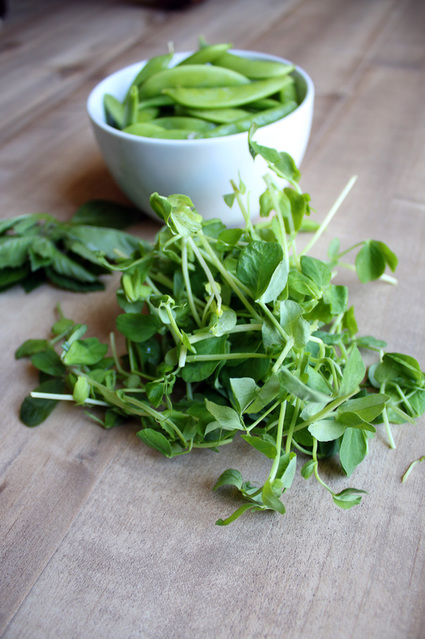
I am sure I am going to be sharing more pea recipes before our short season is over (peas make the best quick pickles!). Having pea season peak just as all of the herbs are cranking means that there are so many opportunities for different flavors and combinations. Fresh herbs and peas really do go well together as they all have that fresh green garden flavor that can't be beat. My husband will be gone for a few more days so the pea stir fry today was all mine. He had better hurry though, it has been hot and peas won't last forever! about the ingredients: Snap Peas Pea Shoots Blue Spice Basil Magnolia Blossom Tendril Pea Brown Sesame Seeds 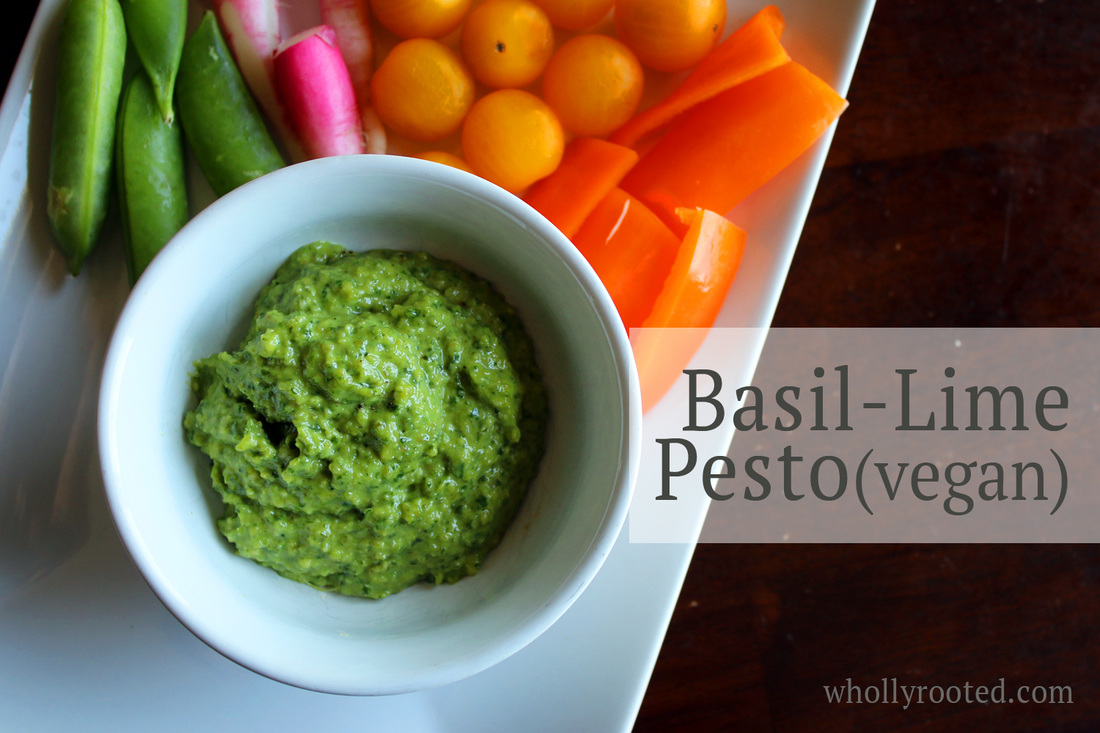
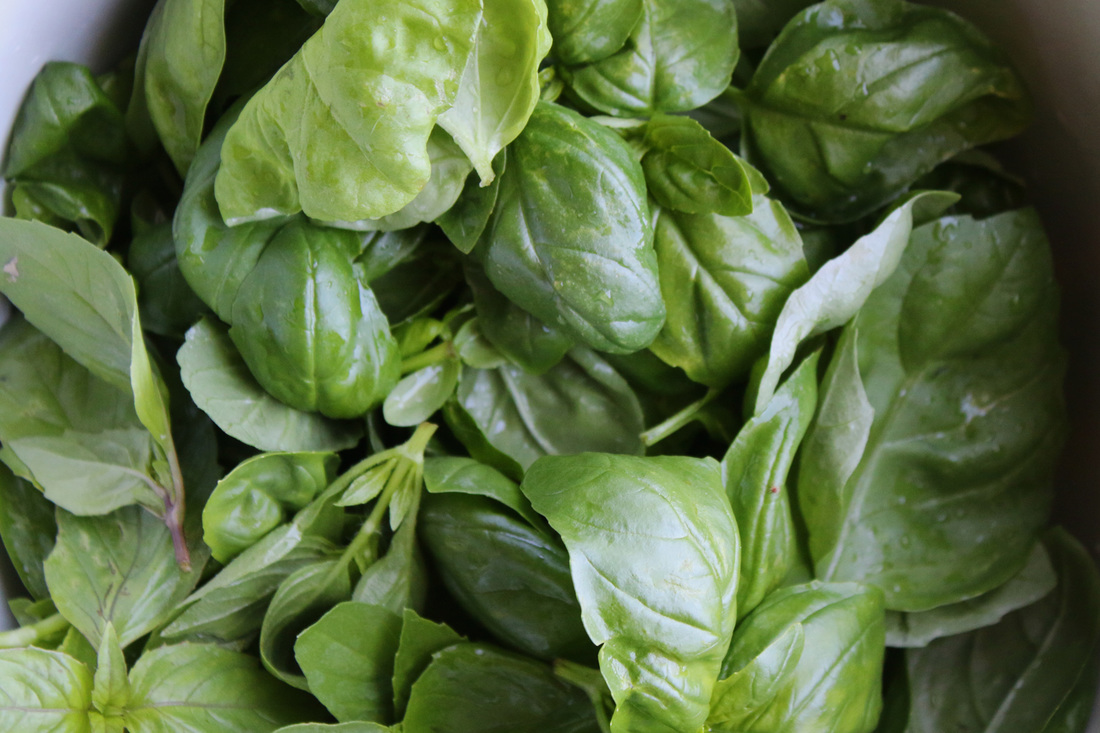
I love the beginning of CSA season. Spring arrives late in Wisconsin and it takes until June for the vegetables to really start rolling in, and it coincides with my burst of rapidly growing herbs which I planted a few weeks ago. Pesto is a favorite way to combine different flavors and use the herbs in abundance with all of the fresh vegetables. The key for me of course is the combining of different flavors. I like pesto, but we have a dairy allergy in the house AND I don't like drowning myself in mono-flavors. I love making different types of pesto so that there is fantastic variety not only for immediate consumption, but also enough to freeze/preserve for winter. This pesto is a favorite. I grow many types of basil, and no matter what type I have on hand, it works. This recipe is dairy free and combines fresh zesty flavors such as lime, ginger and garlic. I am also using cashews instead of pine nuts. Not only are they easier to find, but they are nutritious and I always have some on hand (I'm addicted to date/cashew truffles and cashew cream). You will be amazed at the flavor and want to make extra to freeze for winter! 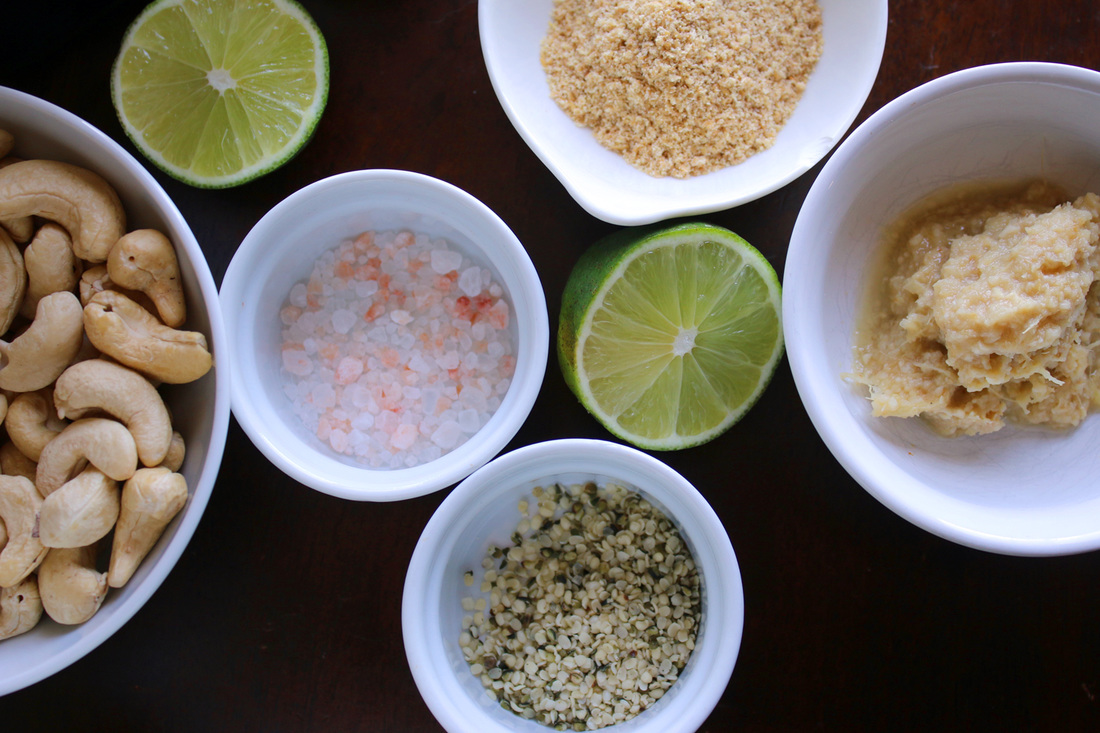
Basil-Lime PestoPrint |
{wholly rooted}There is nothing better than the taste of freshly homemade pesto with crudités, on grilled veggies, or over pasta. This version is vegan, and combines the amazing flavors of basil, lime, garlic, and ginger. The ground flax and hemp seeds make a great texture subsitute for the cheese -it is so good! GF/DF {ingredients}
First, using a food processor, pulse your raw cashews with the flax meal and hemp seeds until finely ground. 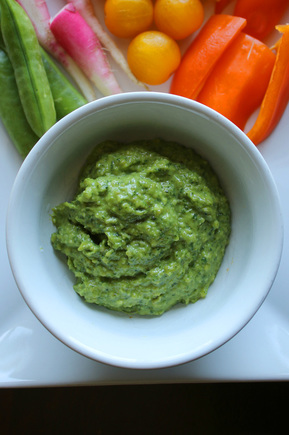
I made a single batch of this today, which will likely only last me a few days. So I am sure I will make some more as my genovese, persian, blue spice, thai, lemon, lime, lettuce leaf, and emily basils grow, grow, grow! bonus: This recipe is delicious and easy to prepare, but also packed full of good vitamins, minerals, healthy fats, fiber, and protein. Yum+. Cashews Garlic & Ginger Basil Lime |
denise cusackI am a certified aromatherapist, clinical herbalist, permaculture designer, organic gardener, plant conservationist, photographer, writer, designer, artist, nature lover, health justice activist, whole foods maker, and mother of two young adults in south central Wisconsin. 

Categories
All
©2007-23 Denise Cusack, all photos and text. Feel free to share my posts on FB or Twitter or online media or pin on Pinterest (thank you!), but please keep the links back to my website intact (meaning please do not take or copy my images off of this website and share them unattributed or without linking back here or use them without permission). Thank you! :)
|


 RSS Feed
